Safely remove gel nails at home with this essential guide! Learn simple, effective methods using common household items to protect your natural nails and avoid damage.
Love the long-lasting shine of gel nails but dread the removal process? You’re not alone! Getting gel manicures off can feel like a chore, and doing it wrong can leave your natural nails feeling… well, less than fabulous. Fret not, nail lovers! This guide is here to help you banish those gels gently and safely. We’ll walk you through easy, step-by-step methods that work, so you can keep your nails healthy and beautiful, ready for their next glamorous makeover. Ready to discover the secret to a damage-free gel removal? Let’s dive in!
Gel nail polish has revolutionized our manicures, offering weeks of chip-free color and incredible shine. But when it’s time for a change, or when your gel starts to lift, knowing how to remove it properly is key to maintaining healthy, strong natural nails underneath. Pulling or peeling gel off is a big no-no, as it can take layers of your natural nail with it, leading to weakness, thinning, and breakage. The good news? You don’t need to be a nail pro to master safe gel removal. With a few simple supplies and a little patience, you can achieve salon-worthy results right at your kitchen table.
Why Safe Gel Nail Removal Matters
Gel polish is designed to adhere strongly to your nails, which is great for durability but tricky for removal. When gel polish is cured under a UV or LED lamp, it hardens into a solid, plastic-like coating. This bond is what gives gel its longevity and resilience. However, if you try to force this bond to break without the right approach, you risk significant damage to your natural nails.
Here’s why being gentle is so important:
- Preserving Nail Health: Natural nails are made of keratin, and while they are resilient, they can be damaged. Aggressive removal can thin the nail plate, making it prone to peeling, breaking, and discomfort.
- Preventing Future Growth Issues: Repeated harsh removals can weaken the nail matrix (where the nail grows from), potentially affecting the quality of new nail growth.
- Maintaining Smoothness: A gentle removal process ensures your natural nails remain smooth and even, ready for your next manicure, whether it’s another gel, regular polish, or a natural nail treatment.
- Avoiding Pain and Sensitivity: Ripping off gel can be painful and leave your nail beds sensitive to touch and temperature.
Gather Your Gel Removal Toolkit
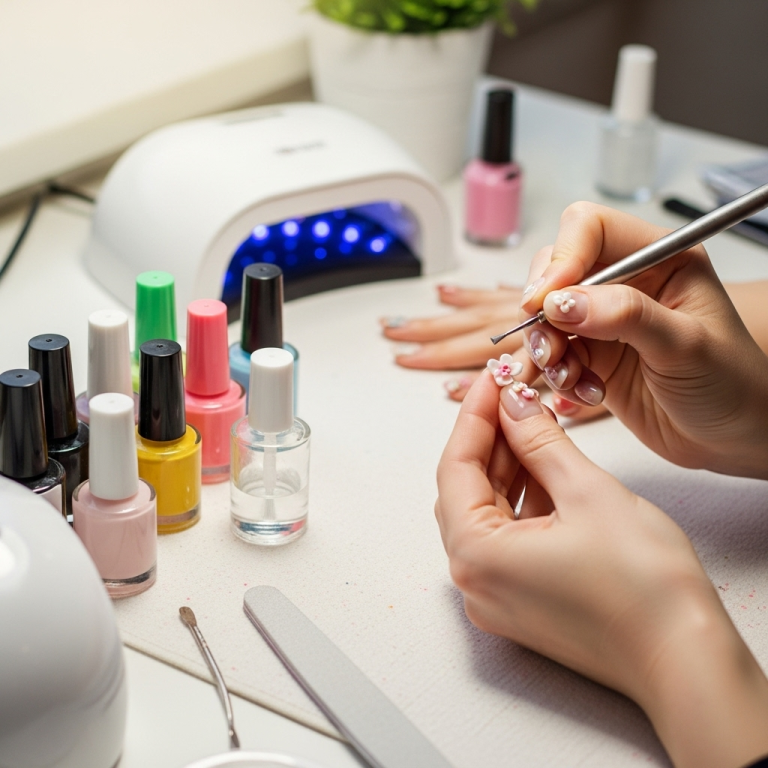
Before you begin, having the right tools makes the process much smoother and safer. You don’t need a lot of fancy equipment! Here’s a list of what you’ll generally need:
Essential Supplies:
- Acetone Nail Polish Remover: This is the most effective solvent for breaking down gel polish. Look for 100% acetone for the fastest results.
- Cotton Balls or Pads: To soak in acetone and apply to your nails.
- Aluminum Foil: To wrap around your fingertips and keep the cotton ball in place, generating gentle heat to speed up the process.
- Nail File (180-220 grit): A medium-grit file is perfect for gently buffing off the top gel layer without damaging your natural nail.
- Cuticle Pusher or Orange Stick: To gently lift softened gel away from the nail.
- Nail Buffer: A soft buffer to smooth the surface of your natural nail after gel removal.
- Cuticle Oil: To rehydrate and nourish your nails and cuticles after the treatment.
- Hand Cream: For extra moisture.
- Optional: A small bowl or dish for soaking if foil wrapping isn’t your preferred method.
It’s important to work in a well-ventilated area when using acetone, as the fumes can be strong. Open a window or turn on a fan to ensure good air circulation.
The Two Safest Gel Removal Methods: Step-by-Step
Let’s get down to business! Here are the most effective and safest ways to remove gel polish from your nails at home. Both methods involve softening the gel with acetone, but differ slightly in application.
Method 1: The Foil Wrap Method (Most Popular)
This is the go-to method for many DIY-ers as it’s effective and contained. It uses body heat and the solvent to work its magic.
- Prep Your Workspace: Ensure you have good ventilation. Lay down some paper towels or a mat to protect your surface from acetone. Have your supplies ready.
- Gently Buff the Top Coat: Using your 180-220 grit nail file, lightly buff the shiny top layer of the gel polish. You don’t need to file deeply; just enough to break the seal of the top coat. This allows the acetone to penetrate the gel polish layers. Be careful not to file down to your natural nail.
- Prepare the Acetone Soakers: Tear aluminum foil into about 10 squares, large enough to wrap around your fingertip. Take cotton balls, tear them into smaller pieces (just big enough to cover your nail plate), and soak them thoroughly in acetone.
- Apply and Wrap: Place one soaked cotton piece onto each buffed nail. Immediately wrap the aluminum foil tightly around your fingertip, ensuring the cotton stays in place and is snug against the nail. Press the foil gently to create a little warmth.
- Wait and Let it Work: Let the acetone soak for about 10-15 minutes. The exact time can vary depending on the gel brand and how many layers were applied. You might notice the gel starting to bubble or lift around the edges.
- Gently Remove the Foil: Unwrap one finger at a time. The gel polish should look softened and slightly lifted.
- Gently Scrape Off the Gel: Using your cuticle pusher or orange stick, gently push or scrape the softened gel polish away from your nail. If the gel doesn’t come off easily, don’t force it! Re-wrap the foil with a fresh, soaked cotton piece for another 5-7 minutes.
- Clean Up and Buff: Once all the gel is removed, there might be some stubborn residue. You can gently buff this away with your nail buffer. Avoid over-buffing. Wash your hands thoroughly with soap and water to remove any acetone residue.
- Nourish and Hydrate: Apply a generous amount of cuticle oil to your nails and surrounding skin, followed by a rich hand cream. This is crucial for replenishing moisture lost during the acetone soak. A good cuticle oil can really transform the health of your nails after gel removal; consider one with Vitamin E or almond oil.
Method 2: The Bowl Soak Method
This method is similar but involves soaking your fingertips directly in a bowl of acetone. It’s quicker for removing multiple nails at once but requires more caution due to prolonged skin exposure to acetone.
- Prepare Your Workspace: As with the foil method, ensure good ventilation. Protect your surfaces.
- Gently Buff the Top Coat: Just like in Method 1, lightly buff the top shiny layer of the gel polish with a 180-220 grit file to break the seal.
- Prepare the Acetone: Pour a sufficient amount of 100% acetone into a glass or ceramic bowl. It should be enough to cover your fingertips. Important Safety Note: Never use a plastic bowl, as acetone can dissolve certain plastics.
- The Soak: Submerge your fingertips into the acetone. You can do this for about 10-15 minutes. To speed up the process and keep the acetone warm, you can place this bowl inside a larger bowl filled with hot (not boiling) water. This creates a makeshift hot soak.
- Check and Scrape: After 10-15 minutes, remove your fingers from the acetone. Much of the gel should be softened. Use your cuticle pusher or orange stick to gently scrape away the loosened gel polish.
- Repeat if Necessary: If gel remains, re-soak for another 5-10 minutes or focus on the stubborn areas with a fresh application of acetone using a soaked cotton ball.
- Clean Up and Buff: Once all gel is removed, wash your hands thoroughly with soap and water. Gently buff any remaining residue or unevenness with your buffer.
- Hydrate, Hydrate, Hydrate!: Follow up immediately with generous amounts of cuticle oil and hand cream. Acetone can be very drying, so this step is non-negotiable for healthy nails.
When to Seek Professional Removal
While at-home gel removal is achievable for most, there are times when visiting a salon is the best option:
- If you have very thin or damaged nails: A professional can assess the best way to remove the gel with minimal further damage.
- If you’ve had a bad experience with home removal previously: It’s worth letting a pro handle it to reset your nail health.
- If you’re unsure about the process: A salon visit is a great way to learn the recommended techniques.
- If you have nail enhancements like acrylics or hard gels: These often require more specialized removal techniques that might be best left to a professional.
Salons often use electric nail files (e-files) for faster removal, but this requires significant skill. If not used correctly, e-files can cause heat spikes and seriously damage the natural nail plate. So, while professionals have tools that can speed things up, the underlying principle of dissolving the gel with acetone remains the safest and most common method.
Tips for Post-Removal Nail Care
Your natural nails have just been through a process that, even when done safely, can strip away some moisture and temporary strength. Here’s how to give them a little TLC:
Immediate Care:
- Moisturize: A good quality cuticle oil is your best friend. Massage it into your nails and cuticles daily.
- Hydrate: Use a rich hand cream frequently, especially after washing your hands.
- Avoid Harsh Chemicals: For a few days, try to minimize contact with harsh cleaning agents or detergents. Wear gloves when doing chores.
- Be Gentle: Treat your nails with care. Avoid using them as tools.
Long-Term Nail Health:
- Nail Strengtheners: If your nails feel weak or brittle, consider using a nail strengthener. Look for treatments that don’t contain formaldehyde, as these can sometimes cause more harm than good.
- Healthy Diet: Ensure you’re getting enough vitamins and minerals that support nail health, such as biotin, iron, and zinc. This is crucial for strong, healthy nail growth from the matrix.
- Rest Period: Consider giving your nails a break from gel polish for a week or two. This allows them to recover and rehydrate fully. During this time, focus on nourishing treatments.
- Proper Filing: When filing your natural nails, always file in one direction to prevent micro-tears that can lead to splitting. Use a fine-grit file for natural nails.
Troubleshooting Common Gel Removal Issues
Even with the best intentions, you might run into a few snags during gel removal. Here’s how to handle them:
Problem: Gel Polish Isn’t Softening Enough
Solution: Firstly, re-check that you’ve adequately filed off the top coat. This is crucial for acetone penetration. If it’s still stubborn, try re-wrapping with fresh, acetone-soaked cotton for another 5-10 minutes. Ensure your acetone is 100% pure. Sometimes, gel brands differ in their ease of removal, with thicker formulas or builder gels requiring a bit more patience.
Problem: Acetone Is Drying Out My Skin Excessively
Solution: While acetone is drying, excessive dryness can be managed. Ensure you’re not soaking for longer than necessary. After removal, immediately wash your hands with a mild soap and apply lotion and cuticle oil generously. If you find your skin is extremely sensitive, consider using acetone-resistant gloves with the fingertips cut off for the soak (if doing a bowl soak), or limit the amount of acetone contact with your skin by using smaller cotton pieces in the foil wrap. Nails Magazine offers great insights into acetone safety. Alternatively, some newer gel systems have “peel-off” bases, which might be a good option for your next manicure if this is a recurring concern.
Problem: I Scraped Off Too Much of My Natural Nail along with the Gel
Solution: This is a common mistake when you’re in a hurry. If you’ve accidentally filed or scraped too aggressively, don’t panic. Be extra diligent with post-removal care. Focus on moisturizing and strengthening treatments. Give your nails a break from polish for a while. Future removals should be done with a much lighter hand, only filing the very top layer of the gel, never touching the natural nail itself.
Problem: My Nails Feel Bumpy or Uneven After Removal
Solution: This is usually due to uneven gel removal. Use a fine-grit buffer block (the softest side) to gently smooth the surface of your natural nail. Avoid over-buffing. The goal is a smooth finish, not to thin the nail. Follow up immediately with cuticle oil and hand cream.
Understanding Acetone and Its Alternatives
Acetone is a powerful solvent that is highly effective at breaking down the polymers in gel polish. It’s the gold standard for gel removal because it works quickly and efficiently. However, it can be drying to the skin.
Acetone Safety First:
- Ventilation is Key: Always use acetone in a well-ventilated area.
- Avoid Open Flames: Acetone is highly flammable. Keep it away from heat sources, sparks, and open flames.
- Skin Sensitivity: If you have very dry or cracked skin, be extra cautious. Consider using a barrier like Vaseline around the cuticle area before soaking, though this can sometimes hinder acetone’s effectiveness.
Are There Safer Alternatives to Acetone?
While acetone is the most effective, there are alternatives that some prefer to try, though they may be less effective or take significantly longer:
- Non-Acetone Polish Removers: These typically contain ethyl acetate or other weaker solvents. They are much gentler on the skin but are generally not strong enough to effectively break down cured gel polish. They work for regular polish but not gel.
- Specialized Gel Removers: Some brands offer “gel removers” that might contain different solvent blends. Read the ingredients carefully. Many still contain acetone or a very similar solvent, just perhaps with added moisturizers.
- Soaking in Water/Soap: This is generally not effective for gel polish. Gel is waterproof. Trying to soak gel off in plain water or soapy water will likely just make your skin pruney and won’t loosen the gel.
For guaranteed successful and safe gel removal, 100% acetone remains the most recommended and widely used solvent by professionals and home users alike. The key is not to avoid it, but to use it correctly and follow up with excellent post-care.
Frequently Asked Questions About Gel Nail Removal
Q1: Can I peel off gel nails if I’m in a hurry?
A: We strongly advise against peeling off gel nails! This is the fastest way to damage your natural nails, stripping away layers of keratin and leaving them weak, thin, and prone to breakage. Always use a safe removal method.
Q2: How long should I soak my nails in acetone?
A: Generally, 10-15 minutes for the initial soak is sufficient. If the gel isn’t lifting easily, soak for another 5-7 minutes rather than forcing it off.
Q3: My nails feel dry after removing gel. What can I do?
A: Acetone can be drying. Immediately after removal, wash your hands and apply a generous amount of cuticle oil, followed by a rich hand cream. Repeat this multiple times a day, especially for the first few days after removal.
Q4: Do I need to file off the gel completely?
A: No, you only need to gently buff off the very top shiny layer of the gel to break the seal. This allows the acetone to penetrate. Never file down to your natural nail.
Q5: Can I use regular nail polish remover to take off gel?
A: Standard nail polish removers (non-acetone) are typically not strong enough to break down cured gel polish. You need 100% acetone for effective gel removal.


