Unleash dazzling nails with reflective glitter nail designs! This beginner-friendly guide breaks down how to achieve that essential sparkle with simple steps and essential tips for a show-stopping manicure at home. Get ready to shine bright!
Want nails that truly capture the light and turn heads? Reflective glitter nail designs are the dazzling secret to instant glamour, but they can seem a little intimidating to achieve at first. You might have seen them on social media and wondered, “How do they get that incredible shimmer?” Don’t worry! Creating these eye-catching looks is more achievable than you think, even if you’re just starting out with nail art. We’re going to walk through everything you need to know, from picking the right glitter to applying it like a pro. Get ready to add some serious sparkle to your life!
What Are Reflective Glitter Nail Designs?
Reflective glitter nail designs are a type of nail art that uses special glitter particles to create an intense, mirror-like shine when hit by light. Unlike regular glitter, which might sparkle or catch the light, reflective glitter actually bounces light back, creating a super bright and eye-catching effect. Think “disco ball” but on your fingertips! These designs can range from a subtle shimmer accentuating a nail to a full-on, dazzling, all-over glitter explosion. They are perfect for special occasions, parties, or anytime you want to add a touch of magic and flair to your everyday look.
Why Are Reflective Glitters So Special?
The magic of reflective glitters lies in their unique composition. They are made with tiny, precision-cut mirror-like particles, often compared to tiny shards of glass or reflective tape, that are designed to bounce light back in a concentrated way. This is different from cosmetic glitters, which are typically made from plastics or metals coated in a fine layer of reflective material, scattering light more diffusely.
The intense light reflection means that under direct light (like a camera flash, sunlight, or a bright lamp), these glitters appear incredibly bright and almost “lit from within.” In normal lighting, they can appear as a beautiful, deep sparkle, but the transformation under light is what makes them so captivating.
Getting Started: Your Reflective Glitter Nail Toolkit
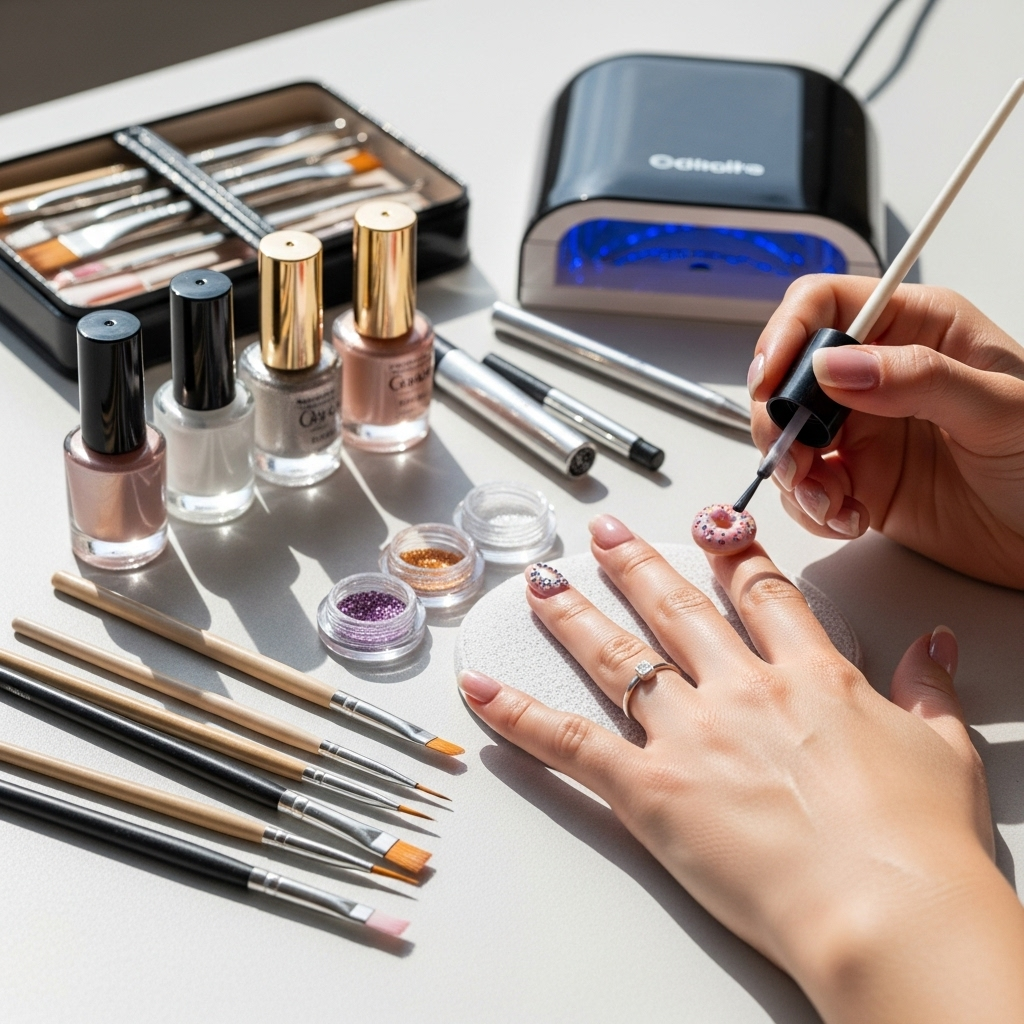
Before we dive into the fun part – creating the designs – let’s make sure you have the right supplies. Don’t worry, you don’t need a professional salon setup to achieve amazing results. Here’s a list of essentials:
- Reflective Glitter: This is the star of the show! They come in various sizes and colors. For beginners, a fine or ultra-fine reflective glitter is often easier to work with.
- Nail Polish Base Coat: Essential for protecting your natural nails and helping your polish adhere better.
- Nail Polish Color (Optional): You can apply reflective glitter over a colored polish, a clear topcoat, or even directly onto the base coat for different effects.
- Top Coat: A good quality, non-wipe topcoat is crucial for sealing in the glitter and providing a smooth, glossy finish.
- Applicator Tools: This can be as simple as an orange stick, a clean makeup brush, a silicone tool, or a small spatula.
- Buffer: A fine-grit nail buffer helps to smooth any rough edges after application.
- Nail File: For shaping your nails.
- Cuticle Pusher: To gently push back cuticles for a clean canvas.
- Rubbing Alcohol or Nail Polish Remover & Cotton Pads: For cleaning the nail surface.
- Tweezers (Optional): For precise placement of larger glitter pieces.
Understanding Different Types of Reflective Glitters
Not all reflective glitters are created equal! Understanding the nuances will help you choose the perfect sparkle for your desired look. The main differences often come down to size, shape, and the material used, which affects how they reflect light.
Here’s a quick rundown:
- Fine/Ultra-Fine Holographic Glitter: These are the most common and easiest for beginners. They create a diffused, rainbow-like shimmer that’s stunning.
- Mirror Flakes/Powders: These are tiny, thin flakes that lay flat on the nail and create a true mirror-like effect. They often require a special base polish and meticulous application.
- Chunky Reflective Glitters: Larger particles that offer a bolder, more dramatic sparkle. These can be trickier to apply smoothly but create a fantastic statement.
- Iridescent Reflective Glitters: These reflect different colors depending on the angle of light, adding another dimension to the sparkle.
For your first attempt at reflective glitter nail designs, I highly recommend starting with a fine or ultra-fine holographic reflective glitter. They are forgiving and deliver a beautiful, impactful result with simpler application methods.
Step-by-Step: Creating Your First Reflective Glitter Nail Design
Let’s get your nails looking absolutely fabulous! This tutorial focuses on a popular and easy method: applying reflective glitter over a colored polish. This combination offers fantastic depth and sparkle.
Step 1: Prep Your Nails
A good manicure starts with proper preparation. This ensures your polish lasts longer and looks cleaner.
- Cleanse: Wash your hands and then wipe each nail with rubbing alcohol or nail polish remover to remove any oils or residue. This is a critical step for polish adhesion.
- Shape: File your nails to your desired shape.
- Cuticle Care: Gently push back your cuticles with a cuticle pusher. Avoid cutting them unless you are very experienced, as it can lead to infection or damage.
Step 2: Apply Base Coat and Color
This is where your design begins to take shape.
- Base Coat: Apply one thin layer of your base coat. Let it dry completely.
- Color Polish: Apply one or two thin coats of your chosen nail polish color. Let each coat dry thoroughly between applications. For a smooth finish, avoid thick coats.
Step 3: Apply the Reflective Glitter
Here comes the fun part – adding the sparkle!
- Apply Top Coat (or Sticky Layer): You have a couple of options here:
- Method A (Over Wet Top Coat): Apply a thin layer of a non-wipe topcoat to the nail. Work quickly while the topcoat is still wet and sticky. This is a great method for beginners as it gives you a bit of play time.
- Method B (Over Colored Polish): If you want a more embedded look, you can try applying the glitter directly onto the wet colored polish. However, this can sometimes lead to a rough surface that’s harder to smooth out later. The topcoat method is generally easier.
- Dip or Sprinkle:
- For a full coverage glitter look: If using Method A (wet top coat), gently dip your nail into the reflective glitter pot, or use your applicator tool to carefully sprinkle the glitter all over the wet topcoat until you achieve your desired coverage.
- For a gradient or accent: Use your applicator tool (like a brush or silicone tool) to pick up a small amount of glitter and gently press or pat it onto the wet topcoat, focusing on specific areas for an ombre or accent effect. A clean makeup brush can also work well for dusting or dabbing finer glitters.
- Press and Pat: Gently press the glitter into the wet topcoat to ensure it adheres well and lays as flat as possible.
Step 4: Seal and Smooth
This step ensures your glitter stays put and your nails look polished and professional.
- Remove Excess Glitter: Gently tap off any loose glitter with your finger or a soft brush.
- Apply Top Coat: Once the glitter is applied and any excess is removed (and the layer beneath is dry if you used Method B), apply one or two generous, smooth coats of a good quality non-wipe topcoat. Make sure to cap the free edge of your nail (paint the very tip) to prevent chipping. This is crucial to encapsulate the glitter and prevent it from snagging or falling off.
- Cure (if using Gel): If you are using gel polish and a UV/LED lamp, cure your topcoat according to the lamp’s instructions.
Step 5: Final Touches
Admire your work!
- Buff (if needed): If you notice any bumpy areas, you can very carefully and lightly buff them after the topcoat is fully dry. Use a fine-grit buffer. Then, apply another thin layer of topcoat to smooth everything out.
- Cuticle Oil: Apply a drop of cuticle oil to each nail and massage it in. This rehydrates your cuticles and adds a final polished touch to your manicure.
Pro Tips for Perfect Reflective Glitter Nails
Achieving that flawless, sparkling finish is all about the details. Here are some insider tips to elevate your reflective glitter game:
- Work in a well-ventilated area: Glitter can be messy, and some polishes have fumes.
- Use thin layers: Whether it’s polish or topcoat, thin layers dry faster and create a smoother finish, preventing bulky application.
- Don’t skip the topcoat: This is essential for longevity and smoothness. A good non-wipe topcoat is your best friend here.
- Cap the edges: Always seal the free edge of your nail with your topcoat to prevent lifting and peeling.
- Experiment with placement: Try a full glitter nail, an ombre effect, a simple accent stripe, or glitter on just the tips.
- Consider a builder gel:** For gel polish users, applying a thin layer of builder gel over the glitter can provide extra strength and a perfectly smooth surface for the topcoat. You can find excellent ones from brands like Ugly Duckling Nails which offer insights into its application.
- Clean your tools: Make sure your brushes or applicators are clean before and after use to avoid transferring unwanted colors or debris.
Reflective Glitter Nail Designs: Ideas to Sparkle
The beauty of reflective glitter is its versatility! It can be the main star or a dazzling supporting player. Here are some ideas to get your creativity flowing:
Full Glitter Nails
Go all out with every nail covered in a glorious coat of reflective glitter. This look is undeniably glamorous and perfect for making a statement. Choose a fine glitter for a sophisticated shimmer or a chunkier mix for maximum impact.
Glitter Ombre
Create a beautiful gradient effect where the glitter starts densely at the tip or cuticle and fades out towards the other end. Apply the glitter strategically with a brush or sponge over a wet topcoat, concentrating the glitter where you want it darkest and gently blending it out.
Accent Nail Sparkle
If a full glitter manicure feels like too much for you, try an accent nail! Paint all your nails in a solid color and then add reflective glitter to just one or two nails. This is a chic and subtle way to incorporate the trend. You can cover the entire accent nail or create a design on it.
Glitter French Tips
Add a modern twist to the classic French manicure. Instead of white tips, use a line of reflective glitter. You can apply it directly onto the tips with a fine brush and clear polish, or over a colored polish base for a more opaque glitter tip.
Under-Polish Sparkle (Encapsulated Glitter)
For a smooth, durable, and intensely sparkly look, try placing reflective glitter under a layer of clear or colored gel polish. This technique requires applying glitter onto a base layer of gel, then covering it with more gel. It protects the glitter and gives a beautiful depth, like looking into a jewelry box. This is often how professional nail techs achieve that super-smooth, embedded glitter finish.
Geometric Glitter Designs
Use striping tape or stencils to create geometric shapes (lines, triangles, squares) on your nail. Paint these shapes with a colored polish, let it dry, then carefully apply reflective glitter over the design using a sticky topcoat or clear polish as adhesive. Remove the tape gently to reveal sharp, sparkling lines.
Maintaining Your Reflective Glitter Nails
To keep your dazzling nails looking their best for as long as possible, follow these simple maintenance tips:
- Be Gentle: Avoid using your nails as tools to pry, scrape, or open things. This can chip the polish and the glitter.
- Wear Gloves: When doing household chores like washing dishes or cleaning, wear rubber gloves to protect your manicure from harsh chemicals and prolonged water exposure.
- Reapply Topcoat: If you notice the shine dulling or a surface scratch, apply an extra thin layer of clear topcoat over the entire nail to refresh the gloss.
- moisturize: Keep your hands and cuticles moisturized with cuticle oil and hand cream daily. Healthy skin around your nails makes your manicure look even better.
Reflective Glitter vs. Regular Glitter: What’s the Difference?
It’s easy to get confused between regular craft glitter and nail-specific reflective glitter. Understanding the differences ensures you get the best results and avoid damaging your nails.
| Feature | Reflective Glitter | Regular Glitter |
|---|---|---|
| Light Reflection | Intense, mirror-like bounce. Appears very bright under light. | Scatters light, creating a general sparkle or shimmer. |
| Material | Precisely cut reflective particles (often plastic or metal coated). | Typically plastic or metallic flakes, metalized films. |
| Application | Best applied with a sticky layer of polish/topcoat or encapsulated. Needs careful application for smoothness. | Can be applied in many ways, including mixed into polish or topcoat. |
| Finish | Can be smooth if applied well and sealed with adequate topcoat. Can also be textured. | Often creates a textured surface, especially with larger glitters. |
| Best Use | Creating high-impact, dazzling, and often “wet-look” finishes. | Adding general sparkle, texture, and decorative elements. |
| Safety | Always use cosmetic-grade glitter specifically designed for nails. | Avoid craft or body glitters which can have sharp edges or unsafe ingredients. |
When purchasing glitter for your nails, always ensure it is labeled as “cosmetic grade” or “nail art glitter.” Craft glitters can have sharp edges that can damage your natural nail or skin, and some ingredients may not be safe for contact with the body. Reputable beauty suppliers and brands will always specify that their glitter is safe for nail art. For more on nail safety, you can refer to resources from the FDA on cosmetics, though specific nail glitter guidelines are often industry-standard rather than explicit FDA regulations; however, adhering to cosmetic-grade is paramount.
Common Beginner Mistakes and How to Avoid Them
Even with the best intentions, beginners can run into a few snags. Here’s how to sidestep common issues:
- Too Much Glitter: Applying too much glitter can lead to a bulky, rough finish that’s hard to seal. Start with a lighter hand and build up coverage if needed.
- Not Enough Topcoat: Skimping on topcoat is a recipe for glitter fallout and a dull finish. Always apply at least two generous, smooth coats, ensuring you cap the edges.
- Not Letting Layers Dry: Applying glitter or topcoat over wet polish can cause smudging and uneven distribution. Patience is key!
- Using Craft Glitter: As mentioned, always use cosmetic-grade glitter. Craft glitter is not designed for nails and can be unsafe.
- Rough Application: Forcing, dragging, or smearing the glitter onto the nail can create a patchy or uneven look. Gentle patting and dusting motions are best.
FAQ: Your Reflective Glitter Nail Design Questions Answered
Q1: Can I use reflective glitter on gel nails?
A1: Absolutely! Reflective glitter works beautifully with gel polish. You can apply it over a cured gel color, on top of a tacky gel topcoat, or even encapsulate it within multiple layers of builder gel for a super smooth and durable finish.
Q2: How do I stop my reflective glitter nails from feeling rough?
A2: The key to a smooth finish is generous and careful application of your topcoat. Ensure you apply at least two to three smooth, full-coverage layers of a good quality, non-wipe topcoat, allowing each layer to cure (if using gel) or dry fully. Encapsulating the glitter within a