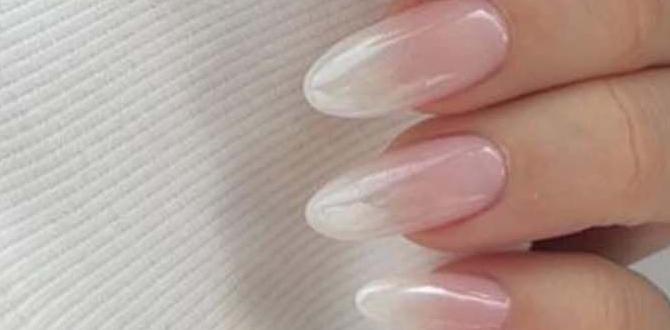
Reflective glitter French nails are an easy way to add shimmer and a modern twist to the classic French manicure, offering a dazzling, eye-catching look that’s surprisingly simple to achieve at home for a touch of effortless beauty.
Ever dreamed of nails that sparkle and shine, catching the light with every move? The classic French manicure is lovely, but sometimes we crave a little more dazzle! Enter reflective glitter French nails. They’re the perfect blend of timeless elegance and modern glamour. You might think this sophisticated look is tricky to master, but don’t worry! We’re going to break down exactly how to get these stunning nails right at your fingertips, making them accessible for everyone, even if you’re just starting your nail art journey.
Reflective Glitter French Nails: A Sparkly Twist on a Classic
The French manicure has been a staple for decades, known for its clean, sophisticated look. It typically features a sheer nude or pink base with a crisp white tip. But what if we could inject a dose of modern fabulousness into this beloved design? That’s precisely what reflective glitter French nails do!
These nails take the traditional French tip and elevate it with shimmering, reflective glitter polish. When light hits these tips, they don’t just shine; they glow, creating a mesmerizing effect that’s both chic and playful. It’s like a disco ball for your fingertips!
What Makes Reflective Glitter Polish So Special?
Reflective glitter polish is a game-changer in the nail world. Unlike regular glitter, it contains tiny reflective particles that bounce light back, creating an intense, almost holographic shimmer. Think of the reflective material on a bicycle or a stop sign – that’s the magic at play! This means your nails will look stunning in regular lighting and absolutely breathtaking under direct light, like flash photography or sunlight. It’s the secret ingredient behind that captivating, eye-catching effect.
The Easy Way to Do Reflective Glitter French Nails at Home
Ready to create your own reflective glitter French nails? It’s easier than you think! We’ve put together a simple, step-by-step guide that makes this trendy look achievable for beginners. All you need are a few key products and a little patience.
What You’ll Need: Your Glitter French Mani Toolkit
Gathering the right tools is the first step to a flawless manicure. Here’s what you’ll want to have on hand:
- Base Coat: Essential for protecting your natural nails and helping polish adhere better.
- Sheer Nude or Pink Nail Polish: This creates the classic French manicure base.
- Reflective Glitter Polish: This is your star ingredient! Choose a color that complements your base.
- Nail Art Brush or Fine-Tipped Liner Brush: For precise application of the glitter tip.
- Nail Polish Remover & Cotton Pads: For tidying up any mistakes.
- Top Coat: To seal your design and add extra shine and longevity.
- Optional: French Manicure Guides or Stencils: If you’re new to freehanding the tip, these can make it much easier!
Step-by-Step: Creating Your Glitter French Masterpiece
Let’s get those nails sparkling!
- Prep Your Nails: Start with clean, dry nails. Gently push back your cuticles and shape your nails. This is a crucial step for a professional-looking finish. For more tips on proper nail prep, you can visit resources like the American Academy of Dermatology’s website on nail care.
- Apply Base Coat: Paint one or two thin coats of your chosen base coat. Let it dry completely. This protects your nails from staining and helps your polish last longer.
- Paint the Base Color: Apply one or two coats of your sheer nude or pink polish. Make sure each coat is fully dry before applying the next. Nice, even coverage here will make the final look pop.
-
Create the French Tip (The Glitter Part!):
- Option A (Freehand with a Brush): Dip your nail art brush into the reflective glitter polish. Lightly wipe off any excess on the bottle’s rim. Carefully paint a thin line along the edge of your nail, mimicking the classic white French tip. You might need two thin coats for opacity.
- Option B (Using Guides): Apply French manicure guide strips or stencils just below where you want your glitter tip to start. Paint the reflective glitter polish over the tip. Carefully peel off the guide before the polish dries completely to avoid lifting.
Take your time with this step. It’s okay if they aren’t perfect! The glitter itself can help disguise minor imperfections.
- Clean Up Edges: Dip a small brush or cotton swab in nail polish remover and carefully neaten up the lines of your glitter tips and around your cuticles. This makes a big difference in achieving a polished look.
- Apply Top Coat: Once everything is completely dry, apply one or two coats of your favorite top coat. Make sure to cap the free edge of your nails (paint a little on the very tip) to help prevent chipping. This also seals in the glitter and smooths out the surface.
- Admire Your Work!: Let your nails dry thoroughly. Now you have stunning reflective glitter French nails!
Pro Tips for Flawless Glitter French Nails
Want to take your glitter Frenchies to the next level? Here are a few insider tips:
- Thin Coats are Key: Whether it’s the base color or the glitter tip, applying thin coats allows for quicker drying and a smoother finish. Thick coats can lead to bubbles and smudging.
- Let it Dry: Patience is a virtue, especially with glitter! Ensure each layer is dry to the touch before moving on to the next. This prevents smudging and makes the application process much smoother.
- Layer for Opacity: If your reflective glitter polish isn’t as opaque as you’d like in one coat, build it up with a second (or even a third, if very thin) coat.
- Experiment with Colors: Don’t feel limited to silver or gold glitter! Try iridescent, multi-chrome, or even a colored reflective glitter over different nude or pink bases. Rose gold, blue, or purple glitter can create unique looks.
- Double Dip: For an extra intense glitter effect, once your first glitter layer is dry, apply a second coat of top coat and then immediately dip your nail art brush into the glitter polish again and carefully paint the tip. This creates a denser glitter payoff.
- Consider Gel Polish: For ultimate chip resistance and a super glossy finish, you can replicate this look using gel polish and a UV/LED lamp. The application process is similar, but gel requires curing under a lamp between coats.
Different Ways to Wear Reflective Glitter French Nails
The beauty of this trend is its versatility. You can play with different colors, placements, and finishes to suit your personal style.
Color Combinations to Sparkle With
The base color and the glitter color can totally change the vibe. Here are some ideas:
| Base Color | Reflective Glitter Color | Overall Look |
|---|---|---|
| Classic Sheer Pink | Silver/Holographic | Ultra-Glamorous, Bright, and Classic |
| Soft Nude Beige | Gold/Rose Gold | Warm, Elegant, and Sophisticated |
| Milky White | Iridescent/Moonstone | Ethereal, Pearly, and Dreamy |
| Sheer Lavender | Purple/Blue Reflective | Mysterious, Playful, and Enchanting |
| Deep Berry Red | Red/Gold Reflective | Bold, Luxurious, and Festive |
Beyond the Tip: Creative Glitter Placements
Who says glitter can only go on the tips? Get creative!
- Full Glitter Tip: The classic look we’ve discussed.
- Glitter Moon (Lunula): Apply a thin crescent of glitter at the base of your nail, near the cuticle.
- Glitter Accent Line: Instead of a full tip, draw a thin, sharp line of glitter across the widest part of your nail or as a vertical stripe.
- Glitter Cuticle Line: A daring and modern take, a thin line of glitter right at the cuticle.
- Half-and-Half: Divide your nail horizontally with a clean line, painting one half with glitter polish and the other with your base color or a solid opaque color.
Maintenance and Longevity
To keep your reflective glitter French nails looking fabulous for as long as possible:
- Wear Gloves: When doing chores, especially washing dishes or using cleaning products, wear gloves. Harsh chemicals can break down your polish.
- Avoid Using Nails as Tools: Resist the urge to open cans or scrape things with your nails. This is a common cause of chips and breaks.
- Refresh Your Top Coat: Every couple of days, apply an extra layer of top coat to the glitter tips. This helps to refresh the shine and seal in the glitter, preventing it from fading or catching on things.
- Touch-Ups: For any small chips or wear, a tiny bit of glitter polish applied carefully with your brush can often do the trick to blend it in.
Frequently Asked Questions (FAQs)
Q1: What is reflective glitter nail polish?
A: Reflective glitter polish contains special particles that bounce light back intensely, creating a super shiny, almost glowing effect, especially under direct light. It’s different from regular glitter polish.
Q2: Can I do reflective glitter French nails with regular nail polish?
A: Yes, absolutely! You can achieve this look with regular nail polish, though gel polish will offer more durability and a higher shine that lasts longer.
Q3: How do I get a clean line for my glitter French tips?
A: For a clean line, you can use French manicure guide stickers, a nail art brush for freehanding, or even a small piece of tape to create a stencil. Making sure the polish underneath is dry is key!
Q4: My reflective glitter polish looks chunky. How can I make it smoother?
A: Applying the glitter polish in thin coats and then sealing it with a thick, smoothing top coat is the best way to make the surface feel smoother. Sometimes, a builder gel top coat can help level out a bumpy glitter texture.
Q5: How long do reflective glitter French nails typically last?
A: With proper application and care (including a good top coat and wearing gloves for chores), regular nail polish versions can last 5-7 days. Gel polish versions can last 2-3 weeks.
Q6: Can I use a matte top coat over reflective glitter French nails?
A: You certainly can! A matte top coat will give a really unique, sophisticated contrast. The glitter will still reflect light, but the finish will be velvety rather than glossy, which can be a very chic look.
Embrace Your Inner Sparkle!
Reflective glitter French nails are more than just a trend; they’re a statement of fun, confidence, and modern style. They prove that you don’t need to be a professional nail technician to achieve salon-worthy results. With this easy-to-follow guide, you’re well-equipped to transform your nails into dazzling works of art. Whether you’re heading out for a special occasion or just want to brighten up your everyday, these sparkly tips are sure to turn heads and make you feel fabulous. So go ahead, grab your polishes, and let your nails shine!

