Red carpet nail designs offer timeless glamour and sophistication. Elevate your look with chic, minimalist styles or sparkling accents. Achieve a glamorous, red-carpet-ready manicure at home with simple techniques and classic color choices.
Red Carpet Nail Designs: Proven Glamour for Every Occasion
Ever scroll through celebrity photos and marvel at their perfectly polished nails? Those flawless manicures shining under the brightest lights are often what we call “red carpet nail designs.” They’re the epitome of elegance and a key part of a put-together look. But guess what? You don’t need a Hollywood stylist to achieve that same stunning effect. Creating sophisticated, red-carpet-worthy nails is totally achievable right in your own home. Whether you’re heading to a special event or just want to add a touch of luxury to your everyday, these designs prove glamour is always in style.
We’ll walk you through everything you need to know, from choosing the perfect shade to simple application tips that make a big difference. Get ready to feel like a star!
What Makes a Nail Design “Red Carpet Ready”?
Red carpet nail designs aren’t about flashy, over-the-top art. They’re about understated elegance, sophistication, and a flawless finish. Think timeless, chic, and polished. The key elements that define these looks include:
- Classic Colors: Deep reds, nudes, classic French tips, and metallics are staples.
- Perfect Shape: Almond, oval, or squoval shapes are often favored for their flattering lines.
- Impeccable Finish: A high-gloss top coat is essential for that luxurious shine.
- Subtle Details: Sometimes a hint of sparkle or a clean accent is all it takes.
- Nail Health: Healthy, well-maintained nails form the perfect base for any glamorous design.
Essential Tools for Your Glamorous Manicure
Before we dive into the designs, let’s make sure you have the right tools. Having these on hand will make the process smoother and your results more professional. You don’t need a professional kit; many of these items are staples for any home manicure.
| Tool | Purpose | Beginner Tip |
|---|---|---|
| Nail File | To shape your nails. | Use a fine-grit file and always file in one direction to prevent breakage. |
| Cuticle Pusher/Orange Stick | To gently push back cuticles. | Moisturize cuticles first and be very gentle; never cut them at home unless you’ve been properly trained. |
| Base Coat | To protect your natural nail and help polish adhere. | A good base coat prevents staining and creates a smooth canvas. |
| Nail Polish (Your Chosen Color) | The star of the show! | Choose high-quality, long-wearing formulas for the best results. |
| Top Coat | To seal in your color and add shine. | A quick-drying, high-gloss top coat is your secret weapon for that salon finish. |
| Cotton Pads/Lint-Free Wipes | For removing old polish and cleaning the nail. | Lint-free wipes are ideal as they don’t leave fuzzy bits behind. |
| Nail Polish Remover | To remove polish. | Acetone-free removers are gentler on nails and cuticles. |
| Optional: Fine Art Brush or Dotting Tool | For adding small details. | These are great for adding tiny dots or lines to classic designs. |
Top Red Carpet Nail Design Ideas for Beginners
Let’s get to the fun part! These designs are elegant, simple to execute, and always make a statement. We’ll focus on techniques that are easy to master, even if you’re new to DIY manicures.
1. The Classic Cherry Red
This is the quintessential red carpet color for a reason. It’s bold, timeless, and exudes confidence. It works with virtually any outfit and any skin tone.
How to Achieve the Perfect Red:
- Prep: Start with clean, shaped nails. Apply a thin layer of base coat and let it dry completely.
- Color Application: Apply one thin coat of your chosen cherry red polish. Let it dry for a minute or two.
- Second Coat: Apply a second thin coat. Ensure even coverage. For a deeper color or better opacity, a third thin coat might be needed, but avoid making it thick.
- Clean Up: Use a small brush dipped in nail polish remover to clean up any stray polish around your cuticles. This is key for a professional look.
- Seal with Shine: Apply a generous layer of high-gloss top coat. Make sure to cap the free edge (paint a tiny bit along the very tip of the nail) to prevent chipping.
Pro Tip: For an extra touch of elegance, choose a red with a slightly blue undertone if you have fairer skin, and a warmer, orangey-red if you have deeper skin tones. However, ultimately, wear the red that makes you feel fantastic!
2. The Polished Nude
A perfect nude manicure is sophisticated and universally flattering. It elongates the fingers and creates a clean, polished appearance that’s never out of style. The key is finding the “your-skin-but-better” shade.
Finding Your Perfect Nude:
- Fair Skin: Look for nudes with pink or beige undertones. Avoid anything too yellow or stark white.
- Medium Skin Tones: Peachy, caramel, or light tan shades often work beautifully.
- Deep Skin Tones: Rich caramel, chocolate, or deep copper nudes will be stunning.
How to Apply Nude Polish Flawlessly:
The steps are the same as for the cherry red. However, with nudes, it’s especially important to get the application just right as any streaks or unevenness can be more noticeable. Thin, even coats are your best friends here.
3. The Timeless French Manicure (Modern Twist)
The classic French manicure is a red carpet staple, but we can give it a subtle update. Instead of a stark white tip, try a softer, milky white or even a very pale pink. The base can be a sheer nude or a pale pink.
Easy Modern French Tips:
- Base Coat: Apply one or two thin coats of your sheer nude or pale pink base color. Let dry completely.
- The Tip:
- Freehand: This takes practice! Hold your hand still and gently float the polish brush across the tip of your nail.
- Guide Stickers: Use French manicure guide stickers for perfectly straight lines. Peel them off immediately after applying the white tip before it dries completely, to get a clean edge.
- The Color: Use a soft, creamy white polish for the tips.
- Top Coat: Finish with a high-gloss top coat, ensuring you cap the edge.
External Resource: For more insights into nail health and care that forms the foundation of any great manicure, the American Academy of Dermatology Association offers trusted advice.
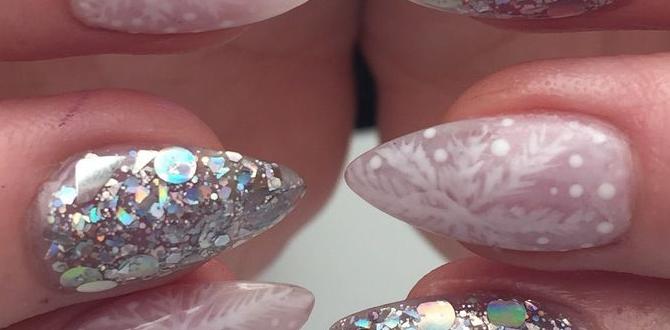
4. Subtle Sparkle: The Micro-Glitter Accent
Sometimes, a touch of shimmer is all you need to elevate a simple manicure to red carpet status. This is perfect for those who love a little bling but want to keep it sophisticated.
How to Add Subtle Sparkle:
- Option 1 (Accent Nail): Choose one nail (usually the ring finger) to be your accent. Polish all other nails in a classic shade like nude, sheer pink, or navy. For the accent nail, paint it with a fine iridescent or silver glitter polish. Alternatively, use a complementary solid color cream shade and paint a thin line of glitter polish across the tip or at the base.
- Option 2 (Glitter Top Coat): Apply your favorite classic nail polish color. Once completely dry, apply one thin coat of a sheer glitter top coat over all nails. This adds a subtle, ethereal shimmer.
- Classic with a Glitter Tip: Paint your nails a solid color and then paint a fine line of glitter polish across the tip, similar to a French manicure.
- Shades: Rose gold is a particularly popular and flattering metallic for many skin tones. Soft, brushed gold or a sleek silver can also be stunning.
- Application: Metallics can sometimes show brush strokes. Apply in thin, even coats, and try to use smooth, consistent strokes. A good top coat will help smooth out any minor imperfections.
- As an Accent: If a full metallic nail feels too bold, use it as an accent nail or for a French tip instead of white.
- Color Choice: Select shades that complement your outfit and skin tone.
- Application: These darker colors can sometimes be more prone to streaking. Ensure you apply thin coats and allow each to dry.
- Clean Edges: Dark colors make any ‘bloopers’ around the cuticle very obvious. Take your time with the cleanup brush for a sharp, clean finish.
- Top Coat is Crucial: A perfect top coat seals the deal, adding shine and depth to these rich colors.
- Prep is Key: Always start with clean, dry nails. Remove any traces of old polish. Make sure your nails are free of oils. Use a nail cleanser or rubbing alcohol on a cotton pad to wipe down each nail before applying polish.
- Thin Coats, Not Thick: This is the golden rule of nail polish application. Thick coats take longer to dry, are more prone to smudging and chipping, and don’t look as professional. Three thin coats are almost always better than two thick ones.
- Cap the Edge: When applying your color and especially your top coat, draw the brush horizontally across the very tip of your nail. This seals the polish and prevents chipping from the edge.
- Let Them Dry: Be patient! Even “quick-dry” polishes need adequate time. Avoid activities that might smudge or dent your nails for at least 15-20 minutes after application. For a full cure, some polishes take up to 24 hours.
- Invest in a Good Top Coat: A quality top coat is vital. Look for one that is “high gloss” and “quick-drying.” Reapply a thin layer every couple of days to refresh the shine and add an extra layer of protection.
- Moisturize: Keep your cuticles and hands moisturized. Dry,
cuticle oils can help prevent hangnails and keep your overall nail appearance neat and healthy, which enhances any design.
- Be Gentle: Treat your freshly polished nails with care. Avoid using them as tools to open things or scrape surfaces.
- Streaks: If your polish is streaky, it’s likely due to not enough polish on the brush, inconsistent strokes, or the polish formula itself. Try slightly more polish on your brush for the next coat, use smoother, longer strokes, and ensure you’re using thin coats.
- Bubbles: Bubbles usually appear when polish is applied too thickly, or when the previous coat wasn’t dry enough. Apply polish in thin coats and allow each layer to dry sufficiently before applying the next. Avoid shaking your polish bottle vigorously; rolling it between your hands is better.
- Smudges/Dents: If you accidentally smudge or dent your nail, there are a couple of fixes. For a minor smudge, you can sometimes gently smooth it over with more top coat. For a more significant imperfection, the best bet is to carefully remove the polish from that nail and reapply the color and top coat.
- Uneven Cuticle Application: This is where your cleanup brush comes in! Dip a small, flat brush (an old, clean eyeliner brush works well) into nail polish remover. Carefully trace around your cuticle line to remove any excess polish for a super clean finish.
Tip: Don’t overdo the glitter. A little goes a long way in achieving that refined red carpet sparkle.
5. The Sophisticated Metallic
Metallics, especially soft golds, rose golds, or silvers, can be incredibly chic and modern. They feel luxurious without being overly flashy.
Wearing Metallics:
6. The Elegant Deep Jewel Tones
For evening events or a more dramatic look, deep jewel tones like emerald green, sapphire blue, or deep burgundy are incredibly sophisticated and have a rich, luxurious feel.
Mastering Jewel Tones:
Tips for Long-Lasting Red Carpet Nails
Achieving a stunning look is one thing, but making it last is another! Here are some essential tips:
Troubleshooting Common Nail Design Issues
Even with the best intentions, sometimes things don’t go perfectly. Here’s how to fix common beginner headaches:
Frequently Asked Questions About Red Carpet Nail Designs
Q1: What is the most popular red carpet nail color?
A1: Classic reds, deep nudes, and sophisticated French manicures are perennially popular. Metallics and elegant jewel tones also make frequent appearances.
Q2: Can I wear nail art on the red carpet?
A2: Absolutely! While classic looks are common, subtle and elegant nail art, like a fine glitter accent or minimalist lines, can also be very red carpet appropriate. Keep it refined and avoid anything too chunky or distracting.
Q3: How do I make my nail polish last longer?
A3: Start with clean, dry nails, use a good base and top coat, apply polish in thin layers, cap the free edge, and reapply top coat every 2-3 days. Moisturizing your cuticles also helps.
Q4: Is it okay to have short nails on the red carpet?
A4: Of course! Short, well-maintained nails painted in a classic or elegant color can look just as glamorous as long nails. Focus on a neat shape and a flawless finish.
Q5: How do I achieve a super shiny finish like the celebrities?
A5: A high-quality, high-gloss top coat is essential. Look for ones specifically labeled “gel-like finish” or “high gloss.” Applying it generously and making sure to cap the nail edge will give you that dazzling shine.
Q6: What’s the difference between a regular polish and a gel polish for this look?
A6: Regular polish is applied with a brush and air dries. Gel polish requires a UV/LED lamp to cure, offers superior durability and shine, and lasts much longer. For DIY, regular polish is easier to start with, but gel polish can provide a more durable, salon-like finish.
Q7: How do I prevent my nail polish from chipping?
A7: Proper prep (cleaning and oil removal), thin coats, capping the nail edge, and a good top coat are key. Avoiding harsh activities with your hands also makes a big difference.
Conclusion
Achieving that coveted red carpet nail glamour is more accessible than you might think. By focusing on classic colors, clean lines, and a flawless finish, you can easily create sophisticated looks at home. Remember that healthy nails are the best canvas, so incorporating good nail care into your routine is just as important as the polish itself. Whether you opt for a bold cherry red, a chic nude, or a subtle sparkle, these proven designs will ensure your hands look elegant and polished for any occasion. Don’t be afraid to experiment with these techniques, and most importantly, have fun expressing your personal style. Your nails are your ultimate accessory!

