Raspberry nail designs offer a vibrant and chic way to express your style, perfect for beginners and seasoned nail art lovers alike. Explore stunning, easy-to-achieve looks that add a playful yet sophisticated pop to any manicure.
Ready to add a burst of delicious color to your fingertips? Raspberry is more than just a fruit; it’s a mood, a statement, and a fantastic inspiration for nail art! Whether you’re a total beginner or looking to spice up your nail game, exploring raspberry nail designs is your ticket to a fun, stylish, and easy manicure. We’ll guide you through simple techniques and stunning ideas that will make your nails the talk of the town. Get ready to be inspired to create beautiful, berry-inspired looks right at home!
Why Raspberry Nail Designs Are Essential
Raspberry, with its rich and versatile pinkish-red hue, is a trending color that brings a touch of playful sophistication to any look. It’s a shade that’s both bold and sweet, making it incredibly adaptable for various nail art styles. Unlike some fleeting trends, raspberry offers a timeless appeal, making it a fantastic investment for your nail design repertoire.
Here’s why raspberry nail designs are an absolute must-try:
- Versatile Shade: From deep, wine-like raspberry to brighter, almost fuchsia tones, this color family offers a spectrum of shades to suit every skin tone and personal preference.
- Mood Booster: The vibrant nature of raspberry can instantly uplift your mood and add a confident, cheerful vibe to your day.
- Seasonal Adaptability: While perfect for summer and spring, deeper raspberry tones can also transition beautifully into autumn and winter manicures.
- Easy to Pair: Raspberry looks stunning on its own or paired with complementary colors like gold, white, black, emerald green, or even other shades of pink and red.
- Beginner-Friendly: Many raspberry nail designs require minimal skill, making them perfect for DIY manicures.
Essential Tools for Raspberry Nail Art
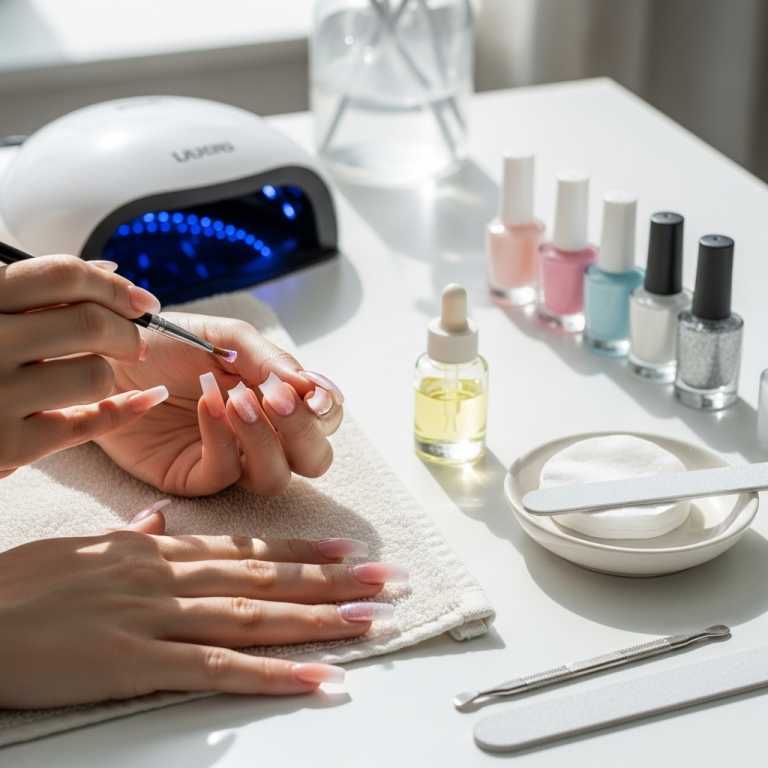
Before we dive into the fun designs, let’s gather the must-have tools. You don’t need a professional salon setup to create gorgeous raspberry manicures. Most of these items are readily available and can be used for countless other nail art projects.
The Basics You’ll Need:
- Nail Polish in Raspberry Shades: This is your star ingredient! Have a few shades if possible, from a creamy opaque to a shimmery finish.
- Base Coat: Protects your natural nails and helps your colored polish adhere better.
- Top Coat: Seals your design, adds shine, and prevents chipping.
- Nail Polish Remover: For cleaning up mistakes and prepping nails.
- Cotton Pads or Balls: To apply remover.
- Cuticle Pusher or Orange Stick: To tidy up cuticles and nail edges.
Optional, But Helpful Tools for More Advanced Designs:
- Thin Nail Art Brushes: Essential for creating fine lines, dots, and intricate details. A set with various tip sizes is ideal.
- Dotting Tools: These have small metal balls at the end, perfect for creating uniform dots of different sizes.
- Striping Tape: Creates sharp, clean lines for geometric designs.
- Stencils or Nail Stickers: A fantastic shortcut for intricate patterns.
- Rhinestones, Glitter, or Studs: For adding a touch of sparkle and dimension.
- Tweezers: To precisely place small embellishments.
- UV/LED Lamp (for gel polish): If you plan to use gel polish for longer-lasting results.
Easy Raspberry Nail Design Tutorials for Beginners
Let’s get creative! These tutorials are designed for simplicity, so you can achieve stunning results without feeling overwhelmed.
1. The Classic Raspberry Monochrome
This is as straightforward as it gets, but oh-so-chic! It’s all about the color.
You’ll Need:
- Base Coat
- Raspberry Nail Polish
- Top Coat
Steps:
- Prep Your Nails: Ensure your nails are clean, dry, and free of old polish. Gently push back your cuticles.
- Apply Base Coat: Apply one thin layer of base coat and let it dry completely.
- Apply Raspberry Polish: Apply two thin, even coats of your chosen raspberry nail polish. Allow each coat to dry for a minute or two before applying the next.
- Seal with Top Coat: Once the second coat is dry, apply a generous layer of top coat. This will give your nails a glossy finish and help them last longer.
Nailerguy Tip: For an extra touch, try a matte top coat for a sophisticated, velvety finish!
2. Raspberry French Tip Twist
A fun, modern take on the classic French manicure.
You’ll Need:
- Base Coat
- Nude or Sheer Pink Polish (optional, for the base)
- Raspberry Nail Polish
- Thin Nail Art Brush or French Tip Guide Stickers
- Top Coat
Steps:
- Prep and Base: Start with clean, dry nails and a base coat. If you like, apply one very thin coat of nude or sheer pink polish for a clean canvas and let it dry.
- Create the Raspberry Tip:
- Using a Brush: Dip your thin nail art brush into the raspberry polish. Carefully paint a curved line along the free edge of each nail, mimicking a traditional French tip.
- Using Stickers: Apply French tip guide stickers along the natural curve of your nail tip. Paint over the exposed tip with raspberry polish.
- Remove Guides (if used): If using stickers, gently peel them off while the polish is still slightly wet to get a clean line.
- Let Dry: Allow the raspberry tips to dry completely.
- Apply Top Coat: Finish with a layer of top coat to seal and shine.
Nailerguy Tip: For a bolder look, try a deep navy or black polish as the base instead of nude!
3. Dot-tastic Raspberry Accents
Dots are beginner-friendly and incredibly versatile.
You’ll Need:
- Base Coat
- Raspberry Nail Polish
- White or Black Nail Polish (for contrast)
- Dotting Tool or Toothpick
- Top Coat
Steps:
- Prep and Base Polish: Apply a base coat, then paint your nails with your primary raspberry polish. Let it dry thoroughly.
- Create the Dots: Dip your dotting tool (or the tip of a toothpick) into the contrasting polish (white or black).
- Place Your Dots: Gently press the dotting tool onto your nail to create dots. You can:
- Create a single accent dot on one or two nails near the cuticle.
- Make a line of dots along the smile line of your nail.
- Create a pattern, like polka dots, across the entire nail.
- Use a larger dotting tool for bigger dots and a smaller one for tiny accents.
- Let Dry: Ensure the dots are completely dry.
- Seal: Apply your top coat carefully, ensuring not to smudge the dots.
Nailerguy Tip: Mix and match! Use raspberry as your base and white/black for dots, or vice versa.
4. Raspberry Gradient or Ombré
This looks intricate but is surprisingly achievable!
You’ll Need:
- Base Coat
- Raspberry Nail Polish
- A Lighter Pink or White Nail Polish
- Makeup Sponge (a clean smoothie sponge works well)
- Top Coat
- Nail Polish Remover and Cotton Swabs (for cleanup)
Steps:
- Prep and Base: Apply base coat and two coats of the lighter pink or white polish as your base color on all nails. Let it dry fully.
- Prepare the Sponge: Cut a piece of your makeup sponge. Apply a few stripes of your raspberry polish and lighter pink/white polish side-by-side onto the sponge.
- Create the Gradient:
- Gently dab the sponge onto your nail, starting from the cuticle and rolling slightly towards the tip.
- You may need to reapply polish to the sponge and dab again to build up the color intensity.
- Repeat: Repeat this process on all nails, reapplying polish to the sponge as needed.
- Cleanup: Use a cotton swab dipped in nail polish remover to clean up any polish that got on your skin.
- Top Coat: Once dry, apply a thick layer of top coat to smooth out the sponged texture and add shine.
External Resource: For a deeper dive into blending techniques, check out this guide on NailPro: Nail Art Techniques for Blending and Gradients.
5. Geometric Raspberry Lines
Sharp lines create a modern, sophisticated look.
You’ll Need:
- Base Coat
- Raspberry Nail Polish
- White or Black Nail Polish
- Striping Tape
- Sharp Scissors or Nail Art Cutter
- Top Coat
Steps:
- Prep and Base Layers: Apply base coat and two coats of your primary polish (e.g., white or black). Let it dry completely until it’s not tacky.
- Apply Tape: Carefully place strips of striping tape onto your fully dried polish to create geometric patterns – think triangles, chevrons, or just straight lines. Press the tape down firmly to prevent polish from seeping underneath.
- Paint Raspberry: Apply one or two coats of raspberry polish over the taped areas.
- Remove Tape: While the raspberry polish is still slightly wet, carefully peel off the striping tape using tweezers or your fingertips.
- Let Dry: Allow the raspberry polish to dry completely.
- Seal: Apply a generous layer of top coat to protect your design.
6. Raspberry Floral Accents
A touch of floral flair can be surprisingly simple.
You’ll Need:
- Base Coat
- Raspberry Nail Polish
- White or Black Nail Polish
- Fine-tipped Nail Art Brush
- Small Green Polish (for leaves, optional)
- Top Coat
Steps:
- Prep and Base: Apply base coat and your preferred base color (can be raspberry, white, or black). Let dry thoroughly.
- Create Raspberry Petals: Dip your fine nail art brush into the raspberry polish. Create small, curved strokes around a central point to form flower petals. You can make simple 3-5 petal flowers. Alternatively, use a dotting tool to make a few small raspberry dots and then gently drag them outwards with the brush to create petal shapes.
- Add Center Dots: Use a smaller dotting tool or the tip of your brush to add a tiny dot of white or black polish in the center of each flower.
- Add Leaves (Optional): If desired, use a fine brush and green polish to add small leaf shapes next to your flowers.
- Let Dry: Ensure all elements are completely dry.
- Seal: Apply top coat carefully.
Choosing Your Perfect Raspberry Shade
The world of raspberry isn’t just one color! There’s a perfect shade for everyone and every occasion. Understanding the nuances can help you choose the best raspberry for your desired look.
| Shade Type | Description | Best For | Nail Design Ideas |
|---|---|---|---|
| Bright Berry | A vibrant, juicy pinkish-red, almost like a fresh raspberry. | Spring, Summer, making a statement, playful looks. | Monochrome manicures, bright French tips, accent nails with white dots. |
| Deep Raspberry/Raspberry Wine | A richer, darker tone with more red and purple undertones, resembling raspberry liqueur. | Autumn, Winter, elegant evenings, sophisticated looks. | Deep monochrome, paired with gold glitter, velvet finish designs. |
| Soft/Pastel Raspberry | A muted, lighter version, leaning towards a dusty rose with a hint of raspberry. | Everyday wear, office-appropriate, romantic styles. | Gentle gradients, subtle floral accents, paired with cream. |
| Shimmery/Glittery Raspberry | Any shade infused with shimmer, metallic flecks, or full glitter. | Parties, holidays, adding glamour. | Glitter ombré, full glitter accent nails, paired with matte finishes. |
Stepping Up Your Raspberry Game: Advanced Ideas
Once you’ve mastered the basics, why not try something a little more daring? These ideas will truly make your nails pop!
1. Raspberry Marble Effect
This technique creates a beautiful, swirling stone-like pattern.
You’ll Need:
- Base Coat
- Raspberry, White, and Black Nail Polish
- A Cup of Room Temperature Water (not hot, not cold)
- Toothpick or Skewer
- Rubbing Alcohol (isopropyl alcohol), minimum 70%
- Cotton Swabs and a small brush for cleanup
- Top Coat
Steps:
- Prep: Apply base coat. Paint nails with a base color (white or nude often works best). Let it dry. Clean up cuticles and apply tape around the nail to protect your skin from the water marbling process.
- Prepare Water: Fill a small cup with room temperature water.
- Create Swirls: Drop a few drops of raspberry polish onto the water surface. Then drop white and black polish around and into the raspberry. Use a toothpick to gently swirl the colors together into a marble pattern.
- Water Marble: Dip your taped finger into the water, just as the colors have swirled but before they start to dry.


