Get gorgeous rainbow pastel almond nails design with a simple DIY guide designed for beginners. Learn the steps and techniques to create this stunning look at home, making your nails pop with soft, dreamy colors and a chic almond shape.
Dreaming of nails that are both playful and pretty? Rainbow pastel almond nails are the perfect way to express your unique style! They’re a fantastic choice for anyone wanting a touch of magic on their fingertips without being overly bold. Want to know how to achieve this delightful look yourself? You’re in the right place! We’ll walk you through everything, from shaping to coloring, making it super easy for even the newest nail art explorer. Get ready to fall in love with your nails!
Your Ultimate Guide to Rainbow Pastel Almond Nails Design
The rainbow pastel almond nail design is a total showstopper. It’s soft, it’s sweet, and it’s incredibly chic. Almond-shaped nails are famous for their elegant, elongating effect, making hands look more slender and sophisticated. When you combine this flattering shape with a gradient of gentle pastel rainbow hues, you get a manicure that whispers elegance while shouting fun. It’s perfect for spring, summer, or any time you need a mood boost!
This design works wonderfully for special occasions, or simply to brighten up your everyday look. What’s even better? You don’t need to be a pro to create it! With a few simple tools and a little patience, you can achieve salon-worthy results right at your own home. Let’s dive into what makes this design so special and how you can recreate it.
Why Rainbow Pastel Almond Nails Are a Must-Try
There are so many reasons why this nail design has captured everyone’s attention. Here’s why you’ll want to give it a try:
- Universally Flattering Shape: The almond shape is known for its elegance. It elongates the fingers, making your hands appear more refined and graceful.
- Soft & Dreamy Colors: Pastel shades—think baby pink, light blue, mint green, soft yellow, and lilac— evoke a sense of calm and delicacy. They’re gentle on the eyes and add a touch of sweetness.
- Vibrant Yet Subtle: The rainbow effect adds a playful pop of color, but the pastel tones keep it from being overwhelming. It’s the perfect balance of fun and sophistication.
- Endless Customization: You can play with the order of colors, the number of colors, and even the intensity of the pastel shades to match your personal style.
- Versatile for Any Occasion: From a casual day out to a wedding or a festive party, rainbow pastel almond nails are a beautiful accessory that complements many outfits.
- Boosts Your Mood: Who doesn’t love a little color therapy? These cheerful yet soft hues can instantly lift your spirits.
Essential Tools and Materials
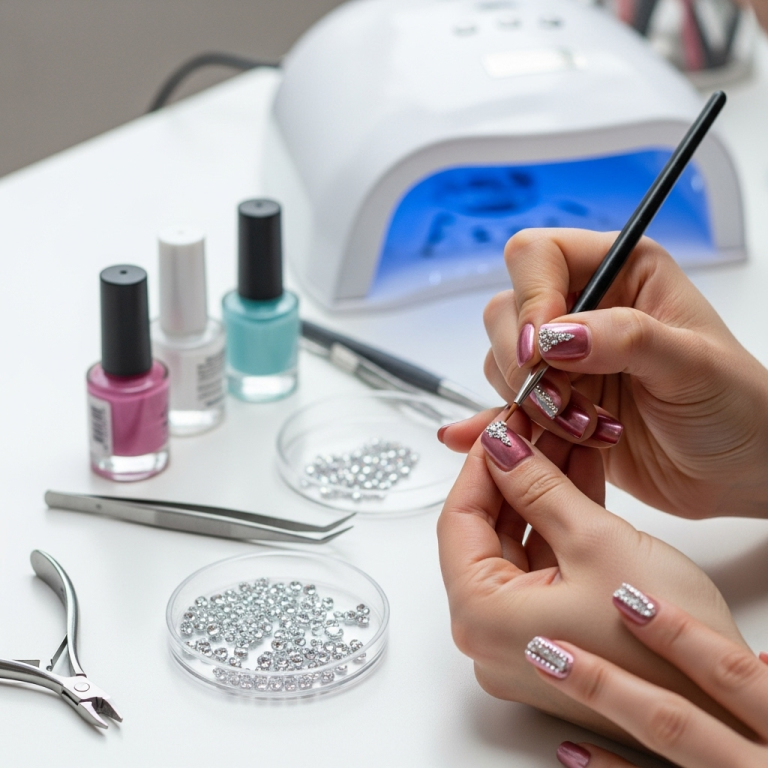
Before we get our hands (literally!) dirty, let’s gather what we need. Having the right tools makes the process smoother and the results much better. Don’t worry if you don’t have everything; many items are readily available online or at your local drugstore.
For Shaping the Almond Nails:
- Nail clippers (optional, for trimming length)
- Nail file (a coarser grit is good for shaping, a finer grit for smoothing)
- Emery board or glass nail file (for refining the shape)
- Cuticle pusher or orange stick
- Cuticle oil (to rehydrate after filing)
For the Pastel Rainbow Design:
- Base coat
- Pastel nail polish in at least 3-5 colors (e.g., baby pink, sky blue, mint green, pale yellow, lavender)
- Top coat
- Nail art brush or a fine-tipped detail brush (for blending if desired, or for precise application)
- Sponge (a makeup sponge or a dedicated nail art sponge)
- Palette or a piece of foil/paper to put polish on
- Rubbing alcohol or nail polish remover (for cleaning brushes and mistakes)
- Cotton swabs or makeup sponges for cleanup
Step-by-Step: Creating Your Rainbow Pastel Almond Nails
Ready to transform your nails? Follow these simple steps. We’ll focus on a gradient technique, which is a fantastic way to achieve a beautiful, blended rainbow effect!
Step 1: Prep Your Nails
Clean nails are the best canvas. Start by removing any old nail polish. Gently push back your cuticles using a cuticle pusher. If they are overgrown, you can very carefully trim any excess dead skin around the nail edge, but be gentle! Then, buff the surface of your nails lightly with a fine-grit file. This helps the base coat and polish adhere better. Wipe your nails with rubbing alcohol to remove any oils or dust.
Step 2: Shape Your Nails into the Perfect Almond
This is where the almond shape comes in! If your nails are long, you might want to trim them down a bit first with clippers to a manageable length before filing.
- File the Sides: Starting from the base of the nail, file straight up towards the widest part of your nail. Do this on both sides.
- Taper Towards the Tip: Once you reach the desired width near the tip, begin to angle your file inward, creating a gentle point at the very center of the nail’s free edge.
- Refine the Tip: Gently file the tip to create a soft point. The key here is to avoid a sharp, needle-like point; it should be a rounded peak.
- Smooth Everything: Use a finer grit file or an emery board to smooth out any rough edges and refine the shape. Ensure both sides are symmetrical.
Remember, it’s okay if this takes a few tries to get perfect. Practice makes perfect, and even slightly imperfect almond shapes look stylish!
Step 3: Apply the Base Coat
A good base coat is crucial for protecting your natural nails from staining and helping your polish last longer. Apply one thin layer and let it dry completely.
Step 4: Create the Pastel Rainbow Gradient
This is the fun, colorful part! For a classic rainbow pastel effect, we’ll use a sponge. Choose 3-5 pastel colors you love.
- Prepare Your Sponge: Cut a piece of your makeup sponge into a usable size (about 1-2 inches is good). It’s often best to use a denser sponge for smoother gradients.
- Apply Polish to Palette: On your foil or palette, create stripes of your chosen pastel polishes, placing them side-by-side in the order you want them to appear on your nail (e.g., pink, orange, yellow, green, blue, purple).
- Load the Sponge: Gently dab the sponge into the stripes of polish. You want to pick up a good amount of each color. You might need to reload the sponge a few times.
- Dab Onto the Nail: Lightly and quickly dab the sponge onto your nail, starting from the cuticle area and moving upwards towards the tip. Apply gentle pressure. Don’t press too hard, or you’ll smear the colors.
- Reload and Repeat: Reload your sponge with fresh polish from the palette and repeat the dabbing motion on your nail. Layering the color helps build up the gradient and blend the shades beautifully. You can dab a few times to intensify the colors and smooth the transitions.
- Work Quickly: Nail polish dries fast, especially on a sponge. It’s best to work on one nail at a time and reload your sponge for each nail.
- Alternative Method (Nail Art Brush): If you prefer more control or don’t have a sponge, you can apply thin layers of each color directly to the nail, allowing each to dry slightly before adding the next. Then, use a clean, slightly damp nail art brush (with rubbing alcohol or water) to gently blend the edges where the colors meet. This takes practice and patience for a smooth blend.
Step 5: Clean Up the Edges
Don’t worry about the polish that got on your skin. Dip a cotton swab or a small, pointed makeup brush into nail polish remover or rubbing alcohol. Carefully trace around your nail bed to clean up any excess polish. This step makes a huge difference in how professional your manicure looks!
Step 6: Apply the Top Coat
Once your gradient is dry (give it a minute or two to set), apply a generous layer of top coat. This seals in your design, adds shine, and protects your beautiful work from chipping. Make sure to cap the free edge of your nail by swiping the brush along the very tip of your nail. This helps prevent chipping!
Step 7: Let it Dry Completely
Patience is a virtue, especially when it comes to nail polish! Let your nails air dry completely. You can use a fast-drying spray or drops if you’re in a hurry, but natural drying usually yields the best results.
Tips for the Best Rainbow Pastel Almond Nails
Want to elevate your rainbow pastel almond nails even further? Here are some pro tips:
- Color Choices: Stick to 3-5 pastel shades that complement each other well. Think about the order: rainbow colors typically follow a ROYGBIV sequence, but you can arrange them as you like for a unique look.
- Sponge Technique: Don’t use too much pressure with the sponge. Light, repeated dabbing is key for a smooth blend. If the sponge starts to tear or get clumpy, cut off a fresh piece.
- Blending is Key: For a seamless gradient, ensure the polish colors on your palette are touching. This helps them blend on the sponge and then on your nail.
- Thin Coats: Apply thin layers of polish, especially when sponging. Thick coats will look clumpy and will take forever to dry.
- Cleanup is Crucial: Take your time with the cleanup. It’s what makes DIY manicures look polished and professional. A fine-tipped cleanup brush dipped in remover is a lifesaver!
- Add Sparkle: For an extra touch of magic, add a fine glitter top coat over your pastel rainbow design. It adds a beautiful shimmer!
- Nail Health: Always use a base coat and top coat. Regular cuticle oil application will keep your nails and surrounding skin healthy, which is essential for beautiful nail art. Check out American Academy of Dermatology’s tips for healthy nails.
Troubleshooting Common Issues
Even with the best intentions, things can go wrong. Here’s how to fix common problems:
| Problem | Solution |
|---|---|
| Colors aren’t blending well. | Ensure the polish colors are touching on your palette. Use a slightly damp sponge (dampened with a bit of alcohol or water and then blotted dry) for smoother distribution and blending. Reload the sponge frequently. |
| Sponge leaving a textured finish. | Try a different type of sponge with a finer texture. Apply lighter pressure when dabbing. Ensure your nail polish isn’t too thick. |
| Polish is streaky. | Apply more layers of color using the sponge. Ensure you’re picking up enough polish on the sponge and dabbing effectively. A good top coat can sometimes help smooth minor streaks. |
| Oversprayed polish on skin. | This is where cleanup tools shine! Use a small brush dipped in nail polish remover or a precision cotton swab to carefully remove the excess while the polish is still slightly wet. |
| Nails chipping quickly. | Make sure your nails are clean and oil-free before starting. Apply a thin layer of base coat and a dedicated top coat. Crucially, cap the free edge of each nail with your top coat – swipe the brush along the very tip. |
| Almond shape isn’t perfect. | Don’t strive for absolute perfection on your first try! Focus on symmetry and a gently tapered point. You can always file and reshape as needed. If you’re struggling, press-on almond nails are a great alternative. |
Maintaining Your Rainbow Pastel Almond Nails
Once you’ve achieved this gorgeous look, you want it to last! Maintaining your manicure is key:
- Avoid Harsh Activities: Try to avoid using your nails as tools (like scraping or prying) as this can lead to chips and breaks.
- Moisturize: Keep your cuticles and hands hydrated by applying cuticle oil and hand lotion regularly. This also helps your mani look fresh.
- Gloves for Chores: Wear rubber gloves when doing dishes or cleaning with chemicals. This protects your nails from harsh substances and excessive water exposure.
- Touch-Ups: If you notice a tiny chip, you can sometimes carefully apply a bit of top coat to seal it. For larger issues, it might be time for a fresh mani!
FAQ: Your Questions Answered
Q1: How do I get smooth color transitions with the sponge method?
A1: Make sure the colors on your palette are touching where they meet. Dab the sponge gently and repeatedly onto the nail. Reload the sponge often with fresh polish to keep the colors vibrant and blendable.
Q2: Can I achieve this look without a sponge?
A2: Absolutely! You can use a clean, fine nail art brush or even a toothpick to carefully paint thin lines of each pastel color onto your nail and then gently blend the edges where they meet before they dry. This method offers more control but requires patience.
Q3: How long does it take to do rainbow pastel almond nails?
A3: For beginners, setting aside about 1 to 1.5 hours is usually a good estimate, including drying time. As you get more practice, you might find you can complete the process more quickly, around 45 minutes to an hour.
Q4: What kind of polish works best for the gradient effect?
A4: Creamy, opaque polishes tend to work best for gradients as they offer good color payoff and blendability. Avoid polishes that are too sheer or too glittery, as they can make the blending difficult.
Q5: My almond shape isn’t perfect. What should I do?
A5: Don’t stress! Focus on achieving a symmetrical taper. If you’re still learning, consider using a slightly coarser grit file for initial shaping and then refining with a finer one. It’s better to aim for a soft, elegant point rather than a sharp one. You can also practice on nail tips before applying to your natural nails.
Q6: Can I make this design with gel polish?
A6: Yes, you can! The sponging technique works well with gel polish. Apply each color stripe to your palette, then pick up with the sponge and dab onto the nail. Cure each layer under a UV/LED lamp. Be sure to cure the final top coat thoroughly.
Q7: How do I prevent cuticle flooding with the sponge method?
A7: You can apply a layer of liquid latex or a peel-off base coat around your cuticles before you start sponging. Once the nail art is done and dry, you can peel off the latex, leaving your cuticles perfectly clean. This is a game-changer for gradient manicures!
Conclusion: Your Dreamy Pastel Rainbow Nails Await!
And there you have it! Your beautiful, DIY rainbow pastel almond nails design is complete. We’ve walked through every step, from preparing your nails and shaping them into that elegant almond form, to creating the dreamy pastel rainbow gradient and finishing with a protective top coat. Remember, nail art is all about creativity and self-expression.
Don’t be discouraged if your first attempt isn’t exactly like a magazine cover. The beauty of DIY is in the process and the learning. Each time you practice, you’ll get better at shaping, blending, and achieving the effects you desire. These rainbow pastel almond nails are a wonderful way to add a touch of whimsy and color to your life, boosting your confidence with every glance at your hands.
So go ahead, give this tutorial a try! Embrace the pastel hues, enjoy the satisfying process of creating something beautiful, and wear your stunning new nails with pride. Happy polishing!


