Rainbow nail design ideas are a fun and vibrant way to express yourself with effortless, colorful nails. This guide offers simple techniques and creative inspiration for beginners to achieve stunning rainbow manicures at home, bringing a burst of joy to your fingertips.
Who doesn’t love a splash of color? Rainbow nails are a fantastic way to brighten your day and add a playful touch to your style. But sometimes, the thought of creating intricate nail art can feel a little overwhelming, especially if you’re just starting out. Will it be messy? Will it take hours? Don’t worry! We’re here to show you that creating beautiful, colorful rainbow nail designs is totally achievable for everyone. Get ready to discover easy-to-follow tips and inspiring ideas that will make your nails the talk of the town!
In this guide, we’ll dive into:
- Simple rainbow nail design techniques perfect for beginners.
- Essential tools and how to use them.
- Creative variations on the classic rainbow look.
- Tips for making your colorful nails last longer.
Why Rainbow Nails Are a Fun Choice for Everyone
Rainbow nails aren’t just for kids or special occasions anymore! They’re a fantastic way to showcase your personality and bring a little extra happiness into your everyday. The beauty of a rainbow design is its versatility. You can go for a full spectrum across all your nails, or just add a pop of color to an accent nail. Whether you’re feeling bold and bright or subtly sophisticated with a pastel rainbow, there’s a rainbow nail design idea out there for you. Plus, with so many colors involved, you can easily match your nails to any outfit or mood!
Think about it: a gloomy day can instantly feel brighter with a vibrant rainbow peeking out from your fingertips. They’re also a wonderful way to practice your nail art skills without the pressure of needing perfect precision. A slightly wobbly line can still look charming as part of a cheerful rainbow!
Getting Started: Essential Tools for Your Rainbow Nail Adventure
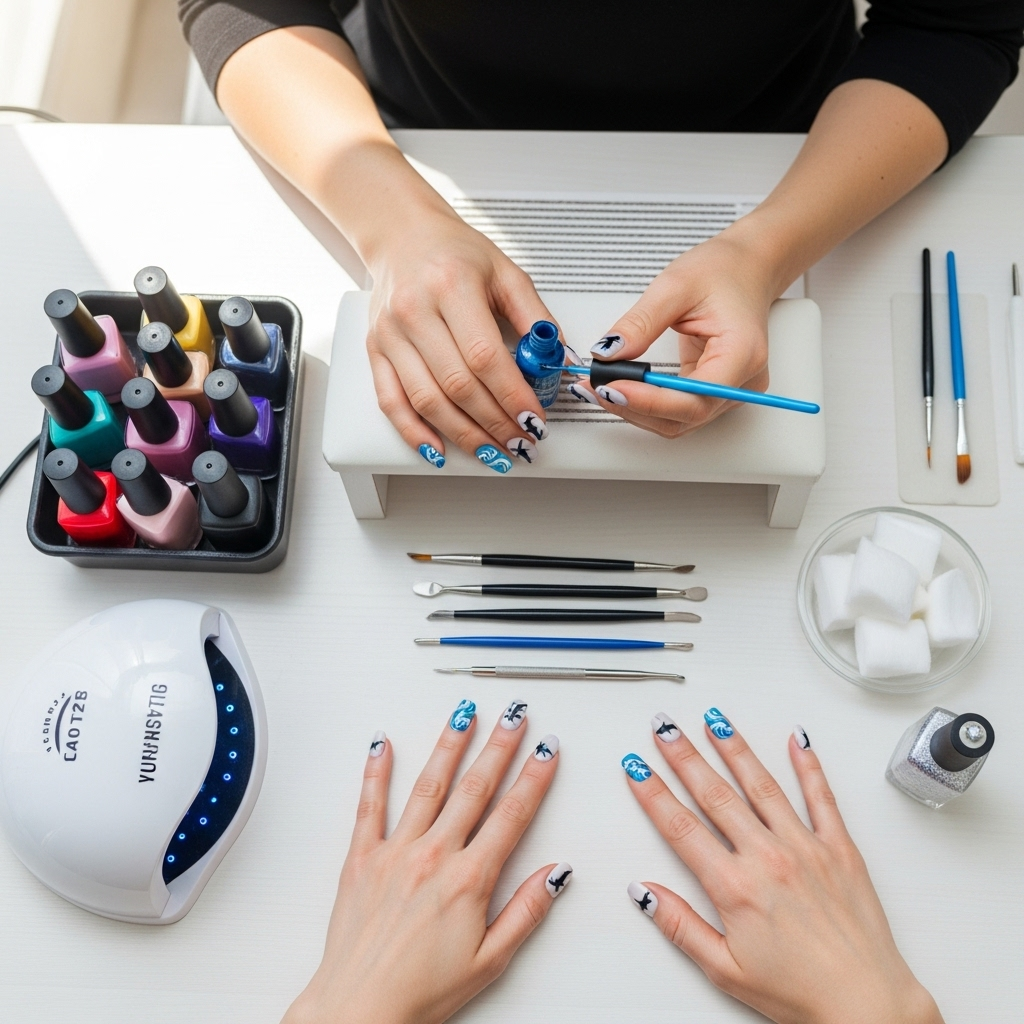
You don’t need a professional salon setup to create gorgeous rainbow nails. With a few basic supplies, you’ll be well on your way. Here’s what you’ll need:
- Base Coat: This protects your natural nails from staining and helps your colors adhere better. It’s a must-have for any manicure.
- Top Coat: This seals your design, adds shine, and crucially, helps your rainbow manicure last longer.
- Nail Polish in Rainbow Colors: You’ll need red, orange, yellow, green, blue, and purple. Don’t be afraid to explore different finishes like creme, shimmer, or glitter!
- Dotting Tools or Toothpicks: Perfect for creating precise dots or thin lines. You can get a set of dotting tools quite affordably.
- Thin Nail Art Brushes: These are invaluable for creating clean lines, gradients, and blending colors.
- Painter’s Tape or Stencils (Optional): Great for achieving crisp, straight lines or specific patterns.
- Nail Polish Remover and Cotton Pads: For cleaning up any mistakes (and believe me, we all make them!).
- Clear Nail Polish (for blending): A little bit of clear polish can help blend colors seamlessly for gradient effects.
Having these on hand will make the process much smoother and more enjoyable. Remember, practice makes perfect, so don’t be discouraged if your first attempt isn’t salon-ready. The goal is to have fun!
Effortless Rainbow Nail Design Ideas for Beginners
Ready to bring on the color? Here are some super simple ways to create stunning rainbow nail designs that even a beginner can master.
1. The Classic Rainbow Stripe
This is the most direct interpretation and surprisingly easy to achieve. You can do this freehand or with the help of tape.
- Prep: Start with a clean nail, apply your base coat, and let it dry completely.
- Tape Method (for crisp lines):
- Apply painter’s tape horizontally across your nail, leaving a space for your first color stripe.
- Paint your first stripe (e.g., red). Let it dry slightly, then carefully remove the tape. You want it dry enough that it doesn’t peel off, but not so dry that the tape leaves a harsh edge.
- Once the first stripe is dry to the touch, apply tape again above your first stripe, leaving a gap for the next color (e.g., orange).
- Paint the orange stripe, remove the tape, and repeat for yellow, green, blue, and purple.
- Allow all colors to dry completely before applying your top coat.
- Freehand Method (for a softer look):
- Start with your base color (white or clear often works best for a vibrant rainbow). Let it dry.
- Using a thin nail art brush or a dotting tool, carefully paint thin stripes of each rainbow color, working your way across the nail. Don’t worry if the lines aren’t perfectly straight – the charm is in the color!
- You can use a bit of clear polish on your brush to slightly blend the edges if you like.
- Clean up any mistakes with a small brush dipped in nail polish remover.
- Apply a top coat once everything is dry.
2. The Rainbow French Tip
A twist on the traditional French manicure, this design adds a colorful arc to the tips of your nails.
- Prep: Apply base coat and let dry. Apply a sheer nude, white, or clear polish as your base color.
- Color Application:
- Once the base is dry, carefully paint a curved stripe of each rainbow color along the tip of each nail. You can do one color per nail tip, or try a gradient of rainbow colors along the tip of a single nail.
- For a cleaner line, you can use a nail art brush to guide the color or carefully use a small stencil designed for French tips.
- Alternatively, you can use a thin brush to paint tiny arches of each rainbow color.
- Finish: Allow to dry fully and seal with a top coat.
3. The Rainbow Dot Gradient
This is incredibly easy and looks super chic! It involves layering dots of different colors.
- Prep: Apply base coat and a neutral or white base color. Let dry.
- Dotting Fun:
- Using a dotting tool or the tip of a toothpick, start creating dots on each nail.
- Begin with one color (e.g., purple) at the cuticle area and place a few dots.
- Move to the next color (e.g., blue) and place dots slightly overlapping or next to the first color.
- Continue with green, yellow, orange, and red, working your way towards the tip of the nail.
- Don’t aim for perfect placement; the random scatter creates a lovely texture.
- Seal: Once dry, apply a generous coat of top coat to smooth over the dots and make them look like a single, cohesive design.
4. The Pastel Rainbow Ombre
Softer and more delicate, pastel rainbows are perfect for a chic, ethereal look.
- Prep: Apply base coat. Apply a very pale pastel shade of your choosing as a base, or paint all but your accent nail in an off-white color.
- Ombre Application:
- On a makeup sponge or the textured side of a nail file, create horizontal lines of your pastel rainbow colors (pale pink, peach, light yellow, mint green, baby blue, lavender).
- Gently dab the sponge onto the nail, pressing down to transfer the colors. You might need to dab a few times to get the colors to show up.
- The sponge will pick up excess polish, making the gradient effect.
- Repeat on other nails, or use different pastel color combinations.
- Smooth and Seal: Apply a layer of clear polish over the ombre to help blend any harsh lines. Let dry, then apply your top coat.
Check out this helpful article from the Harvard Health Publishing about nail polish safety. It’s always good to be informed about the products we use!
Rainbow Nail Design Variations to Stir Your Creativity
Once you’ve got the basic techniques down, why not play around with these fun variations?
- Rainbow Accent Nail: Choose one nail on each hand to be your rainbow focal point. Paint the other nails in a solid complementary color (like white, black, or a neutral tone) for a modern and sophisticated look.
- Rainbow Water Marbling: This is a bit more advanced but creates a truly unique swirled effect. You’ll drop your rainbow colors into a cup of water and then dip your nail into the swirling polish. It takes practice, but the results are stunning! A great resource for learning this technique is the Nail Understanding website, which has detailed guides.
- Rainbow French Tips with a Twist: Instead of full tips, try just a small corner accent or a “V” shape at the cuticle.
- Rainbow Heart or Star Accents: Use a small stencil or freehand to add a tiny rainbow heart or star to a neutral-colored nail.
- Color Blocking Rainbow: Divide your nail into sections and fill each section with a different rainbow color. This creates a geometric, modern rainbow effect.
Step-by-Step: Creating a Rainbow Gradient with a Sponge
The sponge technique is one of the easiest ways to achieve a smooth color transition, perfect for beginners wanting a professional-looking gradient.
What You’ll Need:
- Base coat
- Nail polish in 3-5 rainbow colors (e.g., pink, orange, yellow, green)
- Makeup sponge or textured nail file
- Clear polish or a specific blending polish
- Top coat
- Nail polish remover and a cleanup brush
The Process:
- Prep Your Nails: Apply a base coat and let it dry. You can apply a sheer white or a light neutral polish as a base for brighter colors, or go directly to your gradient.
- Apply Polish to the Sponge: On your makeup sponge (or the textured side of a nail file), paint thin, parallel lines of your chosen rainbow colors. Place them next to each other in the order you want them to appear on your nail (e.g., pink next to orange, orange next to yellow). Don’t press too hard on the sponge yet.
- Dab Onto the Nail: Gently dab the sponge onto your nail. Start at the cuticle and roll or drag the sponge slightly towards the tip. The goal is to transfer the blended colors from the sponge onto your nail.
- Repeat and Blend: You may need to reapply polish to the sponge and dab again to achieve the desired opacity and smoothness. As you dab, the colors will naturally blend together. For very crisp transitions, you can use a thin brush dipped in a little clear polish to gently blend the edges where the colors meet.
- Clean Up: Once you’re happy with the gradient, use a small brush dipped in nail polish remover to clean up any polish that got onto your skin. This sharpens the edges of your manicure.
- Seal the Deal: Let the gradient dry for a minute or two, then apply a generous coat of clear polish or top coat. This will smooth out any texture from the sponge and meld the colors together beautifully.
Tips for Long-Lasting, Vibrant Rainbow Nails
You’ve put in the effort to create a beautiful rainbow design – let’s make it last!
- Don’t Skip the Base Coat: This is essential for preventing staining from vibrant colors and creating a smooth canvas for your design.
- Let Each Layer Dry: Patience is key! Make sure each stripe, dot, or gradient layer is dry to the touch before adding the next. This prevents smudging and color mixing where you don’t want it.
- Seal with a Good Top Coat: A high-quality top coat is your best friend. Apply it generously over all your colors, making sure to cap the free edge of your nail (paint a thin stroke along the tip of the nail) to prevent chipping.
- Reapply Top Coat: For extended wear, consider reapplying your top coat every couple of days. This refreshes the shine and adds an extra layer of protection.
- Be Gentle: Avoid using your nails as tools. Try to protect them from harsh chemicals or prolonged soaking in water, which can soften the nail and cause polish to lift. Consider wearing gloves when doing household chores.
- Moisturize: Keep your cuticles and the skin around your nails hydrated with cuticle oil. Healthy skin makes for a healthier-looking manicure.
Common Questions About Rainbow Nail Designs
Q1: What are the basic colors of a rainbow for nail art?
The traditional rainbow colors are red, orange, yellow, green, blue, and violet (purple). You can arrange them in this order or mix and match for your own creative interpretations.
Q2: Do I need special tools for rainbow nail art?
Not necessarily! While dotting tools and thin brushes make it easier, you can achieve simple rainbow designs with toothpicks, fine-tipped pens (applied a certain way), or even the edge of a credit card for straight lines. The key is creativity and patience.
Q3: How can I prevent rainbow nail polish from staining my nails?
Always use a good quality base coat! A thicker, opaque base coat acts as a barrier. If you’re particularly worried, consider a nail varnish specifically designed to prevent staining, or use lighter colors as your base layer.
Q4: My stripes aren’t perfectly straight. What can I do?
Don’t worry! For beginners, painter’s tape is your best friend for straight lines. If you’re going freehand, embrace the imperfections – they add character! Alternatively, use a cleanup brush dipped in nail polish remover to neaten up wobbly edges after the polish has slightly set.
Q5: Can I do rainbow nails with gel polish?
Absolutely! Gel polish offers great durability and a high-gloss finish, making it perfect for vibrant designs. The application techniques are similar, but you’ll need a UV or LED lamp to cure each layer.
Q6: How do I get a smooth rainbow gradient effect?
The sponge technique is excellent for this. Apply your colors in thin stripes directly onto a makeup sponge, then gently dab the sponge onto your nail. A top coat applied over the gradient will also help smooth out any texture and create a seamless look.
Conclusion: Shine Bright with Your Colorful Creations!
There you have it – your ultimate guide to creating stunning, effortless rainbow nail designs! We’ve explored simple techniques like stripe painting and dotting, offered creative variations like French tips and gradients, and equipped you with the knowledge of essential tools and longevity tips. Remember, nail art is all about self-expression and having fun. So, don’t be afraid to experiment with colors, patterns, and techniques. Whether you’re a seasoned nail art enthusiast or just dipping your toes into crafting colorful nails, these ideas will help you achieve vibrant, eye-catching results that are sure to brighten your day and turn heads. Grab your polishes, embrace your creativity, and let your nails shine with all the colors of the rainbow!

