Rainbow nail art is a vibrant and fun way to express yourself! This guide offers simple designs and tips for beginners, showing you how to create stunning, colorful manicures with ease. Get ready to add a splash of joy to your fingertips!
Feeling a little dull and looking to brighten your day? Your nails can be the perfect canvas for some serious fun! If you’ve ever admired a dazzling rainbow manicure and thought, “That looks way too complicated for me,” I’ve got great news. You can absolutely create stunning rainbow nail art right at home, even if you’re just starting out. We’ll walk through easy techniques, essential tools, and gorgeous designs that will have your nails looking like a work of art. Let’s dive into making your manicure pop with every color of the rainbow!
Your Essential Rainbow Nail Art Toolkit
Before we paint, let’s gather our rainbow-making treasures! You don’t need a pro salon setup to achieve amazing results. With a few key items, you’ll be ready to unleash your inner artist. Think of this as your starter kit for all things colorful and creative.
Must-Have Polishes:
- A rainbow color palette: This means you’ll need red, orange, yellow, green, blue, and purple nail polish.
- A good quality top coat: This is crucial for sealing your design and adding shine.
- A clear base coat: Protects your natural nails and helps polish adhere better.
Helpful Tools:
- Nail polish corrector pen or a small brush with nail polish remover: For cleaning up any wobbly lines or mistakes.
- Dotting tools: These come in various sizes and are perfect for creating dots and small details.
- Thin striping brushes: Ideal for drawing fine lines and intricate patterns.
- Sponge (makeup sponge or dedicated nail art sponge): Great for creating gradient or ombre effects.
- Nail files and buffers: To shape and smooth your nails for a perfect base.
Preparation is Key:
Just like any great artwork, a good base makes all the difference. Start by cleaning your nails, pushing back your cuticles, and shaping them. Apply a thin layer of your clear base coat and let it dry completely. This step is super important to prevent staining from those vibrant colors!
Easy Rainbow Nail Art Designs for Beginners
Ready to get painting? These designs are simple, effective, and perfect for dipping your toes into the wonderful world of rainbow nail art. We’ll break them down step-by-step so you can follow along with confidence.
1. The Classic Rainbow Polish Band
This is the most straightforward way to rock a rainbow. It’s all about precise application and a steady hand. It looks impressive but is surprisingly easy to achieve!
How to Create the Polish Band:
- The Base: Start with your clear base coat. Let it dry thoroughly.
- Red: Paint a thin stripe or band of red polish near the tip of your nail. Think about how wide you want your rainbow bands to be.
- Orange: Next, paint an orange band right below the red stripe. Try to keep the edges neat.
- Yellow: Continue with a yellow band below the orange.
- Green: Add a green band below the yellow.
- Blue: Follow with a blue band below the green.
- Purple: Finish with a purple band at the cuticle area or just below the blue.
- Clean Up: Use your nail polish corrector pen or a small brush dipped in remover to clean up any polish that went outside your nail lines. This makes a huge difference!
- Seal the Deal: Apply a generous layer of your favorite glossy top coat. This will smooth out any texture and make your rainbow shine.
Pro Tip: Don’t worry if your lines aren’t perfectly straight on your first try. The clean-up pen is your best friend! You can also practice on paper first to get a feel for the brush strokes.
2. The Rainbow Dot Accent
Dots are your best friend for simple yet impactful nail art. This design is playful and forgiving!
How to Create the Rainbow Dot Accent:
- Base Color: Paint all your nails with a solid base color. White or a sheer nude works beautifully as it makes the rainbow dots pop. Let it dry.
- Red Dots: Using your smallest dotting tool, place small red dots across your nail in a flowing, curved line, like a gentle rainbow arc.
- Orange Dots: Add orange dots just below the red ones.
- Yellow Dots: Continue with yellow dots.
- Green Dots: Add green dots below the yellow.
- Blue Dots: Place blue dots underneath the green.
- Purple Dots: Finish with purple dots at the bottom of your arc.
- Don’t Overcrowd: Aim for a clean, spaced-out look. The beauty is in the colors, not necessarily filling every inch.
- Top Coat: Once dry, carefully seal with a top coat.
Variation: You can also do a straight line of dots or scatter them randomly for a more abstract, playful look.
3. The Rainbow Gradient (Ombre) Nails
This technique gives a beautiful, blended effect that looks like a sunset or a soft spectrum. It requires a little patience but is so worth it!
How to Create the Rainbow Gradient:
- Base Coat: Apply your base coat and let it dry.
- Prepare Your Sponge: Cut a makeup sponge into small, workable pieces. You can also purchase dedicated nail art sponges which have a finer texture.
- Paint the Colors: On a piece of paper or a palette, draw stripes of your rainbow colors next to each other: Red, Orange, Yellow, Green, Blue, Purple. Don’t make them too thick.
- Sponge Application: Lightly pat your sponge onto the wet polish stripes. You want to pick up a bit of each color.
- Gradient on Nail: Gently dab the sponge onto your nail. You’ll see the colors start to transfer and blend. You may need to reapply polish to the sponge and dab a few times to get a smooth gradient. Work from cuticle to tip or side to side.
- Clean Up: This is where the clean-up pen or brush is essential. The sponge can get messy, so carefully clean the skin around your nails.
- Repeat (Optional): For a more intense gradient, let the first layer dry slightly and repeat the sponging process.
- Top Coat: Apply a thick, glossy top coat to blend and seal the gradient.
Tip: A white base coat under your gradient can make the colors appear brighter and more true to their original shade.
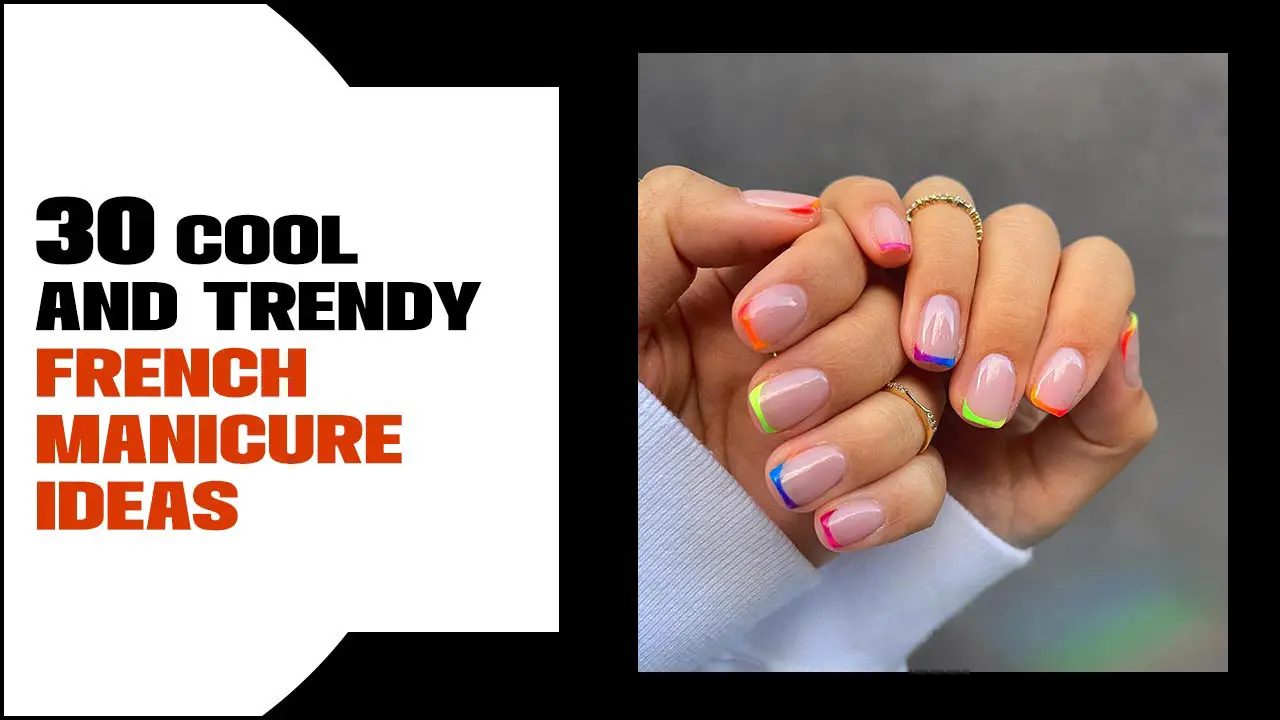
4. Rainbow French Tips
A fun twist on the classic French manicure! Instead of white tips, we’re going to use rainbow colors.
How to Create Rainbow French Tips:
- Base Color: Paint your nails with a sheer nude or a soft white polish. Let it dry completely.
- French Tip Guide (Optional): If you want super neat French tips, you can use French tip guide stickers. Place them on your nails where the white tip would normally start.
- Red Tip: Carefully paint a thin red line across the tip of your nail.
- Orange Tip: Just below the red, paint an orange line.
- Yellow Tip: Add a yellow line below the orange.
- Continue the Rainbow: You can choose to do a full rainbow on each tip, or just a few colors. For a simpler look, try just red, yellow, and blue.
- Clean Up: Clean up any messy edges with your corrector pen.
- Top Coat: Apply your top coat to seal everything in place.
Tip: For a more subtle rainbow, use pastel shades of your rainbow colors.
Advanced (But Still Achievable!) Rainbow Techniques
Once you’re comfortable with the basics, you might want to explore these slightly more intricate, but still beginner-friendly, ideas!
5. Rainbow Water Marbling
This technique uses water to create swirling, abstract rainbow patterns. It’s mesmerizing to watch and creates unique results every time!
Understanding Water Marbling for Nails:
Water marbling relies on the principle that oil and water don’t mix. Nail polish, containing solvents that are less dense than water, can float on the surface. When you swirl it, you create beautiful patterns that you can then transfer to your nail. It can be a bit messy, so be prepared!
How to Create Rainbow Water Marbling:
- Prep Your Nails: Apply your base coat and your chosen base color (white or black works well).
- Protect Your Skin: Apply a thick layer of petroleum jelly or use liquid latex around your nails to protect your skin from the polish.
- Prepare Your Water: Fill a small cup or bowl with room-temperature water.
- Drop the Polish: Open your rainbow nail polishes. Carefully drop one color (e.g., red) into the center of the water. Then drop orange into the center of the red, yellow into the center of the orange, and so on, working your way through the rainbow.
- Swirl the Polish: Once all your colors are dropped, use a toothpick or needle to gently swirl the colors together. Don’t over-swirl, or the colors will become muddy. Create a pattern you like.
- Dip Your Nail: Carefully dip your nail into the center of the swirled pattern. Press your finger down slightly.
- Release Tension: Before pulling your nail out, gently push the excess polish off the surface of the water away from your nail with the toothpick.
- Lift and Clean: Slowly lift your nail out of the water. Let any excess polish drip off. Use your corrector pen or brush to clean up any polish on your skin.
- Top Coat: Once completely dry, apply a good top coat.
External Resource: For a deeper dive into the science behind water marbling and tips for success, check out resources on surface tension and fluid dynamics. For instance, understanding how different polish formulas affect the marbling can be helpful. A great starting point from a scientific perspective is [Khan Academy’s Surface Tension] which touches on the principles at play.
6. Rainbow Stamping
Nail stamping is a fantastic way to get intricate designs without freehanding. You can use rainbow-colored polishes with stamping plates.
How to Create Rainbow Stamped Nails:
- Base Color: Paint your nails a solid color—white, black, or a shimmering shade works well. Let it dry.
- Choose Your Plate: Select a nail stamping plate with a rainbow design or a design you want to fill with rainbow colors.
- Apply Polish to Plate: Apply a stripe of red polish over the chosen design on the stamping plate.
- Add More Colors: Immediately beside the red, add a stripe of orange, then yellow, green, blue, and purple, so the colors are next to each other on the etched design on the plate.
- Scrape and Stamp: Use your stamper to pick up the multi-colored polish from the plate. You can gently roll the stamper or press firmly.
- Transfer to Nail: Immediately stamp the design onto your nail. Roll or press gently.
- Clean and Seal: Clean up any excess polish around your nails. Apply a top coat once the stamped design is dry.
Tip: Practice picking up multiple colors onto your stamper. Sometimes it takes a few tries to get the blend you want.
Maintaining Your Rainbow Masterpiece
You’ve created a stunning rainbow! Now, how do you make it last? Proper nail care is key to keeping your artwork looking fresh.
Quick Nail Care Tips:
- Be Gentle: Avoid using your nails as tools. Open cans, scrape things, or pry anything open can chip your polish.
- Wear Gloves: When doing chores like washing dishes or cleaning, wear rubber gloves. This protects your nails from harsh chemicals and excessive moisture.
- Moisturize: Keep your hands and cuticles hydrated. Dryness can lead to chips and make your manicure look dull. Use a good cuticle oil and hand cream daily.
- Reapply Top Coat: Every 2-3 days, apply an extra layer of top coat to refresh your manicure and add extra protection.
- Avoid Hot Water: Prolonged exposure to hot water can soften the polish and lead to chipping.
Troubleshooting Common Rainbow Nail Art Issues
Even the most seasoned nail artists run into a few hiccups now and then. Here’s how to fix some common rainbow nail art problems:
| Problem | Solution |
|---|---|
| Polish is too thick and streaky. | Ensure you’re using thin coats of polish. If the polish is old, it might be time to replace it or add a nail polish thinner. For gradients, try a different density sponge. |
| Lines are wobbly or uneven. | Use a nail polish corrector pen or a fine-tipped brush dipped in acetone. Gently trace over the wobbly lines to straighten them. Practice makes perfect! |
| Colors are mixing and looking muddy. | Make sure each layer is dry before applying the next, especially for banded designs. For gradients and marbling, don’t over-swirl or over-blend. Less is often more. |
| Top coat smudges the design. | Wait until the polish is completely dry, or nearly dry, before applying the top coat. For stamped or water-marbled designs, a slightly thicker top coat applied with a gentle “cap” motion (without touching the nail surface too much) can help. |
| The colors aren’t vibrant enough. | Applying a white or “milky” clear polish as a base coat can significantly boost the vibrancy of your rainbow colors. Ensure you are using good quality, opaque polishes. |
FAQ: Your Rainbow Nail Art Questions Answered
Q1: How do I make my rainbow colors pop?
A: A white or very light pastel base coat is your secret weapon! It creates a clean canvas that makes every color appear brighter and truer to its shade. Also, use good quality, opaque polishes.
Q2: My rainbow lines are messy. What can I do?
A: Don’t worry; it happens! A nail polish corrector pen is a lifesaver for clean-up. You can also use a small, fine-tipped brush dipped in a bit of nail polish remover to carefully neaten edges around your nail. Practicing on paper first also helps improve your steady hand.
Q3: Is rainbow nail art hard for beginners?
A: Not at all! Many rainbow designs, like the polish band or dot accent, are incredibly beginner-friendly. We’ve covered several easy methods in this guide. Start simple, and you’ll be amazed at what you can create.
Q4: How long does rainbow nail art usually take to do?
A: Depending on the design and how quickly your polish dries, a simple rainbow band can take 30-45 minutes. More intricate designs like water marbling or detailed stamping might take an hour or a bit more, especially if you’re cleaning up mistakes.
Q5: Can I use regular nail polish for rainbow designs?
A: Absolutely! You don’t need special polishes. Any nail polish in your chosen rainbow colors will work perfectly. Just ensure they are the right consistency – not too watery and not too thick.
Q6: What is the best top coat for nail art?
A: A good quality gel-like or quick-dry top coat is recommended. Look for one that provides a smooth, glossy finish and helps seal your design to prevent chipping and enhance shine. Brands like Essie, OPI, or Sally Hansen often have excellent options.
Creativity is Your Best Color!
Creating rainbow nail art is a fantastic way to add a burst of happiness and individuality to your look. Whether you’re opting for bold stripes, playful dots, a dreamy gradient, or a whimsical French tip, the key is to have fun with the process. Don’t be afraid to experiment with different color combinations or add your own unique flair.
Remember, nail art


