Quick salon nail designs are achievable, stylish looks for busy individuals, offering a professional finish without a lengthy salon visit. Focus on simple techniques like accent nails, minimalist lines, and subtle glitter for effortless beauty.
Ever wish you could have gorgeous, salon-worthy nails without spending hours at the salon or needing advanced art skills? We get it! Life is busy, and sometimes, a full nail art session just isn’t in the cards. But that doesn’t mean you have to settle for plain polish. You deserve nails that make you feel fabulous, and it’s totally possible to achieve stunning looks quickly and easily. No more feeling frustrated by complicated tutorials or designs that just don’t turn out right. We’re about to unlock the secrets to quick, genius, and absolutely essential salon-style nail designs, perfect for anyone, especially beginners!
In this guide, we’ll dive into simple yet chic designs that use everyday tools and techniques. Get ready to transform your nails into mini masterpieces in no time. Let’s discover how effortless chic can be!
Why “Quick” Salon Nail Designs Are Essential
In our fast-paced world, time is a precious commodity. The allure of a salon manicure is undeniable – the pampering, the professional finish, the feeling of having perfectly polished nails. However, booking an appointment, traveling to the salon, and the actual service can easily eat up a significant chunk of your day. This is precisely where the magic of “quick salon nail designs” comes in. These aren’t just about saving time; they’re about empowering you with the knowledge to achieve beautiful, on-trend nails that fit seamlessly into your life.
Quick designs are essential for several reasons:
- Time Efficiency: The most obvious benefit! Get a polished look in minutes, not hours, perfect for those spontaneous events or busy work weeks.
- Cost-Effectiveness: Skip regular salon visits and save money while still achieving a high-end look.
- Accessibility for Beginners: Designed with simplicity in mind, these techniques are easy to learn and master, boosting your confidence.
- Versatility: These quick designs can be adapted to any outfit, occasion, or personal style.
- Creativity on Demand: Express yourself without a huge commitment. Easily change your nail look to match your mood.
Think of them as your secret weapon for looking put-together and stylish, no matter how squeezed your schedule is. They prove that you don’t need to be a nail art expert to have fantastic nails.
Essential Tools for Quick Salon Nail Designs
Before we dive into the designs, let’s make sure you have the right tools. You don’t need a professional kit; a few key items will go a long way. Having these on hand means you’re always ready to create a quick, beautiful manicure.
The Must-Haves
- Nail Polish Remover: For clean slates and quick fixes.
- Cotton Pads/Balls: Essential for applying remover.
- Nail Files & Buffers: To shape and smooth your nails. A fine-grit buffer is great for a smooth finish.
- Base Coat: Protects your natural nail and helps polish adhere better.
- Top Coat: Seals your design, adds shine, and prolongs wear. A quick-dry top coat is a lifesaver!
- Nail Polish Colors: Your favorites! Consider classic neutrals, trendy shades, and maybe a metallic or glitter polish for accents.
- Orangewood Sticks or Cuticle Pushers: For cleaning up polish mistakes and gently pushing back cuticles.
- Dotting Tools (Optional but Recommended): These have small metal balls on the end, perfect for creating dots of various sizes. A toothpick can work in a pinch!
- Fine-Tipped Brush or Toothpick: For drawing thin lines or picking up small embellishments.
Having these basic tools ready means you can create almost any quick design we discuss. It’s about making the process smooth and enjoyable!
Genius Quick Salon Nail Designs: Step-by-Step
Now for the fun part! These designs are chosen for their simplicity, visual impact, and speed. We’ll break them down so even a total beginner can follow along.
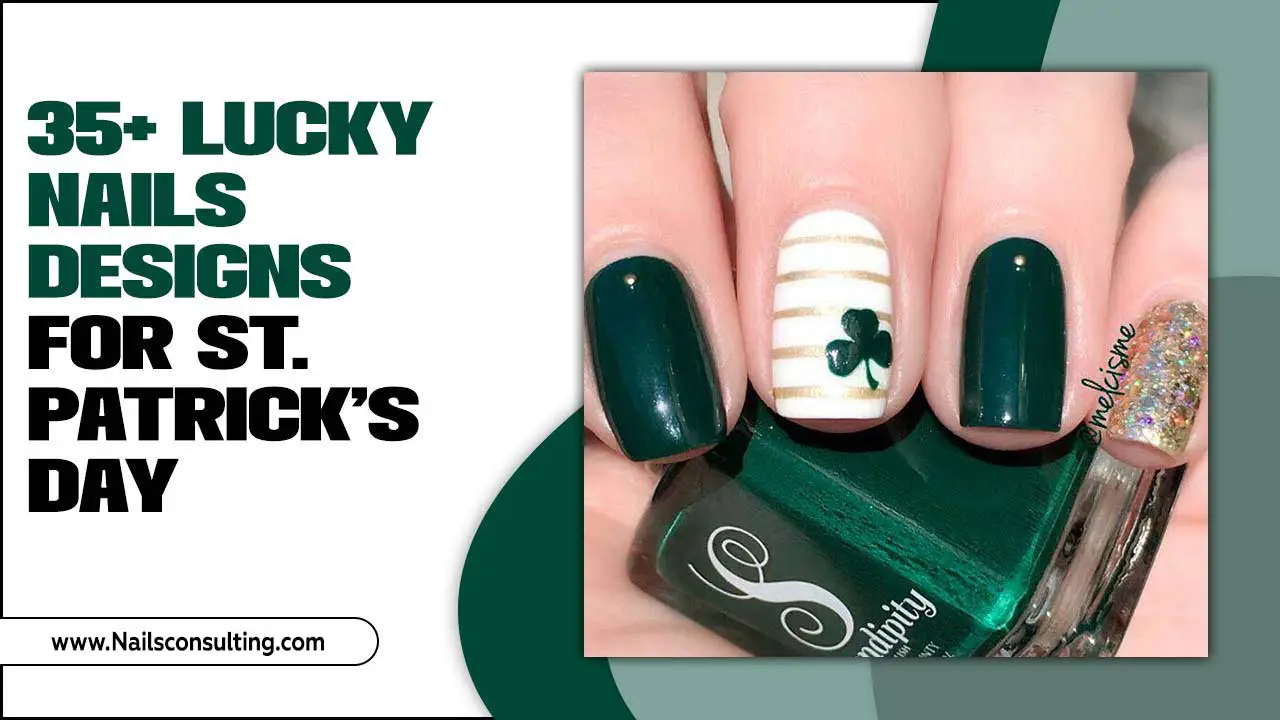
1. The Chic Accent Nail
This is the ultimate beginner-friendly design. You paint all your nails one color, and then add a simple design to just one nail (usually the ring finger). It looks intentional and stylish without much effort.
How to Do It:
- Prep: Start with clean, shaped nails. Apply your base coat and let it dry completely.
- Color Application: Paint all nails with your chosen base color. Apply two thin coats for even coverage, letting each coat dry for a minute or two.
- Accent Design: On your accent nail (e.g., ring finger), apply your design. This could be:
- A contrasting color stripe.
- A few strategically placed dots.
- A delicate glitter polish.
- A simple geometric shape.
- Let it Dry: Allow the design on the accent nail to dry thoroughly.
- Seal the Deal: Apply a layer of top coat over all nails, including the accent nail. This unifies the look and adds shine.
- Quick-Dry Finish: Use a quick-dry top coat or a nail drying spray to speed up the final drying time.
Pro Tip: Use a metallic or glitter polish as your accent for instant glam. A simple stripe down the center or a few dots near the cuticle can make a big difference.
2. Minimalist Lines & Geometric Shapes
Clean lines and simple shapes are super trendy and surprisingly easy to create. They offer a sophisticated, modern look that’s perfect for any occasion.
How to Do It:
- Prep: Clean, shape, and apply base coat.
- Base Color: Paint all nails your desired base color and let them dry.
- Line Work:
- Using a Striper Brush/Toothpick: Dip your fine-tipped brush or toothpick into a contrasting polish color. Carefully draw a thin line across the nail. You can do this horizontally, diagonally, or vertically.
- Try a Half-Moon: Paint a curve along the cuticle line.
- Create Blocks: Paint a simple triangle or square shape on a portion of the nail.
- Use Tape (Optional): For very straight lines, you can use nail art tape. Apply the tape after your base color is completely dry, paint over it, and peel it off carefully while the polish is still slightly wet. This requires a bit more precision but gives perfectly sharp lines.
- Allow to Dry: Let the design dry completely before applying top coat.
- Top Coat: Apply a smooth layer of top coat.
Genius Hack: Don’t aim for perfection! Slightly wobbly lines can add a charming, handmade feel. The key is the overall minimalist aesthetic.
3. Subtle Glitter Fade (Ombre Glitter)
A glitter fade is stunning, looks incredibly professional, and is incredibly forgiving. It’s a perfect way to wear glitter without it being overwhelming.
How to Do It:
- Prep: Clean, shape, and apply base coat.
- Base Color: Apply one or two coats of your chosen opaque color polish (nudes, pastels, or deep shades work well). Let it dry.
- Glitter Time:
- Dip a sponge (a makeup sponge or even a slightly textured kitchen sponge cut small) into a glitter polish.
- Gently dab the sponge onto the tip of your nail, concentrating the glitter where you want it to be most intense.
- Lightly dab upwards towards the middle of the nail, using less pressure as you go, to create a gradient effect.
- Re-dip your sponge for more glitter if needed.
- Refine (Optional): If the transition looks too harsh, you can use a clean nail art brush slightly dampened with nail polish remover to gently blend the edges.
- Second Coat (Optional): If you want more glitter intensity or a smoother blend, wait for the first layer to dry and repeat the sponging process.
- Seal the Sparkle: Apply a generous layer of top coat. You might need two layers to completely smooth out the glitter texture.
Salon Secret: Using a sponge is the easiest way to get a smooth glitter gradient. It presses the glitter onto the nail beautifully.
4. The “Two-Tone Pop” Mani
This design involves using two complementary or contrasting colors in a simple, eye-catching way. It’s super quick and always looks chic.
How to Do It:
- Prep: Clean, shape, and apply base coat.
- Color 1: Paint all your nails with your first color. Let it dry completely.
- Color 2 Application:
- Diagonal Split: Decide where you want the dividing line (e.g., halfway up the nail diagonally). Carefully paint one half with your second color. For a clean line, let the first color dry completely, then use nail tape, or carefully freehand it.
- Tips (Frenchie Twist): Instead of white tips, use a bold or metallic color for your tips.
- Cuticle Color: Paint a contrasting color in a crescent shape at the cuticle.
- Clean Up: Use an orangewood stick with a tiny bit of remover to neaten any messy lines.
- Seal: Apply top coat to all nails.
Stylist’s Tip: Pair a classic color like navy or burgundy with a vibrant metallic like gold or rose gold for a sophisticated yet modern look.
5. Dotted Delight
Dots are playful, easy to control, and can be arranged in countless ways. They add a touch of charm without needing a steady hand for complex art.
How to Do It:
- Prep: Clean, shape, and apply base coat.
- Base Color: Paint all nails with your chosen color and let them dry completely.
- Dotting:
- Dip your dotting tool (or the head of a pin, or a toothpick) into a contrasting polish color.
- Gently press the dotted tip onto your nail to create a dot.
- Clean the dotting tool with a bit of remover on a paper towel between dots to ensure clean-colored circles.
- Design Ideas:
- A single, neat row of dots along the smile line.
- A scattered pattern all over the nail.
- A cluster of dots near the cuticle or at the tip.
- Create tiny flowers by making a circle of dots.
- Dry Time: Let the dots dry completely.
- Seal: Apply top coat. Be gentle so you don’t smudge the dots.
Beginner’s Best Friend: If you don’t have dotting tools, the rounded end of an orangewood stick or even a ballpoint pen tip can work! Just dab them after wiping off most of the ink/gel.
Quick Salon Nail Design Inspiration Table
Sometimes, seeing a quick overview helps spark ideas! Here’s a table to give you a visual of simple yet effective design combinations.
| Design Type | Base Color Ideas | Accent/Detail Color Ideas | Occasion/Vibe | Ease Level |
|---|---|---|---|---|
| Accent Nail (Simple Dot/Line) | Nude, Soft Pink, Navy, Burgundy | Gold Glitter, Silver Metallic, White, Black | Everyday Chic, Office, Date Night | Beginner |
| Minimalist Lines | White, Black, Pastels, Deep Jewel Tones | Metallic (Gold, Silver, Rose Gold), Contrasting Color | Modern, Sleek, Professional | Beginner-Intermediate |
| Glitter Fade | Sheer Pink, Beige, Muted Blues, Grays | Silver Holographic, Gold, Rose Gold, Iridescent Glitter | Glamorous, Evening, Special Occasion | Beginner |
| Two-Tone Split (Diagonal/Tips) | Black, White, Red, Emerald Green | Gold, Silver, Bright Contrast (e.g., Pink on Blue), Nude | Bold, Trendy, Artsy | Beginner-Intermediate |
| Dotted Pattern | Coral, Teal, Lavender, Light Gray | White, Black, Gold, Contrasting Brights | Playful, Fun, Casual | Beginner |
Tips for Making Your Quick Designs Last Longer
Achieving a quick design is great, but making it last even longer is the ultimate win! A few simple habits can keep your manicure looking fresh for days.
- Prep is Key: Always start with clean, dry nails. Remove any old polish and oils.
- Base Coat is Non-Negotiable: It creates a smooth surface for polish and prevents staining.
- Thin Coats Rule: Apply two to three thin coats of color rather than one thick one. Thin coats dry faster and are less prone to chipping.
- Cap Your Polish: After applying your color and top coat, run the brush along the free edge (the very tip) of your nail. This seals the edge and prevents chipping.
- Quick-Dry Top Coat: Invest in a good quality quick-dry top coat. It seals the design and significantly speeds up drying time.
- Avoid Water (Initially): Try to keep your nails dry for at least an hour or two after your manicure, especially if you didn’t use a quick-dry product. Water can soften polish.
- Wear Gloves for Chores: When washing dishes or doing anything that requires prolonged hand immersion in water or exposure to harsh chemicals, wear rubber gloves. This is one of the most effective ways to prevent chips and maintain polish integrity. You can find durable household gloves from many reputable retailers.
- Hydrate Your Cuticles: Dry cuticles can lead to hangnails and can make your manicure look less polished. Use cuticle oil daily.
By incorporating these tips, your quick salon-inspired nail designs will look amazing for longer, giving you more confidence and fewer touch-ups.
Troubleshooting Common Quick Design Issues
Even with simple designs, little hiccups can happen. Here’s how to fix them!
Smudged Polish?
The Fix: If it’s a fresh smudge, try to gently smooth it with the brush of your top coat or a tiny bit of remover on an orangewood stick. If it’s a major smudge, sometimes you can salvage it by turning it into a new design element (like turning a smudge into abstract art!). If all else fails, wipe it off, let the nail dry, and reapply your base and color, then redo the design element.
Wobbly Lines?
The Fix: Embrace it! A slightly imperfect line can add character. If you really want to perfect it, use a fine-tipped brush dipped in nail polish remover to carefully clean up the edges. Or, if using tape, ensure it’s pressed down firmly to prevent color bleeding.
Dots Too Big/Small?
The Fix: Experiment with different tools! A larger dotting tool or a toothpick head makes bigger dots. A finer tip or the very end of a pin makes smaller ones. Don’t be afraid to practice on a piece of paper first!
Glitter Texture is Rough?
The Fix: You need a good top coat! Apply a generous, smooth layer, focusing on smoothing over the textured glitter. If it’s still bumpy, consider a second layer of top coat once the first is dry. A glitter-specific smoothing top coat can also be a great investment.
Polish Not Drying?
The Fix: Ensure you’re applying thin coats. If it simply refuses to dry, try a quick-dry spray or drops, or dip your fingers in ice-cold water for a minute (this hardens the polish quickly, though it can sometimes make it brittle if done too aggressively). For future manicures, use a reliable quick-dry top coat.
FAQ: Your Quick Salon Nail Design Questions Answered
Let’s clear up any lingering questions you might have!


