Quick Nail Designs At Home: Effortless Style
Yes! Achieve stunning, effortless style with quick nail designs at home using simple techniques and readily available tools. Transform your fingertips into chic canvases without salon appointments or complicated methods.
Ever look at your nails and wish they had a little something extra? Maybe a pop of color, a subtle sparkle, or a touch of trendy art? You’re not alone! The good news is that creating beautiful, stylish nails at home doesn’t have to be a time-consuming or difficult task. Forget those complex tutorials that require a steady hand and a dozen special tools. We’re diving into the world of quick nail designs that are perfect for busy schedules and beginner-friendly aspirations. You’ll discover simple yet chic ways to elevate your look, boosting your confidence one polished nail at a time. Ready to unlock your inner nail artist without the fuss? Let’s get started on creating your next favorite manicure!
Why Simple is Smart: The Power of Quick Nail Designs
Think intricate nail art is only for professional salons? Think again! The beauty of “quick nail designs at home” lies in their accessibility and the sheer joy they bring. Life is busy, and spending hours on your nails can feel like a luxury many of us can’t afford. That’s where the magic of simple, effective designs comes in. They allow you to express your personal style, stay on-trend, and feel polished with minimal effort. Whether you have five minutes or twenty, there’s a design waiting to happen. Plus, mastering these easy techniques means you can have fabulous nails for any occasion, from a casual coffee date to an important presentation, all from the comfort of your own home.
Getting Started: Your Essential Quick Design Toolkit
You don’t need a professional kit to create gorgeous nails. A few basic items can unlock a world of creative possibilities. Having these on hand will make your DIY nail design sessions smooth sailing!
- Nail Polish: The foundation of any design! Have a few of your favorite colors, a good base coat, and a quick-dry top coat. Don’t forget a clear polish for adding shine without color.
- Toothpicks or Dotting Tools: Perfect for creating small dots, simple lines, and tiny accents. Toothpicks are a freebie you likely already have! If you want more consistent dots, a set of dotting tools is very inexpensive. You can find a set of nail art dotting tools for just a few dollars online.
- Thin Nail Art Brush: For more intricate lines or filling in small areas. Even a fine-tipped eyeliner brush you no longer use can work in a pinch!
- Striping Tape or Regular Scotch Tape: Your best friend for creating crisp lines and geometric patterns.
- Sponge (Makeup Sponge or Kitchen Sponge): Ideal for creating beautiful gradient or ombré effects and textured looks.
- Old T-shirt or Paper Towels: For dabbing excess polish or creating a textured look.
- Nail Polish Remover and Cotton Swabs: For cleaning up mistakes and refining edges. These are essential for a clean finish!
- Optional: Glitter, Studs, or Decals: For adding that extra bit of sparkle and personality.
Effortless Designs for Every Nail Lover
Ready to paint? Let’s dive into some super simple, super stylish nail designs you can do right now!
1. The Chic Dot Accent
This is probably the easiest way to add a touch of design. It’s elegant, modern, and incredibly quick.
What You’ll Need: Base coat, your favorite nail polish color, a contrasting polish color, a toothpick or dotting tool, and a top coat.
Steps:
- Apply a base coat to clean, dry nails and let it dry completely. This protects your natural nails and helps polish adhere better.
- Apply two thin coats of your favorite nail polish color. Let each coat dry for at least a minute or two.
- Dip the tip of your toothpick or dotting tool into the contrasting polish.
- Gently place a few dots in a pattern on one or two accent nails (like your ring fingers). You can make a line, a cluster, or a simple scattered pattern.
- Allow the dots to dry thoroughly – this is crucial!
- Apply a clear top coat over all your nails to seal the design and add shine.
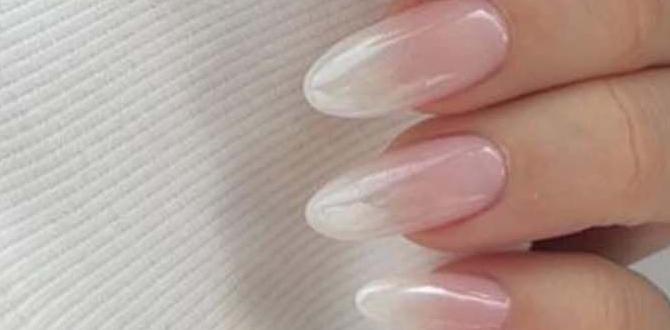
2. The Subtle French Fade (Ombré French)
Take the classic French manicure to a new level with a soft, blended transition. It’s sophisticated and surprisingly easy!
White French Fade vs. Color French Fade:
You can do this with classic white for a modern take on the French, or use soft pastels for a romantic look. Some of my favorite color combinations include soft pink fading into white, or a muted coral fading into a peachy nude. For a bolder statement, try a deep berry fading into a dark grey.
What You’ll Need: Base coat, nude or light pink polish, white or contrasting color polish, a makeup sponge, scissors, and a top coat.
Steps:
- Apply a base coat and let it dry.
- Apply one or two thin coats of your chosen nude or light pink polish. Let dry thoroughly. This will be your base color for the fade.
- Cut a small piece of makeup sponge – a wedge works perfectly.
- Apply a thin layer of your nude/light pink polish to a small section of the sponge.
- Immediately next to that, apply a thin layer of your white or contrasting polish.
- Gently dab the sponge onto a piece of paper or your nail art mat to help blend the two colors slightly on the sponge and remove excess polish.
- Now, gently dab the sponge onto the tips of your nails, focusing on the free edge. You want to build up the color gradually. Reapply polish to the sponge as needed.
- Continue dabbing until you achieve your desired fade.
- Let this layer dry completely.
- Apply a top coat to smooth out the texture and seal the design. For a cleaner look, you can use a nail polish remover-dipped cotton swab to clean up any harsh lines around your cuticle.
Pro Tip: If the sponge-dabbed layer feels too textured, a thicker top coat can help smooth it out. You can also try applying the polish to your nail first, then using a slightly damp makeup sponge to blend the edges up for a softer effect.
3. The Speedy Stripe
Lines add instant polish! This design uses tape to create sharp, clean stripes that look incredibly professional.
What You’ll Need: Base coat, two contrasting nail polish colors, striping tape or scotch tape, scissors, and a top coat.
Steps:
- Apply base coat and let it dry.
- Paint your nails with your first color and let it dry completely. This is critical to prevent the tape from lifting the polish.
- Cut small pieces of striping tape or regular scotch tape. For super clean edges, using proper nail striping tape is best as it’s very thin and adheres well.
- Carefully apply the tape strips to your nail in a desired pattern. You can do a single stripe, create a V-shape, or even do a grid. Ensure the edges are pressed down firmly.
- Paint over the taped areas with your second polish color. Apply one or two thin coats for opaque coverage.
- While the second color is still wet, very carefully peel off the tape. If you wait for it to dry, you risk peeling off the polish underneath.
- Let the design dry thoroughly.
- Finish with a top coat.
Table: Tape Placement Ideas for Striped Nails
| Design Idea | Tape Placement | Result |
|---|---|---|
| Single Bold Stripe | Apply one strip vertically or horizontally across the nail. | A clean, contrasting line. |
| French Tip with a Twist | Apply tape across the tip of the nail to create a clean separation, revealing the base color underneath. | A sharp, updated French manicure. |
| Geometric Block | Apply tape to section off parts of the nail, creating sharp geometric shapes. | Modern, angular designs. |
| Two-Tone Diagonal | Apply tape diagonally across the nail, paint one section, remove tape, let dry, then paint the other section. | A stylish split color effect. |
4. The Easy Glitter Gradient
Glitter is always a good idea, and this design makes it incredibly simple to add a festive touch.
What You’ll Need: Base coat, your main polish color, a glitter polish, and a top coat.
Steps:
- Apply base coat and let it dry.
- Paint your nails with your main color and let it dry for a minute.
- Start applying the glitter polish at the tip of your nail, concentrating most of the glitter there.
- As you move down the nail, use fewer strokes or apply the glitter polish more sparingly, allowing the base color to show through.
- Repeat with a second layer of glitter polish if you want more intensity, focusing the glitter towards the tip.
- Let it dry completely, then apply a top coat to smooth out the glitter and seal it in.
5. The Textured T-shirt/Sponge Effect
This technique uses an everyday item to create a unique, diffused color effect that looks intentionally artistic but is super forgiving.
What You’ll Need: Base coat, two complementary nail polish colors (one lighter, one darker or bolder), a piece of old T-shirt or a clean kitchen sponge, and a top coat.
Steps:
- Apply base coat and let dry.
- Paint your nails with your lighter polish color. Let it dry completely.
- Take your T-shirt scrap or sponge. You can either dab it into a pool of your darker polish, or apply the darker polish directly onto the fabric/sponge.
- Gently dab the T-shirt/sponge onto the tips or across the surface of your nails. The goal is to create a textured, diffused color effect. Don’t press too hard; you want a light, wispy application.
- Repeat dabbing until you achieve the desired depth of color and texture.
- Let dry thoroughly.
- Apply a top coat to seal the design and give it a smooth finish.
6. The Minimalist Line Art
For those who appreciate subtle elegance, a single fine line can make a huge statement. It’s chic, modern, and requires only your steadiest hand or a fine brush.
What You’ll Need: Base coat, your main polish color, a thin nail art brush or a toothpick, a contrasting polish color, and a top coat.
Steps:
- Apply base coat and then one or two thin coats of your main polish color. Let dry completely.
- Dip your fine brush or toothpick into your contrasting polish color. Wipe off any excess on a piece of paper so you have a fine point of color.
- Carefully draw a single, thin line. Popular placements include horizontally across the nail, vertically from the cuticle, or diagonally near the tip.
- If you’re feeling bold, you can add a second, parallel line or a tiny dot at the end of your line.
- Let the line art dry completely.
- Apply a top coat gently, being careful not to smudge your delicate line.
Mastering Quick Nail Designs: Pro Tips for Beginners
Even the simplest designs benefit from a few smart practices. These tips will help you achieve salon-worthy results at home:
- Prep is Key: Always start with clean, dry nails. Push back your cuticles gently and remove any old polish. A smooth surface makes for a smooth application.
- Base Coat is Non-Negotiable: It prevents staining and provides a grippy surface for your polish, making it last longer.
- Thin Coats are Better: Two to three thin coats of polish usually look smoother and dry faster than one thick, gloopy coat.
- Patience, Young Grasshopper: Let each layer dry sufficiently before applying the next. Rushing is the #1 cause of smudged nails and lifted tape! A quick-dry top coat can be your best friend here.
- Clean Up is Your Friend: Don’t be afraid to use a small brush dipped in nail polish remover to clean up any goofs around your cuticle or sidewalls. It makes a world of difference! For more on nail care and maintenance, exploring resources from reputable health organizations is always wise. The National Institute for Occupational Safety and Health (NIOSH) provides guidelines on hand hygiene and nail care in various occupational settings, which offer general principles applicable to personal nail health.
- Experiment with Colors: Don’t be afraid to mix and match! Play with neutrals, brights, neons, metallics – whatever makes you happy.
- Practice Makes Progress: The more you do it, the steadier your hand will become, and the more confident you’ll feel trying new things.
Tools Comparison: Dotting Tools vs. Toothpicks
When it comes to creating dots for your nail designs, you have a couple of readily available options. While both can get the job done, they offer slightly different results.
| Feature | Dotting Tools | Toothpicks |
|---|---|---|
| Size Variety | Come in sets with multiple ball sizes, offering consistent dot diameters. | Tip size is generally consistent, and the point can be slightly altered by pressing. |
| Ease of Use | Ergonomic handles make them comfortable to hold and control. | Simple to grip, but can be a bit fiddly for very small hands. |
| Consistency | Excellent for creating uniform dots of the same size repeatedly. | Can create dots, but consistency in size might vary slightly. The point can also break. |
| Durability | Reusable and durable metal or plastic tools. | Disposable; the point can break or fray if used too roughly. |
| Cost | Generally inexpensive, especially for beginner sets. | Virtually free if you already have them in your home. |
For absolute beginners or those on a very tight budget, toothpicks are a fantastic starting point. They allow you to try out dotting techniques without any investment. However, if you find yourself loving the dotting look and want more precision and variety in dot size, investing in a small set of dotting tools is a worthwhile step. They make the process quicker and more professional-looking.
Frequently Asked Questions About Quick Nail Designs
Q1: What is the easiest nail design for beginners?
The easiest nail design is typically the single accent dot or a simple glitter gradient. Both require minimal tools and skill, and they offer a significant visual impact with little effort.
Q2: How do I prevent my nail polish from chipping quickly?
Ensure your nails are clean and dry before applying polish. Always use a base coat to protect your nails and provide a good surface for polish adherence. Apply polish in thin coats, and always finish with a quality top coat, reapplying it every few days to extend the life of your manicure.
Q3: Can I use regular tape for nail art?
Yes, regular scotch tape can be used for nail art, especially for creating stripes. However, ensure you press it down firmly to prevent polish from seeping underneath, and remove it while the polish is still slightly wet to get the cleanest lines. For super sharp edges, dedicated nail striping tape is recommended.
Q4: How long should I wait between nail polish coats?
Wait at least 1-2 minutes between thin coats of nail polish. For designs involving tape or other elements, ensure the underlying color is completely dry to prevent smudging or lifting.
Q5: My nail art keeps smudging, what am I doing wrong?
The most common reason for smudging is not waiting long enough for layers to dry


