Quick & Easy Nail Designs: Your Genius Solution
Looking for speedy, stylish nail art? Our guide offers genius solutions for beautiful nails that fit your busy life. Discover simple techniques and smart tips to elevate your manicure game effortlessly. Get ready for gorgeous, effortless nails!
Ever feel like stunning nail art is only for those with hours to spare? I get it! Life gets crazy, and sometimes a full salon appointment or intricate DIY session just isn’t in the cards. But that doesn’t mean you have to settle for plain, uninspired nails. You deserve to feel polished and express your unique style, even when you’re on the go. The good news? You don’t need a ton of time or professional skills to achieve eye-catching nail designs. We’re going to unlock some genius, beginner-friendly solutions that will transform your nails from drab to fab in minutes.
Get ready to discover how simple and fun creating beautiful nails can be. We’ll cover everything from essential tools to super-fast design techniques that will make you feel like a nail art pro, no matter how little time you have.
Unlock Your Inner Nail Artist: Quick & Easy Nail Designs Explained
Let’s dive into the world of quick and easy nail designs! The beauty of these techniques is their versatility and immediate impact. Whether you have five minutes or fifteen, you can create something special. We’re focusing on methods that are foolproof, require minimal supplies, and deliver maximum style points. Think chic minimalism, playful patterns, and elegant accents – all achievable from your own home.
What Makes a Nail Design “Quick & Easy”?
For beginners and busy individuals, “quick and easy” means a few key things:
- Minimal Steps: Designs that don’t require intricate layering or complex techniques.
- Simple Tools: Relying on basic items you likely already have or can easily find.
- Fast Drying Time: Utilizing polishes or topcoats that set quickly.
- Forgiving Application: Designs where minor imperfections won’t ruin the look.
- High Impact, Low Effort: Achieving a polished look with a noticeable “wow” factor.
Your Go-To Toolkit for Speedy Manicures
You don’t need a professional kit to create amazing nail art. Here are a few essentials that will make your quick designs a breeze:
Must-Have Nail Polish Colors
Start with a curated collection of polishes. These core colors provide a fantastic base for endless combinations:
- Classic Neutrals: Beige, cream, soft grey, and nudes are perfect for sophisticated looks and act as a great canvas.
- Bold Solids: A vibrant red, a deep navy, or a striking emerald green can make a statement on their own or as accent colors.
- Metallics/Glitter: Silver, gold, rose gold, or a chunky glitter polish can instantly add glamour.
- White & Black: Essential for simple dots, lines, and graphic designs.
Essential Tools for Effortless Application
These tools will elevate your DIY game without adding complexity:
- Base Coat & Top Coat: Crucial for polish longevity and a smooth finish. A good quick-dry top coat is a lifesaver!
- Nail Polish Remover & Cotton Pads: For quick cleanups of any mistakes.
- Toothpicks or Dotting Tools: Perfect for creating small dots and simple patterns. A toothpick’s fine tip is surprisingly versatile!
- Thin Nail Art Brush: Even an inexpensive one can help with drawing fine lines or small details.
- Stencils (Optional): For clean lines and shapes, like French tips or geometric patterns.
- Washi Tape or Painter’s Tape: Amazing for creating sharp, geometric designs.
Remember, keeping your nails in good shape is the first step to any beautiful design. A simple filing and buffing can work wonders! For more on basic nail care, check out resources from the American Academy of Dermatology Association on nail health.
Genius Quick & Easy Nail Design Ideas (Step-by-Step!)
Ready to create some magic? Here are some of my favorite go-to designs that are as easy as they are stylish.
1. The Chic Polka Dot Manicure
Polka dots are a timeless trend that’s incredibly simple to execute. They add a playful touch without being overwhelming.
What You’ll Need:
- Base coat
- Your choice of polish color (e.g., navy blue)
- A contrasting polish color (e.g., white)
- Toothpick or dotting tool
- Top coat (preferably quick-dry)
Steps:
- Prep: Apply a base coat and let it dry completely.
- Color Coat: Apply two thin coats of your main polish color. Give each layer time to dry.
- Dotting Fun: Dip the tip of your toothpick or dotting tool into the contrasting polish.
- Create Dots: Gently place dots onto your nails. You can arrange them in neat rows, scatter them randomly, or create larger clusters. Don’t worry about perfect uniformity; that’s part of the charm!
- Seal the Deal: Once the dots are dry, apply a quick-dry top coat to seal your design and add shine.
2. Effortless Glitter Gradient
A glitter gradient (or “fade”) is super forgiving and adds instant sparkle. It’s perfect for a night out or when you want a little extra dazzle.
What You’ll Need:
- Base coat
- Your choice of polish color (e.g., deep purple)
- Glitter polish
- Top coat
Steps:
- Prep: Apply base coat and let dry.
- Color Coat: Apply one or two coats of your main polish color, letting them dry in between.
- Glitter Application: Dip your brush into the glitter polish. Start by applying it heavily at the tip of your nail.
- Fade it Out: Gently brush upwards towards the cuticle, picking up less glitter as you go. The idea is to have the most glitter at the tip and have it fade into the base color. You can dab the brush gently to blend.
- Second Coat (Optional): If you want more glitter, apply a second layer, focusing the heaviest glitter at the very tip.
- Seal: Apply a generous layer of top coat to smooth out the texture from the glitter and add shine.
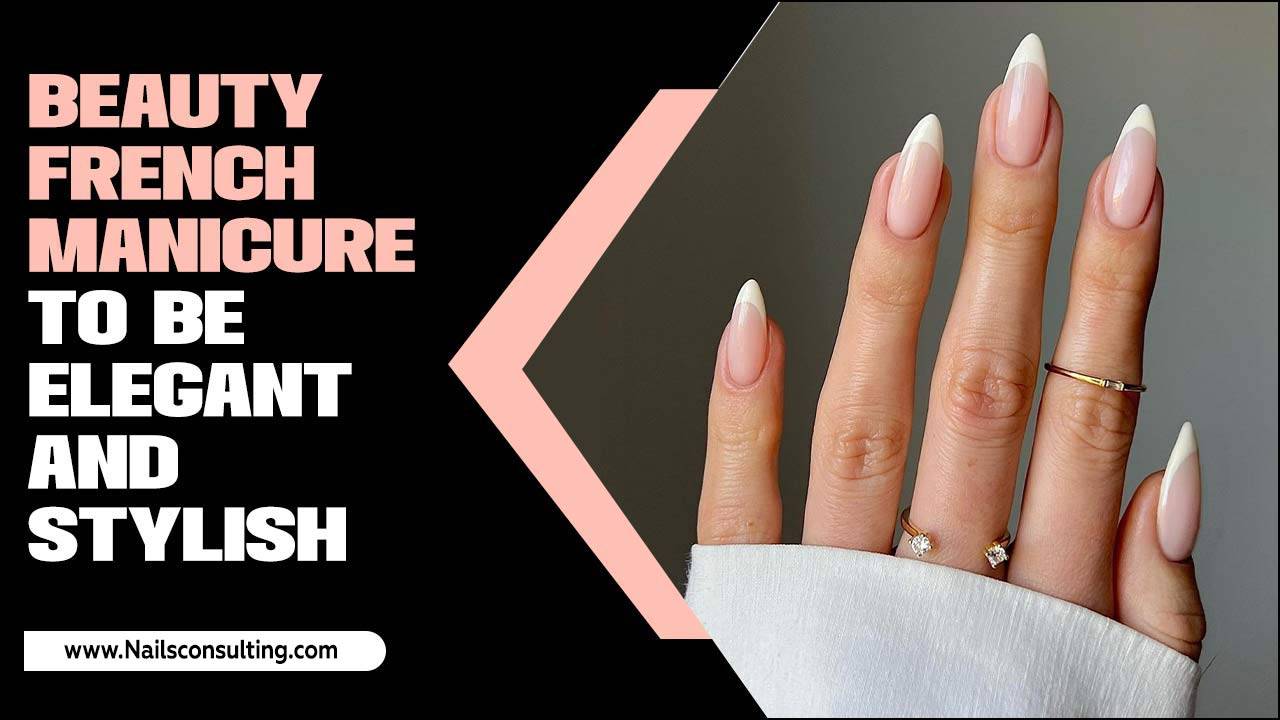
3. The Speedy French Manicure Twist
Who says French tips have to be complicated? A minimalist twist is modern and incredibly fast.
What You’ll Need:
- Base coat
- Sheer nude or pink polish
- White polish OR a metallic polish (e.g., gold)
- Thin nail art brush or a fine-tipped regular brush
- Top coat
Steps:
- Prep: Apply base coat and let dry.
- Sheer Base: Apply one to two thin coats of your sheer nude or pink polish, allowing each to dry.
- Tip Time: Load your thin brush with the white or metallic polish.
- Create the Tip: Gently paint a thin line across the very tip of each nail. You can aim for a classic curve or a straight line for a modern look. Don’t worry if it’s not perfectly symmetrical; slight variations add character!
- Clean Up: Use a small brush dipped in nail polish remover to sharpen any edges if needed.
- Finish: Apply your top coat for a polished, long-lasting finish.
4. Geometric Accent Nail with Tape
This technique uses tape to create crisp, clean geometric shapes. It looks super professional but is surprisingly easy!
What You’ll Need:
- Base coat
- 2-3 polish colors (e.g., black, cream, and a pop of turquoise)
- Washi tape or painter’s tape
- Scissors or a craft knife
- Top coat
Steps:
- Prep & Base: Apply base coat and let dry. Apply your first color (e.g., black) to all nails and let dry completely. This is crucial for the tape not to peel up the base color.
- Tape it Up: Cut small pieces of tape and apply them to your nails in geometric patterns. Think stripes, triangles, or chevrons. Press the tape down firmly to ensure no polish seeps underneath.
- Add Second Color: Paint over the taped areas with your second color (e.g., cream). You can paint over the whole nail or just the taped sections.
- Remove Tape: While the second color is still wet, carefully peel off the tape. This is the magic step!
- Add More (Optional): Once dry, you can add another layer of tape and a third color (e.g., turquoise) for a more complex design, repeating steps 2-4.
- Top Coat: Apply a generous top coat to seal everything in.
5. The Minimalist Dot or Line
Sometimes, less is more! A single dot or a thin line can be incredibly chic and takes mere seconds.
What You’ll Need:
- Base coat
- Your desired polish color
- A contrasting polish color OR metallic polish
- Toothpick, fine dotting tool, or thin nail art brush
- Top coat
Steps:
- Prep: Apply base coat and let dry.
- Color Coat: Apply one to two coats of your main polish color. Let it dry completely.
- Add Your Accent:
- For a Dot: Dip your tool into the accent polish and place one or a few small dots near the cuticle or on one side of the nail.
- For a Line: Dip your fine brush into the accent polish and draw a thin line either horizontally across the tip, vertically down the center, or just at the base of your nail.
- Let Dry & Seal: Allow the accent to dry, then apply your top coat.
Quick Tips for Flawless Fast Nails
Even the quickest designs benefit from a few smart tricks:
- Work in a well-lit area: Good lighting helps you see what you’re doing, reducing mistakes.
- Keep polish bottles upright: Prevents spills and makes dipping tools easier.
- Wipe excess polish from your brush: Too much polish leads to blobs and smudges.
- Clean up mistakes immediately: A fine-tipped brush dipped in remover can erase small errors before they set.
- Don’t skip the top coat: It seals your design, adds shine, and prevents chipping. A quick-dry top coat is your best friend.
- Practice makes progress: The more you try these techniques, the faster and neater you’ll become.
Troubleshooting Common Quick Design Dilemmas
Even with easy designs, things can go awry. Here’s how to fix them:
| Problem | Solution |
|---|---|
| Smudged Design | If the polish is still wet, gently try to smooth it with a clean brush or toothpick. If it’s mostly dry, accept it as part of the “imperfectly perfect” charm or cover it with a strategically placed dot or glitter! |
| Uneven Lines/Dots | Use a fine brush dipped in nail polish remover to carefully neaten the edges. Alternatively, embrace the slight imperfection – handmade has character! |
| Polish Peeling with Tape | Ensure your base color is completely dry before applying tape. Press tape down firmly. If it lifts color, try a different brand of polish for your base. Sometimes, a slightly older polish formula adheres better. |
| Gloopy Polish | Wipe excess polish off the brush onto the bottle’s rim before applying. For dots, use less polish on your tool. A thicker polish can be thinned with a nail polish thinner (e.g., SuperNail Lacquer Thinner), but be sparing. |
| Bubbles in Polish | This often happens when polish is applied too thickly or when shaking the bottle vigorously. Try thinner coats and let each dry. Avoid shaking; roll the bottle between your hands instead. |
Embracing Your Personal Style
The best part about these quick and easy nail designs is their adaptability. Don’t be afraid to mix and match colors, experiment with different placements, and put your own spin on them. Your nails are a canvas for self-expression!
Trendy Variations to Try:
- Color Blocking: Use tape to create bold blocks of color on one or two nails.
- Negative Space: Incorporate areas of bare nail into your design (e.g., a thin line of polish on an unpolished nail).
- Accent Nail Focus: Keep most nails simple (one color) and go a bit more elaborate on just one finger.
- Sticker Accents: Use nail stickers (like tiny stars or metallic strips) over a base color for instant detail.
Remember, the goal is to have fun and feel good about your nails. Whether you’re heading to work, a special event, or just running errands, a little bit of polish and creativity can make a big difference in how you feel.
Frequently Asked Questions About Quick Nail Designs
Q1: How can I make my nail polish dry faster?
A1: Use a quick-dry top coat! You can also try dipping your fingers in ice-cold water for a minute or two once the polish is set (not fully dry) to help harden it. Avoid using heat, as it can soften the polish.
Q2: What if I don’t have any fancy nail art tools?
A2: No problem! Toothpicks are fantastic for dots and fine lines. The edge of a business card can help create clean lines for French tips. Even a pin can work in a pinch for small details.
Q3: Can these easy designs last a long time?
A3: With a good base coat and a robust top coat (especially a quick-dry one), most of these simple designs can last 4-7 days, depending on how hard you are on your hands. Reapplying the top coat every couple of days can extend wear.
Q4: My nails are short. Can I still do these designs?
A4: Absolutely! Many quick designs, like polka dots, single lines, or glitter gradients, look fantastic on short nails. In fact, minimalist designs often suit shorter nail beds beautifully.
Q5: What’s the easiest nail design for a complete beginner?
A5: The single polka dot or a simple glitter gradient are generally the easiest. They require minimal precision and are very forgiving if you make a small mistake. A swipe of metallic polish is also super simple and chic!
Q6: How do I avoid smudging when applying a top coat?
A6: Make sure your polish color and any design elements are completely dry before applying the top coat. Apply the top coat in thin, even strokes. Start from the base of the nail and stroke upwards. Avoid going


