Pumpkin French tips are a chic, festive twist on the classic French manicure, perfect for autumn. They blend the elegance of French tips with the warm, cozy vibes of pumpkin spice season. Easy to create at home, these nails are sure to turn heads!
Feeling that autumn chill in the air? As the leaves turn golden and the scent of pumpkin spice fills the season, our style often follows suit. But what about our nails? Sometimes, giving our fingertips a fall makeover can feel a little intimidating, especially if you’re new to nail art. You might love the idea of seasonal nails, but worry about complicated designs or expensive salon trips. We’ve all been there, wanting fun nails but feeling stuck with the everyday look. Well, get ready to banish those nail blues! Today, we’re diving into one of the most delightful and surprisingly easy fall manicure trends: the Pumpkin French Tip. It’s the perfect blend of sophisticated and seasonal, and I’m going to show you exactly how to achieve it, step-by-step. You’ll be rocking these gorgeous nails in no time!
What are Pumpkin French Tips?
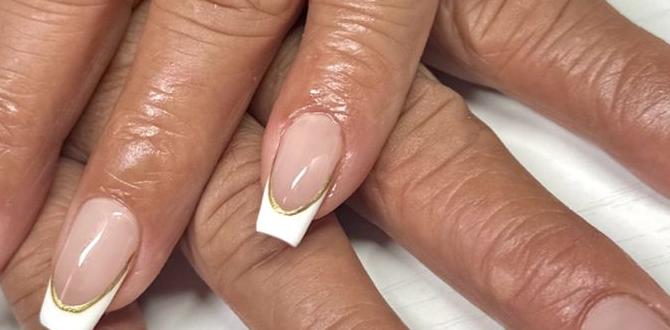
Imagine the classic French manicure – that clean, elegant look with a white tip. Now, picture that tip painted in a warm, autumnal shade like pumpkin orange, burnt sienna, or even a deep mustard yellow. That’s the essence of pumpkin French tips! It’s a playful yet sophisticated way to embrace the fall season on your fingertips. Instead of the traditional white, you swap it for those rich, earthy tones that just scream “cozy autumn.” This trend takes a beloved nail design and gives it a seasonal, festive update that’s incredibly versatile.
Why We Love Pumpkin French Tips
This manicure trend has quickly become a fall favorite for so many reasons. Let’s break down why it’s such a genius idea:
- Festive & Chic: It’s the perfect balance between being truly festive for fall and maintaining a chic, polished look. You can feel the autumn spirit without going over the top.
- Versatile Shades: “Pumpkin” is a flexible term here! You can opt for bright, true pumpkin orange, or dive into deeper, moodier shades like terracotta, rust, or even a warm brown. This allows for personalization to match your skin tone and outfit.
- Beginner-Friendly: Unlike intricate nail art, French tips themselves can be a bit tricky, but the concept of coloring them with a different shade is super accessible. We’ll cover tips to make even the French tip application easier!
- Suits Any Occasion: From casual pumpkin patch visits to Thanksgiving dinners and even everyday office wear, these nails fit right in. They add a touch of seasonal personality without being distracting.
- Elegant Yet Fun: This style remains sophisticated. It’s not a novelty nail; it’s a stylish evolution of a classic that feels fresh and contemporary for the season.
Gather Your Tools: What You’ll Need
Before we start painting, let’s make sure you have everything ready. Having your supplies on hand makes the process smooth and enjoyable. Think of this as setting up your little personal nail studio!
Here’s a list of what you’ll want to have:
- Base Coat: This protects your natural nails and helps your polish last longer.
- Your Polish Colors:
- A nude, beige, or sheer pink polish for the nail bed.
- Your chosen “pumpkin” shade! Think classic pumpkin orange, burnt sienna, warm terracotta, rust, or even a deep marigold.
- A clear top coat for shine and protection.
- Optional: White or Cream Polish: Some variations use a subtle cream or white base under the pumpkin tip for a softer look, but it’s not essential.
- Nail Polish Remover: For any little oopsies.
- Cotton Balls or Pads: To go with the remover.
- Orange Stick or Cuticle Pusher: To clean up edges.
- Fine-Tipped Nail Art Brush or French Tip Guide Stickers: This is key for getting that clean line!
- Nail File and Buffer: To shape and smooth your nails.
Understanding Your Polish Colors
Choosing the right “pumpkin” shade can make all the difference. Here’s a quick guide to popular fall tones:
| Color Family | Shade Examples | Vibe | Best For |
|---|---|---|---|
| Classic Orange | Bright Pumpkin, Marigold | Bolen and fun, instantly autumnal | Those who love a pop of color, casual autumn outfits |
| Earthy Tones | Terracotta, Burnt Sienna, Rust | Warm, sophisticated, and natural | Everyday wear, professional settings, anyone seeking a subtle fall look |
| Deep Reds/Browns | Cinnamon, Muted Cranberry, Dark Ochre | Rich, cozy, and luxurious | Evening events, cooler climates, a more mature take on fall nails |
Don’t be afraid to experiment! You can even mix and match shades on different fingers or use a matte top coat for an extra-trendy finish.
Step-by-Step: Creating Your Pumpkin French Tips
Ready to get those gorgeous nails? Grab your tools and let’s dive in!
Step 1: Prep Your Nails
This is the foundation for any great manicure. Clean, smooth nails mean polish sticks better and looks cleaner.
- Remove Old Polish: Make sure all traces of old nail polish are gone.
- Shape Your Nails: File your nails to your desired shape. Almond, squoval, or even a short, neat round shape all work beautifully with French tips. A smooth, consistent shape is key.
- Push Back Cuticles: Gently push back your cuticles using an orange stick or cuticle pusher. This creates a clean canvas and makes the nail bed appear longer.
- Buff:** Lightly buff the surface of your nails. This helps polish adhere better and removes any shine, which can prevent chipping. Don’t over-buff! You just want a matte surface.
- Cleanse: Wipe your nails with nail polish remover or rubbing alcohol to remove any dust or oils. Let them dry completely.
Step 2: Apply the Base Coat
A good base coat is crucial for a long-lasting manicure. It acts as a barrier between your natural nail and the polish, preventing staining, and it provides a smooth surface for your color.
Apply one thin layer of your clear base coat. Let it dry for at least a minute.
Step 3: Apply the Nail Bed Color
This is the main color of your nail, underneath the tip. For a classic look, a sheer nude, beige, or pale pink works perfectly. This creates a clean, natural-looking canvas.
- Apply one thin coat of your nude or sheer color.
- Let it dry completely.
- Apply a second thin coat if needed for opacity. Again, ensure it’s fully dry before moving on. Patience here pays off!
Step 4: Create the Pumpkin Tips
Here’s where the magic happens! There are a few ways to achieve those perfect French tips, depending on your skill level and the tools you have.
Method A: Using a Fine-Tipped Nail Art Brush
This method offers the most control and can create a beautifully delicate line.
- Dip Your Brush: Dip your fine-tipped nail art brush into your chosen “pumpkin” polish. You want just enough polish on the brush – not too much that it blobs, and not too little that it skips.
- Start the Curve: Starting from one side of your nail, gently draw a curve inward towards the center of your nail tip.
- Connect the Sides: Repeat on the other side, creating a smile line that connects in the middle. Aim for a thin, consistent line.
- Fill in the Tip (Optional): If you want a thicker tip, you can lightly go over the line again or gently fill in the very edge of the tip.
- Clean Up: Dip your orange stick (or a bent cotton swab) into nail polish remover. Carefully trace along the edge of your tip to clean up any stray marks and perfect the curve.
- Let it Dry: Allow the tip polish to dry completely. This is important to prevent smudging when you apply the top coat.
Method B: Using French Tip Guide Stickers
These little stickers are a lifesaver for beginners!
- Apply Sticker: Once your nail bed color is completely dry, carefully position a French tip guide sticker just below where you want your colored tip to start. Press down firmly to ensure a good seal so polish doesn’t bleed underneath.
- Paint the Tip: Apply your pumpkin polish over the exposed tip of the nail, onto the sticker. You can do one thin coat or two, depending on coverage preference.
- Remove Sticker: While the polish is still wet (but not runny!), carefully peel off the guide sticker. If you wait until it’s dry, you risk pulling up the polish with the sticker.
- Clean Up: Use your orange stick and remover to tidy up any imperfections along the line.
- Let it Dry: Allow the tips to dry thoroughly.
Method C: The “Dab and Drag” (for a more rustic look or shaky hands!)
This is a more forgiving approach.
- Apply Polish: Apply your pumpkin polish to the tip of your nail using the brush from the bottle. Don’t worry about perfection yet.
- Drag and Shape: Use a clean nail art brush or even the edge of your orange stick dipped in a tiny bit of remover to gently “drag” the polish downwards to create a softer, slightly imperfect smile line, or to refine a wobbly straight line.
- Clean Up: Go around the edges with your remover-soaked clean-up tool.
- Let it Dry: Ensure it’s dry.
Whichever method you choose, take your time! If you make a mistake, nail polish remover and a steady hand are your best friends. For more resources on achieving perfect French tips, you can check out guides from reputable beauty sites like Allure, which offer great visual examples.
Step 5: Apply the Top Coat
The final, most important step for shine and longevity!
- Once your pumpkin tips are completely dry, apply a generous layer of your clear top coat.
- Make sure to cap the free edge of your nail by running the brush along the very tip. This helps prevent chipping and makes your manicure last longer.
- Let it dry completely. You can speed this up with a quick-dry spray or by dipping your hands in cool water (be careful not to smudge!).
Variations to Try
Once you’ve mastered the classic pumpkin French tip, why not play around with some fun variations? The beauty of this trend is its adaptability!
- Ombre Pumpkin Tips: Blend your pumpkin shade into the nude base for a soft, gradient effect.
- Glittery Tips: Add a fine glitter polish in gold or bronze over the pumpkin tip for some sparkle.
- Matte Pumpkin Tips: Use a matte top coat instead of a glossy one for a super modern, velvety finish.
- Two-Tone Tips: Pair your pumpkin orange with a contrasting fall color like deep green or burgundy for a bolder look.
- Accent Nail: Do classic pumpkin French tips on all nails except one, which could feature a simple pumpkin accent nail (like a tiny painted pumpkin).
- Reverse French Tips: Apply the pumpkin color at the cuticle line instead of the tips.
Tips for Long-Lasting Pumpkin French Tips
You’ve put in the effort to create beautiful nails, so let’s make them last!
- Always Start with Clean Nails: Oils and residue are your enemy.
- Use a Good Base Coat: It’s non-negotiable for protection and adhesion.
- Thin Coats are Key: Thick layers of polish take longer to dry and are more prone to chipping and smudging.
- Cap the Edges: With your color coats and especially your top coat, run the brush along the very tip (the free edge) of your nail. This seals the polish and prevents lift-off.
- Let Polish Dry Between Coats: Rushing is the quickest way to a smudged mess.
- Invest in a Quality Top Coat: A good top coat adds shine and seals everything in. Consider a gel-like formula for extra durability.
- Wear Gloves for Chores: Water and harsh cleaning chemicals are tough on manicures.
- Reapply Top Coat: Every 2-3 days, a fresh layer of top coat can refresh your manicure and boost its lifespan.
Common Questions About Pumpkin French Tips
Q1: What color should I use for the nail bed with pumpkin French tips?
A: A sheer nude, beige, or pale pink is classic and lets the pumpkin tip pop. You can also use a creamy white for a softer look, or even a light peachy tone that complements the orange.
Q2: How do I get that super clean line for the French tip?
A: Patience is key! Using guide stickers is a fantastic beginner option. If freehanding, a fine-tipped nail art brush and a steady hand, with plenty of clean-up using a remover-dipped tool, will help create a sharp line.
Q3: My French tips always smudge. What am I doing wrong?
A: The most common culprit is not letting the polish dry completely between coats. Also, be careful when applying the top coat – glide it on smoothly without going over the same spot too much if the color beneath isn’t perfectly dry.
Q4: Can I do pumpkin French tips on short nails?
A: Absolutely! French tips look great on all nail lengths. For short nails, a thinner tip often works best to avoid making the nail look shorter.
Q5: What’s the difference between pumpkin orange and other fall orange shades?
A: Pumpkin orange is typically a warm, medium-toned orange. Other fall shades might lean more towards reddish-browns (like terracotta or rust), deeper yellows (like mustard), or richer, muted tones.
Q6: How long do DIY pumpkin French tips usually last?
A: With proper prep and a good top coat, you can expect your pumpkin French tips to last anywhere from 5 to 10 days. Applying a fresh top coat every few days can extend this further.
Q7: Can I use press-on nails to achieve this look?
A: Yes! You can easily find press-on nails that already have a French tip design in pumpkin shades, or you can buy plain press-ons and paint the tips yourself using the methods described above. It’s a great way to get a professional look instantly.
Conclusion
There you have it! Pumpkin French tips are a truly genius way to welcome fall onto your fingertips. They’re stylish, festive, and surprisingly achievable for anyone, from nail art novices to seasoned pros. By following these simple steps and embracing the warm, inviting colors of autumn, you can create a manicure that’s both elegant and full of seasonal spirit. Don’t be afraid to experiment with different shades of “pumpkin” or add your own unique twists. Your nails are a canvas for self-expression, and this fall trend offers a beautiful way to show off your personal style. So go ahead, grab those polishes, and get ready to rock the most delightful fall manicure of the season. Happy painting!

