Planning your proposal nail designs is key to capturing that special moment perfectly. This guide offers stunning, easy-to-achieve ideas for every style, ensuring your hands sparkle as much as your new ring!
Getting ready for that big question? You’re probably thinking about outfits, the perfect spot, and maybe even how to capture the moment. But have you thought about your nails? Your hands will be front and center as you accept that sparkling ring! Don’t let uninspired nails steal the spotlight. This guide is here to help you find the perfect proposal nail design, whether you’re a DIY pro or just starting out. We’ll walk you through gorgeous, simple ideas that will make your engagement photos absolutely shine. Let’s get those nails proposal-ready!
Proposal Nail Designs: Stunning & Essential Ideas
The moment you say “yes” is an unforgettable one. It’s a whirlwind of emotion, excitement, and, of course, a beautiful new piece of jewelry gracing your finger. While many focus on the dress or the location, your nails play a surprisingly significant role! They’re in all the photos, they catch the light as you admire your ring, and they’re a personal touch that adds to your glow.
Choosing the right proposal nail design doesn’t have to be stressful. It’s all about feeling confident and beautiful. We’re sharing a treasure trove of ideas, from timeless classics to trendy twists, all designed to be beginner-friendly. So, grab your favorite nail polish, and let’s dive into creating a manicure that celebrates your special moment!
Why Your Proposal Nails Matter
Think about it: your hands will be all over social media, in every photo, and the focus of attention as your ring is revealed. Beautifully done nails can elevate your entire look and add an extra layer of personal style to this once-in-a-lifetime event.
Photography Ready: Stunning nails make your engagement photos pop! They add detail and sparkle.
Ring Showcase: Your nails frame your new diamond. Complementary colors and designs let your ring take center stage.
Personal Expression: Your nail choice reflects your personality and style, adding a perfect, polished touch.
Confidence Booster: Feeling confident and beautiful in every detail is key to enjoying the moment fully.
Timeless & Elegant Proposal Nail Designs
These designs are all about classic beauty. They’re sophisticated, chic, and always in style, ensuring your nails look perfect no matter your personal aesthetic.
1. The Classic French Manicure: A Forever Favorite
The French manicure is iconic for a reason. Its clean lines and understated elegance make it a perfect choice for proposal nails.
How to Achieve It:
1. Start with a clear or nude base coat for a smooth canvas.
2. Apply a sheer pink or milky white polish over the entire nail.
3. Using a fine brush or striping tape, carefully paint a crisp white tip across the edge of each nail.
4. Finish with a high-shine top coat.
Tips for a modern twist:
Try a “reverse French” with the white line at the cuticle.
Use a nude or sheer pink instead of a stark white tip for a softer look.
Opt for a slightly thicker white tip if you prefer a bolder statement.
2. Milky White/Sheer Pink: Subtle Sophistication
This is the epitome of understated elegance. A soft, milky white or a delicate sheer pink shade on your nails is incredibly flattering and chic. It’s clean, polished, and lets your engagement ring be the undisputed star.
Why it works:
It’s universally flattering on all skin tones.
It creates a clean, sophisticated backdrop for your ring.
It’s incredibly easy to achieve at home.
Application Tips:
1. Ensure nails are perfectly shaped and buffed.
2. Apply two thin coats of your chosen sheer or milky polish.
3. Finish with a glossy top coat.
3. Soft Nudes & Neutrals: Universally Chic
A well-chosen nude or neutral shade is another fail-safe option. These shades offer a polished, put-together look without competing with your ring. From creamy beige to warm taupe, there’s a perfect neutral for everyone.
Choosing your shade:
Fair skin: Opt for cool-toned nudes with pink or beige undertones.
Medium skin: Warm, caramel, or peachy nudes look stunning.
Deep skin: Richer, deeper nudes like coffee or chocolate brown are beautiful.
Pro tip: Apply two thin coats for opaque coverage and a professional finish. A good quality nude polish can be found from brands like Essie (“Ballet Slippers” for a classic pinky-nude) or OPI (“Bubble Bath” for a sheer pink).
4. The Barely-There Manicure (The “Clean Girl” Aesthetic)
This look is all about healthy, natural-looking nails. It’s the ultimate in minimalist chic and requires minimal effort but delivers maximum impact.
Key elements:
Perfectly shaped nails.
A clear or ultra-sheer pink/nude polish.
A healthy cuticle.
Achieving it:
1. File your nails into a smooth, uniform shape (squoval or soft almond are popular).
2. Gently push back your cuticles.
3. Apply one coat of a clear or very sheer pink/nude polish.
4. Seal with a high-gloss top coat.
Romantic & Delicate Proposal Nail Designs
If your style leans towards the whimsical and romantic, these designs add a touch of enchantment to your proposal moment.
5. Subtle Sparkle: A Touch of Glitter
A little bit of shimmer can go a long way! Adding a touch of glitter or fine shimmer to your nails can catch the light beautifully without being overpowering.
Ideas for subtle sparkle:
Glitter Top Coat: Apply a sheer glitter top coat over a nude or pink base.
Accent Nail: Choose one nail (like the ring finger!) and apply a delicate glitter polish.
Shimmer Polish: Use a polish with a fine, iridescent shimmer for a diffused glow.
Application tip: For glitter, opt for fine-grain glitter rather than chunky pieces for a more sophisticated look.
6. Delicate Blooms or Tiny Hearts: Sweet Details
For the ultimate romantic, consider adding tiny, hand-painted details. These are subtle yet incredibly charming.
How to DIY:
1. Paint your nails in a soft solid color (nude, pink, or white are ideal).
2. Using a fine-tip nail art brush or a dotting tool, carefully add tiny dots to create a flower shape or a small heart on one or two nails.
3. A tiny dot of polish at the base of the nail (near the cuticle) can also be a sweet detail.
Pro Tip: If hand-painting feels daunting, look for nail stickers or decals that offer delicate floral or heart designs.
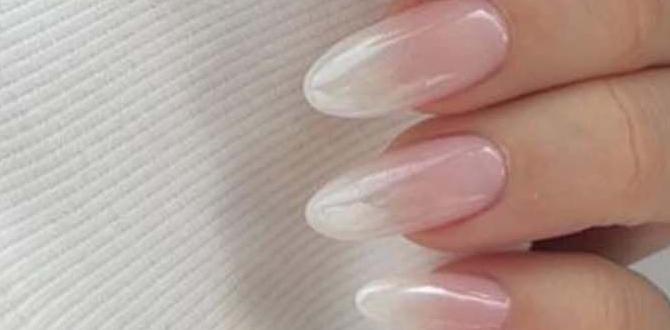
7. Pearlescent Finish: Iridescent Dreams
A pearlescent or iridescent finish adds a dreamy, ethereal quality to your nails. It’s subtle, shimmery, and truly magical, especially under light.
Achieving the look:
Pearlescent Polish: Many brands offer polishes with a beautiful, subtle sheen.
Chrome Powder: A very light dusting of iridescent chrome powder applied over a white or nude polish can give a stunning pearlescent effect. This might require a bit more practice or a visit to a salon.
Expert Tip: For best results with chrome powder, ensure your base polish is fully dry and use a no-wipe top coat after applying the powder.
Modern & Chic Proposal Nail Designs
If you’re looking for something a little more trend-forward, these designs offer a contemporary edge while still being elegant and proposal-appropriate.
8. Micro-French or Colored French Tips: A Subtle Pop
Update the classic French by opting for a super-thin “micro” line or a subtle pop of color for the tip.
Variations:
Micro-French: A very fine white line on almond or stiletto nails looks incredibly chic.
Colored Tip: Instead of white, try a soft blush pink, a pale lavender, or even a delicate metallic gold for the tip.
Nude Base: Always pair colored or micro-tips with a nude, sheer pink, or milky white base.
Application Tip: Use a very fine brush or a silicone stamper tool to get that precise line.
9. Geometric Accents: Minimalist Edge
For the modern bride-to-be, simple geometric lines can add a sophisticated, edgy touch.
Design Ideas:
Thin Gold/Silver Line: A single, thin metallic line running vertically down the center of the nail or horizontally across the base.
Small Dot: A tiny metallic dot near the cuticle.
Negative Space: Incorporating unpainted sections of the nail within a design.
Tools Needed: Fine-tip nail art brush, metallic polish (gold, silver, rose gold), striping tape.
10. Ombre Fade: Softly Blended Beauty
An ombre, or gradient, effect can be incredibly beautiful and subtly captivating.
Style: A soft blend from a nude or pink at the cuticle to a slightly lighter shade or even a hint of shimmer at the tip.
How to Create Ombre:
1. Apply your base color(s).
2. Use a makeup sponge to gently dab and blend the colors together, starting from the tip of the nail and working down.
3. Apply a top coat to smooth out the texture.
Tip: Ombre nails can be done vertically or horizontally, but a soft vertical blend is often most flattering for proposal nails.
DIY Nail Prep: Essential Steps Before You Design
No matter which design you choose, proper nail preparation is crucial for a professional-looking and long-lasting manicure.
Before you even reach for a polish bottle, ensure your nails are in their best condition. This prep work makes all the difference!
- Shape Your Nails: File your nails to your desired shape. Squoval, almond, and short rounded shapes are often preferred for elegance. Use a fine-grit file and always file in one direction to avoid weakening the nail. For shaping guidance, check out resources like the NHS guide on healthy nails.
- Push Back Cuticles: Gently push back your cuticles with an orange stick or a cuticle pusher. This makes your nail bed appear longer and cleaner. Never cut your cuticles, as this can lead to infection.
- Buff Gently: Lightly buff the surface of your nails to smooth any ridges and create a perfect canvas for polish. Don’t over-buff, as this can thin your nails.
- Cleanse: Wipe your nails with an alcohol-based nail cleanser or remover to remove any oils. Oils can prevent polish from adhering properly.
- Base Coat: Apply a good quality base coat. This protects your natural nail from staining and helps your polish adhere better.
Essential Tools for Beginner Nail Designs
You don’t need a professional salon’s worth of tools to create beautiful proposal nails at home! Here are a few essentials that will help you achieve stunning results.
| Tool | Purpose | Why it’s Essential for Beginners |
|---|---|---|
| Fine-Tip Nail Polish Brush | For detailed lines, dots, and clean-up. | Allows for precision when creating thin lines (like micro-French tips) or adding small details. |
| Dotting Tools (various sizes) | Creating perfect dots, small flowers, or accents. | Easy to use for consistent dots – great for floral designs or simple embellishments. |
| Striping Tape or Guide Stickers | Creating clean, straight lines and geometric shapes. | A foolproof way to achieve sharp lines for French tips or modern designs. |
| Nail Polish Remover & Cotton Swabs/Pads | For clean-up and corrections. | Essential for tidying up wobbly lines or mistakes without ruining the whole manicure. |
| Good Quality Base & Top Coat | Protecting nails and adding shine/longevity. | Crucial for a smooth finish, preventing staining, and making your design last longer. |
| Nail File & Buffer | Shaping and smoothing nails. | The foundation for any beautiful manicure. |
Tips for Choosing Your Perfect Proposal Nail Design
Making the final decision can be tricky. Here are some tips to help you choose a design that perfectly suits you and the occasion.
Consider Your Personal Style: Are you classic and elegant, or modern and bold? Choose a design that feels authentically “you.”
Think About Your Ring: Your nails should complement, not compete with, your engagement ring. If you have a very elaborate ring, a simpler nail design might be best.
Wedding Theme (If Applicable): If you already have some wedding ideas, you might want to choose a nail design that loosely hints at your wedding style.
Comfort Level: Pick a design you feel comfortable with. If you’re someone who only wears sheer polish, don’t suddenly opt for heavy glitter!
Test Run: If you’re doing your nails yourself, do a test run a week or two before. This allows you to practice the technique and ensure you love the result.
Professional Help: If you’re not confident with DIY, book an appointment with a trusted nail technician. Show them inspiration photos well in advance.
Proposal Nail Design Inspiration: A Quick Look
To help you visualize, here’s a quick summary of popular choices:
Classic: French tips, milky white, sheer pink, nude.
Romantic: Subtle glitter, tiny hearts, pearlescent finish.
Modern: Micro-French, geometric accents, soft ombre.
Keeping Your Proposal Nails Looking Great
Once your perfect nails are on, you’ll want them to stay looking flawless for as long as possible, especially if you have photoshoots planned!
Seal the Deal: Always finish with a high-quality, quick-drying top coat. Reapply a thin layer every couple of days to maintain shine and prevent chipping.
Gloves are Your Friends: Wear gloves when doing household chores, especially washing dishes or using cleaning products. These can strip polish and damage your manicure.
Moisturize: Keep your cuticles and hands hydrated with a good cuticle oil and hand cream. Healthy cuticles make your manicure look polished. A popular and effective option is CND SolarOil.
Avoid Using Nails as Tools: Resist the urge to use your nails to open cans, scrape things, or pick at labels. This is a surefire way to cause chips and breaks.
Touch-Ups:** Keep a small bottle of your polish and a mini top coat with you for quick fixes if needed.
Frequently Asked Questions About Proposal Nail Designs
Q1: How long before the proposal should I do my nails?
A1: For DIY manicures, aim to do your nails 1-2 days before the proposal. This gives the polish time to cure fully and allows for minor fixes if needed. If you’re getting them done professionally, schedule your appointment the day before.
Q2: Should my nails match my outfit?
A2: Not necessarily! Your nails should complement your overall look and, most importantly, your ring. Classic neutrals, soft pinks, or elegant whites are usually the safest bet and go with almost any outfit.
Q3: What if I have short nails? Can I still have a great proposal manicure?
A3: Absolutely! Short nails can look incredibly chic and sophisticated. Opt for classic shapes like squoval or rounded. Clean, polished short nails with a nude, sheer pink, or a subtle French tip can be stunning. Short nails are also less prone to chipping, which is a bonus!
Q4: Is it okay to have artificial nails (like acrylics or gels) for my proposal?
A4: Yes, many people choose acrylics or gel manicures for their proposal. They offer durability and a flawless finish. Just ensure you get them done by a reputable technician and choose a design that aligns with your proposal vision.
Q5: Should I add diamonds or gems to my proposal nails?
A5: While tempting, it’s generally recommended to keep proposal nails relatively simple. Heavy embellishments like large gems or diamonds can be distracting and may chip easily. A touch of subtle sparkle or a fine shimmer is usually a safer and more elegant choice.
Q6: What colors should I avoid for proposal nails?
A6: It’s best to avoid extremely bright neons, very dark colors (like black or deep navy, unless it’s your signature style), or overly complex, busy designs. These

