Prom nail designs offer endless ways to express your style, from classic elegance to dazzling trends. At Nailerguy, we’ll guide you through easy-to-create, essential looks that will make your nails the perfect accessory for your big night. Get ready for a stunning manicure that complements your prom outfit and boosts your confidence!
Prom night is a huge deal, and every detail matters, right? Your nails are like the finishing touch to your entire look, and you want them to be absolutely perfect! But staring at a million design ideas online can feel overwhelming, especially if you’re new to nail art. Don’t worry, though! We’re here to make it simple and fun. We’ll break down some genius and essential prom nail designs that are totally achievable, even if you’re just starting out. Get ready to discover looks that will make your nails shine as bright as you do!
Mastering Prom Nail Designs: Your Ultimate Beginner’s Guide
Choosing the perfect prom nail design can be just as exciting as picking out your dress! As Lisa from Nailerguy, I love sharing simple ways to get gorgeous nails. For prom, we want looks that are chic, memorable, and that you can feel totally confident rocking all night long. Whether your style is subtly elegant or boldly glamorous, there’s a design waiting for you. Let’s get our nails ready to impress!
The Building Blocks: Essential Prep for Flawless Prom Nails
Before we dive into the fun designs, let’s talk about getting your nails into tip-top shape. A little prep work goes a long way in making any design look professional and last longer. Think of it as prepping a canvas for a masterpiece!
Step-by-Step Nail Prep Essentials:
- Cleanse and Shape: Start with clean, dry nails. Remove any old polish. Gently push back your cuticles using a cuticle pusher or an orange stick. Then, file your nails into your desired shape (square, round, squoval, or almond). Always file in one direction to prevent splitting.
- Buff to Perfection: Use a fine-grit nail buffer to gently smooth the surface of your nails. This helps to create an even base for polish and makes it adhere better. Don’t over-buff, just a light, even sweep is perfect.
- Hydrate Your Cuticles: Apply a nourishing cuticle oil to soften and moisturize your cuticles. Gently massage it in. This not only makes your nails look healthier but also makes the cuticle area easier to work with.
- Base Coat is Key: Apply a good quality base coat. This protects your natural nail from staining, especially from darker polishes, and creates a smooth surface for your color to adhere to. Let it dry completely.
Essential Tools for Your Prom Nail Arsenal:
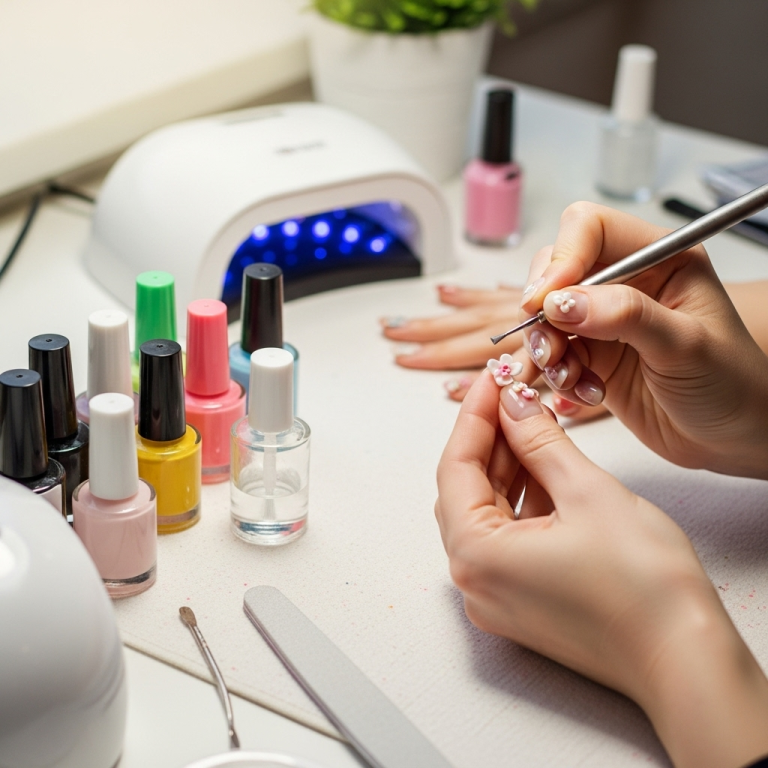
You don’t need a whole salon’s worth of tools to create amazing prom nail designs. Here are a few essentials that will make your DIY manicure journey much easier:
- Nail file
- Nail buffer
- Cuticle pusher (or orange stick)
- Cuticle oil
- Base coat
- Top coat
- Your chosen nail polish colors
- Dotting tool (optional, but super handy!)
- Thin nail art brush (optional, for details)
- Clean-up brush (an old, small makeup brush works great!)
Having these basics will set you up for success with any prom nail design you choose!
Genius Prom Nail Designs for Every Style
Now for the exciting part – the designs! I’ve handpicked essential looks that are beautiful, achievable, and scream prom-ready. We’ll cover everything from timeless classics to trendy twists.
1. Classic Elegance: The Timeless French Manicure with a Twist
The French manicure is a forever favorite for a reason. It’s sophisticated and complements any outfit. For prom, we can give it a little refresh!
How to Achieve It:
- Start with your prepped nails and a base coat.
- Apply a sheer nude or light pink polish. Let it dry.
- Using a fine brush or a nail art pen in white or a metallic shade (like silver or gold), carefully paint a crisp line along the tip of your nail.
- For an extra touch, add a tiny dot or a thin line of glitter polish just where the white or colored tip meets the base color.
- Seal everything with a durable top coat.
Variations to Consider:
- Color Play: Instead of white, try a pastel color for the tip, like baby blue, mint green, or lavender.
- Glitter Fade: Apply a sheer color, then add a glitter polish to the very tip of the nail and fade it slightly down.
- Micro-French: Make the colored tip super thin for a delicate, modern look.
2. Subtle Sparkle: The Glitter Ombre/Gradient
This design is super popular because it adds just the right amount of bling without being overdone. It’s also incredibly easy to create!
How to Achieve It:
- Apply your base coat and your chosen sheer base color (nude, pink, or a subtle shimmer).
- Take a glitter polish and a makeup sponge or a small piece of a makeup sponge.
- Apply a bit of glitter polish onto the sponge.
- Gently dab the sponge onto the very tip of your nail, building up the glitter concentration.
- As you move down the nail, use lighter pressure with the sponge to create a gradient effect where the glitter fades into the base color.
- Let it dry completely, then apply another layer of sheer polish over the glitter to smooth it out a bit and seal it, if desired.
- Finish with a thick top coat to smooth out any grittiness from the glitter.
Why You’ll Love It:
- Easy to do at home.
- Looks professional and festive.
- The gradient effect is super flattering.
3. Minimalist Chic: The Accent Nail with a Single Detail
Sometimes, less is more! An accent nail featuring a simple, elegant detail can be incredibly impactful.
How to Achieve It:
- Paint all your nails your chosen base color (e.g., a classic red, a deep navy, a soft blush).
- On just one nail (usually your ring finger), add a special touch. This could be:
- A single strip of metallic tape (gold, silver, rose gold) running vertically or horizontally.
- A few tiny rhinestones or pearls placed strategically in a line or cluster.
- A delicate hand-painted dot or a tiny star using a dotting tool or fine brush.
- Ensure your detail is completely sealed with a good top coat, especially if you’re using embellishments.
Tips for Success:
- Placement is Key: Experiment with where you place your embellishments for the most stylish look.
- Don’t Overdo It: One well-placed detail is more elegant than too many scattered elements.
- Secure Embellishments: Use a bit of top coat or nail glue to firmly attach rhinestones or studs before your final top coat.
4. Modern Glam: The Chrome or Foil Detail
Chrome and foil accents are a huge trend and add instant wow-factor. They look super high-end but can be surprisingly easy to achieve.
How to Achieve It (Using Transfer Foil):
- Apply your base coat and your chosen nail polish. A black or dark color often makes metallic foils pop the most. Let it dry until it’s almost fully cured but still slightly tacky.
- Apply a special foil glue or top coat to the areas where you want the foil to stick. Let it dry until it’s clear and tacky.
- Cut a piece of transfer foil slightly larger than the area you want to cover.
- Place the colored side of the foil down onto the tacky glue/top coat.
- Press firmly all over, then quickly peel off the backing paper. The foil design will transfer to your nail.
- Be patient and practice! Some foils can be tricky.
- Seal the design with a specialized foil top coat or a thick, non-smudging top coat.
Considerations for Foil/Chrome:
- Practice Makes Perfect: This technique might take a couple of tries to get right.
- Clean Edges: Use a clean-up brush dipped in nail polish remover to sharpen the edges around your foil design.
- Prep is Crucial: Ensure your base color is fully dry and your foil glue/top coat is perfectly tacky before applying the foil.
5. Candy Apple Red: The Bold Statement Nail
You can never go wrong with a classic, vibrant red. It’s sophisticated, bold, and incredibly chic for prom.
How to Achieve It:
- Ensure your nails are perfectly prepped and you have a good base coat on.
- Apply two thin coats of a high-quality, glossy red nail polish. Allow each coat to dry slightly before applying the next.
- For a super polished finish, apply a generous, smoothing top coat. This will seal in the color and give it that beautiful, long-lasting shine.
Why Red Works:
- Timeless and universally flattering.
- Adds a pop of confidence and glamour.
- Matches or contrasts beautifully with many dress colors.
6. Soft & Sweet: Pastel Dream with Delicate Details
Pastel shades are perfect for a romantic and dreamy prom look. They offer a softer alternative to bold colors.
How to Achieve It:
- Start with your well-prepped nails and base coat.
- Apply two thin coats of your chosen pastel polish (e.g., periwinkle, mint, coral, lilac).
- On one or two nails, add a delicate design using a fine nail art brush or a dotting tool:
- Tiny white dots in a constellation pattern.
- A single, small pearlescent stud.
- A delicate swirl in a complementary color.
- Finish with a good top coat to protect your artwork.
Pastel Palettes to Try:
- Mint Green
- Baby Blue
- Soft Peach
- Lavender Haze
- Pale Yellow
Table: Prom Nail Design Ideas at a Glance
Here’s a quick look at some essential prom nail designs and their key features:
| Design Type | Key Features | Best For | Beginner Friendly? |
|---|---|---|---|
| Classic French (with a twist) | Chic white/colored tips, sophisticated | Elegant dresses, timeless style | Yes, with practice on the tip line |
| Glitter Ombre/Gradient | Sparkly transition, festive | Adding subtle bling, modern glam | Yes, using a sponge |
| Accent Nail Detail | Minimalist, single focal point | Subtle statement, busy patterns | Yes, easy to add simple details |
| Chrome/Foil Accent | Mirror-like shine, high-impact metallic | Trendy looks, dramatic flair | Moderate, requires specific tools/technique |
| Bold Red | Vibrant, classic, confident | Versatile, adds drama to any look | Yes, easy solid color application |
| Pastel Dream | Soft, romantic, dreamy | Flowy dresses, sweet aesthetics | Yes, especially with minimal details |
Advanced Touches for the Aspiring Nail Artist
If you’re feeling a bit more adventurous, or you’ve nailed the basics, here are a couple of ideas that add a bit more flair. Remember, even complex looks can often be simplified!
The Delicate Floral Accent:
A few tiny painted flowers can add a romantic, vintage vibe. You can use a fine brush or even the tip of a dotting tool to create small petals. A lighter colored polish for the flowers against a darker or pastel base creates a beautiful contrast. For step-by-step floral painting guidance, resources like those on Nailpro.com (a reputable industry publication) often have great visual tutorials.
Geometric Minimalism:
Use striping tape or fine brushes to create clean lines, shapes, or color-blocking. A negative space manicure with geometric lines is super modern and chic. Think half-moon shapes, triangles, or simple intersecting lines. This requires steady hands and precision, but the result is incredibly high-fashion.
Choosing Your Prom Nail Design: Outfit & Personality Match
The best prom nail design is one that makes you feel amazing and matches your personal style and outfit. Here are some things to consider:
When to Match Your Polish to Your Dress:
- Color Coordination: If you have a specific color dress, matching your nails can create a cohesive, polished look.
- Neutral Dresses: A bold color polish can be the star of the show against a neutral dress (like black, white, or nude).
- Patterned Dresses: Pick one of the accent colors from your dress for your nails to tie everything together.
When to Contrast or Complement:
- Bold Dresses: Sometimes, a neutral or metallic nail color can be a better complement to a very detailed or brightly colored dress.
- Metallic Accents: If your dress has silver or gold detailing, carrying that metallic into your nails is a stylish choice.
- Personal Preference: Ultimately, wear what makes you happy! If a bright blue polish doesn’t ‘match’ your pink dress but you love it, go for it!
Considering Your Prom Night Activities:
Think about what you’ll be doing. If you’re planning on dancing the night away, heavily embellished nails with large gems might snag on clothing or be uncomfortable. Simpler designs, gel polish for durability, or carefully secured embellishments are your best bet. For longer-lasting manicures, understanding the https://www.fda.gov/consumers/consumer-updates/nail-care-tips National Food and Drug Administration’s (FDA) advice on nail products can be helpful in choosing safe and effective options.


