Get ready to shine! Discover genius prom nail designs perfect for a dazzling night. From elegant classics to sparkly statements, find easy DIY ideas and inspo to make your nails the talk of the prom. We’ve got simple steps and gorgeous looks for every style.
Prom night is all about feeling your absolute best! Your outfit, your hair, and yes, your nails, all come together to create that unforgettable you. But with so many choices, picking the perfect prom nail design can feel a little overwhelming. Don’t worry, we’ve all been there! Whether you’re aiming for subtle sophistication or a bold, show-stopping statement, creating amazing prom nails is totally achievable. Forget complicated techniques or expensive salon trips. This guide is packed with simple, stylish, and super-wow prom nail ideas that you can totally rock. Let’s get your nails prom-ready and ready to impress!
Your Prom Nail Design Toolkit: Essentials for Every Beginner
Before we dive into the dazzling designs, let’s make sure you have the basics covered! Having the right tools makes all the difference, turning a potential nail art challenge into a fun and easy DIY project.
Here’s a quick rundown of what you might find super handy:
- Nail File & Buffer: Essential for shaping your nails and creating a smooth base.
- Base Coat: Protects your natural nails from staining and helps polish adhere better.
- Top Coat: Seals your design, adds shine, and makes your manicure last.
- Nail Polish Remover: For those inevitable oops moments!
- Cotton Pads/Balls: For removing polish evenly.
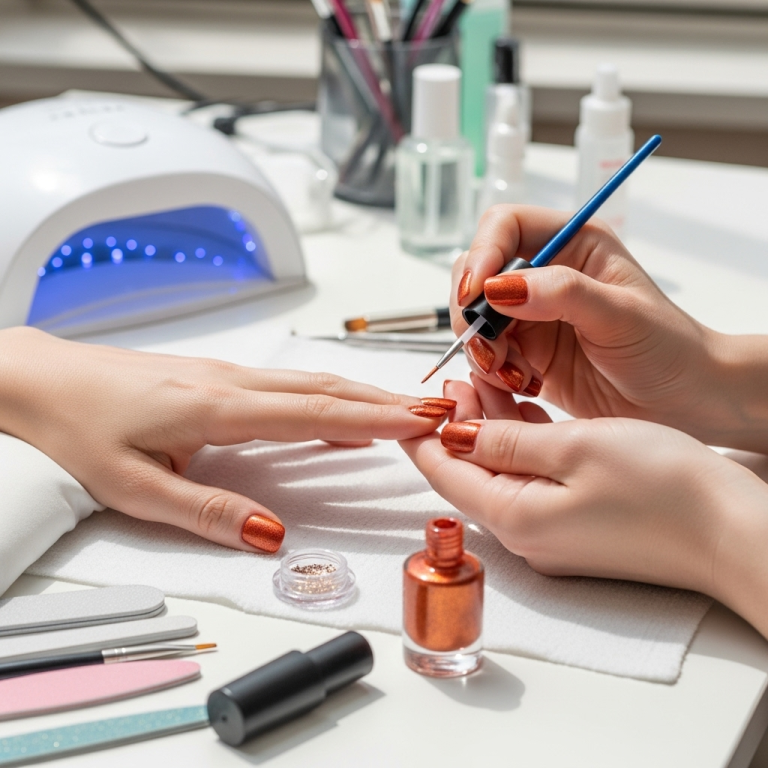
- Dotting Tools: These come in various sizes and are perfect for creating dots, swirls, and tiny accents.
- Thin Nail Art Brush: Great for fine lines, French tips, and detailed work.
- Tweezers: For picking up small embellishments like rhinestones or glitter.
- Nail Glue (optional): For attaching larger gems or 3D nail art elements.
- Clear Rhinestones or Gems: Tiny, sparkling additions that can elevate any design.
- Fine Glitter (loose or in polish): Adds instant glamour.
When choosing your polishes, think about your dress color and your personal style. Metallics, soft pastels, classic nudes, and deep jewel tones are always popular choices for prom.
Gorgeous Prom Nail Designs to Make You Shine
Ready for some inspo? I’ve gathered some of the most popular and achievable prom nail designs that are sure to get you noticed for all the right reasons. We’ll start with the elegant and move towards the more statement-making looks.
1. Classic Elegance: The Sophisticated Chic
Sometimes, less is more. A timeless look is always a safe bet and incredibly chic for prom.
The Subtle Shimmer Nail
This is all about polished perfection with a hint of sparkle.
- Base Color: Choose a sophisticated nude, soft blush pink, or a classic ivory.
- Accent: On one or two nails (usually the ring finger), add a fine glitter polish or a subtle shimmer topcoat. You can also add a delicate line of glitter polish along your cuticle or the tip of the nail.
- Finish: A high-shine top coat seals the deal.
Why it works: It’s understated, complements any dress color, and always looks polished.
The Monochromatic Glam Nail
Pick a color you love or one that matches your dress and go all out!
- The Look: Paint all your nails in one beautiful shade. Think deep sapphire, emerald green, ruby red, or a sophisticated dusty rose.
- The Twist: On your ring finger, add a subtle detail like a tiny rhinestone at the base of the nail or a thin strip of metallic polish.
Why it works: It’s bold yet simple, making a strong style statement without being too busy.
2. Sparkle and Shine: Dazzling Prom Nail Ideas
Prom NIGHT demands a little extra sparkle, right? These designs take it up a notch!
The Glitter Gradient (Ombre) Nail
This is a stunning way to incorporate glitter without it being all glitter.
Start by applying your base color to all nails. Let it dry completely.
Now, take a glitter polish. Dab it onto a makeup sponge. Gently press the sponge onto the tip of your nail, blending downwards towards the cuticle. The glitter will be more concentrated at the tip and fade out towards the base.
Apply one or two coats of glitter polish directly from the brush onto the tips of your nails and blend downwards with the brush.
Once dry, apply a generous layer of top coat to smooth out the glitter and add shine.
Pro Tip: Using a fine-to medium-sized glitter works best for a smooth gradient effect.
The Rhinestone Accents Nail
Adding a few carefully placed rhinestones can transform a simple manicure into prom-ready perfection.
- Base: A solid color polish of your choice (nude, black, deep red, or even a pastel).
- Placement: Using a dotting tool or tweezers, pick up a small amount of nail glue (or a dollop of top coat) and place it on the nail where you want your gem. Carefully position the rhinestone.
- Design Ideas:
- A single, larger rhinestone at the base of the nail.
- A cluster of tiny rhinestones at the cuticle corner.
- A thin line of small crystals trailing up the nail.
- Covering the entire nail tip for a full-on sparkle effect (this takes patience!).
- Seal: Once the glue is dry, carefully apply a top coat around the gems, avoiding flooding them with polish so they keep their sparkle.
The Metallic Mania Nail
Metallics are HUGE for special occasions, and for good reason – they scream glamour!
- Colors: Think rose gold, silver, gold, or even a trendy holographic metallic.
- Designs:
- Full Metallic: Paint all nails with a vibrant metallic polish.
- Metallic Tips: Apply a solid color base, then use tape or a stencils to create sharp metallic French tips.
- Metallic Accents: Use a thin brush or dotting tool to add metallic lines or shapes over a solid color.
3. Fun & Trendy Prom Nail Designs
Want something a little more playful and unique? These designs are perfect for showing off your personality.
The Subtle French Ombre Nail
This is a softer, more modern take on the classic French manicure.
- Base: Apply a sheer nude or pinkish-clear polish.
- The Ombre: Use a makeup sponge to gently dab a slightly lighter shade of pink or white polish just at the tips of your nails, blending downwards slightly.
- The ‘French’ Fade: Instead of a harsh white line, the color softly blends from the tip. You can add a tiny shimmer or a super fine glitter to the tips for extra pizzazz.
- Finish: A clear top coat.
The Galaxy/Cosmic Nail
This is a super fun and surprisingly easy design that looks incredibly complex.
Honestly, this looks intimidating, but it’s all about layering dark colors and adding shimmers! You don’t need to be perfect; the chaos is part of the beauty.
- Base: Start with a dark base color like black, deep navy, or dark purple.
- Layering Colors: While the base is still slightly wet (or after it dries, and you’re applying subsequent layers), lightly dab on other deep colors like blue, purple, or even some scattered crimson. Use a sponge or a stippling brush for a mottled effect.
- Stars and Swirls: Use a white or silver polish with a thin brush or dotting tool to flick on tiny dots for stars. You can also swirl in some lighter colors like light blue or pink for nebulae effects.
- Glitter & Shimmer: Finish with a generous coat of holographic or iridescent glitter and shimmer top coat to tie everything together and give it that deep space sparkle.
For a step-by-step video tutorial, check out this guide on blending dark nail polish colors for a similar effect.
The Floral Accent Nail
Delicate and pretty, floral accents add a touch of romance.
- Base: A pastel shade, nude, or even a deep tone like navy or burgundy.
- The Accent: On one or twonails, use a very thin brush and white or a contrasting color polish to paint tiny flowers. Think simple dots for petals or delicate lines. You can also use dotting tools to create cute floral patterns.
- Embellishment: Add a tiny dot of glitter polish in the center of the flowers for extra sparkle.
4. Bold & Beautiful: Statement Prom Nail Designs
Ready to make a statement? These designs are for the bold and the confident!
The Chrome Finish Nail
Chrome nails are incredibly trendy and deliver maximum impact with minimal actual design.
- The Look: This effect is achieved using a special chrome powder (often called mirror powder) applied over a gel polish base and then sealed.
- DIY Tip: While traditional chrome powder application requires specific tools and cured gel polish, you can find chrome-effect polishes that give a similar, albeit less intense, mirror-like finish in regular nail polish form. Apply multiple thin coats for a truer chrome look.
- Colors: Silver and gold are classic, but iridescent and colored chromes are also incredible options for prom.
The Geometric Glam Nail
Sharp lines and shapes create a modern, edgy look.
- Base: A solid color, often deep, dark, or metallic.
- The Design: Use nail tape or thin brushes to create lines, triangles, squares, or other abstract geometric patterns. You can use contrasting colors or metallic polishes for the geometric elements.
- Tip: Ensure your base coat is completely dry before applying tape to avoid lifting the polish.
The Dramatic Jewel Tone Nail
Deep, rich colors can be incredibly luxurious and sophisticated.
- Colors: Think deep emerald, sapphire blue, amethyst purple, ruby red, and luxurious burgundy.
- Additions:
- A touch of gold or silver polish as an accent line.
- A single, elegant rhinestone at the base of the nail.
- A glitter top coat for subtle shimmer.
Designing Your Perfect Prom Nails: A Step-by-Step Approach
Let’s break down how to create one of these gorgeous looks, using a popular and achievable design as our example: the Glitter Gradient Nail.
Get Your Nails Prom-Ready: The Prep Work
Proper preparation is key to a long-lasting and beautiful manicure.
Step 1: Shape Your Nails
- Start by filing your nails to your desired shape. Use a nail file held in one direction to avoid weakening the nail. A smooth edge is important!
- If you have any rough edges or cuticles, gently push them back or trim them carefully.
Step 2: Buff Your Nails
- Use a nail buffer to gently buff the surface of your nails. This creates a smooth canvas and helps polish adhere better. Don’t over-buff! Just a few light strokes per nail are enough.
- Wipe away any dust with a dry cloth or a nail brush.
Step 3: Apply Base Coat
- Apply one thin layer of base coat to all your nails. This prevents staining from dark or highly pigmented polishes and helps your manicure last longer.
- Let it dry completely.
Creating the Glitter Gradient
Now for the fun part!
Step 4: Apply Your Base Color
- Apply one or two thin coats of your chosen base color. For our glitter gradient, let’s use a sophisticated nude.
- Ensure each coat is completely dry before applying the next.
Step 5: The Glitter Magic (Using a Sponge)
- Take a clean makeup sponge (the kind you might use for foundation). Cut off a small piece.
- Apply a generous amount of your glitter polish onto a piece of foil or a palette.
- Gently dab the sponge into the glitter polish.
- Start dabbing the glitter onto the tips of your nails. You want the concentration of glitter to be heaviest at the very tip and gradually fade as you move down towards your cuticle.
- Use light dabbing motions and build up the intensity as needed. You can also dab downwards to help blend the glitter.
- Reapply glitter to the sponge as needed.
Step 6: The Glitter Magic (Direct Application – Alternative)
- If you don’t have a sponge, you can apply the glitter directly.
- Take your glitter polish. Start painting the glitter onto the tips of your nails.
- Use the brush to ‘pull’ the glitter downwards towards the cuticle, with lighter strokes as you go. This creates a natural fading effect. Blend carefully until you achieve the gradient look you desire.
Step 7: Clean Up Edges
- Before the polish fully dries, use a small brush dipped in nail polish remover to clean up any glitter or polish that got onto your skin. This makes your manicure look super neat and professional!
Step 8: Apply Top Coat
- Once the glitter layer is completely dry, apply a generous layer of good quality top coat. This smooths out any texture from the glitter, adds incredible shine, and seals everything in for maximum wear.
- You might need two coats of top coat to really smooth out a dense glitter gradient.
Final Touches & Drying Time
Step 9: Let Them Dry Completely
This is the hardest part, I know! Resist the urge to touch anything. Give your nails at least 10-15 minutes to dry, and up to an hour for full hardness, especially if you used a quick-dry top coat.
Step 10: Admire Your Work!
You did it! Show off those gorgeous, sparkling prom nails!
Prom Nail Design Trends Table
To help you visualize and choose, here’s a quick look at some popular prom nail design trends and what makes them great:
| Design Trend | Key Features | Best For | DIY Difficulty |
|---|---|---|---|
| Classic Nude with Sparkle | Soft, neutral base with a touch of glitter or shimmer accent. | Elegant dresses, those who prefer subtlety. | Easy |
| Glitter Gradient (Ombre) | Sparkle that fades from tip to base. | Versatile, adds glamour to any look. | Easy to Medium |
| Rhinestone Accents | Polished color with carefully placed gems. | Adding bling, luxurious feel. | Medium |
| Metallic Finish | High-shine, reflective polish. | Modern, bold looks, matching metallic accessories. | Easy (with special polish) to Medium (with powder) |
| Geometric Designs | Clean lines and sharp shapes using tape or brushes. | Edgy, modern, minimalist styles. | Medium |
| Floral Accents | Delicate painted flowers on an accent nail. | Romantic, feminine looks, pastel or softer dresses. | Medium |
| Jewel Tones | Deep, rich saturated colors. | Sophisticated, dramatic, or vintage vibes. | Easy |
| Chrome/Mirror Effect | Ultra-shiny, reflective surface. | Futuristic, high-fashion, statement looks. | Medium to Difficult (requires powder & specific tools) |
Nail Care Tips for Prom Night Success
Want your nails to look fantastic not just on prom night, but also feel healthy? A little TLC goes a long way!
- Hydrate Cuticles: Dry cuticles can ruin the look of even the best nail art. Use cuticle oil daily in the week leading up to prom.
- Moisturize Hands: Dry hands can make your manicure look less polished. Keep a hand cream by your sink!
- Avoid Harsh Chemicals: If you’re doing chores, wear gloves! Harsh cleaners can


