Prom glitter nails are dazzling, easy-to-achieve manicures that add sparkle and fun to any formal event. This guide breaks down everything you need to know, with simple steps and insider tips to get salon-worthy results at home.
Ready to dazzle at prom? Glitter nails are the perfect way to add that extra touch of magic to your look! They can seem tricky, but trust me, stunning prom glitter nails are totally doable for anyone. Forget complicated designs; we’re focusing on fun, fabulous glitter that will make your hands the star of the show. This guide will show you exactly how to get that high-shine, glitter-packed manicure that’s perfect for your big night. Let’s dive in!
What Are Prom Glitter Nails?
Prom glitter nails are simply manicures designed with glitter as a key element, specifically for formal occasions like prom. Think shimmering finishes, all-over glitter looks, glitter gradients, or subtle glitter accents. They’re a fantastic way to express your personal style and complement your prom outfit. Whether you love a bold, sparkly statement or a more delicate shimmer, there’s a glitter nail design for everybody!
Why Choose Glitter Nails for Prom?
Glitter is synonymous with celebration and glamour – what better way to embrace the excitement of prom? Here’s why they’re a brilliant choice:
- Instant Glamour: Glitter instantly elevates any nail look, making it feel special and festive.
- Versatility: From subtle shimmers to full-on disco ball vibes, glitter can be adapted to any style.
- Completes Your Outfit: Glitter nails can perfectly match or contrast with your prom dress, shoes, or jewelry.
- Confidence Boost: There’s something incredibly empowering about a sparkly, well-done manicure!
- DIY Friendly: Many glitter nail techniques are surprisingly easy to do yourself, saving you money and time.
Essential Tools and Materials for Your Glitter Manicure
You don’t need a salon full of fancy equipment to create amazing prom glitter nails. Here’s a breakdown of what you’ll need:
| Item | Purpose | Notes for Beginners |
|---|---|---|
| Nail Polish Remover | To clean and prep nails. | Use acetone-free if you have dry cuticles. |
| Cotton Pads/Balls | For applying remover. | Pads are less likely to leave lint. |
| Nail File | To shape your nails. | Use a fine-grit file for a smooth finish. |
| Buffer Block | To smooth the nail surface. | Gently buff; don’t overdo it. |
| Base Coat | Protects natural nails and helps polish adhere. | Crucial for preventing stains from dark or glitter polish. |
| Colored Nail Polish (Optional) | Your desired base color. | Choose a shade that complements your glitter. |
| Glitter Nail Polish OR Loose Glitter | The star of the show! | Glitter polish is easier for beginners. Loose glitters offer more control and intensity. |
| Top Coat | Seals the design and adds shine. | A good quality top coat is essential for longevity. Gel top coats offer extra durability. |
| Small Brush or Applicator | For applying loose glitter (if used). | An old, clean makeup brush or a specialized nail art brush works well. |
| Tweezers (Optional) | For placing larger glitter pieces precisely. | Helpful for intricate designs. |
| Cuticle Oil | To moisturize after your manicure. | Leaves your nails looking healthy and polished. |
| Small Bowl of Water (Optional) | For quick drying (water method) or cleanup. | Helps set polish faster. |
Step-by-Step Guide to Stunning Prom Glitter Nails
Let’s get down to business! Here’s how to create beautiful prom glitter nails at home. We’ll cover a few popular techniques.
Technique 1: Easy Glitter Polish Application
This is the simplest way to add glitter and is perfect for beginners. You can use a glitter-packed polish directly or layer it over a color.
- Prep Your Nails: Start with clean, dry nails. Remove any old polish with remover and cotton pads. Shape your nails with a file and gently buff the surface to create a smooth canvas.
- Apply Base Coat: Paint one or two thin coats of your chosen base coat. Let it dry completely. This is super important for protecting your nails, especially from dark or intensely pigmented polishes.
- Apply Your Base Color (Optional): If you’re layering glitter over a color, apply one or two thin coats of your chosen polish. Let each coat dry almost completely before applying the next.
- Apply Glitter Polish: Now for the fun part! Apply your glitter nail polish. You can:
- Full Coverage: Apply one or two coats for an all-over glitter look. Let it dry between coats.
- Glitter Gradient: Apply one coat of glitter polish towards the tip of your nail. Use a dabbing motion with the brush to blend it down towards the cuticle, creating a fade effect. Add more coats as needed to achieve your desired intensity.
- Accent Nails: Apply glitter polish to just one or two accent nails for a more subtle sparkle.
- Let it Dry: Allow the glitter polish to dry completely. Glitter can take a little longer to dry than regular polish, so be patient! You can speed this up by dipping your fingers in a small bowl of cool water for a minute or two (be gentle!).
- Apply Top Coat: Once the glitter is totally dry, apply one or two coats of a good quality top coat. Make sure to cap the free edge of your nail (paint the very tip) to seal in the glitter and prevent chipping. This is key for durability!
- Finishing Touches: Once the top coat is dry, apply a drop of cuticle oil around your nails. It makes everything look super polished and professional.
Technique 2: Using Loose Glitter for Maximum Impact
Loose glitters offer more control and can create a more intense, customized look. You’ll need a bit more precision for this one.
- Prep and Base Coat: Follow steps 1 and 2 from Technique 1. Ensure your base coat is fully dry.
- Apply Color Polish (Optional): Apply your desired base color polish. Let it get tacky but not fully dry. This means it’s still sticky enough for the glitter to adhere.
- Apply Loose Glitter:
- All-Over Glitter: Dip a stiff brush (like a clean makeup brush) into your loose glitter. Gently tap or press the glitter onto your tacky nail polish. Work from cuticle to tip, building up the coverage. You can also pour some glitter onto a piece of paper, then carefully press your tacky nail into the glitter pile.
- Glitter Gradient: Apply a coat of polish, leaving the cuticle area clear. Then, use your brush to dab and blend loose glitter towards the tip.
- Accent Areas: Use tweezers to place larger glitter pieces precisely onto specific areas of the nail, or use a small brush to apply glitter to the tips or edges.
- Remove Excess Glitter: Once you’ve applied the glitter, let the polish dry for a minute. Then, gently brush away any loose glitter that didn’t adhere using a clean, dry brush.
- Let it Dry: Allow the polish and glitter to dry completely.
- Apply Top Coat: This is where loose glitter can be tricky! You’ll likely need multiple thin coats of top coat to fully encapsulate the glitter and create a smooth surface. Apply one coat, let it dry, then apply another. Repeat until your nails feel smooth when you run your finger over them. A thicker, glossy top coat works best here. You can even use a gel top coat for extra strength and shine if you have a UV/LED lamp.
- Clean Up and Moisturize: Clean up any stray glitter from your skin with a brush or a slightly damp cotton swab. Finish with cuticle oil.
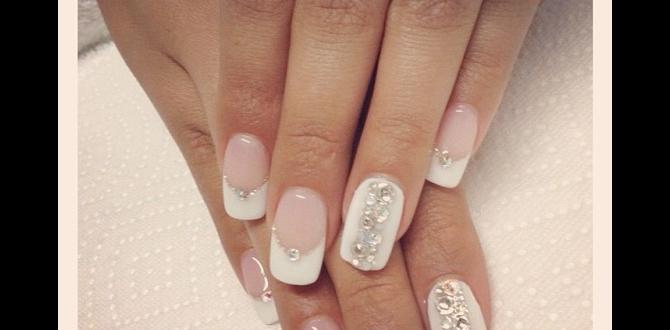
Technique 3: Glitter French Tips or Accents
Want a touch of sparkle without going full glitter-bomb? Try glitter French tips or other creative accents.
- Prep and Base Coat: Follow steps 1 and 2 from Technique 1.
- Apply Base Color: Apply your main nail polish color to all nails. Let it dry completely.
- Create Glitter Tips:
- Freehand: Apply a thin line of glitter polish or glitter glue along the free edge (tip) of your nail.
- With a Guide: Use nail tape or a small stencil to create a crisp line across your nail, just below the tip. Paint the tip area with glitter polish or apply a thin layer of polish and then dip the tip into loose glitter over a tray. Carefully remove the tape once the polish is slightly tacky.
- Glitter Cuticles/Half Moons: Apply a thin layer of polish or glitter glue just around the cuticle line or at the base of the nail to create a “half-moon” effect with glitter.
- Apply Top Coat: Once the glitter is dry, carefully apply top coat. For French tips, it’s best to apply it just to the glittered tip to keep the line crisp, or use a small brush to get precision. If you want to seal the whole nail, ensure the glitter is fully covered.
- Final Touches: Clean up and moisturize.
Tips for Long-Lasting Prom Glitter Nails
You’ve spent time making your nails look fabulous, so let’s make them last! Here are some pro tips:
- Always Use a Base Coat: It prevents staining and creates a smoother surface for polish application.
- Seal the Deal with a Top Coat: Don’t skip the top coat! It adds shine, protects your design, and prevents chipping. Apply it to the edge of your nails (“capping” the free edge) for extra durability.
- Give Them Time to Dry: Glitter polishes, especially those with fine particles, can take a while to fully harden. Be patient! Rushing can lead to smudges and indentations.
- Avoid Water Exposure (Initially): Try to avoid prolonged contact with water for the first few hours after your manicure. This helps the polish cure properly.
- Wear Gloves: When doing chores, washing dishes, or anything that involves prolonged hand moisture or harsh cleaning products, wear gloves. This is the golden rule for making any manicure last longer.
- Maintain Your Cuticles: Keeping your cuticles moisturized with cuticle oil daily can prevent them from drying out and looking unkempt, which can detract from even the most perfect glitter nails.
- Consider a Gel Top Coat: If you have a UV/LED lamp, a gel top coat offers superior durability and a glass-like shine that lasts much longer than traditional top coats.
Choosing the Right Glitter for Your Prom Look
Glitter comes in many forms, textures, and sizes. Understanding the options can help you achieve the perfect vibe for your prom.
Types of Glitter
- Fine Glitter: These are tiny particles that provide a subtle shimmer and a smooth finish. They’re great for subtle glints or for creating gradients that blend seamlessly.
- Chunky Glitter: Larger pieces of glitter, often hexagon-shaped, create a more dramatic, eye-catching effect. They can be applied all over for a statement look or used for accent details.
- Iridescent Glitter: This glitter shifts color depending on the light, offering a rainbow-like effect. It adds a magical, ethereal quality.
- Holographic Glitter: HOLOGRAPHIC glitter is a showstopper! It reflects light in a spectrum of colors, creating a dazzling, almost liquid-like shine.
- Glitter Flakes: These are thin, flat pieces of glitter that can be applied individually or layered for a textured, mosaic-like appearance.
How to Match Glitter to Your Prom Dress
Your prom dress is your ultimate fashion statement, and your nails should complement it beautifully.
| Dress Color/Style | Recommended Glitter Colors/Styles | Why it Works |
|---|---|---|
| Classic Black or Deep Navy | Silver, Holographic, Iridescent, Black Glitter | These cool tones add a sophisticated shimmer without clashing. Holographic adds a modern twist. |
| Sparkly or Embellished Dress | Subtle Fine Glitter (clear, silver, or matching dress color), Chrome Powder | Avoid overpowering the dress. A delicate shimmer or a smooth chrome finish complements intricate beading. |
| Bright & Bold Colors (e.g., Red, Emerald, Royal Blue) | Gold, Rose Gold, Contrasting Jewel Tones, or a clear glitter with iridescent shifts | Metallics like gold can be striking against bright colors. A matching jewel tone glitter can deepen the look, or iridescent glitter adds complexity. |
| Pastels or Light Colors (e.g., Blush, Mint, Lavender) | Rose Gold, Pale Gold, Pearly White, Iridescent, or Holographic | Soft metallics and iridescent hues enhance the delicate tone of the dress beautifully. |
| White or Ivory Dress | Silver, Gold, Iridescent, or Pearl-like Glitter | Metallics add elegance, while iridescent or pearl finishes bring a soft glow that complements bridal-like tones. |
Remember, these are just suggestions! The most important thing is to choose what makes you feel amazing. Sometimes, a pop of unexpected glitter can be the perfect finishing touch.
Troubleshooting Common Glitter Nail Problems
Even the most experienced nail enthusiasts run into a few snags. Don’t let these deter you!
- Problem: Glitter is clumpy or uneven.
- Solution: This usually happens with glitter polishes that have too much glitter suspended in one spot. Try shaking the bottle gently before use. For loose glitter, aim for even application and use thin layers of top coat to smooth it out. Don’t try to apply too much glitter at once.
- Problem: Glitter polish is too thick or gloopy.
- Solution: Thick polish can be difficult to apply evenly. If it’s a glitter polish that has thickened over time, you might need to add a drop or two of nail polish thinner (not remover!). If it’s just a densely packed glitter, use a light hand and dabbing motions.
- Problem: Glitter chips off easily.
- Solution: This usually means the top coat wasn’t applied correctly or wasn’t enough. Ensure you are “capping” the free edge (painting the tip) with your top coat. For loose glitter, you absolutely need enough top coat to fully encapsulate all the particles and make the surface smooth. Multiple thin layers are better than one thick one.
- Problem: Glitter polish is hard to remove.
- Solution: Glitter polish can be notoriously stubborn! The best method is the soak-off technique. Soak a cotton ball in acetone-based nail polish remover, place it on your nail, and wrap your fingertip with foil. Let it sit for 5-10 minutes. The glitter should then wipe away much more easily. For stubborn bits, try gently scraping with an orangewood stick.
- Problem: Loose glitter gets everywhere!
- Solution: Work over a tray or a large piece of paper to catch excess glitter. A stiff brush or fan brush is great for gently sweeping away stray particles. Don’t try to wipe glitter away with your finger; it will just spread.
Beyond Prom: Caring for Your Glitter Nails
Your beautiful prom glitter nails deserve a little TLC even after the big night. Here’s how to keep them looking their best:
- Gentle Removal: As mentioned in troubleshooting, always use the foil soak-off method with acetone for glitter removal. This prevents unnecessary scrubbing that can damage your nails.
- Hydrate, Hydrate, Hydrate: Glitter polish can


