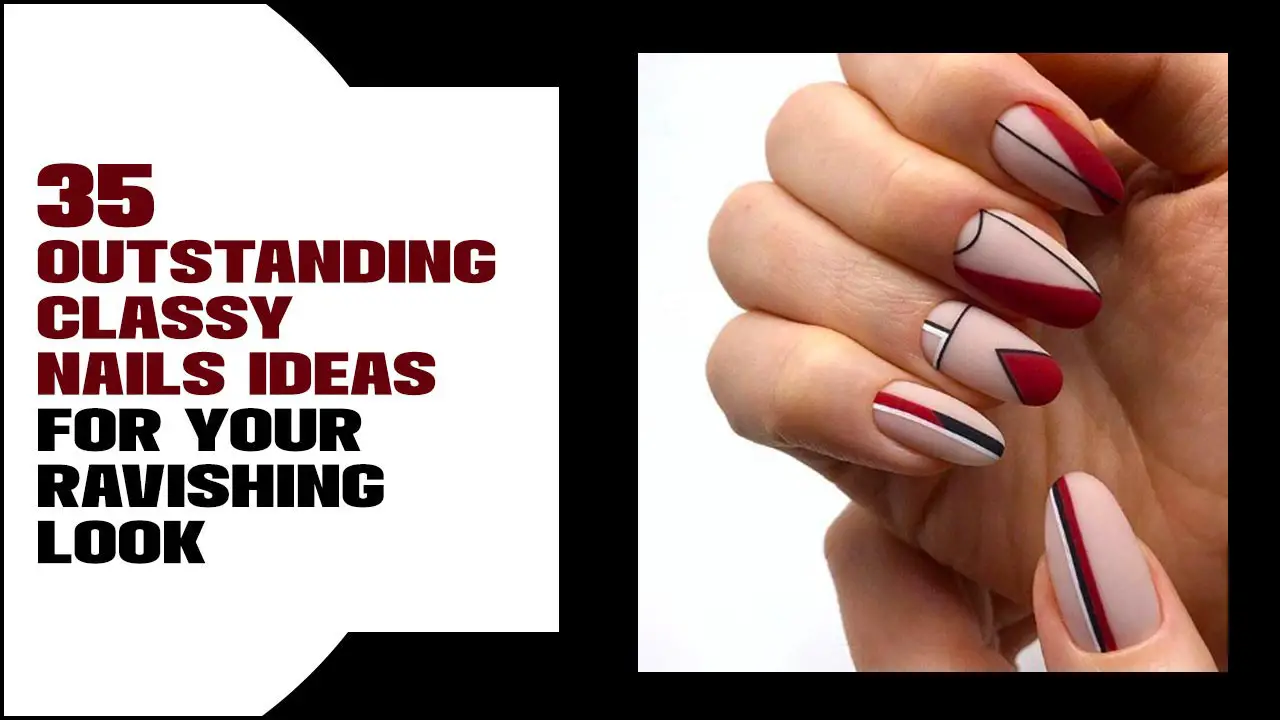
Proven professional nail designs are classic, elegant looks that are always in style and easy for beginners to master. Think chic French tips, sophisticated solid colors, and subtle embellishments. These essential manicures enhance your natural beauty and are perfect for any occasion, boosting your confidence with minimal effort.
Ever feel overwhelmed by endless nail art trends, wondering how to achieve that polished, professional look without hours of practice? You’re not alone! Many of us admire salon-perfect nails but struggle to replicate them at home. It’s easy to feel like achieving beautiful, professional nail designs is out of reach. But guess what? It doesn’t have to be! With the right techniques and a few key looks, you can absolutely create stunning manicures that rival the pros. We’re going to break down some of the most essential and proven professional nail designs that are surprisingly simple to do yourself. Get ready to transform your nails and your confidence!
Your Guide to Essential Professional Nail Designs
Welcome to the world of chic and achievable nails! As your go-to guide at Nailerguy, I’m here to demystify professional nail designs and show you how easy it can be to elevate your look. We’re not talking about complicated 3D sculptures or intricate hand-painted cartoons here. We’re focusing on those timeless, sophisticated styles that make you feel put-together and elegant, no matter the occasion.
These are the looks that grace magazine covers and red carpets for a reason: they are universally flattering, incredibly versatile, and surprisingly simple to master once you know the basics. Whether you’re heading to a job interview, a wedding, or just want to feel fabulous on a Tuesday, these professional nail designs have your back. We’ll cover everything from the perfect solid base to the subtle artistry that makes all the difference.
Why Stick to the Classics?
In a world buzzing with fleeting trends, why focus on what might seem “basic”? The answer is simple: Classics are classics for a reason! Professional nail designs that stand the test of time offer:
- Versatility: They complement any outfit, skin tone, and personal style.
- Timeless Appeal: They never go out of fashion, ensuring you always look polished.
- Achievability: They are easier for beginners to execute flawlessly.
- Confidence Boost: A well-done, classic manicure makes you feel sophisticated and ready for anything.
- Professionalism: They project an image of neatness and attention to detail, perfect for work or formal events.
The Essential Professional Nail Designs You Can Do at Home
Let’s dive into the core looks that define professional nail artistry. These are the foundation upon which many other trends are built, and mastering them will give you a fantastic starting point for your nail journey.
1. The Flawless Solid Color Manicure
This is the ultimate blank canvas and perhaps the most universally flattering nail design. A perfectly applied solid color speaks volumes about attention to detail and sophistication. The key here is preparation and application technique.
Choosing Your Perfect Shade:
- Nudes and Neutrals: For an effortlessly chic and elongating effect, opt for shades close to your skin tone. Think soft beiges, pale pinks, and creamy taupes.
- Classic Reds: A true red is powerful and iconic. Find a shade that complements your undertones – a blue-based red for cooler tones, an orange-based red for warmer tones.
- Deep Berries and Burgundies: These are sophisticated, especially in fall and winter, and offer a rich, elegant look.
- Soft Pastels: Muted blues, greens, and lavenders can be surprisingly chic and add a touch of subtle color.
Application Steps for a Pro Finish:
- Prep Your Nails: Start with clean, dry nails. Push back your cuticles gently with an orange stick or cuticle pusher. If needed, trim any hangnails.
- Shape Your Nails: File your nails into your desired shape (squoval, round, almond). Always file in one direction to prevent snagging. For a professional look, consistent shape across all nails is key.
- Buff for Smoothness: Lightly buff the surface of your nails to create a smooth base and remove any natural shine. This helps polish adhere better.
- Apply a Base Coat: A good base coat prevents staining and provides a smooth surface for color. Let it dry completely.
- Apply Thin Coats of Color: This is crucial! Apply two to three thin coats of your chosen polish. Don’t try to get full opacity in one go. Let each coat dry for a minute or two before applying the next. For each coat, aim for three strokes: one down the center, one on each side.
- Use a Clean-Up Brush: Dip a small angled brush or an old eyeliner brush into nail polish remover. Carefully trace around your nails to clean up any mistakes. This step makes a huge difference!
- Apply a Top Coat: Seal your manicure with a durable top coat. This adds shine, protects your color from chipping, and extends the life of your manicure.
Pro Tip:
For an ultra-smooth finish, consider using a gel polish system. While they require a UV/LED lamp and a bit more initial setup, the longevity and high-shine finish are often worth it for a truly professional look that lasts for weeks. Always follow the manufacturer’s instructions carefully.
2. The Timeless French Manicure
The French manicure is the epitome of understated elegance. Its clean, classic look is perfect for any professional setting and easily transitions to evening wear. The key is a crisp, clean white tip.
Variations to Consider:
- Classic White Tip: The original, with a sheer pink or nude base and a bright white tip.
- Reverse French (or Half-Moon): The color is applied at the base of the nail, leaving the tip bare.
- Colored Tips: Instead of white, use a sophisticated accent color like deep navy, burgundy, or even a metallic tone.
- Micro French: A very thin, delicate white line at the tip for a modern twist.
Achieving Perfect French Tips:
This can be tricky at first, but practice makes perfect! You have a few options:
| Method | Pros | Cons |
|---|---|---|
| Freehand Painting | Requires minimal tools beyond a polish brush; highly adaptable to nail shape. | Steep learning curve for precision; can be shaky for beginners. |
| Using Guides/Stickers | Provides a clean, uniform line; great for achieving crisp edges even for beginners. | Requires careful application to avoid lifting; can sometimes leave residue. |
| French Tipique Tool/Stamper | Designed specifically for French tips, offering consistent curves; can be fast once mastered. | Requires specific tool purchase; may have a slight learning curve for the technique. |
Step-by-Step (Using Guides):
- Prep and Base Coat: Follow steps 1-4 from the solid color manicure. Apply your sheer pink or nude base color and let it dry completely.
- Apply French Tip Guides: Carefully place the guide sticker across the nail, just below where you want your white tip to begin. Gently press down the edges to ensure a good seal.
- Paint the Tip: Apply a thin layer of white polish over the exposed tip of the nail. Aim for one smooth stroke just over the edge of the guide.
- Remove the Guide (Carefully!): While the white polish is still slightly wet (but not runny), slowly and carefully peel off the guide sticker. Peeling while wet prevents the polish from lifting or creating a jagged line.
- Let Dry and Top Coat: Allow the white tips to dry fully, then apply a top coat over the entire nail.
3. The Subtle Accent Nail
Want to add a touch of personality without going full-on art? The accent nail is your best friend. This involves painting one or two nails on each hand with a different color or a simple design, while the rest are a complementary solid color.
Accent Nail Ideas:
- Different Color: Paint your ring fingers black and the rest a deep red.
- Glitter: Apply a glitter polish to your ring fingers over a solid base color.
- Metallic: Use a metallic polish (gold, silver, rose gold) on one nail.
- Simple Geometric: A single line or dot in a contrasting color on one nail.
- Debossed Detail: Using a dotting tool or toothpick to create a simple pattern on one nail.
How to Execute:
- Plan Your Look: Decide which nail(s) will be your accent and what design/color you’ll use.
- Apply Base Colors: Paint all nails with their respective base colors. Ensure the accent nail color is applied neatly.
- Create the Accent: Once the base color is dry, apply your accent. This might be a layer of glitter, a metallic coat, or a simple design.
- Seal and Finish: Apply your top coat to all nails once any accent details are dry.
Pro Tip:
Keep the accent simple and complementary to the main polish color. The goal is a subtle pop, not a distraction. For example, a deep jewel tone with a fine gold glitter accent nail is sophisticated and eye-catching.
4. The Negative Space Manicure
This is a more modern and edgy professional design that plays with areas of bare nail. It looks intricate but can be surprisingly simple to achieve. It’s perfect for those who want something unique yet still refined.
What is Negative Space?
Negative space nail art uses the natural nail or a clear polish as part of the design. Instead of covering the entire nail with polish, you strategically leave parts bare or use tape or decals to create clear sections.
Easy Negative Space Design: Geometric Blocking
- Prep and Base: Start with clean, prepped nails and apply a clear base coat. Let it dry completely.
- Apply Tape: Use nail art tape (thin, self-adhesive strips) to create geometric shapes on your nails. You can make triangles, squares, or even abstract lines. Press the tape down firmly. Alternatively, you can use this technique with a very thin layer of a nude or sheer polish as your “negative space.”
- Paint Over: Apply your chosen color(s) over the taped sections. This could be one solid color or multiple colors.
- Remove Tape: While the polish is still wet, carefully peel off the nail art tape. This is crucial to get clean lines.
- Clean and Top Coat: Use a clean-up brush to perfect any edges, then apply a clear top coat over the entire nail to seal the design.
External Resource:
For more on nail health and basic nail care that underpins all these designs, check out these guidelines from the American Academy of Dermatology.
5. The Power of Sheer and Milky Monochromes
Sheer polishes offer a “your nails but better” finish that is incredibly chic and always appropriate. Milky finishes are slightly more opaque but still translucent, providing a soft, diffused color.
Why They Work Professionally:
- Natural Glow: They enhance your natural nail color and create a healthy-looking sheen.
- Subtle Color: They add a hint of tint without being overpowering.
- Forgiving: Minor imperfections are less noticeable than with opaque polishes.
- Easy Application: Often require fewer coats and mistakes are less apparent.
How to Wear Them:
- Prep: Ensure nails are clean, shaped, and have a good base coat applied.
- Apply 1-3 Coats: Apply thin coats of your sheer or milky polish. You can build up the opacity to your desired level. For a very subtle look, one coat is perfect. For a more colored effect, two or three thin coats will do.
- Seal: Finish with a hydrating, high-shine top coat.
Shade Recommendations:
- Sheer Pinks: For a soft, rosy enhancement.
- Milky Whites: Creates a soft, diffused, almost ethereal look.
- Sheer Peaches/Corals: For a subtle warmth.
- Sheer Berries: A delicate hint of deep color.
Essential Tools for Professional Nail Designs
You don’t need a full salon setup to achieve professional-looking nails. Here are a few key tools that will make a big difference:
| Tool | Purpose | Why It’s a Game-Changer |
|---|---|---|
| Good Quality Nail File | Shaping nails | A fine-grit file prevents damage and creates smooth edges, essential for a professional finish. |
| Cuticle Pusher/Orange Stick | Cuticle care | Gently pushing back cuticles creates a larger nail surface for polish application and a cleaner look. |
| Nail Buffer | Smoothing nail surface | Removes ridges and creates a smooth surface for polish adhesion. |
| Clean-Up Brush (Angled or Liner Brush) | Edging and mistake correction |

