Press on nail design ideas can transform your look in minutes! Discover genius, essential tips and fun, easy-to-achieve designs perfect for beginners and busy bees wanting salon-quality nails at home.
Are you dreaming of gorgeous, insta-worthy nails but feel like you lack the time, skill, or budget for salon visits? You’re not alone! Many of us want stunning manicures that express our personal style, but the reality of appointments and complex techniques can feel overwhelming. But what if I told you that achieving those fabulous nails is simpler than you think? Get ready to unlock a world of creativity right at your fingertips with press-on nails!
This guide is your new best friend for all things press-on nail designs. We’ll dive into everything you need to know, from picking the perfect set to creating unique looks that will turn heads. Forget complicated steps; we’re keeping it fun, easy, and totally achievable. Let’s get started on your journey to effortlessly chic nails!
The Magic of Press On Nails: Why They’re a Game Changer
Press-on nails have come a long way from the basic, often unnatural-looking options of the past. Today’s press-ons are sophisticated, durable, and come in an astonishing array of styles, colors, and finishes. They are the ultimate solution for anyone seeking a quick, beautiful manicure without the commitment or cost of a nail salon.
Why Press Ons Are So Genius:
- Speed: Applying a full set can take as little as 10-20 minutes.
- Affordability: A fraction of the cost of professional manicures.
- Variety: Endless design possibilities, from subtle elegance to bold statements.
- No Drying Time: Once applied, they’re ready to go!
- Damage-Free: When applied and removed correctly, they won’t harm your natural nails.
- Customizable: Most sets can be trimmed, filed, and even painted over.
Essential Tools for Your Press On Nail Journey
While press-on nails are incredibly user-friendly, having a few key essentials on hand will elevate your application and ensure a long-lasting, flawless finish. Think of these as your press-on artistry toolkit!
Must-Have Tools:
- Nail File: For shaping natural nails before application and for customizing your press-ons. A fine-grit file (around 180-240 grit) is ideal for natural nails, while a slightly coarser one can be used for trimming plastic.
- Nail Buffer: To gently buff the surface of your natural nails, creating a smooth canvas for better adhesion.
- Cuticle Pusher (or Orange Stick): To gently push back your cuticles, creating more surface area for the press-on nail to adhere to.
- Alcohol Wipes or Rubbing Alcohol: Crucial for cleaning and dehydrating your natural nails. Any oils or residue will prevent the glue or adhesive tabs from sticking properly. This is a key step for longevity!
- Nail Glue or Adhesive Tabs: The adhesive is vital! Nail glue generally offers a longer hold (up to 2 weeks), while adhesive tabs are easier to apply and remove, often lasting 3-7 days.
- Small Scissors or Nail Clippers: For trimming press-on nails to your desired length before filing.
- Top Coat (Optional but Recommended): A good quality top coat can seal in elements and add extra shine, especially if you plan to add your own embellishments.
Step-by-Step Guide: Applying Press On Nails Like a Pro
Ready to get started? Follow these simple steps for a beautiful, secure manicure that looks like it came straight from a salon!
Preparation is Key:
- Remove Old Polish: If you have any old nail polish on, remove it completely with a nail polish remover.
- Shape Your Natural Nails: Trim your natural nails short and file them into your preferred shape. This prevents your natural nails from peeking out from under the press-ons.
- Gently Push Back Cuticles: Use your cuticle pusher to push back your cuticles. This creates a cleaner look and a better surface for the press-on to adhere to, preventing lifting.
- Buff Your Nails: Lightly buff the surface of your natural nails with a nail buffer. This removes shine and creates a slightly roughened surface, which helps the adhesive grip better. Don’t over-buff; you just need to remove the natural gloss.
- Cleanse and Dehydrate: This is a critical step! Wipe down each nail thoroughly with an alcohol wipe or rubbing alcohol on a cotton pad. Let your nails dry completely. This removes any natural oils or moisture that could interfere with adhesion.
Application Time:
- Dry Fit: Before applying any adhesive, lay out the press-on nails and find the best fit for each of your natural nails. The cuticle edge of the press-on should align with the cuticle edge of your natural nail. If you’re unsure, it’s better to go slightly larger, as you can always file them down.
- Apply Adhesive:
- Using Nail Glue: Apply a thin, even layer of nail glue to the back of the press-on nail OR to your natural nail. Avoid applying too much, as it can flood your cuticles.
- Using Adhesive Tabs: Peel the backing off one side of the adhesive tab and place it onto your natural nail, aligning it with the cuticle. Then, peel off the other side of the backing.
- Press On: Carefully align the press-on nail with your cuticle and press it down firmly onto your natural nail. Hold it in place for 20-30 seconds to ensure a strong bond. Press from the cuticle towards the free edge.
- Repeat: Repeat steps 7 and 8 for all your nails.
- Final Touches: Once all nails are applied, you can gently file the edges to refine the shape or trim them shorter if needed. Apply a thin layer of top coat over the entire nail (press-on and your natural nail edge) for extra shine and durability, if desired.
Genius Press On Nail Design Ideas for Every Occasion
Now for the fun part! The beauty of press-on nails is their inherent design potential. You can buy them pre-designed or customize plain ones to create something truly unique. Let’s explore some essential and genius design ideas!
1. The Effortless Elegance: Minimalist Chic
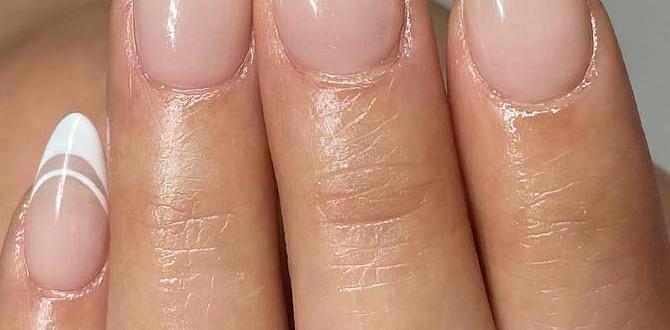
Sometimes, less is more. This design focuses on clean lines, subtle colors, and a sophisticated feel. It’s perfect for everyday wear, the office, or when you want your nails to complement, not dominate, your look.
- Base Color: Opt for neutral shades like sheer pink, milky white, nude, or a soft grey.
- The Twist: Add a single fine line of metallic polish (gold, silver, or rose gold) either horizontally across the middle of the nail, vertically down the center, or tracing the cuticle line.
- Accent Nail: Consider one accent nail with a delicate shimmer or a single tiny rhinestone at the base.
- Shape: Almond, squoval, or short coffin shapes work beautifully.
2. The Bold Statement: Color Blocking & Geometric Fun
Embrace vibrant colors and sharp lines for a modern, artistic vibe. This is where you can really play with contrast and shape!
- Color Combos: Think contrasting colors like navy and mustard yellow, emerald green and black, or pink and orange.
- Designs:
- Half Moon: Paint the bottom half of the nail one color and the top half another, with a sharp line where they meet.
- Geometric Shapes: Use tape or stencils to create stripes, triangles, or checkerboard patterns.
- Color Blocking French: Instead of a white tip, use a bold color for the tip and a contrasting color for the base.
- Shape: Short or medium square/squoval nails let the colors pop.
3. The Glam Goddess: Sparkle & Shine
Who doesn’t love a bit of sparkle? These designs are perfect for parties, holidays, or just when you want to feel extra special.
- Full Glitter: Cover the entire nail in a dazzling glitter polish or use a full-nail glitter press-on.
- Ombre Glitter: A gradient from a solid color at the cuticle to full glitter at the tip.
- Rhinestone Accents: Apply small rhinestones or gems along the cuticle line, at the tip, or create a small cluster on an accent nail. For best adhesion, use nail glue and consider placing a small dot of top coat or builder gel over them.
- Metallic Sheen: Chrome powders or metallic polishes can create futuristic, high-shine looks.
- Shape: Long coffin or stiletto shapes enhance the glamour!
4. The Nature Lover: Florals & Pastels
Bring the beauty of the outdoors to your fingertips with soft, nature-inspired designs. These are often delicate and feminine.
- Watercolor Florals: Achieve a dreamy, artistic look with subtle watercolor floral transfer stickers or hand-painted (if you’re feeling brave!) delicate flowers.
- Leaf Motifs: Simple, elegant pressed leaves or metallic gold/silver leaf accents can be stunning.
- Pastel Palettes: Use soft shades of lavender, mint green, baby blue, pale yellow, and blush pink.
- Matte Finish: A matte top coat can give floral designs a more sophisticated, almost pressed-flower appearance.
- Shape: Oval or almond shapes lend themselves well to delicate designs.
5. The Trendsetter: Abstract & Expressive
Don’t be afraid to get a little messy (in a controlled way!). Abstract designs are all about unique patterns and personal expression.
- Marble Effect: Create a faux marble look using black, white, and a touch of grey or gold polish. Swirl colors together on a palette, then use a thin brush to transfer the pattern to the nail.
- Splatter Paint: Use an old toothbrush or a stiff brush to flick paint onto the nails for a fun, artistic splatter effect.
- Swirls and Lines: Freehand organic swirls or clean, sharp lines in varying colors.
- “Cow Print” or “Tortoise Shell”: These popular animal-inspired prints can be achieved with practice and simple dotting tools or fine brushes.
- Shape: Any shape can work, but medium-length nails offer a good canvas.
Customizing Your Press Ons: Beyond the Box
The real genius of press-on nails lies in their versatility. Don’t feel limited by what’s in the package. Here’s how to make them truly your own:
Trimming and Shaping:
Most press-on nails come in a standard shape that might not be your ideal fit. Don’t hesitate to:
- Trim: Use nail clippers or small scissors to shorten the nails to your desired length.
- File: Use a nail file to refine the shape – round off corners, create a sharper coffin, or perfect an almond tip. Always file in one direction to avoid rough edges.
Painting and Embellishing:
Plain press-on nails are a blank canvas!
- Paint Them: Once applied (or even before, though painting after application can sometimes make them stick better), you can paint over them with your favorite nail polish colors. This is a great way to refresh a plain set or customize the color to match an outfit.
- Add Decals and Stickers: Water-transfer decals and nail stickers are super easy to apply and can add intricate designs without freehand skill. A top coat will seal them in.
- Stamping: If you have nail stamping plates and a stamper, you can add detailed patterns to plain press-ons.
- 3D Art: Small charms, rhinestones, or even small pieces of glitter can be glued onto the nail using strong nail glue for a 3D effect.
Press On Nail Maintenance and Removal
To ensure your press-on nails look their best and your natural nails stay healthy, proper care and removal are essential.
Tips for Longevity:
- Avoid Harsh Chemicals: When doing chores, wear gloves to protect your nails from harsh detergents and prolonged water exposure.
- Be Gentle: Avoid using your nails as tools to pry, scrape, or open things.
- Reapply Top Coat: If you notice the shine fading or if you’ve added embellishments, a fresh layer of top coat can refresh the look and add durability.
Safe Removal Techniques:
The key to protecting your natural nails is patience and the right method.
- Soak: Soak your fingertips in warm, soapy water for about 10-15 minutes. This helps to soften the adhesive.
- Gently Lift: Try to gently lift one corner of the press-on nail. If it doesn’t budge easily, soak longer.
- Use Oil or Acetone: You can also use a cuticle oil or acetone-based nail polish remover to help break down the adhesive. Apply a little under the edge of the press-on nail and let it seep in for a few minutes.
- Pry Carefully: With a cuticle pusher or orange stick, gently work under the edge of the press-on nail. Never force it. If it feels stuck, soak and reapply oil/acetone.
- Clean Up: Once the press-on is removed, gently buff away any residual glue from your natural nails. Apply a nourishing cuticle oil and a good hand cream.
For more detailed guidance on nail health, the Mayo Clinic offers excellent general advice on nail care, which is always a great starting point for maintaining healthy nails beneath any enhancements.
Press On Nails vs. Other Nail Enhancements
Let’s consider how press-ons stack up against other popular nail options.
| Feature | Press On Nails | Gel Polish Manicure | Acrylic Nails |
|---|---|---|---|
| Application Time | 5-20 minutes | 30-60 minutes | 60-90 minutes |
| Durability | 3-14 days (depends on adhesive) | 2-3 weeks | 2-3 weeks (requires fills) |
| Cost (Initial) | $5 – $30+ | $30 – $70+ | $50 – $100+ |
| Skill Level | Beginner | Intermediate (DIY) / Professional (Salon) | Professional (Salon) / Advanced (DIY) |
| Damage Potential | Low (with proper removal) | Low to Moderate (with improper removal) | Moderate to High (with improper removal/filing) |
| Design Variety | Endless (pre-made or customizable) | Moderate to High | High |
As you can see, press-on nails offer an unparalleled combination of speed, affordability, and design flexibility, making them a top choice for many seeking quick, stylish nail solutions.
Troubleshooting Common Press On Nail Issues
Even with the best intentions, you might run into a small hiccup. Here are solutions to common problems:
- Problem: Nails are lifting at the cuticle.
Solution: This usually means there was oil or moisture left on the nail, or the nail wasn’t prepped sufficiently. Ensure you thoroughly clean and dehydrate your natural nails with alcohol before applying. Push back cuticles well. Press down firmly for the full 20-30 seconds. - Problem: The press-on feels too curved or flat for my nail.
Solution: Finding the right size is crucial. Try a different brand or size if possible. Some people find that slightly warming a rigid press-on with their hands can make it a bit more pliable to conform to their nail shape. - Problem: The adhesive isn’t holding well.
Solution: Make sure you’re using enough glue (a thin, even layer) or the correct adhesive tabs. If using glue, let it dry for a few seconds before pressing

