Plumeria flower nail design is a beautiful and achievable way to add a touch of tropical elegance to your nails. Whether you’re a beginner or looking to refine your skills, these designs capture the essence of this iconic bloom, making your manicure a statement of natural artistry and personal style.
Welcome, nail lovers! Are you dreaming of sun-kissed beaches and vibrant tropical flowers right on your fingertips? The plumeria flower, also known as frangipani, is an absolute icon of tropical beauty. It’s no wonder so many of us want to capture its delicate petals and sweet fragrance in a nail design. But sometimes, recreating a beautiful flower on such a small canvas can feel a little daunting, especially if you’re new to nail art. Don’t worry! Today, we’re diving into the wonderful world of plumeria flower nail designs. We’ll break it down step-by-step, making it super easy and fun for everyone. Get ready to unleash your inner artist and create stunning, vacation-ready nails that will turn heads!
Your Guide to Plumeria Flower Nail Art
Plumeria flowers are famous for their stunning beauty and often delightful fragrance. They grow on trees and shrubs native to tropical and subtropical regions. Their five-petal formation is instantly recognizable and brings a sense of paradise wherever it blooms. Translating this natural wonder to your nails can seem intricate, but with a few simple techniques and the right tools, you can create breathtaking plumeria flower nail designs that look professionally done. This guide will walk you through everything you need to know, from choosing your colors to mastering the brush strokes.
Why Plumeria Flower Nail Designs are Essential Beauty
Plumeria isn’t just a pretty flower; it’s a symbol. Depending on the culture, it can represent beauty, love, spring, or new beginnings. Wearing a plumeria flower nail design is like carrying a little piece of that symbolism with you. They are versatile enough for a subtle accent on one or two nails or a full floral explosion across all fingers. Plus, these designs, when done right, offer a timeless elegance that never goes out of style, adding a touch of sophistication to any look.
Getting Started: Essential Tools and Materials
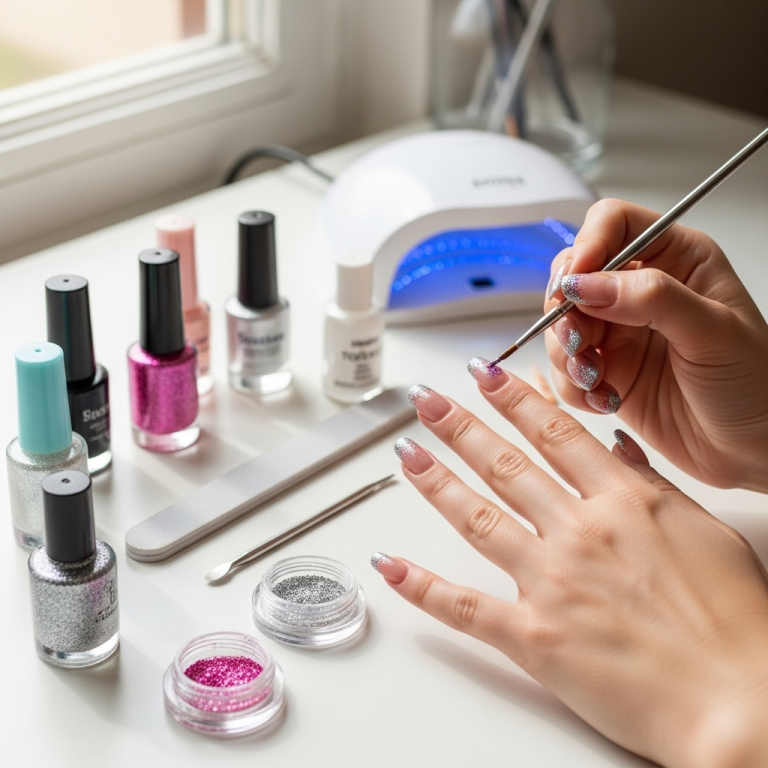
Before we grab our brushes, let’s make sure you have everything you need. Having the right tools makes the artistic process so much smoother and more enjoyable. Think of these as your trusted companions on this creative journey!
Here’s a breakdown of what you’ll want to have on hand:
Base Coat: This is your nail’s best friend! It protects your natural nail from staining and helps your polish adhere better.
Top Coat: This seals your design, adds incredible shine, and makes your manicure last longer.
Nail Polish Colors:
Base Color: Typically a soft white, cream, pale pink, or even a subtle gradient for the petals.
Center Color: Often a soft yellow or peach to mimic the plumeria’s center.
Outline/Detail Color: A darker shade like brown, deep pink, or even black for depth and definition.
Background Colors: Any color you like for accent nails or the base if you’re not using a traditional petal color. Think sky blues, ocean greens, or sandy beiges.
Detail Brushes: This is where the magic happens!
Fine-tip brush: For delicate lines, outlines, and tiny details.
Smaller dotting tool: For creating the center of the flower or small accents.
Nail Art Palette or a clean surface: A piece of foil, a ceramic tile, or a special nail art palette works perfectly for mixing and loading your polish onto the brush.
Nail Polish Remover and Cotton Swabs/Pads: Essential for cleaning up any mistakes and tidying up edges.
Cuticle Oil: To nourish your cuticles after your design is complete.
Understanding Plumeria Anatomy for Nail Art
To paint a plumeria flower, it helps to know what you’re drawing! A typical plumeria has five petals that are rounded or slightly pointed. They often overlap slightly at the base and spread outwards. The center of the flower is usually a different color, often a cluster of stamens that appear as a small, textured or differently colored area. When we translate this to nails, we’re focusing on capturing that five-petal shape and the distinct center.
Step-by-Step: Creating a Classic Plumeria Flower Nail Design
Let’s get painting! This tutorial is designed for beginners, so take your time and enjoy the process.
Step 1: Prepare Your Nails
Start with clean, dry nails. If you’re doing a full manicure, now is the time to apply your base color polish and let it dry completely. Apply one or two thin coats for an even finish.
Step 2: Draw the Petals
This is the most crucial part!
Using your fine-tip brush and your petal color (e.g., white or pale pink), paint a small dot in the center of your nail. This will be the anchor for your flower.
From this center dot, create five petal shapes radiating outwards. Think of drawing five rounded “C” shapes or slightly elongated ovals that meet at the center dot. Don’t worry if they aren’t perfectly symmetrical; natural flowers aren’t! The beauty is in their imperfect charm.
For beginners, you can even paint one large petal shape, then create the others adjacent to it, ensuring they slightly overlap.
Step 3: Add Depth to the Petals
Once your base petals are dry, it’s time to add some dimension.
Using a slightly darker shade of your petal color (or a very diluted darker polish), add subtle shading. You can add a touch of this darker color to the base of each petal where it meets the center, or along one edge of the petal. This makes the flower pop.
Step 4: Create the Flower Center
Now for the heart of the plumeria!
Dip your fine-tip brush or a small dotting tool into your yellow or peach polish.
Gently dab this color into the very center of your flower, where all the petals meet. You can create a small, soft circle or a few tiny dots to represent the stamens. Don’t overdo it; a little goes a long way.
Step 5: Add Outlines and Details
This step is optional but recommended for a more defined look.
Using a very fine-tip brush and a dark brown or black polish, carefully outline each petal. This adds structure and makes the design stand out.
You can also add tiny veining lines on the petals if you feel adventurous, but this is advanced and not necessary for a beautiful result.
Step 6: Accentuate and Finish
Consider adding a little something extra.
A tiny dot of glitter polish in the center can add sparkle.
For accent nails, you could try a simple gradient background or a solid complementary color.
Once your entire plumeria design is completely dry—and I mean completely dry, give it a good 5-10 minutes—apply a generous layer of your clear top coat. This will protect your artwork, give it a glossy finish, and help prevent chipping.
Step 7: Clean Up and Nourish
Use a small brush dipped in nail polish remover to clean up any polish that got on your skin or cuticles.
Apply a touch of cuticle oil to keep your skin hydrated.
Alternative Plumeria Nail Art Techniques
Not everyone loves painting freehand, and that’s okay! There are other fantastic ways to achieve gorgeous plumeria flower nail designs.
Stamping Plumeria Designs
Nail stamping is a fantastic technique for precise and intricate designs. You’ll need:
A stamping plate with plumeria designs.
A stamper and scraper.
Specialized nail stamping polish (these are more pigmented).
How it works:
1. Apply your base color and let it dry.
2. Apply stamping polish to the etched design on your plate.
3. Scrape off the excess polish.
4. Quickly roll the stamper over the design to pick it up.
5. Roll the stamper onto your nail, transferring the design.
6. Seal with a top coat.
This method is perfect for achieving perfectly formed flowers every time!
Plumeria Nail Foils and Decals
For the ultimate in ease, consider using nail foils or decals.
Foils: These come with adhesive and the foil design. You apply the adhesive, let it dry to tacky, press the foil onto it, and peel away the backing. This gives a metallic or holographic effect and is super quick!
Decals/Stickers: These are like tiny nail stickers. You peel them off and place them on your pre-polished and dried nail, then seal with a top coat.
These options are ideal for busy individuals or those who want stunning results with minimal effort.
Color Palettes: Beyond the Basics
While traditional plumeria colors are beautiful, don’t be afraid to experiment! Playing with color can drastically change the mood of your nail design.
Here are some ideas:
Monochromatic Magic: Use different shades of the same color for a sophisticated and modern look. For example, a pale lavender plumeria with deeper lavender outlines.
Sunset Vibes: Blend shades of orange, pink, and yellow for a fiery plumeria design.
Ocean Breeze: Use blues and greens for a cool, calming take on the tropical flower.
Bold and Bright: Think vibrant fuchsia, electric blue, or even neon yellow for a modern, statement-making mani.
Romantic Pastels: Soft blues, mint greens, and baby pinks create a delicate and dreamy feel.
A Table of Plumeria Nail Design Color Combinations:
| Base Petal Color | Center Color | Outline/Detail Color | Accent/Background Suggestion | Mood/Vibe |
| :————— | :———– | :——————- | :————————— | :————— |
| Classic White | Soft Yellow | Light Brown | Sky Blue or Teal | Tropical Paradise |
| Pale Pink | Peach | Deep Pink | Cream or White | Romantic, Gentle |
| Lavender | Light Purple | Dark Purple | Silver Glitter | Elegant, Mystical|
| Coral | Orange | Dark Red | Sandy Beige | Vibrant, Energetic|
| Mint Green | Light Yellow | Forest Green | White | Fresh, Natural |
Maintaining Your Plumeria Flower Nail Design
A beautiful nail design deserves to last! Here are some tips to help your plumeria creations stay looking fresh:
Avoid Harsh Chemicals: When doing chores, wear gloves! Cleaning products can strip away polish and dull the shine.
Be Gentle: Try not to use your nails as tools (like opening cans or scraping things). This is a common way to chip polish, especially around the delicate nail art.
Reapply Top Coat: About every 2-3 days, apply an extra layer of top coat. This refreshes the shine and adds another layer of protection.
Keep Cuticles Hydrated: Regularly applying cuticle oil not only looks professional but also prevents dry, hangnail-prone cuticles that can detract from your beautiful design.
Customizing Your Plumeria Design
The beauty of nail art is its endless customization. Here’s how you can make your plumeria design completely your own:
Nail Shape: Plumeria looks stunning on any nail shape, from classic square to elegant almond. Almond and stiletto shapes can really emphasize the outward bloom of the petals.
Accent Nails: You don’t need to cover every nail in plumerias. Try a single plumeria on your ring finger and a complementary solid color or simple French tip on the others.
Layering: Try placing a tiny plumeria over a French manicure, or use a gradient as your base instead of a solid color.
3D Elements: For the more advanced artist, you can create 3D plumeria flowers using acrylic or gel to add a real pop-off-the-nail effect.
Combine with other elements:
Add tiny water droplets using clear gel or top coat for a dewy look.
Incorporate subtle glitter or chrome powder for a touch of sparkle.
Pair with delicate leaf designs in green for a fuller floral look.
The Science Behind a Long-Lasting Mani
A key factor in making any nail art last, including your beautiful plumeria designs, is proper nail preparation and sealing. The National Center for Biotechnology Information (NCBI) highlights the importance of nail surface preparation for adhesion in various nail applications. Properly buffing your nails lightly before applying a base coat helps create a surface that polish can adhere to more effectively. Furthermore, a quality top coat acts as a protective barrier. It seals in the color and design, prevents chipping by providing a smoother, harder surface, and protects against everyday wear and tear. For long-lasting results, ensure your top coat is applied evenly and extends over the free edge of your nail, often called “capping the edge,” which significantly reduces the risk of tip-wear and chipping.
Frequently Asked Questions About Plumeria Flower Nail Designs
Q1: I’m a complete beginner. Is a plumeria flower nail design too hard for me?
A1: Not at all! While intricate details exist, the basic five-petal plumeria is very beginner-friendly. Start with simple one-layer petals, and you can always add depth later. Dotting tools and stamps are also great aids for beginners.
Q2: What are the best colors for a plumeria flower nail design?
A2: Traditional colors include white, cream, pale pink, yellow, and peach. However, you can use any colors you love! Think sunset oranges, vibrant blues, or even deep purples for a modern twist.
Q3: How do I prevent my nail art from smudging when applying the top coat?
A3: The most important tip is to ensure your polish and art are completely dry before applying the top coat. A quick “drying accelerator spray” or drop can help speed this up if you’re impatient. When applying the top coat, use a generous, smooth stroke and try to do it in one go from cuticle to tip, avoiding going back and forth too much.
Q4: Can I create plumeria nail designs on short nails?
A4: Absolutely! Plumeria flowers scale beautifully. On shorter nails, you might opt for a single, smaller flower as an accent on one or two nails, or perhaps a cluster of tiny blooms. It’s all about proportion.
Q5: How long should I let each layer of polish dry?
A5: For regular nail polish, allow each layer at least 5-10 minutes. For nail art, especially fine lines, let the base color and the painted design dry thoroughly before adding the next layer or top coat. Rushing this is the main cause of smudging.
Q6: What’s the difference between nail polish and nail stamping polish?
A6: Nail stamping polish is specially formulated to be highly pigmented and thicker, allowing it to transfer cleanly from the stamping plate to the stamper and then to your nail. Regular nail polish is often too sheer or dries too quickly for effective stamping.
Q7: Are there any professional plumeria flower nail design techniques for advanced users?
A7: Yes! Advanced techniques include:
One-Stroke Nail Art: Using a special brush loaded with multiple colors to create dimension and shading in a single stroke.
3D Acrylic/Gel: Sculpting plumeria flowers right on the nail for a dimensional, eye-catching effect.
Airbrushing: Creating soft, gradient backgrounds or intricate petal designs with an airbrush machine.
Intricate Detail Work: Using ultra-fine brushes for delicate veining, subtle gradients within petals, and complex layering.
Embracing Your Inner Artist
Creating plumeria flower nail designs isn’t just about following steps; it’s about expressing yourself. Whether you choose a classic, elegant look or a bold, vibrant interpretation, your nails become a canvas for your personal style. Don’t be afraid to experiment with colors, embellishments, and placement. The most beautiful nail art often comes from trying something new.
Conclusion
Plumeria flower nail designs are a fabulous way to infuse your look with a touch of tropical paradise and timeless beauty. From simple, elegant blossoms to vibrant floral arrangements, these designs are accessible to everyone, regardless of skill level. By gathering the right tools, understanding the basic shapes, and practicing the steps, you can easily recreate these stunning floral motifs on your fingertips. Remember to have fun with the process, explore different color palettes, and don’t be afraid to make them uniquely yours. With a little patience and creativity, your plumeria flower nails will be blooming with beauty, bringing a little bit of sunshine to your day! So go ahead, grab your polishes, and let your nails blossom!


