Plum nail designs offer a rich, sophisticated look perfect for any season. From subtle elegance to bold statements, these designs are surprisingly easy to achieve with a few key techniques and the right shades of plum polish, making them ideal for beginners and seasoned nail art lovers alike.
Hello, nail lovers! Lisa Drew here from Nailerguy. Are you looking for a nail color that’s both stylish and versatile? Plum is absolutely fabulous! It’s a shade that looks amazing on everyone and can be dressed up or down. But how do you take a beautiful plum polish and turn it into something extra special? It might seem a little tricky, but I promise, it’s totally doable. We’re going to explore some super fun and stunning plum nail designs that you can easily create at home. Get ready to fall in love with your nails all over again!
Why Plum Nails Are a Perfect Choice
Plum is more than just a color; it’s a whole mood! This deep, luscious shade brings a touch of sophistication and intrigue to your fingertips. It’s a fantastic alternative to traditional reds and berries, offering a unique depth that catches the eye.
Think about it: plum can be moody and mysterious, or it can be vibrant and playful, depending on the shade and the design you choose. It works beautifully in fall and winter, but can also add a rich pop to spring and summer outfits. Plus, it complements a wide range of skin tones, making it a universally flattering color. It’s like the little black dress of nail colors, but with so much more personality!
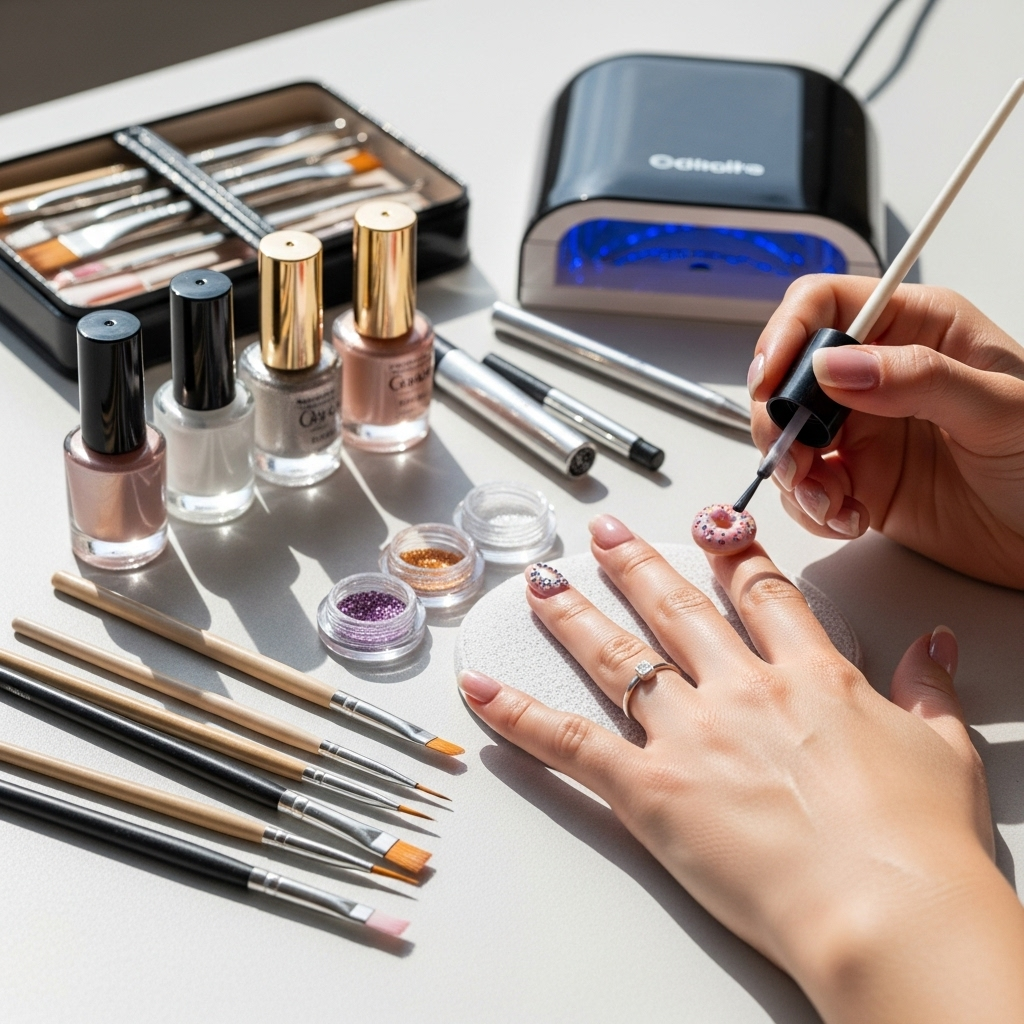
Essential Tools for Stunning Plum Nail Designs
Before we dive into the fun designs, let’s talk about the tools that will make your plum nail art dreams a reality. You don’t need a whole professional salon at home; a few key items will set you up for success.
What You’ll Need:
- Plum Nail Polishes: Of course! Gather a few shades if you can – a deep, dark plum, a brighter, more vibrant plum, and maybe even one with a shimmer or metallic finish.
- Base Coat: Crucial for protecting your nails and helping your color last longer.
- Top Coat: To seal your design, add shine, and prevent chipping.
- Dotting Tools: These are lifesavers for creating perfect dots and small details. They come in various sizes. You can even use the tip of a bobby pin if you don’t have them!
- Thin Nail Art Brush: Perfect for drawing fine lines, swirls, and delicate patterns.
- Striping Tape (Optional): Great for creating clean geometric lines and French tips.
- Toothpicks: Handy for applying small amounts of polish or for detailed work.
- Nail Polish Remover & Cotton Swabs: For cleaning up any mistakes (we all make them!).
- Clean-Up Brush: A small, flat brush that’s been cut or a regular makeup brush works well to tidy up edges.
Having these on hand will give you so many more options when you’re feeling creative. Don’t be intimidated if you don’t have everything; many of these can be substituted!
Beginner-Friendly Plum Nail Designs: Step-by-Step
Let’s get to the good stuff! Here are some easy-to-follow designs that will make your plum nails absolutely pop, perfect for anyone just starting out.
Design 1: The Classic Elegant Plum with a Twist
This design takes a simple plum manicure and adds a touch of understated glamour with a metallic accent.
Steps:
- Start by cleaning your nails thoroughly and applying a thin layer of base coat. Let it dry completely.
- Apply two thin coats of your favorite deep plum nail polish. Allow each coat to dry for a minute or two before applying the next.
- Once the plum polish is dry, carefully apply a strip of gold or silver striping tape across the tip of one or two accent nails (like your ring fingers). Press it down firmly to avoid polish bleeding underneath.
- Using a metallic polish (gold, silver, or rose gold work beautifully), paint over the striping tape and a small section of the nail tip.
- While the metallic polish is still wet, carefully peel off the striping tape. This will leave a clean, sharp metallic line.
- Let the accent nails dry completely, then apply a generous coat of top coat over all your nails to seal everything in and add a glossy finish.
Design 2: Playful Plum Polka Dots
Dots are a timeless nail art element, and they’re incredibly easy to do! This design is fun, cheerful, and adds a sweet touch to your plum base.
Steps:
- Apply your base coat and let it dry.
- Paint your nails with a lighter, brighter plum shade or even a nude or pale pink base color. Let it dry completely.
- Using a dotting tool (or the tip of a toothpick), dip it into a darker plum or contrasting color polish (like black, white, or a metallic shade).
- Gently press the dotting tool onto your nail to create a polka dot. Start with one or two accent nails, or dot all of them!
- Continue creating dots, spacing them evenly or randomly, as you like. Don’t worry if they aren’t perfect; the charm of polka dots is their charming imperfection.
- Once all your dots are in place and dry, apply a top coat to lock them in.
Design 3: Chic Plum Gradient or Ombré
This technique creates a beautiful, seamless blend of colors, giving your nails a sophisticated, multi-dimensional look.
Steps:
- Apply base coat and let it dry.
- Apply a lighter plum shade as your base color on all nails. Let it dry thoroughly.
- On a makeup sponge or a small piece of a clean cosmetic sponge, apply a few stripes of your lighter plum polish and a darker plum polish side-by-side. You can also add a third shade if you like.
- Quickly and gently dab the sponge onto your nail, starting from the tip and moving down, to transfer the color gradient. You might need to reapply the polish to the sponge and dab a couple of times to build up the color intensity.
- For a smoother blend, you can use the sponge to lightly dab over the gradient once more.
- Clean up any polish that got on your skin around the nails using a clean-up brush dipped in nail polish remover.
- Once the gradient is dry, apply a top coat. A thicker, jelly-like top coat can sometimes help smooth out the texture of the sponge marks.
Design 4: Modern Plum French Tips
A twist on the classic French manicure, this design uses plum for a chic and contemporary look.
Steps:
- Apply base coat and let it dry.
- Paint your nails with a sheer nude, pale pink, or even a very light lavender polish. Let it dry completely.
- Using a thin nail art brush or a fine-tipped polish, carefully paint a plum-colored tip onto each nail. You can do a classic curved line, or try a straight “ditch” line for a modern feel.
- Alternatively, use striping tape to create a clean line where you want your plum tip to begin, paint the tip with plum polish, remove the tape while wet, and let dry.
- For an extra touch, you can add a tiny dot of a metallic polish at the base of the nail where the two colors meet.
- Once dry, seal the design with a top coat.
Leveling Up Your Plum Nail Game: Intermediate Designs
Once you’re comfortable with the basics, you might want to try designs that involve a bit more detail. These are still very achievable and add a stunning, intricate flair.
Design 5: Plum and Gold Marbled Nails
Marble is a sophisticated pattern that looks complex but is surprisingly manageable with a few tricks.
Steps:
- Apply base coat and let it dry.
- Paint all nails with a solid plum polish (a medium to deep shade works best). Let it dry completely.
- On a piece of plastic wrap or foil, add a few drops of your plum polish and some gold polish.
- Swirl the colors together gently with a toothpick, creating a marbled effect. Don’t over-mix!
- While the polishes are still wet on the plastic/foil, press your nail onto the marbling. You’ll transfer the pattern onto your nail. You may need to reposition and press again to cover the nail surface.
- Clean up any excess polish around your nail with your clean-up brush and remover.
- Repeat for any other nails you want to marble.
- Once dry, apply a top coat to seal the unique design.
Design 6: Plum Floral Accents
Blooming flowers add a touch of feminine charm. This design focuses on accent nails for a balanced look.
Steps:
- Apply base coat and let it dry.
- Paint your nails with a nude or light lavender base. Let it dry.
- On your accent nails, use a thin nail art brush and a lighter plum shade to paint a few simple petal shapes, creating a flower. You can also use a white polish to draw tiny dots as the center of the flower.
- Alternatively, use a dotting tool to create small dots of plum polish and connect them with thin lines using a black or dark plum polish to form flower outlines.
- You can also add small green leaves using a green polish and a thin brush.
- Once the floral details are dry, carefully apply top coat.
Design 7: Geometric Plum Lines
Clean lines and shapes create a modern, edgy look that’s easy to achieve with striping tape.
Steps:
- Apply base coat and let it dry.
- Apply a solid plum color to all nails. Let it dry completely.
- Once dry, apply a contrasting color (like white, black, gold, or silver) to about half of each nail, leaving the other half bare or in the plum color. You can use striping tape to create a clean dividing line.
- Experiment with different lines: diagonal, horizontal, or even creating small triangular sections.
- Let the second color dry completely before carefully peeling off the striping tape.
- If you want to incorporate more than two colors, ensure each layer is fully dry before applying tape and the next color.
- Finish with a top coat.
Tables for Quick Reference
To help you choose the best plum shades and design pairings, here are a couple of helpful tables.
Plum Nail Polish Shade Guide
Understanding the different undertones and depths of plum can help you select the perfect shade for your desired look and skin tone.
| Plum Shade Family | Characteristics | Best For | Example Designs |
|---|---|---|---|
| Deep & Dark Plum | Rich, almost black undertones. Mysterious and sophisticated. | Evening wear, fall/winter collections. Bold statement. | Monochromatic sleek look, geometric lines, dark French tips. |
| True Plum | Balanced, classic purple with red undertones. Versatile and elegant. | All seasons, most skin tones. Everyday chic. | Polka dots, subtle glitter accents, simple elegant designs. |
| Berry Plum | Warmer, with more red and pink undertones. Fruity and vibrant. | Spring/summer, warmer skin tones. Playful and sweet. | Floral accents, gradient designs, lighter polka dots. |
| Mauve Plum | Softer, more muted, with grey or dusty undertones. Understated and modern. | Daytime wear, minimalist style. Subtle sophistication. | Clean French tips, simple line art, subtle shimmer accents. |
| Metallic/Shimmer Plum | High shine, often with holographic or glitter flecks. Eye-catching and glamorous. | Special occasions, parties. Glamorous appeal. | Accent nails with solid colors, gradient effects, abstract swirls. |
Plum Nail Design Pairing Ideas
Not sure which design goes best with which plum shade, or what accents to use? This pairing guide is for you!
| Plum Base Shade | Suggested Accent Colors | Recommended Design Styles | Occasion/Vibe |
|---|---|---|---|
| Deep & Dark Plum | Gold, Silver, Black, White | Geometric lines, bold French tips, solid matte finish, metallic accents. | Sophisticated, glamorous, elegant. |
| True Plum | White, Gold, Rose Gold, Cream, Nude | Polka dots, marble, classic French tips, simple floral accents, glitter ombré. | Versatile, chic, playful, romantic. |
| Berry Plum | Pink, Coral, Mint Green, Gold | Floral designs, gradient, playful dots, ombre with lighter shades. | Fun, fruity, summery, cute. |
| Mauve Plum | Silver, White, Nude, Deep Burgundy | Minimalist lines, subtle shimmer, clean French tips, negative space designs. | Understated, modern, chic, professional. |
| Metallic Plum | Black, White, Silver, Deep Plum | Solid accent nails, abstract swirls, minimalist lines, glitter accents. | Bold, statement, party-ready. |
Tips for Long-Lasting Plum Nail Designs
Achieving a gorgeous plum design is one thing, but keeping it looking fresh is another! Here are some pro tips to help your manicures last longer.
Prep is Key
- Cleanliness: Always start with clean nails. Remove any old polish, wash your hands, and ensure they are completely dry. Oils and residue can prevent polish from adhering properly.
- Buffing: Gently buff the surface of your nails to create a smooth canvas. However, don’t over-buff, as this can weaken your nails.
- Base Coat: Never skip the base coat! It creates a barrier, preventing staining from dark polishes like plum, and provides a better surface for polish adhesion.
Application Matters
- Thin Coats: Apply your polish in thin, even coats. Thick coats take longer to dry and are more prone to chipping and smudging.
- Cap the Edge: When applying each coat of polish (base, color, and top coat), run your brush along the edge (the free edge) of your nail. This seals the polish and helps prevent chipping.
- Drying Time: Be patient! Allow each coat to dry sufficiently before applying the next. Rushing the process is a common cause of smudges and dents.
Top Coat to the Rescue
- Quality Top Coat: Invest in a good quality top coat. A quick-dry top coat can save time, but a durable, glossy one makes a huge difference in longevity.
- Reapply: Consider reapplying top coat every 2-3 days, especially to the tips of your nails, to add an