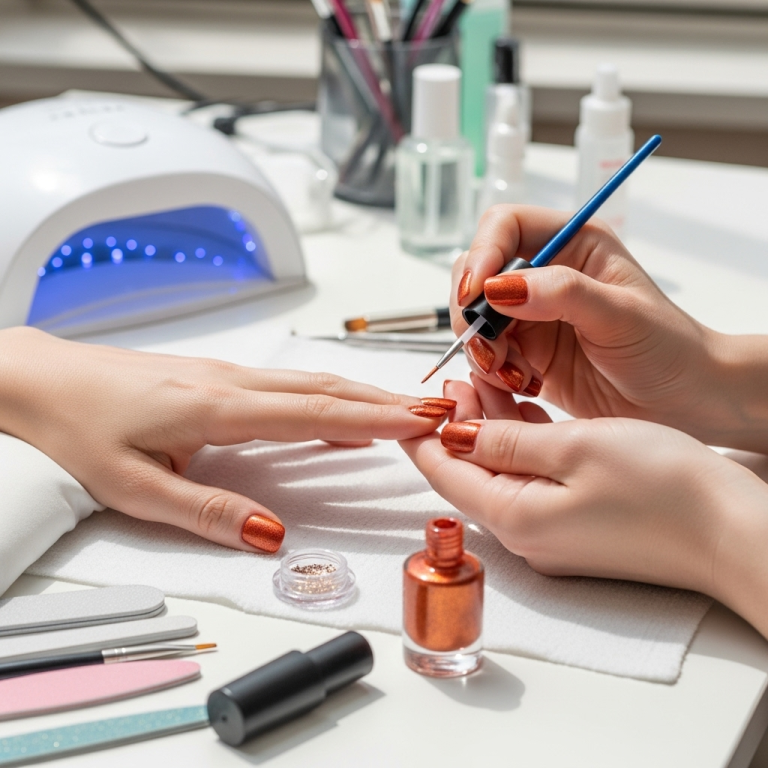
Plaid nail designs offer a chic and timeless way to elevate your manicure, perfect for adding a touch of sophisticated style to any look. This guide breaks down the essential, beginner-friendly approaches to achieving these classic patterns with ease.
Feeling a little uninspired by your nails? Want to add a pop of something special without a complicated design? You’re not alone! Many of us admire those stylish, patterned nails but feel they’re too complex to do ourselves. The good news is, achieving beautiful plaid nail designs is totally achievable, even for beginners! We’re going to walk through simple steps and prove that you can rock this classic look with confidence. Get ready to discover your new favorite manicure!
Frequently Asked Questions About Plaid Nail Designs
What are the easiest plaid nail designs for beginners?
The simplest designs often involve straight lines and basic intersections. Think of a classic tartan where you create intersecting lines of different colors. Using nail tape is also a fantastic beginner-friendly method as it helps create clean, crisp lines.
What colors work best for plaid nails?
Classic plaid often uses combinations like red and black, green and blue, or various shades of brown and beige for a tartan or lumberjack feel. However, you can experiment with pastels for a softer look, or jewel tones for a richer vibe. The key is choosing colors that complement each other and have good contrast.
Do I need special tools for plaid nail designs?
Not necessarily! You can achieve plaid designs with just a few essential items: nail polish in your chosen colors, a fine-tipped nail art brush or dotting tool, and a good top coat. Optional extras like nail tape or stencils can make it even easier.
How do I prevent nail polish from bleeding under tape?
Ensure your base coat is completely dry before applying tape. Also, apply a very thin layer of your top coat over the dried base color before applying the tape; let that thin top coat dry completely too. This creates a slight barrier. When removing the tape, do so while the polish is still slightly wet to get cleaner lines.
How can I make my plaid nail art last longer?
The secret to longevity is a flawless application and a great top coat. Always start with clean, dry nails. Apply a good base coat to prevent staining and help polish adhere. After your design is dry, apply two thin layers of a high-quality, quick-drying top coat. This seals the design and protects it from chipping.
Can I do plaid designs on short nails?
Absolutely! Plaid designs can look super cute on short nails. You might need to simplify the pattern slightly, focusing on fewer lines or a smaller scale. A simple two-color intersecting line design works wonderfully on a shorter nail bed.
Where can I find inspiration for plaid nail designs?
Pinterest and Instagram are treasure troves of inspiration! Search for hashtags like #plaidnails, #tartanails, #nailart, or #diynails. You’ll find endless variations, color palettes, and techniques to get your creative juices flowing.
Plaid Nail Designs: Your Essential Guide to Timeless Style
Dreaming of that effortlessly chic, cozy vibe that only plaid nails can deliver? You’ve seen them on Pinterest, maybe on your favorite fashion blogger, and thought, “That looks amazing, but I could never do that!” Well, think again! Plaid nail designs are not just for the pros; they’re surprisingly achievable for anyone wanting to add a touch of classic style to their fingertips. We’re here to show you how simple it can be to recreate these iconic looks right at home, proving that beautiful nail art is well within your reach.
Why We Love Plaid Nails
Plaid patterns, with their intersecting lines and checks, have been a fashion staple for decades. They evoke feelings of comfort, warmth, and a sophisticated, grounded style. Think cozy sweaters, autumn walks, and classic flannel. This timeless appeal translates beautifully to manicures, making plaid nail designs a perfect choice for:
- Year-round versatility: While often associated with fall, plaid can be adapted for any season with different color palettes.
- Effortless sophistication: Plaid adds an instant touch of polished style to any outfit.
- Endless customization: From muted tones to bold brights, the color combinations are limitless.
- Beginner-friendly options: Many plaid designs rely on simple lines, perfect for practicing nail art skills.
Proven, Essential Plaid Nail Looks for Every Skill Level
Ready to dive in? We’ve curated some of the most popular and approachable plaid nail designs that look impressive but are surprisingly easy to execute. Let’s break them down!
1. The Classic Tartan
This is the quintessential plaid design, instantly recognizable and incredibly versatile. It’s all about creating intersecting stripes of varying widths and colors. While it might look complex, we’ll simplify it.
How to Achieve the Classic Tartan Look:
You’ll Need:
- Base coat
- Base polish color (e.g., white, cream, or a neutral tone)
- Two or three accent polish colors (e.g., deep red, navy blue, forest green, black)
- A fine-tipped nail art brush or a striping tool
- Top coat
Step-by-Step:
- Prep Your Nails: Start with clean, dry nails. File them to your desired shape and push back your cuticles. Apply a base coat to protect your nails.
- Apply Base Color: Polish your nails with your chosen base color (like white or a soft beige). Let it dry completely. A smooth, even base is key!
- Create the First Set of Lines: Using your thinnest nail art brush, carefully paint a few vertical stripes across your nail. Vary the thickness and spacing of these lines. For a traditional look, think about your accent colors: maybe a bolder red line next to thinner navy and black lines. Let these lines dry partially.
- Add the Second Set of Lines: Once the vertical lines are mostly dry (but not fully cured, so they can meld slightly), paint horizontal lines that intersect the vertical ones. Again, vary widths and colors. Try to have some intersections where different colors meet, and others where the same color overlaps. This overlap is what creates the depth in plaid.
- Refine and Correct: Use a clean-up brush dipped in nail polish remover to tidy up any stray lines and sharpen the edges.
- Seal the Deal: Once your design is completely dry, apply a generous layer of top coat to seal everything in and add shine.
Pro Tips for Classic Tartan:
- Don’t aim for perfection: Slight imperfections can add to the charm and handmade feel.
- Color Palette Inspiration: Look up traditional tartan patterns online from the Scottish Tartans Authority for authentic color combinations and inspiration.
- Thin is In: Use extremely thin lines for the most delicate and authentic plaid look.
2. The Simplified Check (Gingham/Madras Style)
This design is a fantastic entry point for plaid. It focuses on creating a grid of equal-width lines, offering a cleaner, more graphic look. It’s less about overlapping colors and more about creating distinct boxes.
How to Achieve the Simplified Check Look:
You’ll Need:
- Base coat
- Base polish color (e.g., pastel pink, baby blue, mint green)
- One accent polish color (often white or black for contrast)
- A fine-tipped nail art brush OR nail tape
- Top coat
Step-by-Step (Using Nail Tape):
- Prep and Base: Apply base coat and your chosen base polish color. Let it dry thoroughly.
- Apply Tape: Carefully place strips of nail tape horizontally across your nail, leaving evenly spaced gaps. Press the edges down firmly to prevent bleeding.
- Paint Over: Paint your accent color into the gaps between the tape strips. Apply one or two thin coats.
- Remove Tape: While the accent color is still slightly wet, carefully peel off the nail tape using tweezers or your fingers. This provides a super clean line. Let the nails dry completely.
- Add Vertical Lines: Once dry, apply vertical strips of tape, making sure they align perfectly with the horizontal lines and create a grid. Repeat step 3 and 4.
- Seal: Apply a final top coat for a glossy finish.
Step-by-Step (Using a Brush):
- Prep and Base: Apply base coat and your chosen base polish color. Let it dry thoroughly.
- Paint Vertical Lines: Using your nail art brush and accent color, paint an even number of equally spaced vertical lines.
- Paint Horizontal Lines: Once the vertical lines are dry, carefully paint equally spaced horizontal lines to create a grid.
- Refine: Clean up any wobbly lines with a clean-up brush.
- Seal: Apply a top coat.
Pro Tips for Simplified Check:
- Even Spacing is Key: For this look, measuring your tape strips or eye-balling equal distances is crucial.
- Color Combinations: Pastels with white or black create a sweet, summery gingham. Brighter colors can give a fun, festival vibe.
- Consider a Matte Top Coat: A matte finish can give a modern, sophisticated twist to this design.
3. Asymmetrical & Abstract Plaid
This is where you can really let your creativity flow! Asymmetrical plaid plays with scale, placement, and unexpected color combinations. It’s less about straight, perfect grids and more about artistic expression.
How to Achieve the Asymmetrical Plaid Look:
You’ll Need:
- Base coat
- A few complementary polish colors (mix and match!)
- Fine-tipped nail art brushes
- Dotting tools (optional)
- Top coat
Step-by-Step:
- Base Color Fun: Apply a single color or a gradient as your base. Let it dry.
- Freeform Lines: Forget perfect grids. Use your brush to paint diagonal lines, varying thicknesses, across a portion of the nail. You might only cover half the nail, or focus on just one corner.
- Layer Colors: Add more lines with different colors, intersecting your first lines in odd places. Don’t be afraid to layer a thinner line over a thicker one, or have lines stop mid-nail.
- Add Accents: Use a dotting tool to add small dots where lines intersect, or sprinkle them randomly to break up the lines.
- Embrace Imperfection: This style thrives on a slightly “messy” yet intentional look. The goal is artistic, not exact.
- Seal: Finish with a top coat.
Pro Tips for Asymmetrical Plaid:
- Mix Textures: Try combining a matte polish with a glossy line, or even a glitter accent.
- Color Blocking: Use larger blocks of color interspersed with thin plaid lines for a bold statement.
- Look at Fabric Swatches: Get inspiration from modern abstract art or even interesting fabric patterns.
4. Color and Finish Variations
Don’t limit yourself to traditional red and green! The beauty of plaid nail designs lies in their adaptability. Experimenting with different color palettes and finishes can completely transform the look.
Ideas to Play With:
- Pastel Plaid: Soft blues, pinks, lavenders, and mints with white or cream for a sweet, spring-ready look.
- Jewel-Toned Plaid: Deep emerald green, sapphire blue, amethyst purple, and ruby red for a rich, luxurious feel.
- Monochromatic Plaid: Different shades of the same color (e.g., light grey, medium grey, dark grey, black) create a subtle yet striking effect.
- Metallic Plaid: Incorporate metallic polishes (gold, silver, rose gold) as your accent lines for a glamorous twist.
- Matte Finish: Apply a matte top coat over a glossy plaid design for a sophisticated, velvety texture.
- Glitter Accents: Add a touch of sparkle by using glitter polish for some of your lines, or by adding glitter dots at intersections.
Essential Tools and Techniques for Perfect Plaid
While you can create plaid with just a basic polish and brush, having the right tools can make the process significantly smoother and yield more professional results. Here’s a breakdown of what’s helpful:
| Tool | What it’s for | Beginner-Friendly Rating |
|---|---|---|
| Fine-tipped Nail Art Brush | Painting thin, precise lines for stripes and details. Essential for detailed plaid. | ★★★ (3/5 – requires a steady hand) |
| Striping Tape / Nail Tape | Creating perfectly straight, clean lines by masking off areas. Excellent for beginners. | ★★★★★ (5/5 – highly recommended for crisp lines) |
| Dotting Tools | Adding small dots, often used at intersections or as decorative accents. Great for breaking up lines. | ★★★★ (4/5 – easy to use) |
| Clean-up Brush | A small, flat brush (often synthetic bristles) dipped in nail polish remover or alcohol to clean up messy edges around the cuticle and sidewalls. Crucial for a polished look. | ★★★★ (4/5 – takes a little practice but worth it) |
| Gel Polish & UV Lamp (Optional) | Gel polish offers immense durability and a high-gloss finish. The “curing” under a UV lamp means polish hardens instantly, making tape removal cleaner and reducing smudge risks. | ★★ (2/5 – higher learning curve, requires extra equipment) |
| Stencils | Pre-cut adhesive stencils in plaid patterns can be a shortcut for achieving defined designs. | ★★★★ (4/5 – good for quick, consistent results) |
Key Techniques to Master:
- The Thin Line: Whether using a brush or tape, practice making consistent, thin lines. For brushes, load the tip with polish and use a light, sweeping motion.
- Drying Time: Patience is a virtue! Always allow each layer of polish to dry sufficiently before adding the next, especially tape application and removal. Rushing this is the number one cause of smudges and bleeding.
- Clean Cuticles: A clean cuticle line makes any nail art look infinitely more professional. Keep that clean-up brush handy!
Nail Care Tips for Your Plaid Masterpiece
To ensure your gorgeous plaid nails look their best for as long as possible, proper nail care is essential. It’s not just about the art; it’s about the canvas!
- Start with

