Stunning Essential Pinterest-Inspired Nail Design Collections for Beginners: Easy Looks to Elevate Your Style!
Dreaming of gorgeous nails like the ones you see on Pinterest? It’s totally doable! This guide breaks down how to create stunning, on-trend nail designs without the fuss. We’ll show you how to collect inspiration, gather your basic tools, and master a few essential looks that are perfect for any occasion. Get ready to transform your fingertips into tiny works of art!
Discovering Your Pinterest-Inspired Nail Design Style
Pinterest is an absolute treasure trove for nail art lovers! It’s a visual playground where trends are born and creativity knows no bounds. But with so many amazing designs, how do you even start? The key is to find what you love and what fits your lifestyle. Don’t feel pressured to replicate every intricate design you see; instead, let them inspire you to create something uniquely yours.
Finding Your Nail Art Muse
Your journey begins with exploration. Spend some time browsing Pinterest and creating dedicated boards for nail inspiration. Look for patterns, color palettes, and styles that catch your eye. Do you lean towards minimalist elegance, bold and bright statements, or delicate floral patterns? Pinning a variety of designs will help you spot recurring themes and understand your personal aesthetic.
- Color Palettes: Notice what color combinations appeal to you. Are you drawn to pastels, neons, nudes, or deep jewel tones?
- Patterns & Textures: Do you love geometric shapes, abstract swirls, glitter accents, or matte finishes?
- Occasion-Specific: Think about nails for everyday wear, special events, or even seasonal themes.
- Complexity: Be honest about your skill level. Start with simpler designs and build from there.
Curating Your Essential Nail Design Mood Board
Once you’ve pinned a good number of images, it’s time to refine. Look at your board and identify the designs that truly resonate with you. Are there certain shapes, applications, or color schemes that appear repeatedly? This is your core collection! Don’t be afraid to save designs that are slightly more advanced, too – they can be great goals for the future!
A helpful tip is to group your pins by style or complexity. You might have a board section for “Minimalist Mondays” or “Glamorous Getaways.” This makes it easier to choose a design when you’re ready to start a manicure.
Gathering Your Beginner-Friendly Nail Art Toolkit
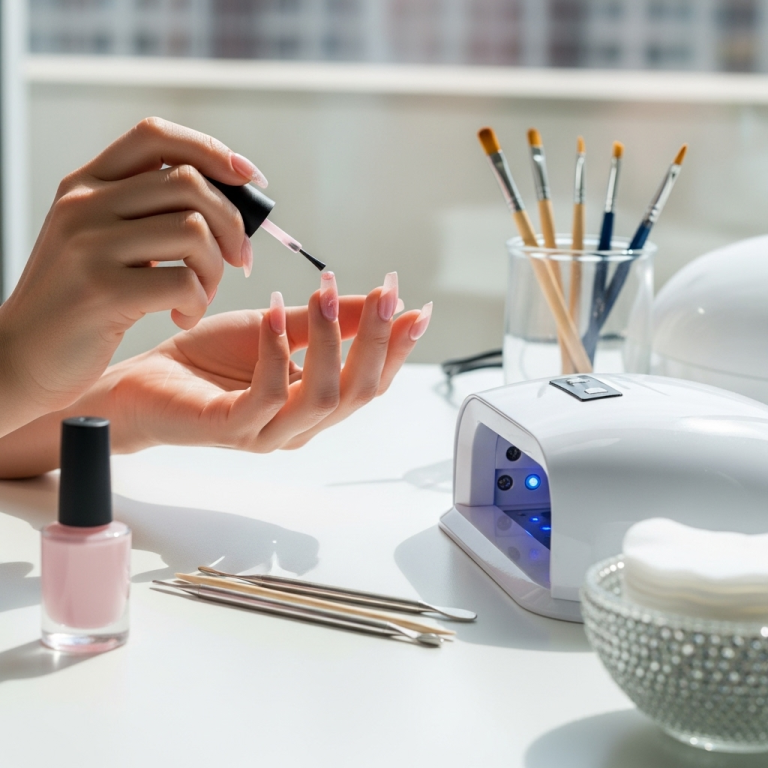
You don’t need a professional salon’s worth of tools to create amazing Pinterest-inspired nails. A few essential items will set you up for success. Starting with the basics ensures you can tackle many popular designs without feeling overwhelmed by specialized equipment.
Must-Have Essentials for DIY Nail Art
Here’s what I recommend for your starter kit. Think quality over quantity!
- Nail Polish Remover: To start with a clean canvas and fix any mistakes. Acetone-free options are gentler on nails and cuticles.
- Cotton Pads or Balls: For applying remover and cleaning up edges.
- Nail File: To shape your nails consistently. A fine-grit file is best for natural nails.
- Nail Buffer: To smooth out ridges and add a natural shine to your nails.
- Base Coat: Crucial for protecting your natural nail from staining and helping polish adhere better. I love a good ridge-filling base coat for a smooth surface.
- Top Coat: This seals your design, adds shine, and prevents chipping. A quick-dry top coat is a lifesaver!
- Assorted Nail Polishes: Start with your favorite colors and a good neutral.
- Dotting Tools: These come in various tip sizes and are perfect for creating dots, small flowers, and other detailed elements.
- Fine-Tipped Nail Art Brush: For drawing lines, swirls, and other fine details. You can often find these in art supply stores or specialized beauty shops.
- Orange Stick or Cuticle Pusher: For cleaning up polish around the cuticles.
Optional, But Helpful Additions
As you get more comfortable, consider these additions:
- Stencils: For sharp, clean geometric patterns or designs.
- Stamping Plates & Stamper: A fantastic way to achieve intricate designs with ease.
- Gems, Glitter, or Foil: For adding extra sparkle and texture.
- Gel Polish & UV/LED Lamp: For a longer-lasting, salon-quality finish.
Always ensure your tools are clean before and after use. A quick wipe-down with nail polish remover will keep them in top shape.
Pinterest-Inspired Nail Design Collections: Essential Looks for Beginners
Now for the fun part! Let’s dive into some stunning essential nail looks inspired by Pinterest that are totally achievable for beginners. These are versatile, stylish, and perfect for building your confidence in nail art.
1. The Classic French Manicure (with a Twist!)
The French manicure is timeless, but Pinterest shows us endless ways to remix it! For beginners, mastering the basic white tip is a great starting point.
How to Achieve the Classic French Tip:
- Start with a clean, prepped nail. Apply a thin layer of base coat and let it dry completely.
- Paint your nails with a sheer nude, pink, or clear polish. This is your nail bed. Apply two coats if needed for opacity. Let it dry.
- This is where the “twist” comes in!
- Classic: Use a steady hand and a fine-tipped brush (or a specialized French tip guide) to paint a crisp white curved line along the tip of your nail.
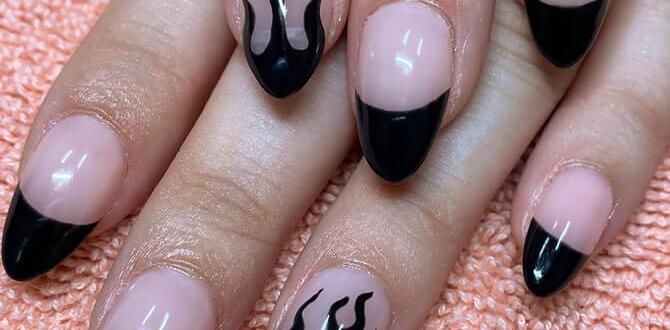
- Modern Twist: Instead of white, use a contrasting color for the tip (e.g., black, metallic gold, pastel blue).
- Reverse French: Apply the colored tip to the base of your nail, near the cuticle.
- For clean lines, you can use nail tape as a guide. Apply the tape across the nail where you want the tip to start, paint the tip, and carefully remove the tape before the polish dries completely.
- Allow the tip polish to dry thoroughly.
- Apply a generous layer of top coat to seal everything in and add shine.
Pinterest Inspiration: Look for “colored French tips,” “reverse French manicure,” or “micro French tips” for variations.
2. The Chic Polka Dot Manicure
Polka dots are playful and incredibly easy to create using dotting tools. They add a pop of fun to any look.
How to Create Perfect Polka Dots:
- Apply your base coat and let it dry.
- Paint your nails with your desired base color. Two thin coats are usually best. Let them dry completely. Rushing this step is a common mistake that leads to smudging!
- Once the base color is dry, choose a contrasting color for your dots.
- Dip the tip of your dotting tool (choose a size for the dots you want) into the polish. You don’t need a lot of polish on the tool – just a small bead.
- Gently press the dotting tool onto your nail to create a dot.
- Continue adding dots, re-dipping your tool as needed. Try to keep the spacing and size consistent for a polished look.
- You can create rows of dots, scatter them randomly, or make a French tip-style dotted line.
- Once all your dots are in place and dry, apply a top coat to seal your design.
Pinterest Inspiration: Search for “polka dot nail art,” “micro dot nails,” or “gradient polka dots.”
3. The Elegant Gradient (Ombre) Nails
Gradient or ombre nails create a beautiful blended effect, moving from one color to another. It looks complex but is surprisingly simple to achieve with a makeup sponge!
How to Master the Gradient Effect:
- Prep your nails with base coat.
- Choose two or three colors that blend well together. Apply a thin base coat of the lightest color to your nail.
- On a piece of foil or a disposable surface, paint thick stripes of your chosen colors next to each other. For a two-color gradient, paint Stripe A next to Stripe B.
- Gently dab a makeup sponge (a regular cosmetic sponge works great!) onto the stripes, picking up the polish. You want to “load” the sponge with color right where the stripes meet.
- Now, lightly dab the sponge onto your nail where you want the gradient to appear. You might need to dab multiple times to build up the color and blend.
- Immediately after applying the gradient to your nail, while the polish is still wet, apply a thin coat of the lightest color over the whole nail to blend the edges slightly.
- The beauty of ombre is that it doesn’t have to be perfect! Embrace the blend.
- Clean up any excess polish on your skin using an orange stick or a small brush dipped in nail polish remover.
- Once dry, finish with a top coat.
Pinterest Inspiration: Look for “two-color ombre nails,” “rainbow gradient nails,” or “sunset nails” for ideas.
4. The Minimalist Line Art Nails
Simple lines can make a huge impact. This trend is all about clean, delicate details that feel modern and chic.
Creating Delicate Line Art:
- Apply your base coat and let it dry.
- Paint your nails with a solid color. Nudes, whites, blacks, or even sheer polishes work wonderfully as a base.
- Once the base polish is completely dry, take your fine-tipped nail art brush.
- Dip the brush into a contrasting polish. You want just a small amount of polish for control.
- On a clean workspace (like a piece of paper), practice drawing a few lines to get the feel of the brush. Clean off excess polish if needed.
- Carefully draw simple lines onto your nails. This could be a single vertical line down the center, a few horizontal lines, a triangle, or abstract squiggles.
- Less is often more with line art! One or two well-placed lines can be very effective.
- Let the line art dry completely.
- Apply a top coat to seal your beautiful minimalist design.
Pinterest Inspiration: Search for “minimalist nail art,” “thin line nails,” or “abstract nail designs.”
Here’s a quick comparison of how these essential styles can be adapted:
| Design Style | Key Tool | Beginner Tip for Success | Pinterest Search Term |
|---|---|---|---|
| French Tip (Classic/Colored) | Fine-tipped brush or Nail Tape | Use tape for straight lines; start with a neutral base. | “Colored French tips” |
| Polka Dots | Dotting Tool | Ensure base coat is fully dry to prevent smudging. | “Easy polka dot nails” |
| Gradient (Ombre) | Makeup Sponge | Dab gently; clean up edges immediately with remover. | “Two-color ombre nails” |
| Minimalist Line Art | Fine-tipped Nail Art Brush | Practice on paper first; use a steady hand. | “Simple line nail art” |
Nail Care for a Stunning Canvas
Beautiful nail designs start with healthy nails! Taking good care of your nails ensures any polish you apply looks its best and lasts longer.
Daily and Weekly Nail Care Routine
Incorporating a few simple habits can make a big difference:
- Moisturize: Apply hand lotion and cuticle oil daily. This keeps your skin soft and prevents hangnails, making it easier to create clean nail art. A good cuticle oil can be found from reputable brands like CuticleOil.com, which offers insights into nail health.
- Protect: Wear gloves when doing chores involving water or harsh chemicals to protect your nails and polish from damage.
- Soften Cuticles: Gently push back your cuticles with an orange stick after showering or soaking to keep the nail plate clean and enhance the appearance of your manicure.
- Hydrate from Within: Drinking plenty of water is essential for overall health, including nail strength.
- Healthy Diet: Ensure your diet includes biotin, protein, and vitamins, which are vital for nail growth and strength. For more on nutrition and nail health, the U.S. National Library of Medicine provides valuable scientific research.
Troubleshooting Common Nail Issues
Even with care, issues can arise. Here’s how to handle them:
- Brittle Nails: This can be due to dryness or nutrient deficiencies. Increase moisturizing and consider a biotin supplement.
- Peeling Nails: Often caused by moisture or harsh products. Avoid prolonged exposure to water and use gentler removers.
- Stained Nails: Dark polishes can stain. Always use a base coat to prevent this. If staining occurs, a nail whitener or lemon juice soak can help.
Remember, patience and consistency are key to achieving and maintaining beautiful, healthy nails that will serve as the perfect canvas for your Pinterest-inspired designs!
Frequently Asked Questions About Pinterest-Inspired Nail Designs
Here are answers to some common questions beginners have about creating beautiful nail art:
Can I achieve Pinterest-worthy nails without expensive tools?
Absolutely! With a few basic essentials like dotting tools, a fine brush, and nail polish, you can recreate many popular designs. The key is practice and using what you have effectively.
How do I prevent my nail art from smudging?
Make sure each layer of polish is completely dry before adding the next. Use thin coats, and consider a quick-dry top coat. Patience is your best friend here!
What’s the best way to clean up mistakes?
A small, flat brush (like a tiny concealer brush) or an angled brush dipped in nail polish remover is perfect for cleaning up polish that gets on your skin around the nail. You can also use a sharpened orange stick.
How long should I wait between applying base coat, color, and top coat?
Allow each coat to dry for at least a minute or two before applying the next. For color coats, especially darker or thicker ones, wait until they are touch-dry. Your top coat should go on last, ensuring all colors underneath are fully dry.
Are gel polishes necessary for these designs?
Not at all! These beginner-friendly designs can be achieved with regular nail polish. Gel polishes offer more durability and an ultra-glossy finish, but they also require a UV/LED lamp and a different removal process.
How do I make my nail art last longer?
Always use a good base coat and top coat. Reapply your top coat every 2-3 days. Avoid using your nails as tools (like to open cans!) and wear gloves for household chores.
What are “nail art stickers” and are they good for beginners?
Nail art stickers are adhesive decals that you can place on your nails. They are excellent for beginners as they offer instant designs without the need for painting skills, though they can sometimes look less integrated than painted art.
Conclusion: Your Nail Art Journey Starts Now!
You’ve explored the vibrant world of Pinterest-inspired nail designs, gathered your essential toolkit, and learned how to create stunning essential looks that are perfect for beginners. Remember, nail art is a form of self-expression and creativity. Don’t be afraid to experiment, make mistakes (they’re part of the learning process!), and most importantly, have fun!
Start with the classic French tips, playful polka dots, dreamy gradients, or chic line art. Build your confidence with each manicure, and soon you’ll be adapting even more intricate designs to suit your personal style. Keep your nails healthy with a good care routine, and let your imagination run wild. Your next favorite nail design is just a Pinterest scroll and a steady brushstroke away. Happy polishing!


