Pink and white nail designs are remarkably simple to achieve, perfect for creating effortless beauty and a touch of elegance for any occasion. These classic combinations offer timeless chic, easily adaptable for beginners with straightforward techniques that deliver stunning results.
Hey there, nail lovers! Lisa Drew here from Nailerguy, and I know that finding that perfect nail design can sometimes feel like a puzzle. We all want nails that look chic and put-together without spending hours in front of the mirror or a fortune at the salon. And if you’re just starting out with nail art, the options can feel a bit overwhelming, right?
Well, guess what? You’re in for a treat! Today, we’re diving into the wonderfully simple world of pink and white nail designs. These aren’t just any colors; they’re a dynamic duo that whispers sophistication and charm. Think classic French tips, delicate floral accents, or elegant gradient fades – all achievable right at home. No complicated steps, no fancy equipment needed. Just pure, effortless beauty that you can create yourself!
We’ll walk through some super easy techniques, discuss the best tools to make your life even simpler, and explore the magic of combining these two lovely shades. Get ready to boost your confidence and unleash your inner nail artist. Let’s make those nails look fabulous!
Why Pink and White Nails Are a Beginner’s Best Friend
Pink and white are a match made in manicure heaven for so many reasons, especially for those new to nail art. Their versatility is unmatched, offering a canvas for a wide range of looks from super subtle to boldly beautiful. If you’re just dipping your toes into the world of DIY nail designs, these colors are your perfect starting point. They’re forgiving, universally flattering, and always in style.
Think about it: the classic French manicure, a staple for decades, relies on this perfect pairing. It’s the epitome of clean, polished elegance. But pink and white can do so much more! They can create soft, dreamy ombres, charming polka dots, cute floral patterns, or even sleek minimalist lines. The contrast is subtle enough not to be jarring, yet distinct enough to make a statement. This makes them ideal for practicing new techniques without the pressure of a complex design.
Plus, these colors are incredibly adaptable to your personal style and the occasion. A sheer pink with a crisp white tip is perfect for the office, while a brighter pink with white accents can be fun for a weekend outing. And for those moments when you want something a little extra, a touch of glitter or a subtle swirl can elevate the look without adding significant difficulty.
Essential Tools for Your Simple Pink and White Manicure
You don’t need a professional salon setup to create beautiful pink and white nail designs. A few basic tools will set you up for success. Investing in good quality essentials makes the process smoother and the results more polished. Here are the must-haves:
- Nail File: For shaping your nails. A medium-grit file is best for most people.
- Nail Buffer: To smooth out any ridges and add a natural shine.
- Base Coat: Crucial for protecting your natural nails from staining and helping polish adhere better.
- Top Coat: Seals your design, adds shine, and prevents chipping, making your manicure last longer.
- Pink Nail Polish: Choose your favorite shade – from soft pastels to vibrant fuchsias.
- White Nail Polish: A classic opaque white is perfect for crisp lines and details.
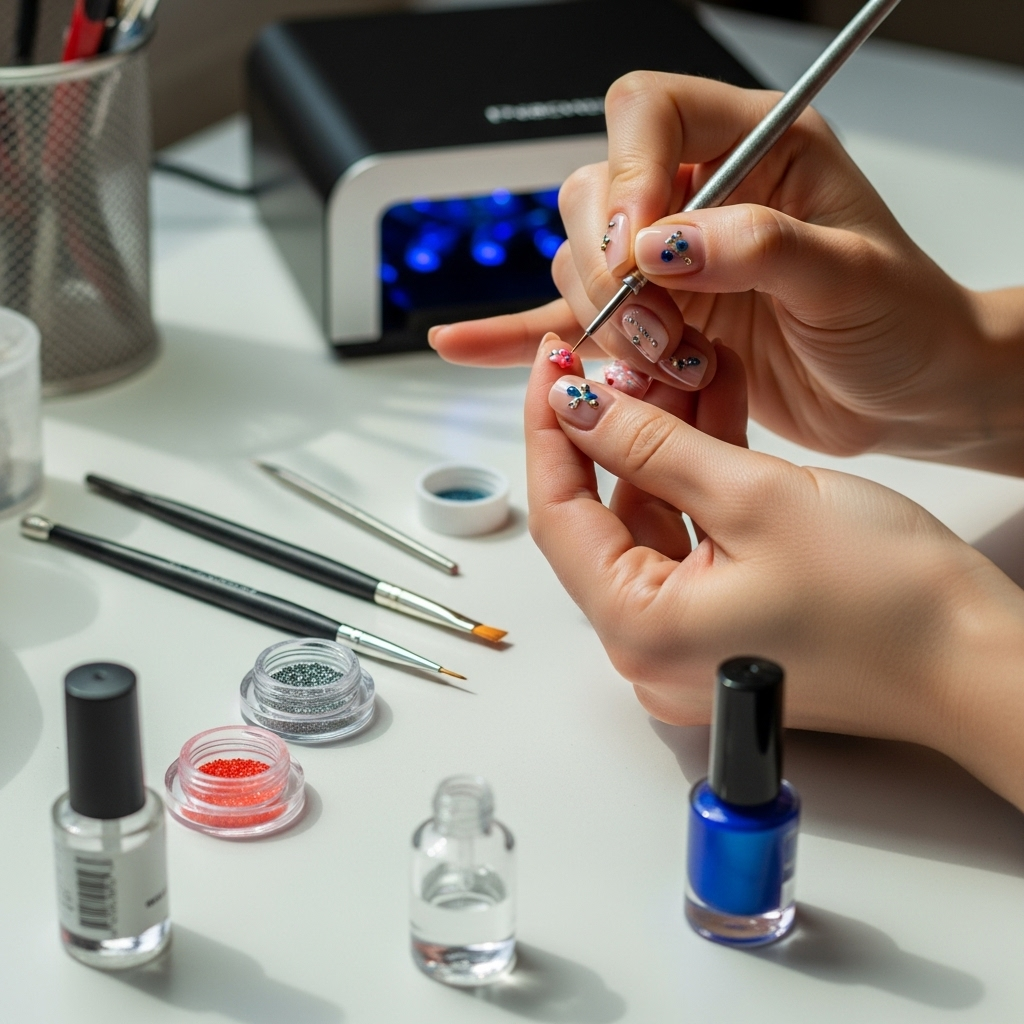
- Dotting Tools or Toothpick: For creating dots and small designs. Different sizes allow for varied dot sizes.
- Thin Nail Art Brush: Ideal for drawing fine lines, swirls, and delicate patterns.
- Cuticle Pusher/Orange Stick: To gently push back your cuticles for a clean nail bed.
- Nail Polish Remover and Cotton Pads: For cleaning up mistakes and removing old polish.
Having these simple tools on hand means you’re ready to tackle almost any easy pink and white design you can imagine. It’s all about making the process enjoyable and accessible!
Easy Pink and White Nail Design Ideas for Beginners
Ready to get creative? These designs are perfect for beginners and deliver maximum impact with minimal effort. They’re all about those simple, elegant touches that make your nails pop!
1. The Classic French Makeover
The French manicure is timeless, but we can give it a little twist! Instead of the traditional white tip, let’s play with pink and white in new ways.
Option A: Pink Base, White Tip
This is the most straightforward French. Apply two coats of your chosen pink polish as your base. Once dry, carefully paint a thin white line across the tip of each nail. Don’t worry if it’s not perfectly straight at first; a clean-up brush with remover can help. Finish with a top coat.
Option B: White Base, Pink Tip
Flip the script! A crisp white base with a soft pink tip offers a fresh, modern take. Apply one or two coats of white polish. Once fully dry, use a fine brush or stamping plate to add a delicate pink line to the tips. This works wonderfully with pastel pinks.
Option C: Reverse French (Half-Moon)
This design focuses on the cuticle area. Apply a nude or sheer pink polish as your base. Once dry, use a small brush or sticker guides to paint a white half-moon shape at the base of your nail, right by the cuticle. Seal it with a top coat.
2. Delicate Pink & White Dots
Dots are incredibly easy to create and always look charming. They’re perfect for adding a playful touch to a solid pink or white base.
How-to:
- Start with a base coat, followed by one or two coats of your chosen main color (e.g., a soft pink). Let it dry completely.
- Dip your dotting tool or the tip of a toothpick into your white polish.
- Gently dab dots onto your nail. You can make a single row of dots along the tip, a scattered pattern, or clusters on each nail.
- Use different sized dotting tools for variety!
- Let the dots dry thoroughly before applying a hydrating cuticle oil and a strengthening top coat.
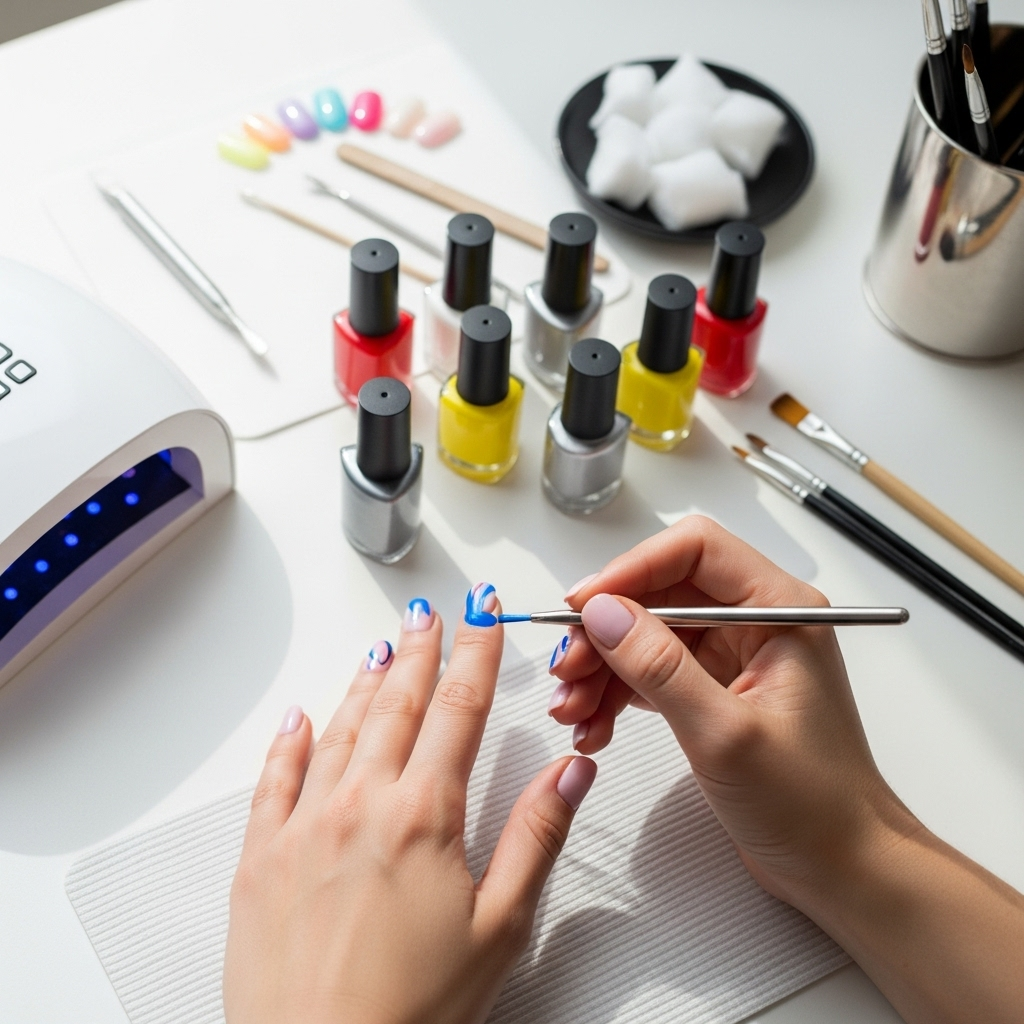
3. Simple Swirls and Lines
Adding a simple swirl or a few clean lines can elevate your manicure instantly. This looks sophisticated but is surprisingly easy to achieve with a thin brush.
How-to:
- Apply your base color (pink or white). Let it dry.
- Load a thin nail art brush with the contrasting color (white or pink).
- For swirls: Start at one edge of the nail and gently draw a curve, letting the brush glide. You can create one large swirl or several small ones.
- For lines: Create thin, vertical lines down the nail, or a single horizontal line across the tip.
- Clean up any wobbles with a brush dipped in nail polish remover.
- Once dry, finish with a top coat.
4. Two-Tone Pink & White Gradient (Ombre)
The ombre effect looks chic and professional, but can be done simply with a makeup sponge.
How-to:
- Apply your base coat and then a sheer pink polish. Let it dry.
- Apply a thin layer of white polish to one section of a clean makeup sponge (a regular cosmetic sponge works!). Apply pink polish next to it.
- Quickly dab the sponge onto your nail, blending the colors upwards or downwards. You might need a few passes to build the gradient.
- Use a clean-up brush to remove color from your skin.
- Repeat on other nails. Once dry, apply a top coat to smooth out the transition.
5. Pink with White Accents
Sometimes, all you need is a little detail! A few strategically placed white elements can make a simple pink polish look extra special.
Ideas:
- A single white flower petal on an accent nail.
- Tiny white stars scattered across a pink base.
- A delicate white crescent moon near the cuticle.
- Thin white stripes running diagonally or horizontally.
Practice these techniques, and you’ll be amazed at how quickly you can create beautiful, salon-worthy looks right in your own home. Remember, the key is patience and a steady hand, and don’t be afraid to experiment!
Achieving the Perfect Pink and White French Manicure: A Step-by-Step Guide
The French manicure is the quintessential pink and white nail design, exuding timeless elegance. While it might seem daunting, breaking it down into simple steps makes it totally achievable for beginners. Let’s dive in!
Step 1: Prep Your Canvas
Proper nail prep is key to a long-lasting and flawless manicure.
- Remove Old Polish: Ensure all traces of old nail polish are gone using nail polish remover and cotton pads.
- Shape Your Nails: Use a nail file to shape your nails to your desired length and shape. Filing in one direction prevents snagging and weakening.
- Buff Gently: Lightly buff the surface of your nails to smooth out any ridges and create an even base. This also helps polish adhere better.
- Cuticle Care: Gently push back your cuticles using a cuticle pusher or orange stick. Avoid cutting cuticles as this can lead to infection. Visit NailCarePros.com for more on basic nail care.
- Cleanse: Wash your hands with soap and water and ensure nails are completely dry. Avoid applying lotions right before polishing, as it can interfere with adherence.
Step 2: Apply Base Coat
A good base coat is non-negotiable. It protects your natural nails from staining (especially important with pigmented polishes) and creates a smooth surface for your polish to grip onto. Apply one even layer and let it dry completely. Most base coats are clear or have a milky finish.
Step 3: Apply the Pink Base Color
For a classic French, a soft, sheer, or opaque pink works best.
- Apply one thin, even coat of your chosen pink nail polish.
- Let it dry for a minute or two, then apply a second coat for full opacity and a richer color. Ensure each coat is fully dry before proceeding.
Step 4: Create the White Tip
This is where the “French” part comes in! There are a few ways to achieve this:
Method A: Freehand with a Thin Brush
This method requires a bit of practice but gives you the most control.
- Dip a fine nail art brush into your white polish. Wipe off excess on the bottle neck.
- Gently draw a smile line across the tip of your nail. Start in the center and work your way to the sides.
- If you make a mistake, don’t worry! Dip a small cleanup brush (or an orangewood stick) in nail polish remover and carefully trace along the edge of the white tip to create a clean line.
Method B: Using French Manicure Guides/Stickers
These adhesive stickers are a lifesaver for beginners!
- Once your pink base is completely dry, carefully apply the French tip guide sticker just below where you want your white tip to start. Press down firmly to ensure a good seal against the nail.
- Paint the white polish over the exposed tip of your nail, staying within the guide.
- While the white polish is still wet (or just starting to set, depending on the polish formula), carefully peel off the sticker. This helps prevent the polish from lifting.
- If the line isn’t perfect, use your cleanup brush as described in Method A.
Method C: Using a Silicone Nail Stamper or French Tip Pen
Specialized tools can make this even easier.
- Silicone Stamper: Some stampers have a curved edge perfect for gliding over your nail tip to create a smile line.
- French Tip Pen: These pens have a fine tip designed for precise application of white polish along the nail edge.
Whichever method you choose, allow the white tips to dry completely.
Step 5: Apply Top Coat
Once all the polish is dry, it’s time for the top coat. This is crucial for sealing the design, adding a glossy shine, and protecting your manicure from chipping, extending its life significantly. Ensure you cap the free edge of the nail by running the brush along the tip to prevent lifting.
Step 6: Final Touches (Optional)
Apply a drop of cuticle oil to moisturize the skin around your nails. Gently massage it in. This adds a professional, polished finish.
And there you have it! A beautiful, classic pink and white French manicure, achieved with simple steps. The key is patience and practice. Soon, you’ll be a pro!
Pink and White Nail Designs: A Comparison Table
To help you choose the perfect simple pink and white nail design, here’s a quick comparison of some popular styles. This table highlights their ease of execution and overall aesthetic.
| Design Type | Primary Colors | Ease for Beginners | Typical Look | Best For |
|---|---|---|---|---|
| Classic French Manicure | Pink base, White tip | Medium (requires steady hand or guides) | Elegant, Polished, Timeless | Everyday wear, Formal events, Professional settings |
| Reverse French (Half-Moon) | Base color + White accent at cuticle | Medium (requires precision or guides) | Chic, Sophisticated, Modern | Fashion-forward looks, Evening events |
| Pink & White Dots | Solid pink or white base, contrasting dots | Easy (requires dotting tool or toothpick) | Cute, Playful, Dainty | Casual outings, Spring/Summer, Adding a subtle detail |
| Simple Swirls/Lines | Solid base + thin lines/swirls | Easy-Medium (requires thin brush & practice) | Artistic, Delicate, Feminine | Adding a creative touch, Personal expression |
| Pink & White Gradient (Ombre) | Two-tone blended effect | Medium (easier with sponge) | Soft, Dreamy, Seamless | All occasions, Achieving a trendy look |
| Pink with White Accents | Solid pink base with minimalist white details | Easy (depends on accent detail) | Subtle, Chic, Minimalist | When you want a touch of detail without going overboard |
Tips for Longevity and Flawless Finish
Want your beautiful pink and white nail design to last and look its best? It’s all about the little details. Here are some pro-tips to keep your nails looking fabulous:
- Always use a base coat: Never skip this step! It prevents staining and provides a smooth canvas.
- Thin coats are better: Apply multiple thin coats of polish rather than one thick one. Thin coats dry faster and are less prone to bubbling or smudging.
- Let each layer dry: Patience is key! Ensure each layer of polish (base, color, and top coat) is dry before applying the next. This significantly reduces the risk of smudging.
- Cap the free edge: When applying your top coat, run the brush along the very tip (free edge) of your nail. This seals the polish and helps prevent chipping.
- Avoid water exposure immediately after polishing: Try to stay away from prolonged water exposure (like washing dishes by hand) for at least an hour or two after your manicure.
- Invest in a good top coat: A high-quality, quick-drying top coat can make a world of difference in shine and durability. Many gel-like top coats offer a salon-level finish without UV lamps.
- Touch-ups are okay: If you notice a tiny chip or smudge, don’t repaint the whole nail. A small dab of polish and another layer of top coat can often fix minor issues discreetly.
- Hydrate: Keep your cuticles