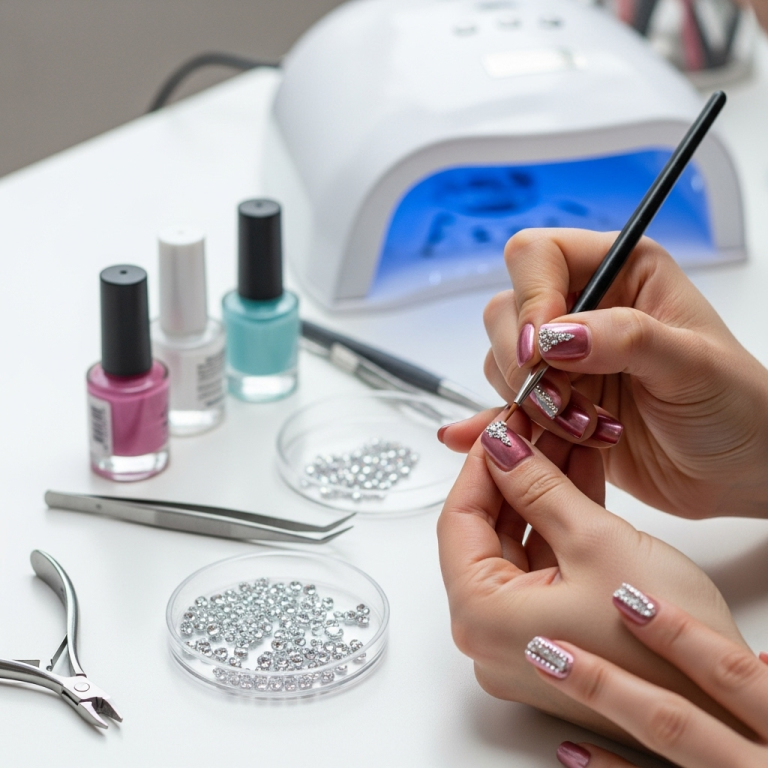
Pink marble nails are a beautiful, sophisticated way to add a touch of elegance to your manicure. This guide breaks down how to achieve this stunning look at home with simple steps, even if you’re a beginner! Get ready to elevate your nail game with this chic and trendy design that’s surprisingly easy to master.
Hey Nail Lovers! Lisa Drew here from Nailerguy, and let’s talk about a nail design that’s been stealing hearts everywhere: pink marble nails! If you’ve ever admired those gorgeous, swirled patterns that look like precious rose quartz or creamy, dreamy marble, you might think they’re super hard to create. Well, I’ve got great news for you! Achieving that effortless chic with pink marble nails is totally doable, even if you’re just starting your nail art journey. We’ll walk through it step-by-step, so you can get salon-worthy results right at your fingertips. Get ready to impress yourself and everyone else with your beautiful, marble-inspired nails!
The Magic of Pink Marble Nails
Pink marble nails are more than just a trend; they’re a statement of understated elegance and a touch of modern luxury. Think of the smooth, cool feel of genuine marble, but translated into a stunning manicure. The beauty of pink marble lies in its versatility. It can range from soft, pastel pinks that whisper sophistication to bolder, vibrant hues that shout glamour. This design is perfect for any occasion, whether you’re heading to a wedding, a business meeting, or just want to add a little sparkle to your everyday life. Because no two marble patterns are ever exactly alike, each manicure is uniquely yours!
Why You’ll Love Pink Marble Nails
Chic and Sophisticated: The marble effect inherently brings a touch of luxury.
Versatile Color Palette: Works with soft pastels, vibrant pinks, and even hints of white or gold.
Unique to You: Every swirl and line is different, making your nails one-of-a-kind.
Beginner-Friendly: With the right technique, it’s surprisingly easy to do at home.
Goes with Everything: Pink marble complements a wide range of outfits and styles.
Getting Started: What You’ll Need
Before we dive into the swirling fun, let’s gather our supplies. Don’t worry, you likely have most of these already, and the few extras are worth it for the beautiful results!
Essential Nail Tools and Products
Remember, good tools make for a better experience and a flawless finish!
Base Coat: To protect your natural nails and help polish adhere.
Pink Nail Polish: Choose your favorite shade of pink! A cream finish usually works best.
White or Cream Nail Polish: For the marble veining.
Top Coat: To seal your design and add shine.
Toothpick or Thin Nail Art Brush: To create the marble swirls.
Rubbing Alcohol or Nail Polish Remover: For cleanup and thinning polish if needed.
Cotton Swabs/Pads: For wiping away mistakes.
(Optional) Fine Glitter or Gold Leaf: For an extra touch of glam.
(Optional) Clear Nail Polish: To thin out thicker polishes for easier swirling.
(Optional) Clean, Flat Surface or Palette: To mix polishes on for the marbling technique.
A Note on Polishes for Marbling
For the best marble effect, try to use polishes of similar consistency. If one polish is much thicker than the other, it can be tricky to get those fine, delicate swirls. A drop of nail polish thinner can help revive older polishes.
Step-by-Step: Creating Your Pink Marble Nails
Ready to get swirling? Follow these simple steps for a gorgeous pink marble manicure. We’ll focus on the classic “wet-on-wet” marbling technique, which is perfect for beginners.
Step 1: Prep Your Nails
This is crucial for any manicure!
Start with clean, dry nails.
Push back your cuticles gently using a cuticle pusher.
If you have any old polish, remove it completely.
Buff your nails lightly to smooth any ridges and create a good surface for polish adhesion.
Wipe your nails with rubbing alcohol or a nail dehydrator to remove any oils.
Step 2: Apply Your Base Coat
Apply one thin layer of your favorite base coat. This protects your nails from staining and helps your polish last longer.
Let it dry completely.
Step 3: Apply Your Base Pink Color
Apply one or two thin coats of your chosen pink nail polish. This will be the background color for your marble design.
Ensure each coat is completely dry before moving to the next step. Patience here is key! You want a smooth canvas.
Step 4: The Marbling Technique (Wet-on-Wet)
This is where the magic happens! You’ll want to work relatively quickly so the polishes don’t dry too fast.
Option A: On a Palette (Recommended for Beginners)
Pour or place a small amount of your pink polish and a small amount of your white/cream polish onto a clean, flat surface like a plastic palette, a piece of foil, or even a sturdy old credit card. Don’t mix them yet!
Dip the tip of your toothpick or thin nail art brush into the edge of the pink polish, then lightly drag it through the white polish, creating a few gentle swirls. You’re just creating a marbled effect on your tool, not mixing them into a grey mess.
Gently dab this swirled polish onto your nail in scattered patches. You’re aiming for an organic, streaky look. Don’t overdo it; less is often more.
Repeat with a clean tool or by cleaning your current one, picking up more of the swirled polish combination until you achieve a pattern you like.
Option B: Directly on the Nail (Slightly More Advanced)
Apply one last coat of your pink polish to your nail (this will be your “wet” layer).
While this layer is still wet, use your toothpick or thin brush. Dip it into your white polish.
Gently touch the white polish onto the wet pink layer on your nail, then drag it through the pink to create a swirl effect.
You can also dot white polish on the wet pink and then drag a clean toothpick through it.
Experiment with lines, dots, and delicate strokes.
Tips for Perfect Swirls:
Don’t Over-Mix: You want distinct streaks of pink and white, not a muddy blend.
Use a Light Hand: Gentle strokes create delicate veins.
Work on One Nail at a Time: The polish can dry quickly, so focus your efforts.
Clean Your Tool Often: Wipe your toothpick or brush with a cotton swab dipped in remover between each swirl to keep the colors clean.
Step 5: Adding Extra Accents (Optional)
If you want to add a little extra pizzazz:
Glitter: While the wet polish is still slightly tacky but not fully wet, you can carefully place fine holographic or gold glitter with a dry brush.
Gold Leaf: Tear off tiny pieces of gold leaf and gently press them into the wet polish for a truly luxurious look.
Step 6: Apply Your Top Coat
Once your marble design is dry to the touch (don’t wait too long, but ensure it’s not smudgy), apply a generous layer of top coat.
This seals the design, smooths out any texture from the polish, and adds that gorgeous glossy shine.
Make sure to cap the free edge of your nail by running the brush along the tip to prevent chipping.
Step 7: Clean Up Edges
Use a small brush or cotton swab dipped in nail polish remover to clean up any polish that may have gotten on your skin around the nail.
Option: Water Marbling (More Advanced)
While the wet-on-wet method is beginner-friendly, water marbling offers a different execution. It involves dropping nail polish onto the surface of water and then swirling it to create a pattern, which you then dip your finger into. It can create more intricate designs but requires more practice and specific tools. For a great introduction to nail care and tools, check out this informative guide from the U.S. Food & Drug Administration (FDA), which discusses ingredients and safety.
Variations and Creative Twists on Pink Marble Nails
Once you’ve mastered the basic pink marble technique, don’t be afraid to play! There are so many ways to customize this chic look.
Color Combinations That Wow
Blush Pink & White: The classic, soft, and romantic look.
Hot Pink & Gold: A bolder, more glamorous take.
Rose Gold & White: Metallic and modern.
Pink & Nude Marble: Subtle and sophisticated for any occasion.
Pink & Grey Marble: A chic, contemporary contrast.
Pink, White, & a Touch of Black: For a more dramatic, high-contrast effect.
Other Design Elements to Add
Accent Nail: Do marble on just one or two nails and keep the rest a solid pink or nude.
Ombre Base: Start with a subtle pink ombre and then add the marble details on top.
Metallic Veining: Instead of white, use silver, gold, or rose gold polish to create the veins for an extra pop of shine.
Matte Finish: For a totally different vibe, apply a matte top coat instead of a glossy one. It gives the marble effect a softer, more velvety appearance.
Caring for Your Pink Marble Nails
To keep your beautiful marble manicure looking fresh and fabulous, follow these simple care tips:
Moisturize Regularly: Apply cuticle oil and hand lotion daily to keep your nails and skin hydrated. Dryness can lead to chips and breaks.
Wear Gloves: Protect your nails from harsh chemicals and prolonged water exposure by wearing gloves when doing dishes or cleaning.
Avoid Using Nails as Tools: Resist the urge to use your nails to open cans or peel stickers. This is a fast track to chipping and breakage.
Touch-Up Gloom: If you notice a tiny chip, try to fill it in with a bit of top coat or matching polish to prevent it from spreading.
| Product | Purpose | Beginner Friendliness | Tips for Use |
|---|---|---|---|
| Base Coat | Protects nails, improves polish adhesion | High | Apply thin, even layer. Let dry completely. |
| Pink Polish | Background color for marble | High | Choose a creamy finish. Apply 1-2 thin coats. |
| White/Cream Polish | Creates marble veins | Medium | Use sparingly for delicate lines. |
| Toothpick/Nail Art Brush | Tool for creating swirls | Medium | Clean often to avoid muddy colors. |
| Top Coat | Seals design, adds shine | High | Apply generously. Cap the free edge. |
Frequently Asked Questions About Pink Marble Nails
This section answers common questions beginners might have.
Q1. Can I achieve pink marble nails without special tools?
Yes! A toothpick is a fantastic and readily available tool for creating the delicate swirls needed for pink marble nails. Sometimes, even a straightened paperclip or a fine-tipped pen (that’s no longer used for writing) can work in a pinch, but a toothpick offers the most control for beginners.
Q2. My pink and white polish is just mixing together and turning grey. How do I fix this?
This usually happens when the polishes are too wet, or you’re swirling them too much. Try applying the white strokes more sparingly onto a still-wet pink base, and make very gentle, quick swirls. Also, ensure you’re cleaning your toothpick or brush very frequently between each stroke. For the palette method, just gently touch the toothpick to both colors without overmixing before applying to the nail.
Q3. How long should I wait between applying the pink base color and starting the marble effect?
For the wet-on-wet technique on the nail, you want one last coat of pink polish to be wet* when you add the white. If you’re doing the palette method, make sure your base pink coat on the nail is fully dry before you start dabbing the swirled colors on. This prevents all the polish from becoming one muddy color.
Q4. Can I use gel polish for pink marble nails?
Absolutely! Gel polish is excellent for marbling. The process is similar, but you’ll need to cure each layer (base coat, pink color, and the marble design before the final top coat) under a UV/LED lamp as per the gel polish manufacturer’s instructions. Gel polish also gives you more working time before curing, which can be helpful for marbling.
Q5. How do I make the marble effect look more realistic?
Realistic marble often has varying thicknesses in the veins and some translucent areas. Don’t be afraid to use different amounts of white polish on your tool. Some strokes can be very fine and delicate, while others can be a bit thicker and more defined. Think about how natural marble looks—it’s rarely uniform!
Q6. My marble design looks too messy. What’s the secret to a clean look?
The key is practice and a light touch! It also helps to have good cleanup supplies ready. Don’t be afraid to make a mistake; just use your cotton swab dipped in remover to clean it up and try again. For a cleaner look, focus on making fewer, more intentional strokes rather than trying to fill the entire nail with a chaotic pattern. A clean application of your top coat can also help smooth over minor imperfections.
Conclusion: Effortless Chic is Within Reach!
There you have it! Pink marble nails are a fantastic way to bring a touch of sophistication and artistic flair to your manicure, and as you’ve seen, they’re totally achievable for beginners. By following these simple steps and a little practice, you can create unique, stylish nails that will turn heads for all the right reasons. Remember, nail art is all about self-expression and having fun, so don’t be afraid to experiment with different shades of pink, add your own creative touches, and make this trend your own. So grab your polishes, let your creativity flow, and get ready to rock those gorgeous pink marble nails! Happy polishing!


