Pearl chrome nails offer a sophisticated, iridescent finish that’s both trendy and timeless. This easy-to-achieve look adds a luminous, ethereal glow to any manicure, making them perfect for beginners and pros alike. Discover stunning styles and learn how to rock this essential pearlized chrome trend!
Ever seen those gorgeous, shimmery nails and wondered if you could recreate that magic yourself? You know, the ones that seem to glow from within, like a perfect pearl? If you’re looking to elevate your nail game with something chic and eye-catching, pearl chrome nails are your answer. They’re not as complicated as they look, and they’re perfect for adding a touch of elegance to any outfit or occasion. Don’t worry if you’re new to nail art; we’re going to break down everything you need to know to get these stunning nails!
In this guide, we’ll explore what makes pearl chrome nails so special, the different styles you can create, and a simple, step-by-step process to achieve that coveted pearly sheen. Get ready to shine!
What Are Pearl Chrome Nails?
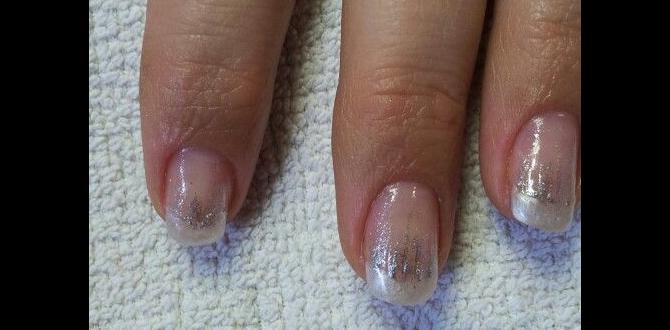
Pearl chrome nails are a stunning nail art trend that combines the smooth, reflective finish of chrome powder with the soft, iridescent glow of pearls. Instead of a flat, metallic shine, pearl chrome offers a multi-dimensional, luminous effect. Think of the inside of a seashell or the gentle sheen of a pearl necklace – that’s the essence of this design! It’s a subtler, more refined take on the popular chrome nail trend, making it incredibly versatile and wearable for everyday or special occasions.
The magic happens when a fine, pearlescent powder is applied over a cured gel polish base. The powder adheres to the sticky layer of the gel, creating a smooth, fused finish that looks almost baked onto the nail. The result is a soft, milky, and iridescent glow that changes subtly with the light. It’s a look that’s both sophisticated and playful, appealing to a wide range of personal styles.
Why Are Pearl Chrome Nails So Popular?
- Ethereal Beauty: They mimic the natural luster of pearls, offering a soft, luminous glow that’s incredibly flattering.
- Versatility: Pearl chrome works beautifully with almost any base color, from classic nudes and whites to soft pastels and even deeper tones.
- Subtle Shine: It’s a more refined alternative to full-on metallic chrome, making it suitable for professional settings and everyday wear.
- Trend-Forward: It’s a popular choice among nail enthusiasts and celebrities, offering a modern and chic aesthetic.
- Easy to Achieve: With the right tools and techniques, even beginners can achieve salon-worthy pearl chrome nails at home.
The Essential Tools You’ll Need
Getting that perfect pearl chrome finish at home is totally doable! Here’s a breakdown of the essential tools to have on hand:
- Gel Nail Polish Kit: You’ll need a quality gel top coat (no-wipe is best for this!), a base coat, and your chosen gel polish color for the base. A UV or LED nail lamp is crucial for curing the gel. For more on gel polish safety, check out this guide from the U.S. Food & Drug Administration.
- Pearl Chrome Powder: This is your star ingredient! You can find these powders in various shades, from pure white pearl to iridescent pinks and blues.
- Silicone Applicator Tool (or Eyeshadow Sponge): These tools are perfect for smoothly pressing and buffing the powder onto the nail surface.
- Nail File & Buffer: For shaping and preparing your nails.
- Cuticle Pusher/Orange Stick: To prep your nail bed.
- Lint-Free Wipes: For cleaning any dust or residue.
- Rubbing Alcohol or Cleanser: To clean the nail surface and remove the sticky layer after curing.
Step-by-Step: How to Achieve Pearl Chrome Nails
Ready to create your own stunning pearl chrome nails? Follow these simple steps!
Step 1: Prepare Your Nails
Start with clean, dry nails. Gently push back your cuticles using a cuticle pusher or orange stick. Shape your nails to your desired length and style using a nail file. Lightly buff the surface of your natural nails to remove any shine – this helps the gel polish adhere better. Wipe away any dust with a lint-free wipe.
Step 2: Apply Base Coat and Color
Apply a thin layer of gel base coat and cure it under your UV/LED lamp according to the lamp’s instructions. Next, apply your chosen gel polish color. For the classic pearl chrome look, white, milky pastels, or sheer nudes are popular choices. Apply one or two thin coats, curing each layer separately under the lamp. Make sure each coat is fully cured.
Step 3: Apply No-Wipe Gel Top Coat
This is a crucial step! Apply a thin, even layer of a no-wipe gel top coat over your cured color. A no-wipe top coat leaves a sticky layer that the chrome powder will adhere to. If your top coat leaves a significant sticky layer, you might need to gently cleanse it with isopropyl alcohol after curing, but usually, a no-wipe is designed to have a minimal sticky residue that’s perfect for chrome application.
Important Note: Make sure to cure this no-wipe top coat thoroughly according to your lamp’s instructions. Incomplete curing will result in the chrome powder not adhering properly.
Step 4: Apply the Pearl Chrome Powder
Using your silicone applicator tool or a clean eyeshadow sponge, gently scoop a small amount of the pearl chrome powder. Lightly and firmly buff and press the powder onto the uncured sticky layer of the top coat. Work the powder in all directions to ensure complete coverage. You should see the pearlescent shine begin to appear immediately.
Continue buffing until the entire nail surface is coated and has a smooth, reflective sheen. Pay attention to the edges and cuticle area to avoid any patchy spots. Use a clean part of the applicator for a final smooth buff.
Step 5: Clean Up and Seal the Deal
Gently brush away any excess powder from around your nails and cuticles using a soft brush. Be careful not to disturb the chrome finish on the nail itself. Once all excess powder is removed, apply another thin, even layer of the same no-wipe gel top coat over the entire nail. This will seal in the chrome powder and protect your beautiful new finish.
Cure this final top coat layer under your UV/LED lamp according to the instructions. Once fully cured, you’re done! You’ll have stunning, luminous pearl chrome nails!
Essential Pearl Chrome Nail Styles
Pearl chrome isn’t just a single look; it’s a versatile finish that can be adapted to countless styles. Here are some of our favorite ways to rock this trend:
1. Classic Milky Pearl
This is the quintessential pearl chrome look. Applied over a milky white or sheer nude gel polish, it creates a soft, understated elegance. It’s perfect for brides, everyday wear, or when you want a touch of purity and sophistication.
2. Iridescent Pink Pearl
For a touch of dreamy romance, opt for a soft pink base. The pearl chrome powder will interact beautifully with the pink, creating a subtle rosy glow with shifts of iridescent light. This is incredibly flattering and adds a youthful, feminine vibe.
3. Pastel Glow Pearl
Dreamy pastels like baby blue, soft lavender, or mint green become even more magical with a pearl chrome finish. The pearlescent effect enhances the pastel shade, giving it an ethereal, almost otherworldly glow. Perfect for spring and summer!
4. Deep Jewel Tone Pearl
Don’t shy away from darker colors! Applying pearl chrome over deep shades like navy, emerald green, or burgundy creates a stunning contrast. The pearl effect adds a sophisticated sheen that prevents the dark color from looking flat, giving it a unique, multifaceted depth.
5. French Tip Pearl Chrome
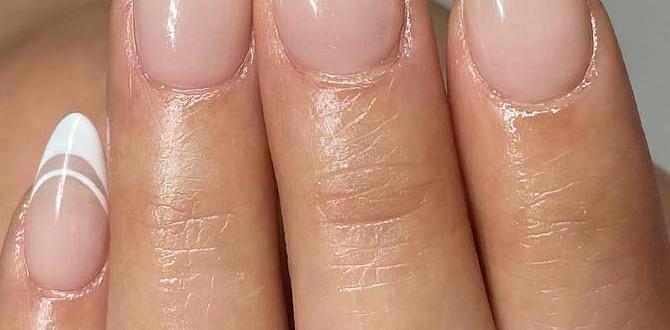
Elevate your French manicure! Instead of regular white tips, try a pearl chrome finish on the tips. You can either apply the pearl chrome all over the nail and add a French tip in a contrasting color, or, for a more subtle look, use the pearl chrome as the tip color over a sheer nude base.
6. Accent Nail Pearl
If you’re not ready for full pearl chrome, start with an accent nail! Choose one finger – perhaps your ring finger – and give it the pearl chrome treatment while the others have a solid color or a different design. This is a great way to test the waters and add a subtle touch of glamour.
7. Glazed Doughnut Effect (with a Twist!)
The “glazed doughnut” nails, popularized by Hailey Bieber, are essentially a milky or sheer base with a pearlescent chrome powder. To give it a pearl twist, use a fine pearlescent powder that has a distinct iridescent shift, focusing on the soft, milky white glow rather than a bright metallic shine.
Pearl Chrome vs. Traditional Chrome
It’s helpful to understand the difference between traditional chrome powders and pearl chrome powders to achieve the look you desire.
| Feature | Traditional Chrome Powder | Pearl Chrome Powder |
|---|---|---|
| Finish | High-shine, mirror-like metallic (silver, gold, rose gold, etc.) | Luminous, iridescent, soft sheen with subtle color shifts. |
| Effect | Bold, reflective, futuristic. | Ethereal, sophisticated, pearlescent. |
| Base Color Impact | Can alter the metallic color (e.g., silver chrome on black vs. white is black vs. silver). | Enhances the base color with an iridescent glow; less drastic color change. |
| Versatility | Works well over dark colors for a bold effect, lighter colors can appear muted. | Works beautifully over a wide range of colors, especially whites, nudes, pastels, and jewel tones. |
| Application | Similar application process. | Similar application process. |
Pearl chrome powder is generally finer and contains iridescent pigments that create that sought-after soft glow. Traditional chrome powders are more about mimicking a highly reflective metal surface.
Tips for Long-Lasting Pearl Chrome Nails
Want your beautiful pearl chrome manicure to last as long as possible? KimikoBeauty offers some excellent tips on extending the life of your gel manicures, which apply to chrome finishes too:
- Proper Prep is Key: As mentioned, ensuring your natural nail is clean, dry, and lightly buffed is the first defense against lifting.
- Thin Coats are Best: Thick layers of gel polish or top coat can chip and lift more easily. Apply everything in thin, even coats.
- Cap the Edges: When applying your base coat, color coats, and especially your top coats, make sure to “cap” the free edge of the nail. This means running your brush along the very tip of the nail to seal it.
- Avoid Rough Tasks Immediately: Try to avoid harsh activities or prolonged exposure to water for the first 24-48 hours after your manicure.
- Wear Gloves for Chores: When doing dishes or cleaning, wear rubber gloves to protect your nails from harsh chemicals and water.
- Regular Maintenance: If you notice any lifting or chipping, it’s best to get them repaired or removed properly rather than trying to pick at them, which can damage your natural nail.
Frequently Asked Questions About Pearl Chrome Nails
Q1: Can I use regular nail polish with pearl chrome powder?
A1: No, pearl chrome powder is designed to adhere to the sticky layer of cured gel polish. It won’t stick to regular air-drying nail polish.
Q2: What base color is best for pearl chrome nails?
A2: While pearl chrome looks stunning over almost any color, milky white, sheer nude, soft pastels, and light pinks are incredibly popular for that ethereal, luminous effect. Dark colors offer a more subtle, sophisticated sheen.
Q3: How do I avoid streaks when applying the pearl chrome powder?
A3: Ensure you’re using a good quality chrome powder and a smooth applicator. Apply firm, even pressure while buffing. You might need to go over it a couple of times with a clean section of the applicator to get a uniform finish. Make sure your no-wipe top coat is fully cured but still has a slightly tacky surface.
Q4: How long do pearl chrome nails last?
A4: When applied correctly with gel products, pearl chrome nails can last as long as a standard gel manicure, typically 2-3 weeks, depending on your nail growth and how well you care for them.
Q5: Do I need a special top coat for pearl chrome?
A5: Yes, you absolutely need a “no-wipe” gel top coat. This type of top coat cures with minimal to no sticky residue left behind, allowing the chrome powder to adhere perfectly. Regular top coats that leave a significant sticky layer might cause the powder application to be uneven or clumpy.
Q6: Can I achieve the pearl chrome effect with gel polish at home?
A6: Absolutely! With the right tools (gel lamp, gel polish, no-wipe top coat, and pearl chrome powder) and by following the steps carefully, you can achieve beautiful pearl chrome nails right at home.
Q7: How do I remove pearl chrome nails?
A7: Removal typically involves the same process as removing gel polish. You’ll likely need to soak your nails in acetone or use foil wraps with acetone-soaked cotton. Gently filing off the top layer first can help the acetone penetrate faster. Always be gentle to avoid damaging your natural nails.
Conclusion
Pearl chrome nails are a fantastic way to add a touch of subtle glamour and sophisticated shine to your manicure. Whether you’re aiming for a delicate, dewy look or a more unique, iridescent gleam, this trend offers endless possibilities for self-expression. We’ve covered the tools you need, a simple step-by-step guide to achieving the look at home, and a variety of stunning styles to inspire your next nail appointment or DIY session.
Remember, the key is in the proper preparation, using the right gel products, and a gentle, consistent application of the pearl chrome powder. Don’t be afraid to experiment with different base colors and designs to find your perfect pearl chrome combination. So go ahead, embrace the shimmer, and let your nails radiate that beautiful, natural luminosity!

