Papaya nail designs offer a vibrant, tropical escape for your fingertips. These fun, fruity looks are perfect for summer, easy to create with simple techniques, and add a cheerful pop to any outfit. Get ready for a refreshing manicure makeover!
Hello nail lovers! Summer is all about bright colors, fun vibes, and celebrating the sunshine. And what better way to capture that feeling than with a tropical twist on your nails? If you’re looking for nail designs that are as refreshing as a cool drink on a hot day, then you’ve come to the right place. Papaya nail designs are IN, and they’re surprisingly easy to achieve. Forget complicated art; we’re talking about simple, stunning looks that will make your nails say “hello, summer!”
Many of us struggle to find nail art that’s cute, trendy, and doesn’t require a nail technician’s precision. You see those gorgeous fruity manicures online and think, “There’s no way I can do that!” Well, get ready to be surprised! We’re going to break down how to create beautiful papaya-inspired nail designs right at home. You’ll learn the simple steps, the essential tools, and some adorable ideas to get you started. Let’s dive into the juicy world of papaya nails!
—
Why Papaya Nails Are Your Summer Manicure Must-Have
Imagine this: the sun is shining, you’re heading out, and your nails are adorned with the cheerful hues of ripe papaya. It’s an instant mood booster! But why papaya, specifically? This tropical fruit brings a unique color palette and a playful motif that’s perfect for the season.
- Vibrant Colors: Papayas offer a fantastic range of colors, from soft peachy-pinks and warm oranges to deeper sunset reds. These shades are naturally flattering and scream summer.
- Tropical Vibe: The fruit itself, with its distinctive shape and texture, lends itself beautifully to creative nail art. It instantly transports you to a beach vacation, even if you’re just at home.
- Easy to Replicate: Unlike intricate floral patterns or detailed portraits, papaya designs can be simplified into elegant and chic looks that even beginners can master. Think simple color blocks, subtle fruit slices, or abstract swirls inspired by papaya’s juicy flesh.
- Versatile Styles: Whether you prefer a minimalist accent nail or a full fruity explosion, papaya designs can be adapted to suit your personal style and the occasion.
Getting Started: Your Papaya Nail Design Toolkit
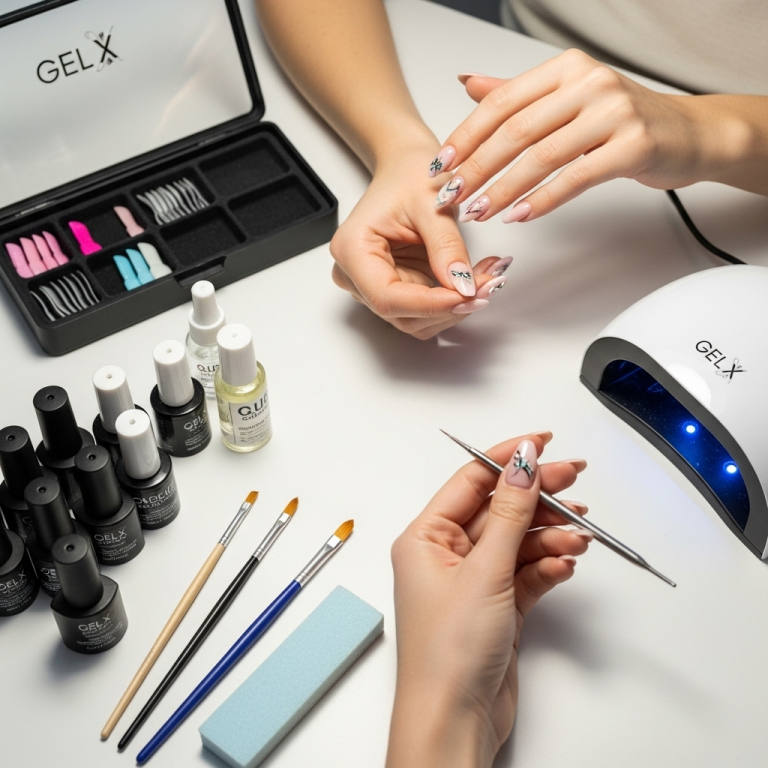
Before we get our hands messy with polish, let’s gather our essential tools. Don’t worry, you probably have most of these already! Having the right supplies makes the process so much smoother (and more fun!).
- Base Coat: Essential for protecting your natural nails and helping your polish last longer.
- Top Coat: Seals your design, adds shine, and prevents chips.
- Nail Polish Colors:
- Peachy-pink or pale orange (for the base papaya color)
- Coral or brighter orange (for accents or details)
- White or cream (for highlights or dotting)
- Green (for leaves, optional)
- Yellow or gold shimmer (for a touch of sparkle, optional)
- Thin Nail Art Brush or Dotting Tool: For drawing small details, creating dots, or making fine lines.
- Toothpick or Orange Stick: Great for small details or cleaning up edges.
- Nail Polish Remover and Cotton Swabs: For correcting any little mistakes.
- Nail File and Buffer: To shape and smooth your nails for a perfect canvas.
Simple Steps to Your First Papaya Nail Design
Ready to get creative? Let’s start with a super simple design that’s perfect for beginners. We’ll focus on creating a cute, abstract papaya-inspired look.
Step 1: Prep Your Nails
Start with clean, dry nails. Push back your cuticles gently using an orange stick. Shape your nails with a nail file to your desired length and style. A quick buff will give you a smooth surface for polish. Apply a thin layer of base coat and let it dry completely.
Step 2: Apply the Base Color
Choose your main papaya color – a soft peachy-pink or a pale orange is perfect. Apply two thin coats, allowing each to dry thoroughly between applications. This ensures an even, opaque finish.
Step 3: Create the Papaya Swirl
This is where the fun begins! Take a slightly brighter coral or orange polish. Using your thin nail art brush or even a toothpick, carefully swirl a small amount of this color onto one or two accent nails. You don’t need to cover the whole nail. Think of it as adding a watercolor effect or mimicking the natural gradient of a papaya’s flesh. You can create a few subtle streaks or a soft, blended swirl.
Step 4: Add a Touch of Dewiness (Optional)
For an extra pop of realism, you can add a tiny dot of white or cream polish in a strategic spot, mimicking a highlight. Or, use your fine brush to add a very thin white line where the colors blend, adding a touch of dimension.
Step 5: Seal and Shine
Once your design is completely dry, apply a generous layer of top coat. This will bring out the colors, smooth out any texture, and protect your beautiful new design from chipping. Let it dry fully.
And voilà! You have a chic, papaya-inspired nail design that’s effortlessly summery and super easy to create. It’s all about playing with color and simple artistic touches.
More Papaya Nail Design Ideas to Try
Once you’ve mastered the basic swirl, the world of papaya nail art opens up! Here are a few more ideas to inspire your creativity:
1. The Papaya Slice Accent Nail
- Main Nails: Paint all your nails (or most of them) in a solid, light peach or peachy-pink.
- Accent Nail: On your ring finger, paint a base a slightly deeper peach or orange.
- The Slice: Using a fine brush and a darker orange or even a reddish-orange, paint a semi-circle or crescent shape on your accent nail. Then, use a dotting tool or the tip of your brush with a black or dark brown polish to add just a few tiny black seeds within the “slice.”
- Finish: Seal with a glossy top coat.
This design is instantly recognizable and incredibly cute!
2. Ombre Sunset Papaya
- Base: Start with a light peach polish on all nails.
- Ombre Effect: On an accent nail (or all of them if you’re feeling brave!), use a makeup sponge or a nail art brush to blend from the peach base to a warmer coral or orangey-red at the tips or one side. You can also transition from a peachy base to a soft pink at the cuticle.
- Optional Detail: A tiny dot of white polish near the cuticle can represent a hint of the fruit’s natural highlight.
This captures the beautiful gradient of a ripe papaya as if it’s kissed by the setting sun.
3. Papaya Dot Manicure
- Base: Apply a solid peachy-pink or light orange base.
- Dots: Using a dotting tool and a brighter coral or even a deep orange polish, create random dots across your nails. Vary the size of the dots for a more organic look.
- Optional: Add a few tiny black dots with a toothpick for a hint of papaya seeds, especially if you’re doing a more literal fruit slice design.
This is a super-easy way to get a fun, fruity effect without any complex painting.
4. Minimalist Papaya Outline
- Base: A sheer peachy or nude polish is perfect for this.
- Outline: With a very fine nail art brush and a brighter orange or coral polish, carefully draw a simple, abstract outline of a papaya shape on one or two accent nails. It doesn’t need to be perfect; think more artistic sketch than precise drawing.
- Optional: Add a tiny black dot inside for a seed hint.
This is for those who love a subtle nod to the trend – chic and understated.
5. Papaya Leaf Accents
- Base: A soft peach or creamy base color.
- Leaves: On one or two nails, use a fine nail art brush and a vibrant green polish to paint small, simple leaf shapes branching out from near the cuticle or the side of the nail.
- Optional: You can add a tiny hint of orange or pink in the center of the leaf, inspired by the papaya’s color bleeding into its stem.
This adds a touch of tropical greenery to your fruity theme.
Papaya Nail Designs: A Comparison of Styles
To help you choose your next manicure, here’s a quick look at different papaya design approaches:
| Design Style | Complexity | Best For | Key Features |
|---|---|---|---|
| Abstract Swirls | Easy | Beginners, everyday wear | Blended orange/pink ‘flesh’ colors, watercolor effect |
| Papaya Slice | Medium | Statement nails, fun occasions | Semi-circle shape, simple ‘seed’ dots |
| Ombre Sunset | Medium | Elegant summer look, gradient lovers | Smooth color transition (peach to coral/pink) |
| Pops of Color Dots | Easy | Playful, casual style | Randomly placed dots in papaya shades |
| Minimalist Outline | Easy-Medium | Chic, subtle trend followers | Simple, artistic wireframe shape |
| Green Leaf Accents | Medium | Nature-inspired, tropical theme | Painted green leaves with optional fruit color hints |
Caring for Your Papaya Nails
Once you’ve perfected your tropical manicure, you’ll want it to last! Here are some tips to keep your papaya nails looking fresh and fabulous:
- Reapply Top Coat: Every 2-3 days, apply a fresh layer of top coat. This reinforces the polish and adds extra shine.
- Moisturize: Keep your cuticles and nails hydrated by applying cuticle oil or hand cream regularly. Dryness can lead to chips and breaks.
- Be Gentle: Avoid using your nails as tools (like opening cans or scraping labels). Opt for gentler methods to prevent premature wear and tear.
- Wear Gloves: When doing household chores, especially those involving water or harsh cleaning products, wear rubber gloves. This is one of the best ways to protect your manicure.
- Touch-Ups: If you get a small chip on an accent nail, you might be able to strategically cover it with a tiny dot of polish or even a glitter accent.
Health and Safety Tips for At-Home Nail Art
While we love a good DIY nail session, it’s always important to be mindful of nail health. Here are some helpful tips:
- Ventilation: Always do your nails in a well-ventilated area. Nail polish fumes can be strong, so open a window or use a fan. For more information on nail product safety, the U.S. Food & Drug Administration (FDA) offers guidance on cosmetic safety.
- Quality Products: Use high-quality nail polishes and removers. Avoid products that contain harsh chemicals like formaldehyde, toluene, and DBP (dibutyl phthalate). Many brands now offer “3-free,” “5-free,” or even “10-free” polishes, meaning they are formulated without these common offenders.
- Less is More with Acetone: While effective, acetone nail polish remover can be very drying to the nails and surrounding skin. If your nails are prone to dryness or brittleness, consider using an acetone-free remover, especially for lighter polish colors.
- Give Nails a Break: It’s a good idea to occasionally give your nails a break from polish altogether. This allows them to “breathe” and can help prevent staining, especially from very dark or vibrant colors.
- Tools Hygiene: Keep your nail art tools clean. Wash brushes with soap and water after use and disinfect metal tools periodically. This prevents the spread of bacteria and ensures your tools are ready for your next creative session.
Frequently Asked Questions About Papaya Nail Designs
Q1: Are papaya nail designs hard to do for beginners?
Not at all! The beauty of papaya designs is that many are quite simple. Abstract swirls, dot patterns, and solid color blocks with a simple accent are all very beginner-friendly. You don’t need to be an artist!
Q2: What are the best nail polish colors for papaya designs?
Think warm and vibrant! Peachy-pinks, soft oranges, coral, deeper sunset reds, and even hints of yellow are ideal. White or cream can be used for highlights, and a touch of green works well for leaf accents.
Q3: How long do DIY papaya nail designs usually last?
With proper prep and a good top coat, your papaya nail design can last anywhere from 5 to 10 days. Reapplying top coat every few days will help extend its life.
Q4: Can I use regular nail polish for these designs, or do I need special polishes?
Regular nail polishes are perfectly fine! For finer details like outlining or tiny dots, a polish with a thinner consistency or a good nail art brush (which you can often find in art supply stores or specialized beauty shops) is helpful. A good quality dotting tool is inexpensive and makes a world of difference.
Q5: My nail polish chips easily. What can I do?
Ensure you apply a good base coat, paint thin coats of color (letting each dry), and finish with a thick, glossy top coat. Capping the free edge of your nail with your top coat (wrapping it around the tip) can also help prevent chipping. Moisturizing your nails and cuticles is also key!
Q6: How do I clean up any mistakes while painting?
A small, angled brush dipped in nail polish remover is your best friend! You can also use a cotton swab for more precise cleanup around the cuticle and sides of the nail. Just be sure to have your cleanup brush/swab ready before your polish fully dries.
Q7: Can I combine papaya designs with other summer nail trends?
Absolutely! Papaya designs pair wonderfully with other summer trends like iridescent finishes, chrome accents, or even incorporating a few simple palm leaves. They also look great as part of a multicolored summer manicure.
These designs are designed to be fun and forgiving, so don’t be afraid to experiment and adapt them to your own unique style!
Embrace Your Inner Tropical Goddess This Summer!
There you have it – your complete guide to creating beautiful and effortless papaya nail designs! From understanding why these designs are perfect for summer to gathering your tools and mastering simple techniques, you’re all set to transform your nails into a portable tropical paradise.
Papaya nail designs are more than just a trend; they’re a way to inject a little joy and vibrancy into your everyday. They’re achievable, customizable, and guaranteed to bring a smile to your face every time you catch a glimpse of your hands. Whether you opt for a bold slice or a subtle swirl, you’re wearing a piece of sunshine.
So grab your polishes, get a little creative, and let your nails do the talking this summer. Don’t be afraid to play with colors and patterns. Your nails are your canvas, and summer is the perfect time to paint them with happiness. Go ahead, embrace the sweet, refreshing charm of papaya nail designs, and shine bright all season long!

