Oval nail designs for a soft style offer effortless elegance by elongating fingers and providing a versatile canvas for delicate, feminine looks. They are perfect for achieving a polished, gentle aesthetic that suits any occasion.
Are you dreaming of a nail look that feels both sophisticated and incredibly soft? Sometimes, achieving that delicate, elegant vibe can feel tricky, especially when you’re just starting out with nail art. You want nails that look polished and refined without being too loud or complicated. The good news is, there’s a wonderfully simple shape that does all this and more: the oval nail. It’s a favorite for a reason, offering a graceful silhouette that flatters most hands. Let’s dive into how oval nail designs can be your secret weapon for effortlessly chic nails!
In this guide, we’ll explore everything you need to know about embracing the oval nail shape and discover stunning, beginner-friendly designs that exude understated elegance. Get ready to transform your nails into a soft, stylish statement!
Why Oval Nails Are Perfect for a Soft Style
The beauty of the oval nail shape lies in its inherent elegance and versatility. It’s not just a shape; it’s a foundation for creating incredibly soft and flattering manicures. Let’s break down why oval is your go-to for that gentle, polished look:
- Elongates Fingers: The rounded sides and tapered tip of an oval nail create an illusion of length, making fingers appear slimmer and more graceful. This alone contributes to a sophisticated and delicate appearance.
- Universally Flattering: Unlike sharper shapes that can sometimes feel harsh, the oval’s gentle curves are universally flattering on all hand shapes and finger lengths. It’s a safe bet for a chic look.
- Less Prone to Breaking: The rounded edge of an oval nail minimizes snagging and is less likely to chip or break compared to pointed or square shapes, meaning your soft style stays intact longer! For more on nail health and preventing breakage, check out these tips for strong nails from Allure.
- Perfect Canvas: The smooth, curved surface of an oval nail is ideal for a wide range of delicate designs, from subtle French tips to minimalist accents and soft color gradients.
Getting Started: Prepping Your Oval Nails
To achieve those gorgeous, soft oval nail designs, starting with well-prepped nails is key. Think of it as laying the groundwork for a beautiful painting! This process ensures your polish adheres well and your designs look their best.
Essential Tools for Nail Prep:
- Nail file (emery board or glass file recommended)
- Nail buffer
- Cuticle pusher or orange stick
- Nail clippers (if needed to shorten nails before shaping)
- Cuticle remover (optional)
- Nail strengthener (optional)
- Base coat
- Top coat
Step-by-Step Oval Nail Shaping:
- Shape the Free Edge: If your nails are longer than desired, trim them first with clippers. Then, using your nail file, gently file the free edge of each nail into a rounded, tapered shape. File in one direction to avoid weakening the nail. Imagine drawing a soft curve from one side of your nail to the other, meeting at a gentle point.
- Smooth the Sides: Ensure the side walls of your nail are even and follow the natural curve of your fingertip.
- Buff for Smoothness: Use a nail buffer to gently smooth out any ridges on the nail surface and to refine the overall shape. Buffing also creates a slightly rough surface for better polish adhesion.
- Push Back Cuticles: Apply a cuticle remover if desired, then gently push back your cuticles with a cuticle pusher or orange stick. Healthy cuticles frame your nail beautifully.
- Cleanse and Dry: Wipe your nails with a lint-free cloth or rubbing alcohol to remove any dust or oils. Ensure nails are completely dry.
- Apply Base Coat: Swipe on a thin layer of your favorite base coat. This protects your natural nail and provides a smooth surface for color. Let it dry completely.
Effortless Oval Nail Designs for a Soft Style
Now for the fun part! Oval nails are incredibly forgiving and provide a beautiful canvas for designs that scream soft elegance. Here are some beginner-friendly ideas that are easy to achieve and always look chic.
1. The Classic Soft French Manicure
The French manicure gets a soft makeover on oval nails. Instead of a stark white tip, opt for softer colors. This is a timeless look that adds a polished touch without overwhelming your nails.
How to Achieve it:
- Start with a sheer nude, pale pink, or milky white polish as your base color. Apply one or two coats for an even finish.
- Once dry, use a fine-tipped brush or a nail polish pen to carefully paint the smile line. Instead of bright white, try a soft cream, a pale peach, or even a very light lavender.
- For a super soft look, you can smudge the line slightly with a clean brush while the polish is still wet, or opt for a barely-there gradient tip.
- Finish with a glossy top coat to seal the design and add shine.
2. Delicate Floral Accents
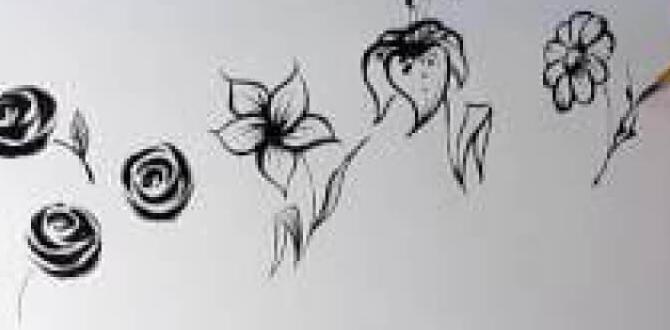
Adding small, understated floral details brings a touch of romance and femininity to oval nails. This works best when you don’t overdo it. Think one or two accent nails!
How to Achieve it:
- Paint all nails with a soft, muted base color like a pastel shade (baby blue, mint green, soft lilac) or a sophisticated nude.
- On one or two accent nails (usually the ring finger), use a fine-tipped nail art brush or a dotting tool to create tiny floral motifs.
- Simple designs like tiny dots arranged in a flower shape, delicate petals, or even a single small bloom are perfect.
- You can use contrasting soft colors for the flowers or stick to shades within the same color family as your base coat for a subtle look.
- Seal with a clear top coat.
3. Milky White Elegance
The “milky white” or “glazed donut” trend is wonderfully suited to oval nails and embodies soft, understated glam. It’s chic, modern, and incredibly easy to achieve.
How to Achieve it:
- Apply a sheer nude or pale pink base coat.
- Follow with one or two coats of a milky white polish. Alternatively, apply a translucent white gel polish for a more opaque look.
- For the “glazed” effect, after the milky white polish is dry (or cured, if using gel), apply an iridescent chrome powder using a makeup sponge or silicone brush. Gently buff it all over the nail.
- Wipe away any excess powder and finish with a high-shine top coat.
4. Subtle Gradient (Ombre) Nails
A soft gradient, or ombre, effect on oval nails is seamless and elegant. It’s a more artistic take that still feels incredibly gentle.
How to Achieve it:
- Choose two complementary soft colors. For instance, a pale pink fading into a soft peach, or a nude transitioning into a milky white.
- Apply a base coat and let it dry completely.
- Using a makeup sponge, apply stripes of your chosen colors side-by-side onto the sponge.
- Gently dab the sponge onto your nail, pressing down to blend the colors. You might need to reapply colors to the sponge and repeat the dabbing motion to build up opacity and a smooth transition.
- Clean up any polish that got onto your skin with a small brush dipped in nail polish remover.
- Apply a top coat to smooth out the texture and add shine.
5. Minimalist Line Art and Dots
Sometimes, less is more! Simple geometric lines or tiny dots can add a touch of modern sophistication to oval nails without being overpowering.
How to Achieve it:
- Start with a clean, neutral base color like a sheer beige, soft grey, or milky white.
- Using a very fine nail art brush or a dotting tool, create thin, delicate lines or small, perfectly placed dots.
- Ideas include: a single thin vertical line down the center of the nail, a few scattered small dots, or a delicate geometric shape near the cuticle.
- Keep the colors muted – think black, white, a soft metallic, or a shade that compliments your base color.
- Apply a clear top coat for a finished look.
6. Pastel Perfection
Pastel shades are inherently soft and romantic, making them a dream for oval nails. Think of a different pastel on each nail, or a harmonious blend of two or three.
How to Achieve it:
- Choose a palette of 2-3 pastel shades that work well together. Popular choices include baby blue, mint green, lavender, pale pink, and soft yellow.
- You can wear a single pastel shade on all nails for a clean look, or alternate colors on different nails.
- For a bit more interest, apply a nude base coat and then use a fine brush to add a subtle stripe or accent of a pastel color to an accent nail
- Ensure each coat is dry before applying the next, and finish with a durable top coat. You can find a comprehensive guide to choosing the right nail polish colors for your skin tone on Healthline to help you pick the most flattering pastels!
Comparing Oval Nail Designs: A Quick Look
To help you choose the perfect soft style, here’s a quick comparison of some popular oval nail designs:
| Design Type | Ease of Execution (Beginner) | Softness Factor | Best For |
|---|---|---|---|
| Soft French Manicure | Easy to Moderate | High | Everyday chic, professional settings |
| Delicate Floral Accents | Moderate | High | Adding a feminine touch, romantic look |
| Milky White Elegance | Easy | Very High | Modern, minimalist, sophisticated glam |
| Subtle Gradient (Ombre) | Moderate to Difficult | High | Artistic, seamless color transition |
| Minimalist Line Art/Dots | Easy to Moderate | Moderate to High | Contemporary, understated detail |
| Pastel Perfection | Easy | Very High | Sweet, playful, spring/summer vibes |
Maintaining Your Soft Oval Nails
Keeping your beautiful soft oval nail designs looking fresh is all about consistent, gentle care:
- Moisturize Daily: Apply cuticle oil and hand lotion regularly to keep your skin and nails hydrated. Dryness can lead to chips and make your manicure look dull.
- Wear Gloves: Protect your nails and polish from harsh chemicals and water by wearing gloves when doing chores like washing dishes or cleaning. This is crucial advice from organizations like the Centers for Disease Control and Prevention (CDC) regarding skin protection.
- Touch-Ups: For minor chips, you can sometimes carefully file the edge smooth or use a tiny bit of clear polish to touch up the area.
- Reapply Top Coat: Every few days, apply an extra layer of top coat to refresh the shine and help extend the life of your manicure.
- Gentle Removal: When it’s time to change your design, use a non-acetone remover if possible, as it’s gentler on the nails and cuticles. Soak gently rather than scraping.
Pro Tips for Achieving Softness and Elegance:
- Sheen over Shine: For a truly soft look, consider satin or matte finishes instead of ultra-high gloss for some designs.
- Subtle Shimmers: Opt for sheer polishes with a hint of iridescent shimmer rather than chunky glitter for an elegant glow.
- Color Palette is Key: Stick to muted tones, pastels, nudes, and milky shades. Avoid neons and very dark, opaque colors if your goal is softness.
- Keep it Simple: For beginners, focus on one or two accent nails rather than trying to do intricate designs on all ten.
Frequently Asked Questions About Oval Nail Designs
Q1: What makes oval nails “soft”?
Oval nails are considered soft because their rounded edges and tapered shape naturally evoke gentleness and femininity. They lack the sharp corners of square or stiletto nails, giving them a more delicate and elegant appearance.
Q2: Are oval nails good for short nails?
Yes! Oval nails can look beautiful on short nails. The shape helps to elongate the appearance of your fingers, even with shorter nail lengths. Focus on shaping the free edge into a gentle curve.
Q3: How do I make my oval nail designs look more elegant?
To add elegance, opt for refined color palettes (nudes, pastels, creams), use fine details like thin lines or small dots, and consider a satin or matte top coat for a sophisticated finish. Keeping the designs uncluttered also enhances elegance.
Q4: Can I do a French manicure on oval nails?
Absolutely! Oval nails are a fantastic shape for French manicures, especially a “soft” French manicure using muted colors for the tips instead of stark white. The shape lends itself perfectly to defining the smile line.
Q5: What are the easiest soft nail designs for oval nails?
The easiest soft designs include solid pastel or milky white colors, minimalist dots or lines on an accent nail, and a soft French tip. These require minimal tools and skill.
Q6: How often should I re-shape my oval nails?
You should re-shape your oval nails every 1-2 weeks, depending on your nail growth and activity level. As they grow, the oval shape can become less defined or more square-like.
Q7: Is it hard to maintain cuticle health with oval nails?
No, cuticle health is important for any nail shape. Gently pushing back cuticles after showering or soaking and applying cuticle oil daily will keep them healthy and moisturized, which complements the soft look of oval nails.
Conclusion
Embracing oval nail designs for a soft style is all about embracing effortless elegance. This universally flattering shape provides the perfect canvas for creating looks that are both sophisticated and gentle, whether you’re opting for a subtle pastel shade, a delicate floral accent, or a modern milky white finish. By mastering the simple art of shaping your nails into an oval and choosing soft, refined designs, you can achieve a polished and beautiful manicure with ease. Remember, nail art is a form of self-expression, so have fun experimenting with these ideas and find the soft style that makes you feel most confident and radiant. Happy polishing!


