Oval nail designs offer a timeless elegance and a versatile canvas for any style. From minimalist chic to vibrant art, oval shape elongates fingers, making them a universally flattering choice for stunning, easy-to-achieve manicures.
Nail shapes are a big deal, right? And sometimes figuring out which one works best for you can feel a little overwhelming. But don’t worry, we’re going to make it super simple! We’re diving into oval nail designs today, and trust me, they’re a secret weapon for gorgeous hands. They’re known for making fingers look longer and more slender – who doesn’t love that? Whether you’re a total beginner or looking for fresh inspiration, this guide is packed with easy ideas and tips to get you started. Let’s get those nails looking fabulous!
Why Oval Nails Are Your New Best Friend
The beauty of oval nails really comes down to their shape. They’re gently rounded at the tips, like an egg or an oval stone. This smooth, continuous curve is incredibly flattering because it creates an optical illusion of length. This makes them a fantastic choice for almost everyone!
Benefits of the Oval Shape:
- Elegant Elongation: As mentioned, oval nails naturally make your fingers appear longer and slimmer. This is a win for nearly every hand type!
- Less Prone to Breaking: With no sharp corners to snag, oval nails tend to be more durable and less likely to chip or break compared to sharper shapes like stiletto or coffin.
- Versatile Canvas: The smooth surface is perfect for a variety of nail art. From simple solid colors to intricate designs, oval nails showcase them beautifully.
- Comfortable and Practical: The rounded edges are generally more comfortable for everyday activities – no snagging on clothes or hair!
- Universally Flattering: Whether you have short or long nail beds, slender or wider fingers, the oval shape tends to suit everyone.
Getting Started with Oval Nails for Beginners
Thinking of trying the oval shape? It’s easier than you might imagine! You can either ask your nail technician to shape your nails oval during a salon visit, or you can carefully file them yourself at home. For home shaping, patience is key.
How to File Your Nails into an Oval Shape at Home:
Here’s a simple step-by-step guide:
- Start with Clean, Dry Nails: Make sure your nails are free of any old polish and are completely dry. This prevents peeling and makes filing easier.
- Gather Your Tools: You’ll need a good quality nail file (a fine-grit file is best for natural nails) and potentially a buffer. A glass nail file is excellent for gentle shaping and sealing the nail edge. You can find great options like Cristina Inn glass nail files for a smooth finish.
- File in One Direction: This is crucial! Sawing back and forth can weaken your nails. Start from the side of your nail and gently file towards the center.
- Create the Curve: As you file towards the center, imagine you’re creating the top half of a circle. File from one side towards the center, then repeat on the other side, meeting in the middle to form the rounded tip.
- Shape the Sides: Gently file the side walls to create a gradual taper towards the rounded tip. You want a smooth, unbroken curve.
- Refine and Smooth: Once you have the basic oval shape, use your file to smooth out any rough edges. A nail buffer can then be used to get a super smooth finish on the nail surface.
- Repeat on All Nails: Aim for consistency across all your nails for a polished look.
Essential Tools for Oval Nail Care:
To keep your oval nails looking their best, a few basic tools are super helpful:
- Nail File: A fine-grit or glass file for shaping and smoothing.
- Nail Buffer: To give your nails a natural shine and smooth out ridges.
- Cuticle Pusher/Nipper: To gently push back or trim excess cuticles.
- Cuticle Oil: To keep your cuticles hydrated and healthy, which also helps prevent hangnails.
- Base Coat, Top Coat, and Polish: Your favorite colors to bring your designs to life!
Stunning Oval Nail Designs for Every Occasion
Now for the fun part – decorating your beautiful oval nails! The oval shape is a dream for nail art. It provides a smooth, continuous surface that lets designs really shine. Let’s explore some ideas, from super simple to a little more adventurous.
Minimalist Chic Oval Nail Designs
Sometimes, less is more, and oval nails are perfect for that understated elegance.
- Classic Solid Colors: A perfectly applied solid color looks incredibly sophisticated on oval nails. Think timeless nudes, elegant grays, deep burgundies, or a crisp white.
- Subtle French Manicure: A modern twist on the classic French tip. Instead of stark white, opt for a sheer nude or pink base with a delicate white, cream, or even a soft pastel tip. The rounded tip of the oval nail complements the curved line of the French tip beautifully.
- Single Accent Nail: Paint all but one nail a solid color, and make that accent nail special. This could be a delicate glitter, a simple stripe, or a tiny dot.
- Matte Finish: A matte top coat can transform any color into a sophisticated, modern look. It’s especially chic with deep tones like navy, forest green, or charcoal.
- Negative Space Designs: These are super trendy and surprisingly easy. Think geometric shapes or lines left unpainted, or with just a clear coat, against a colored background. This can be as simple as a single line down the center or a V-shape at the cuticle.
Elegant Embellishments for Oval Nails
Adding a little something extra can take your oval nails from pretty to absolutely stunning.
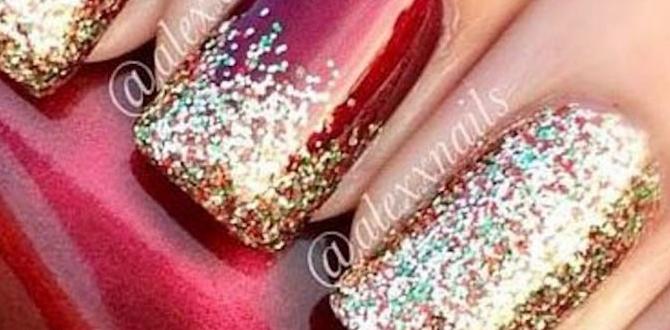
- Glitter Accents: A touch of glitter can add instant glamour. Try a full glitter nail on one or two fingers, or just add a glitter gradient fading from the cuticle or tip.
- Subtle Geometric Patterns: Simple lines, dots, or small geometric shapes can add visual interest without being overwhelming.
- Pearls and Studs: A tiny pearl or a small metal stud placed strategically near the cuticle or at the tip can add a touch of luxury. Be careful not to add too many, as they can snag.
- Ombre/Gradient Nails: The smooth curve of oval nails is perfect for blending two or more colors together seamlessly. A classic pink-to-white or a bolder color combination can look amazing.
- Metallic Accents: Think metallic stripes, foil-like flakes, or a subtle metallic shimmer. Rose gold and silver are particularly popular and complement many colors.
Bold and Beautiful Oval Nail Art Ideas
Ready to make a statement? Oval nails are a fantastic base for vibrant and eye-catching designs.
- Floral Designs: Delicate painted flowers, abstract floral patterns, or even tiny floral stickers can look incredibly charming on oval nails.
- Abstract Art: Swirls, splatters, marbling effects – the oval shape can really enhance the flow of abstract designs.
- Animal Prints: From subtle leopard spots to bold zebra stripes, animal prints have a chic vibe on oval nails.
- Crystal Embellishments: For a true showstopper, carefully applied rhinestones or crystals can add sparkle and dimension. Consider placing them along the cuticle line, as a “ring” around the nail, or scattered for a starry effect. For tips on safe crystal application, you can refer to resources like NailCareer.com’s guide on applying rhinestones.
- Themed Designs: Whether it’s for a season, a holiday, or just a vibe you love, oval nails can carry off intricate themed art with style.
Popular Oval Nail Design Palettes
Choosing the right colors can make all the difference. Here are some color combinations that work exceptionally well with the oval nail shape:
Classic Combinations
These palettes offer timeless elegance and are perfect for any occasion.
| Color Duo | Vibe | Best For |
|---|---|---|
| Nude & White | Chic, Sophisticated | Everyday wear, professional settings |
| Soft Pink & Cream | Feminine, Delicate | Weddings, bridal showers, spring |
| Deep Red & Gold | Luxurious, Glamorous | Evening events, holidays |
| Navy & Silver | Modern, Sleek | Professional settings, fall/winter |
Trendy and Vibrant Palettes
For those who love to experiment and make a statement.
| Color Trio/Quartet | Vibe | Best For |
|---|---|---|
| Pastel Blue, Lavender, Mint Green | Sweet, Dreamy | Spring, summer, playful looks |
| Coral, Peach, Gold Shimmer | Warm, Tropical | Summer, vacation vibes |
| Black, White, and a Pop of Red | Bold, Edgy | Statement nails, evening looks |
| Earthy Tones (Olive, Terracotta, Beige) | Grounded, Natural | Fall, everyday style |
Maintaining Your Oval Nails
Keeping your nails healthy and your designs looking fresh is key to enjoying your oval manicure.
Daily Care Routines:
- Hydrate, Hydrate, Hydrate: Apply cuticle oil daily, especially after washing your hands or using harsh cleaning products. This keeps the skin around your nails soft and prevents dryness and hangnails.
- Be Gentle: Avoid using your nails as tools. Tapping on keyboards or scraping things can cause damage and chip your polish.
- Wear Gloves: When doing household chores, especially those involving water or chemicals, wear rubber gloves. This protects your nails and the polish from damage.
Tips for Longevity of Your Design:
- Apply a Good Base Coat: This protects your natural nail from staining and helps your polish adhere better.
- Use Two Thin Coats of Polish: Thin coats dry faster and are less likely to form bubbles or bumps.
- Finish with a Quality Top Coat: A good top coat seals your design, adds shine, and protects against chipping. Reapply every few days to refresh the manicure’s durability and shine.
- Avoid Soaking Your Nails: Prolonged exposure to water can soften the nail plate and weaken the polish bond.
- Touch-Ups: If you notice a tiny chip, a careful touch-up with your polish color and a dab of top coat can save the manicure until you can fully redo it.
Frequently Asked Questions About Oval Nail Designs
Q1: How do I know if oval nails are right for me?
Oval nails are a fantastic choice for almost everyone! They are particularly flattering if you want to make your fingers appear longer and more slender. If you find sharp nail shapes snag easily, the rounded edges of oval nails will be more comfortable and less prone to breakage.
Q2: Are oval nails difficult to maintain?
No, oval nails are generally quite easy to maintain. Their rounded shape makes them less likely to snag on things, reducing the risk of breakage. With regular moisturizing and a good top coat application, they hold up beautifully.
Q3: Can I wear long nail designs on oval nails?
Absolutely! Oval nails are a wonderfully versatile shape. Whether your oval nails are short, medium, or long, they can carry off a wide variety of designs. Longer oval nails offer more surface area for intricate nail art, while shorter oval nails look incredibly chic and polished with simple, solid colors or subtle accents.
Q4: What colors look best on oval nails?
Nearly any color looks stunning on oval nails! Classic choices like nudes, soft pinks, deep reds, and elegant grays are always sophisticated. For a bolder look, vibrant blues, greens, or even neon shades can make a statement. The smooth, flowing shape complements both minimalist and intricate color palettes.
Q5: Are oval nails good for nail art?
Yes, oval nails are an excellent canvas for nail art! The smooth, continuous curve provides a generous and flattering surface area. Delicate details like fine lines, small dots, floral patterns, and even intricate hand-painted designs look fantastic. The shape also works well with gradients and ombre effects, allowing colors to blend seamlessly.
Q6: How often should I reapply the top coat to my oval nails?
To keep your oval nail designs looking fresh and to add extra protection against chips, it’s a good idea to reapply a layer of top coat every 2-3 days. This simple step significantly extends the life of your manicure and keeps the shine looking like you just left the salon!
Conclusion: Embrace the Elegance of Oval Nails
There you have it! Oval nails are a truly versatile and beautiful choice, offering a harmonious blend of elegance and practicality. They’re your reliable favorite for elongating your fingers, providing a smooth canvas for any design you can dream up, and generally being super easy to live with.
From the simplest single polish to the most intricate nail art, the oval shape seems to enhance it all. We’ve covered everything from how to achieve that perfect shape yourself to a rainbow of design ideas and essential tips for keeping them looking fabulous. So go ahead, embrace the timeless appeal of oval nails. Experiment with new colors, try a simple design, or go bold – whatever you choose, you’re bound to feel polished and confident. Happy polishing, and enjoy your stunning oval nails!


