Organza nail designs offer a chic, sheer, and ethereal look that’s surprisingly easy to create at home. These designs mimic the delicate, layered fabric of organza, adding a touch of elegance and dimension to your manicure with minimal effort. Get ready to master these gorgeous, essential looks!
Dreaming of nails that look like delicate, flowing fabric? Organza nail designs are the perfect way to get that sophisticated, airy vibe right at your fingertips. But if you’re new to the nail art game, the idea of creating such a polished look might seem a little daunting. Don’t worry! You don’t need to be a pro to achieve these stunning, elegant manicures. In this guide, we’ll break down exactly how to create gorgeous organza-inspired nails that will have everyone asking where you got them done. Get ready to unleash your inner nail artist with simple steps and amazing results!
What Exactly Are Organza Nails?
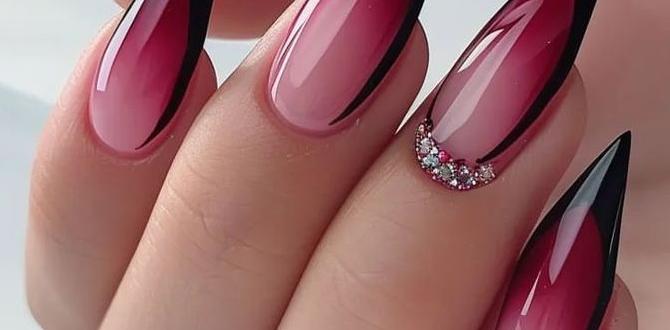
Organza nails are a nail art trend that mimics the look and feel of organza fabric. Think sheer layers, a subtle shimmer, and a delicate, almost translucent finish. This style is all about creating depth and dimension by layering sheer polishes or gels. It’s a versatile design that can be adapted to various colors and aesthetics, from soft pastels to bolder hues, making it a fantastic choice for any occasion.
The beauty of organza nails lies in their subtlety. They aren’t loud or overly intricate, but they possess a refined elegance that catches the eye. The sheer quality allows your natural nail or the base color to peek through, adding to the layered, fabric-like effect. It’s a sophisticated trend that’s surprisingly accessible, even for nail art beginners.
Nail artists achieve this effect through strategic layering of sheer polishes or gels. The secret is in building up color and opacity gradually, creating visual depth without making the nail appear chunky. This technique can be applied to various nail shapes and lengths, offering a personalized touch to your manicure.
Why Try Organza Nail Designs?
Organza nail designs are trending for a reason! They offer a unique blend of simplicity and sophistication. Here’s why you’ll want to give them a try:
- Ethereal and Elegant: They have a soft, dreamy quality that instantly elevates any look.
- Versatile Styling: Easily adaptable to your outfit, mood, or the season.
- Beginner-Friendly: The core technique is simple and forgiving, perfect for DIYers.
- Subtle Sophistication: They offer a chic pop of color and texture without being overpowering.
- Trendy Yet Timeless: A modern twist on classic sheer nail looks.
These designs provide a perfect balance between being fashionable and remarkably easy to execute. Whether you’re heading to a special event or just want to add a touch of elegance to your everyday style, organza nails are a fantastic choice. They prove that stunning nail art doesn’t always require complicated techniques or professional tools.
Essential Tools and Materials
Before we dive into the designs, let’s gather what you’ll need. Don’t worry; these are mostly standard nail supplies!
What You’ll Need:
- Base Coat: To protect your natural nails and help polish adhere.
- Sheer Polishes/Gels: This is key! Look for polishes specifically labeled “sheer” or “jelly.” They come in various colors like pink, peach, lavender, and even subtle nudes.
- Opaque Polish (Optional): A thin layer of opaque color can be used as a base for some designs.
- Top Coat: For shine and to seal your design.
- Nail File and Buffer: For shaping and smoothing your nails.
- Cuticle Pusher/Orange Stick: To tidy up the nail bed.
- Lint-Free Wipes: Essential for cleaning brushes and nails without leaving fibers.
- Alcohol or Nail Polish Remover: For prepping nails and cleaning up mistakes.
- Small Detail Brush (Optional): For adding fine details if desired.
Having these items on hand will make the process smooth and enjoyable. Remember, the quality of your sheer polishes will significantly impact the organza effect, so opt for brands known for their smooth application and buildable coverage.
Genius Organza Nail Looks: Step-by-Step
Let’s get creative! Here are some essential organza nail designs that are perfect for beginners and seasoned nail enthusiasts alike.
Look 1: The Classic Organza Sheer
This is the most basic and arguably the most elegant organza nail design. It’s all about building up sheer color for a beautiful, translucent effect.
Steps:
- Prep Your Nails: Start with clean, dry nails. File them to your desired shape and gently buff the surface to remove any shine. Push back your cuticles.
- Apply Base Coat: Apply a thin layer of your favorite base coat and let it dry completely.
- Apply First Layer of Sheer Polish: Apply one thin coat of your chosen sheer polish (e.g., a soft pink or peachy nude). Let it dry thoroughly. Don’t try to get full opacity in one go; the beauty is in the layers!
- Apply Second Layer: Apply a second thin coat of the sheer polish. You’ll notice the color deepening and becoming more opaque, with your natural nail still subtly showing through. Let it dry.
- Apply Third Layer (Optional): For a richer color or more defined organza look, apply a third thin layer. This is where you achieve that beautiful, almost fabric-like depth. Ensure each layer is dry before applying the next.
- Apply Top Coat: Once you’re happy with the color saturation, apply a generous layer of top coat. This will seal the design, add a glossy finish, and protect your manicure.
- Clean Up: Use a small brush dipped in nail polish remover to clean up any polish on your skin or cuticles.
This look is incredibly chic and works for any occasion. Experiment with different sheer colors like lavender, baby blue, or a soft coral to find your perfect shade.
Look 2: Layered Organza with a Hint of Glitter
Adding a touch of glitter can enhance the ethereal quality of organza nails, making them sparkle subtly.
Steps:
- Prep and Base Coat: Follow steps 1 and 2 from “The Classic Organza Sheer.”
- Apply Sheer Color: Apply 1-2 thin coats of your chosen sheer polish and let it dry completely.
- Add Glitter Layer: Now, here’s the fun part! Apply another thin layer of sheer polish, but this time, either mix a tiny amount of fine cosmetic glitter into the polish before application, or carefully apply a sheer glitter polish over your existing sheer color. Alternatively, use a sheer polish and apply a fine glitter top coat or strategically place glitter with a dotting tool. The goal is a subtle shimmer, not chunky glitter.
- Apply Another Sheer Layer (Optional): If you want to further embed the glitter and create more depth, apply one more thin layer of your original sheer polish over the glitter layer.
- Apply Top Coat: Seal everything with a good quality top coat.
- Clean Up: Tidy up any errant polish.
This design adds just the right amount of sparkle to make your organza nails truly mesmerizing. The key is using fine, cosmetic-grade glitter that complements the sheer finish without overwhelming it.
Look 3: Ombre Organza Effect
Achieve a seamless blend of colors with an organza ombre that is both sophisticated and beautiful.
Steps:
- Prep and Base Coat: Prepare your nails and apply a base coat.
- Apply Transition Colors: Apply two thin coats of your lighter sheer polish on the middle and tips of your nails. Then, apply your darker sheer polish on the bottom half of your nails, allowing it to slightly overlap the lighter shade.
- Blend with a Sponge: For a smoother transition, lightly dab a makeup sponge (a clean, dry cosmetic sponge works best) with your sheer polishes and gently tap it onto the nail, blending the colors where they meet. You might need to reapply a little of each shade to the sponge as you blend. Work quickly before the polish dries too much.
- Build Color and Depth: Once the colors are blended, apply another thin, even coat of each sheer polish to build up the color intensity and achieve that desirable organza depth. Try to maintain the ombre effect.
- Apply Top Coat: Finish with a generous top coat to smooth out the surface and add shine.
- Clean Up: Clean around the cuticles.
This ombre technique, when done with sheer polishes, creates a stunning, soft gradient that looks incredibly professional. You can also achieve this with a small brush and careful application, dabbing the colors together on the nail.
Look 4: Organza French Tips
A modern take on the classic French manicure, using sheer colors for a delicate and chic look.
Steps:
- Prep and Base Coat: Start with prepped nails and a base coat.
- Apply Sheer Base: Apply 1-2 thin coats of a sheer nude or pale pink polish to the entire nail. Let it dry completely.
- Create Organza Tips: Using your sheer color polish (this can be the same as your base, or a slightly different shade for contrast), carefully paint a French tip. For a softer look, you can use a fine detail brush or even a small piece of a makeup sponge to dab the color, creating a slightly diffused edge.
- Build Depth: Apply a second thin coat of the sheer tip color to build up the opacity and achieve that organza-like appearance.
- Apply Top Coat: Seal the design with a top coat over the entire nail.
- Clean Up: Clean any mistakes.
This variation is incredibly understated and sophisticated, perfect for those who prefer a more minimalist style. The sheer tips offer a peek-a-boo effect that’s very on-trend.
Look 5: Two-Tone Organza Layers
Play with contrasting sheer colors to create a unique, layered effect.
Steps:
- Prep and Base Coat: Prepare your nails and apply a base coat.
- Apply First Sheer Color: Apply 1-2 coats of your first sheer polish (e.g., sheer baby blue) and let it dry.
- Apply Second Sheer Color: Apply 1-2 coats of a different, slightly contrasting sheer polish (e.g., sheer white or a very pale grey) only to certain sections of the nail. You could do this in horizontal stripes, as a half-moon at the base of the nail, or even create abstract blocks of color. The key is that both colors remain sheer.
- Build Depth: If the colors look too separated or you want more depth, you can apply another very thin layer of the first color over the second, or vice-versa, being careful not to muddy the colors.
- Apply Top Coat: Finish with a glossy top coat.
- Clean Up: Clean the edges.
This design is where you can really get playful. Think about how fabric layers overlap and create subtle shifts in color. This is your chance to experiment with color pairings!
Tips for Achieving the Perfect Organza Look at Home
Even with simple designs, a few tricks can elevate your organza nail game. Here are some expert tips for nailing this trend:
- Work in Thin Layers: This is the golden rule! Thick coats can look gloopy and lose the sheer effect. Thin, even coats build up color beautifully and allow light to interact with the polish, creating dimension.
- Allow Proper Drying Time: Patience is key. Ensure each layer of polish is completely dry before applying the next. This prevents smudging and lifting.
- Choose the Right Sheer Polishes: Not all sheer polishes are created equal. Look for “jelly” polishes, which are known for their vibrant, buildable transparency. Many brands offer sheer formulas in beautiful colors. For instance, brands like OPI, Essie, and China Glaze often have jelly-like finishes in their collections. You can explore resources like Nails Magazine for reviews and brand spotlights on nail polishes.
- Understand Color Theory: Playing with light and dark sheer colors can create stunning effects. A sheer pink over a sheer nude creates a richer pink, while a sheer purple over sheer blue creates a beautiful violet hue.
- Cleanliness is Crucial: Wipe your brush on the rim of the bottle to remove excess polish before application. Use lint-free wipes to clean up any mistakes around the cuticle for a crisp finish.
- Consider Your Base: While organza effects look great over bare nails (with base coat!), you can also apply them over a thin layer of opaque white, nude, or even a contrasting color for a different look.
- Seal it Well: A good quality, quick-drying top coat is essential. It not only adds shine but also smooths out any subtle ridges from layering and protects your beautiful work.
Mastering these tips will ensure your organza nails look professionally done, even when you’re doing them yourself. It’s all about technique and understanding how sheer polishes behave.
Organza Nails: Color Palette Inspiration
The beauty of organza nails is their adaptability to color. Here’s a guide to some popular and effective color palettes:
| Look/Vibe | Color Palette Suggestions | Why It Works |
|---|---|---|
| Ethereal & Romantic | Sheer Pinks (Baby Pink, Rose), Sheer Lavender, Sheer Peach, Sheer White | These soft, delicate colors create a dreamy, almost bridal look. Layering them adds a subtle blush or flush of color. |
| Fresh & Clean | Sheer Nudes, Sheer Milky White, Sheer Light Beige, Sheer Pale Grey | Perfect for a “clean girl” aesthetic or a sophisticated everyday look. They offer subtle enhancement and a polished appearance. |
| Jewel-Toned Elegance | Sheer Emerald Green, Sheer Sapphire Blue, Sheer Amethyst Purple, Sheer Ruby Red | For a more dramatic but still sophisticated look. These deep, translucent shades catch the light beautifully and offer a rich, stained-glass effect. |
| Soft Modern Pastel | Sheer Mint Green, Sheer Sky Blue, Sheer Pale Yellow, Sheer Corals | These colors are trendy and playful yet maintain an elegant feel due to their sheer nature. Great for spring and summer manicures. |
| Subtle Gradient | Combining any two complementary or similar sheer shades (e.g., sheer pink and sheer peach, sheer blue and sheer purple) for ombre effects. | Creates beautiful depth and visual interest without clashing colors. The sheer quality ensures a smooth transition. |
Don’t be afraid to mix and match these palettes. For example, a sheer pink tip on a sheer nude base, or a sheer lavender layered over sheer white. The possibilities are endless!
Frequently Asked Questions About Organza Nails
Got questions? We’ve got answers! Here are some common queries beginners have about organza nail designs.
Q1: Can I achieve organza nails with regular nail polish, or do I need gel?
A: You can absolutely achieve organza nails with regular (traditional) nail polish! Look for polishes labeled “sheer,” “jelly,” or “translucent.” While gels can offer a more durable and often brighter sheer effect, regular polishes are perfect for practicing and achieving beautiful results at home without special curing equipment.
Q2: My sheer polish looks streaky. What am I doing wrong?
A: Streaky sheer polish is common, but easily fixed! The key is applying thin, even coats. Avoid overloading your brush. Also, ensure each coat is completely dry before applying the next. If you’re still struggling, try using a makeup sponge to dab the color on, which can help blend out streaks and create a smoother finish.
Q3: How many layers of sheer polish are usually needed?
A: It typically takes 2 to 3 thin layers to achieve a good organza effect. The exact number depends on the specific polish formula and the opacity you desire. You want the color to build but still allow some of your natural nail or the layer beneath to show through slightly for that layered, fabric-like depth.


