Opal gemstone nail design is easier than you think! Get ready to dazzle with simple techniques and gorgeous looks that capture the magic of opals, perfect for beginners and busy bees wanting show-stopping nails without a fuss.
Have you ever looked at the mesmerizing shimmer of an opal and wished you could wear that magic on your fingertips? It’s easy to think that replicating that ethereal glow is super complicated and only for professional nail artists. But guess what? It’s totally achievable, even if you’re just starting out! We’re going to break down how to get stunning opal gemstone nail designs right at home. Forget the intimidation; we’re making it fun and simple so you can express your unique style. Get ready to fall in love with your nails all over again!
What is Opal Gemstone Nail Design?
Think iridescent, shimmery, and full of shifting colors! Opal gemstone nail design is all about mimicking the unique beauty of natural opals on your nails. These designs capture the play-of-color that opals are famous for, creating a look that’s both sophisticated and eye-catching. It’s not just about painting a gem; it’s about creating depth, light, and that signature captivating shimmer that makes everyone do a double-take.
Why You’ll Love Opal Gemstone Nails
Opal designs are incredibly versatile. They can be subtle and chic for everyday wear or bold and glamorous for a special occasion. The beauty lies in their adaptability – they can complement almost any outfit or mood. Plus, they offer a dreamy, almost otherworldly effect that feels truly unique.
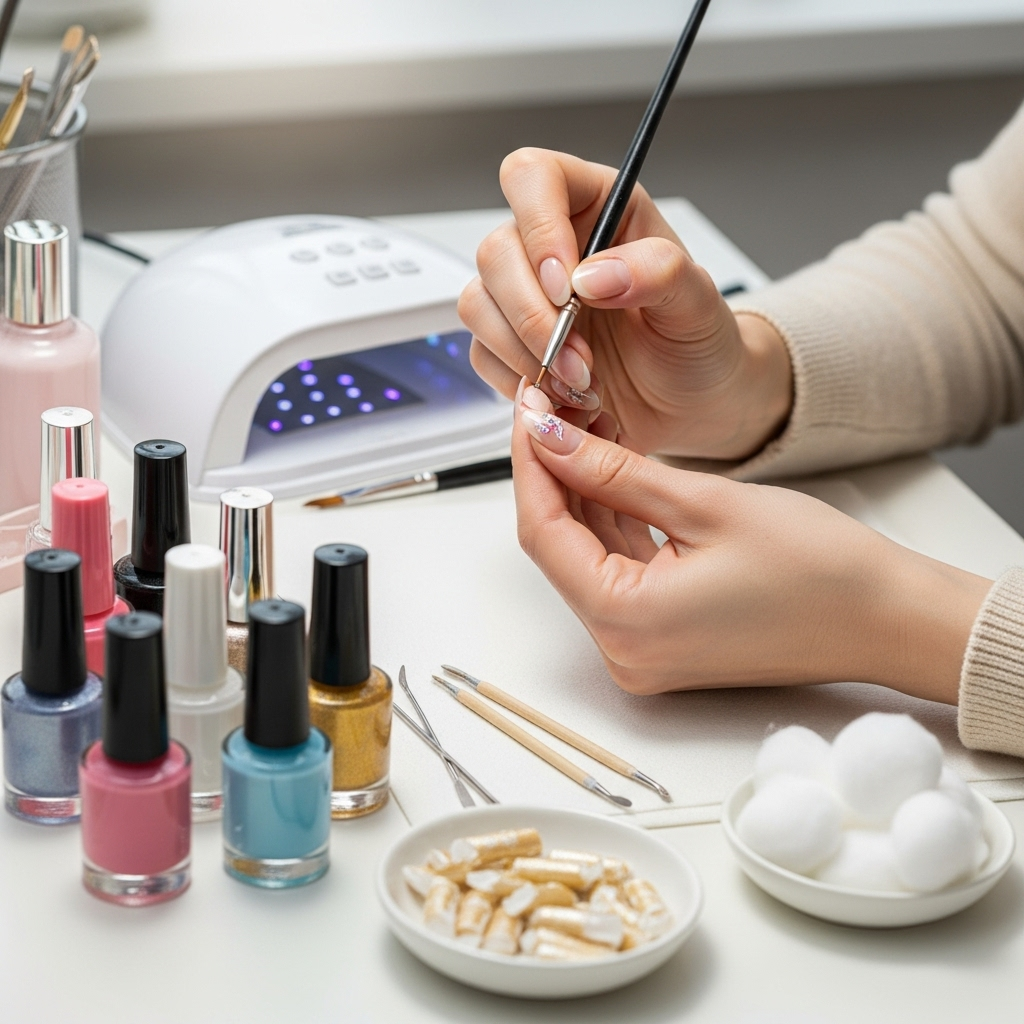
Essential Tools for Your Opal Nail Journey
Before we dive into the stunning looks, let’s gather our supplies. Don’t worry, most of these are standard nail kit items!
Base Coat: Protects your natural nails.
Top Coat: Seals your design and adds shine. A glossy, non-wipe top coat is often best for this effect.
Nail Polish Colors:
Sheer White, Milky Pink, or Nude: For the creamy, milky base of the opal.
Iridescent or Holographic Top Coats/Polishes: These are key to the color shift.
Accent Colors: Think pastel blues, pinks, greens, and purples for the “flash” of color.
Fine Glitter or Shimmer Powder: Often called “mermaid powder” or “chrome powder,” especially iridescent or holographic varieties.
Small Nail Art Brush or Dotting Tool: For precise application of color flashes.
Sponge or Makeup Applicator: For creating a soft, blended gradient effect.
Optional: Gel Polish: For a longer-lasting, salon-quality finish. If using gel, you’ll also need a UV/LED lamp.
How to Achieve the Opal Effect: The Basic Technique
The magic of opal nails often comes down to layering and iridescence. Here’s the most common and beginner-friendly way to get that gorgeous glow.
1. Prep Your Nails: Start with clean, dry nails. Push back your cuticles and gently buff the surface. Apply a thin layer of your favorite base coat and let it dry completely.
2. Apply the Base Color: Paint one or two coats of your sheer white, milky pink, or nude polish. This creates the soft, opaque base that mimics the body of an opal. Let each coat dry fully.
3. Create the “Flash” of Color: This is where the fun begins!
Using a Sponge: Dip a makeup sponge or applicator into a light pastel color (like baby blue, mint green, or soft pink). Gently tap or dab this color onto the nail in random, sweeping motions. You’re not trying to cover the whole nail, just add hints of color.
Using a Brush: Dip a fine nail art brush into your pastel or iridescent polish. Lightly sweep or flick the brush across the nail in irregular patterns, creating streaks and patches of color. Think of how light dances on a real opal.
4. Blend (Optional but Recommended): If you used a sponge or want to soften the edges of your color flashes, you can gently dab over the colored areas with a clean, dry sponge or a very light dusting of iridescent shimmer powder. This helps meld the colors and adds depth.
5. Add the Opal Sheen: This is the defining step!
Iridescent Top Coat: Apply one or two coats of a good iridescent or holographic top coat over your design. Watch as the colors underneath begin to shift and shimmer!
Shimmer Powder/Chroma Powder: For an even more intense effect, apply a layer of translucent or white gel polish (or regular polish that’s still slightly tacky). While it’s wet (or after curing gel polish and wiping off the sticky layer), gently rub an iridescent or holographic shimmer powder over the nail. Buff off any excess. Then, apply a top coat.
6. Seal the Deal: Apply a generous layer of your favorite glossy top coat. Make sure to cap the free edge of your nail to prevent chipping. If you used regular polish, let it dry thoroughly. If you used gel, cure it under your UV/LED lamp.
Stunning Opal Gemstone Nail Looks for Every Style
Now that you know the basics, let’s explore some beautiful variations!
1. The Classic Milky Opal
This is the quintessential opal look – soft, creamy, and with just a hint of color shift.
Base: Sheer milky white or soft pastel pink.
Color Flash: Very subtle streaks of pale blue, lavender, and a whisper of mint green, applied with a light hand.
Shimmer: A good holographic or iridescent top coat.
Vibe: Ethereal, elegant, and sophisticated. Perfect for weddings or everyday chic.
2. Bold & Bright Opal Pop
For those who love a bit more color and drama!
Base: A slightly more opaque white or light grey.
Color Flash: More pronounced flashes of vibrant pastel pink, aqua blue, and soft yellow, blended a little more visibly on the nail.
Shimmer: A strong iridescent powder rubbed over a cured gel layer for maximum impact.
Vibe: Playful, summery, and eye-catching. Great for vacations or when you want your nails to be a statement piece.
3. Aura Opal Nails
This trend combines the soft, diffused look of an aura manicure with the opal effect.
Base: A nude or sheer pink.
Color Flash: Concentrated color applied to the center of the nail and blended outwards using a sponge, creating a gradient effect like a glowing aura. Use two complementary pastel shades, like pink and purple.
Shimmer: Top with an iridescent or holographic shimmer powder for that opal glow.
Vibe: Trendy, modern, and mesmerizing.
4. Opal French Tips
A delicate twist on a classic.
Base: Natural or sheer nude nails.
Color Flash: Apply opal colors (as described in the basic technique) to the entire nail, but keep the color flashes more subtle.
French Tip: Instead of white, create the French tips using a thin line of iridescent polish, a white polish with shimmer, or even a fine glitter polish that mimics opal tones.
Vibe: Chic, understated, and a perfect way to try opal without going all-out.
5. Opal Accent Nail
If you prefer a minimalist approach, dedicate just one nail to the opal magic.
Base: Solid color nails in a complementary shade (e.g., white, pale blue, silver).
Accent Nail: Apply the full opal gemstone nail design technique to one finger, usually the ring finger.
Vibe: Subtle beauty, a touch of unexpected sparkle.
Comparing Techniques: Powder vs. Polish
The iridescent effect can be achieved in a couple of ways. Each offers a slightly different finish.
| Feature | Iridescent/Holographic Top Coat | Iridescent/Chroma Powder |
| :—————- | :—————————————————- | :—————————————————– |
| Application | Applied as a regular polish top coat. | Rubbed onto a tacky surface (gel) or wet polish. |
| Finish | A more diffused, glassy shimmer. | A more intense, reflective, almost mirror-like sheen. |
| Ease for Beginners | Very easy, just paint on. | Slightly trickier to get an even application. |
| Durability | Good, dependent on top coat quality. | Excellent, especially over gel polish. |
| Opal Look | Soft, ethereal glow, subtle color shifts. | Vibrant, dynamic color shifts, high-impact sparkle. |
| Best For | Casual, everyday looks; quick application. | Statement nails; longer-lasting wear; salon finish. |
Tips for Long-Lasting Opal Nails
Patience is Key: Let each layer dry or cure completely. Rushing the process is the quickest way to smudging or poor adhesion.
Cap Those Edges: Always paint the polish or top coat along the very tip of your nail. This creates a seal and prevents chipping, especially important for delicate designs.
Moisturize: Keep your cuticles and hands moisturized. Dry, flaky skin can make even the most stunning nails look less polished. A good cuticle oil can work wonders.
Be Gentle: While opal designs are durable, avoid using your nails as tools. Don’t scrape or pry with them.
Opal Nail Care and Maintenance
Caring for your opal gemstone nails is much like caring for any other manicure, but a few extra steps can help preserve that magical shimmer.
Wear Gloves: When doing household chores, washing dishes, or gardening, wear rubber gloves. This protects your nails from harsh chemicals and excessive moisture, which can cause polish to lift or chip.
Avoid Harsh Chemicals: Household cleaners, acetone-based removers (unless you’re intentionally removing polish), and even some sanitizers can degrade the polish and dull the shimmer over time.
Regular Moisturizing: As mentioned, keeping your hands and cuticles hydrated is crucial. Dryness can lead to hangnails or cuticle lifting, which can mar the appearance of your nails. Use a good cuticle oil daily.
Touch-Ups: If you notice minor chips or wear, you can often do a quick touch-up. Gently buff the chipped area, apply a bit of your base color, then reapply the iridescent top coat or shimmer powder, and finish with a new layer of top coat on that nail.
Debunking Opal Nail Myths
Here are some common questions and concerns beginners have about opal gemstone nail designs.
FAQ: Opal Gemstone Nail Design
Q1: Do I need special skills to do opal nails at home?
Absolutely not! While practice helps, the basic opal effect is designed to be simple and forgiving. We’ve outlined easy techniques that even beginners can master quickly.
Q2: Can I achieve the opal look with regular nail polish, or do I need gel?
You can definitely achieve a beautiful opal look with regular nail polish! Using gel polish and chrome powders can give a more intense, salon-like effect and longer wear, but regular polish with iridescent top coats works wonderfully too.
Q3: How long does an opal gemstone nail design typically last?
With proper application and care, regular polish opal designs can last 5-7 days. Gel polish versions, especially those using powders, can last 2-3 weeks.
Q4: What colors work best for the “opal flash”?
Soft, pastel colors are ideal: light blues, pinks, purples, greens, and yellows. You can also use sheer iridescent polishes directly which contain the shimmer and color shift.
Q5: My shimmer isn’t showing up. What am I doing wrong?
Ensure you’re applying enough base color for the shimmer to reflect off. For powders, you might need a tackier surface or to rub a bit more vigorously. For iridescent top coats, sometimes a second coat makes all the difference!
Q6: Can I combine opal nails with other nail art?
Yes! Opal designs look stunning as accent nails next to solid colors, simple dots, or even delicate line art like a French tip.
Q7: Are there any safety concerns with opal nail products?
Always use nail products from reputable brands. Ensure good ventilation when using polishes and removers. Pay attention to ingredient lists if you have known sensitivities. Using a UV/LED lamp for gel requires following the manufacturer’s instructions for safe curing times.
Where to Find Inspiration
The beauty of opal is its infinite variation.
Nature: Look at photos of actual opals – note the subtle shifts in color and how the light plays across their surface.
Online Galleries: Pinterest and Instagram are goldmines for nail art inspiration. Search #opalnails, #gemstonenails, or #iridescentnails.
Fashion Trends: Keep an eye on runways and fashion blogs. Opal shades and finishes are often featured in clothing and accessories, giving you ideas for color palettes.
Conclusion: Embrace Your Inner Gemstone Artist
Mastering the opal gemstone nail design is a journey of adding a touch of magic to your everyday. From the subtle elegance of a milky opal to the vibrant charm of a bold pop, there’s a look for everyone. The key is to have fun with the process, experiment with colors, and remember that perfection isn’t the goal – creativity and enjoyment are! With these simple steps and a dash of your personal style, you can create breathtaking nails that truly shine. So go ahead, gather your tools, and let your fingertips become your favorite canvas for a little bit of dazzling, everyday magic. Happy nail painting!