Ombre coffin nails offer a stunning, gradient effect that can elevate any look. This guide breaks down how to achieve beautiful ombre designs on coffin-shaped nails, from simple transitions to glamorous embellishments. Get ready to master this versatile trend and express your unique style!
Dreaming of nails that blend colors seamlessly? Ombre nail design ideas for coffin nails are super popular and for good reason! They offer a chic, modern vibe that’s surprisingly easy to achieve once you know a few tricks. Sometimes, getting that perfect gradient can feel a little tricky, especially for beginners. You might worry about messy lines or uneven color blends. But don’t sweat it! We’re here to guide you through creating gorgeous ombre looks right at home. Get ready to fall in love with your nails all over again!
What are Ombre Nails?
Ombre, a French word meaning “shaded” or “shadowed,” refers to a design where one color gradually fades into another. On nails, this means a beautiful blend of two or more colors, creating a smooth transition from one shade to the next. Think of a sunset captured on your fingertips! This technique can be done in many ways and with a vast array of color combinations, making it incredibly versatile.
Why Coffin Nails Are Perfect for Ombre
Coffin nails, also known as ballerina nails, are characterized by their long, tapered shape with a flat tip. This elegant silhouette provides a fantastic canvas for ombre designs. The long, straight edges allow for a smooth gradient to be showcased beautifully, making the color transition appear even more striking. The shape itself adds a touch of sophistication, and when combined with the soft allure of ombre, you get a truly show-stopping manicure.
Essential Tools for Ombre Nail Designs
Before we dive into the stunning ideas, let’s gather your toolkit. Having the right tools makes the whole process smoother and more enjoyable. Don’t worry if you don’t have everything right away; many of these are staple nail art items.
- Base Coat: To protect your natural nails and help polish adhere better.
- Top Coat: To seal your design and add a glossy finish.
- Nail Polish Colors: Your chosen transition shades.
- Sponge: A makeup sponge works great for the classic gradient effect. You can also use specialized nail art sponges.
- Painter’s Tape or Liquid Latex: To protect your skin from polish while sponging.
- Clean-up Brush or Cotton Swabs: For tidying up any messy edges.
- Nail Polish Remover: For that clean-up.
- Optional: Glitter, rhinestones, stencils, or other embellishments for added flair.
Beginner-Friendly Ombre Technique: The Sponge Method
This is the most popular and easiest way for beginners to achieve that beautiful ombre effect. It’s all about dabbing and blending!
Step-by-Step Guide to Sponged Ombre Nails:
- Prep Your Nails: Start with clean, dry nails. Apply a base coat and let it dry completely.
- Apply Your First Color: Paint your nails with the lightest color you’ll be using in your ombre. Let it dry thoroughly. This provides a good base for the gradient.
- Protect Your Skin: Apply painter’s tape or liquid latex around your nail beds. This is crucial to avoid getting colorful polish all over your skin.
- Create the Gradient on the Sponge: Take your makeup sponge and apply stripes of your chosen colors side-by-side. For a classic look, place the lighter color on one side and the darker color next to it. You can also add a third color if you’re feeling adventurous!
- Dab the Polish Onto Your Nail: Gently press the sponge onto your nail. You want to dab rather than swipe to transfer the colors. You might need to dab a few times to build up the color intensity and create a smoother blend.
- Repeat for Intensity: If the color isn’t as vibrant or blended as you’d like, re-apply polish to the sponge and dab again.
- Clean Up Edges: Carefully remove the painter’s tape or liquid latex. Use your clean-up brush dipped in nail polish remover to clean up any stray polish around your cuticles.
- Add More Colors (Optional): If you want to add another color into the mix, you can repeat steps 4-7, focusing the new color at the tip or base.
- Seal It In: Once the polish is dry, apply a generous layer of top coat. This will smooth out any texture from the sponge and seal the design.
Stunning Ombre Nail Design Ideas for Coffin Nails
Now for the fun part! Let’s explore some of the most breathtaking ombre nail design ideas that are perfect for coffin-shaped nails. These ideas range from subtle and sophisticated to bold and glamorous.
1. Classic Sunset Ombre
This is a timeless favorite. It involves blending warm hues like yellow, orange, and pink, mimicking a beautiful sunset. It’s perfect for spring and summer but adds a touch of warmth year-round. For coffin nails, the gradient will flow smoothly from the base to the tip, creating a dramatic effect.
2. Pastel Dream Ombre
Soft, delicate pastels like baby pink, lavender, mint green, and baby blue create a dreamy, ethereal look. This is ideal for weddings, baby showers, or just when you want a touch of gentle color. The subtlety of pastels looks incredibly chic on long coffin nails.
3. Bold & Bright Ombre
Don’t shy away from vibrant colors! Think electric blue fading into a bright teal, or a hot pink blending into a fiery red. These bold combinations make a statement and are perfect for expressing personality and confidence. The length of coffin nails really allows these intense colors to shine.
4. Nude & White Ombre (French Ombre)
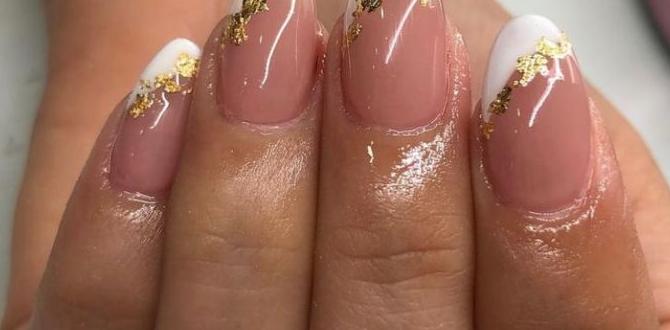
A modern twist on the classic French manicure. This design features a sheer nude or milky pink at the base, gradually fading into a clean white tip. It’s incredibly elegant, sophisticated, and perfect for any occasion, from professional settings to special events. This is often referred to as “baby boomer” nails.
5. Deep Jewel Tone Ombre
Imagine deep purples fading into blues, or emerald green blending into a rich teal. Jewel tones offer a luxurious and sophisticated feel. This look is stunning for fall and winter, or any time you want to add a touch of opulence to your manicure.
6. Black & White/Grey Ombre
For a chic, monochrome look, blend black into white or shades of grey. This creates a dramatic, edgy, or even a soft, moody feel depending on the ratio and intensity of the colors. It’s incredibly versatile and always stylish.
7. Glitter Ombre
Add some sparkle! You can have a glitter polish fade into a solid color, or use a fine glitter polish to create a gradient effect on its own. A popular choice is a nude or pink base with iridescent or silver glitter fading towards the tips. This is a fantastic option for parties and holidays.
8. Metallic Ombre
Metallic finishes add a futuristic and glamorous edge. Think rose gold fading into champagne, or silver blending into a deep gunmetal. This look is incredibly eye-catching and perfect for making a statement.
9. Reverse Ombre
Why stick to the usual? In a reverse ombre, the darker color is at the base of the nail, and it gradually fades into a lighter color towards the tip. This can create a unique and striking effect, especially on longer coffin nails.
10. Multi-Color Ombre
Get creative with three or more colors! You can create rainbow effects, or blend complementary colors for a unique artistic finish. This is where you can really let your imagination run wild.
Beyond the Basics: Adding Embellishments to Your Ombre Coffin Nails
Once you’ve perfected the basic ombre gradient, why not take your coffin nail designs to the next level? Embellishments can add texture, sparkle, and personality.
- Rhinestones: Apply small rhinestones strategically along the cuticle line, at the tip, or scattered across the nail for a touch of sparkle.
- Glitter Accents: Add a strip of chunky glitter at the cuticle or tip, or create a full glitter accent nail to complement your ombre.
- Stamping: Use nail stamping plates to add intricate patterns over your ombre design.
- Chrome Powder: A chrome overlay can give your ombre a stunning, iridescent finish.
- 3D Charms: Small charms, like pearls or tiny bows, can be adhered to your nails for a unique 3D effect.
Maintaining Your Ombre Coffin Nails
To keep your gorgeous ombre coffin nails looking their best, follow these simple care tips:
- Wear Gloves: Protect your nails from harsh chemicals and prolonged water exposure by wearing gloves when doing chores, washing dishes, or cleaning.
- Moisturize: Keep your cuticles and hands hydrated by applying cuticle oil and hand lotion regularly.
- Be Gentle: Avoid using your nails as tools to pry or scrape.
- Touch-Ups: If you notice any chipping or wear, simply reapply a layer of top coat. For minor issues, a bit of clear polish can do wonders.
- Don’t Over-File: Be careful when filing your nails to maintain the coffin shape. Over-filing can weaken the nail.
Ombre Nail Colors and Their Meanings (A Fun Guide!)
Colors can evoke different feelings and meanings. Here’s a fun look at what some popular ombre color combinations might convey on your coffin nails:
| Color Combination | Mood/Meaning | Occasion Suggestion |
|---|---|---|
| Nude to White | Sophisticated, clean, pure, subtle elegance | Work, weddings, everyday chic |
| Pink to Orange | Warm, joyful, energetic, optimistic | Spring, summer, parties, vacation |
| Blue to Purple | Mysterious, creative, calm, regal | Evening events, fall, artistic expression |
| Green to Teal | Natural, refreshing, calming, luxurious | Everyday wear, spa days, embracing nature |
| Black to Grey | Edgy, modern, sophisticated, powerful | Night out, fashion-forward events, minimalist style |
| Pastels (various) | Soft, gentle, whimsical, innocent | Spring, Easter, baby showers, playful days |
Troubleshooting Common Ombre Nail Issues
Even the best nail artists encounter minor hiccups. Here’s how to fix them:
- Harsh Lines: If your color transition looks too blocky, gently dab the sponge over the line between colors again, or buff very lightly with a fine-grit file and reapply a thin layer of top coat.
- Patchy Polish: Apply polish to the sponge in quick, bold strokes, and dab firmly onto the nail. You might need 2-3 layers on the nail, with drying time in between.
- Polish on Skin: This is where that painter’s tape or liquid latex is a lifesaver! If you forget, a clean-up brush dipped in remover is your best friend for precise correction.
- Dull Finish: Ensure you’re using a good quality, glossy top coat and apply it generously.
Where to Get Inspiration for Ombre Nail Design Ideas
The internet is bursting with ideas! Here are some great places to find inspiration:
- Pinterest: Search for “ombre coffin nail ideas,” “gradient nails,” or “coffin nail art.”
- Instagram: Follow nail artists and hashtags like #ombrenails #coffinails #nailinspo.
- Beauty Blogs and Websites: Many beauty sites feature trend roundups and tutorials.
- Fashion Magazines: Keep an eye on celebrity manicures and trending styles.
- Your Local Nail Salon: Look at their display books or ask your technician for their favorite ombre designs.
For more insights into nail trends and care, the U.S. Food & Drug Administration (FDA) offers valuable information on cosmetic safety, including products used for nail enhancements.
Frequently Asked Questions About Ombre Coffin Nails
Q1: Is ombre difficult to do on coffin nails at home?
A: With the sponge method, it’s quite beginner-friendly! It takes a little practice, but the results are very forgiving and can look professional.
Q2: How many colors can I use for an ombre design?
A: You can use two, three, or even more colors! Two colors are standard for a classic ombre, but feel free to experiment with more for unique looks.
Q3: How do I make my ombre blend look smooth?
A: The key is to dabbing the sponge multiple times to build up the color and blend the edges. Ensure each layer of polish on your nail is dry before sponging again. A good top coat also helps smooth out any slight texture.
Q4: Can I do ombre nails with gel polish?
A: Yes! You can achieve ombre with gel polish, though the sponging technique can be trickier as gel dries under a UV/LED lamp. Many artists use a brush to blend gel colors directly on the nail or use specific gel ombre kits. For beginners, regular nail polish is often easier.
Q5: How long do ombre coffin nails last?
A: With proper application and care, regular nail polish ombre designs can last anywhere from 5-10 days. Gel polish ombre designs can last 2-3 weeks.
Q6: What’s the difference between ombre and gradient nails?
A: They’re essentially the same! “Ombre” is the French term, while “gradient” describes the visual effect of colors blending. So, ombre nails are gradient nails.
Q7: Can I do ombre on short coffin nails?
A: Absolutely! While long coffin nails showcase the gradient beautifully, shorter coffin shapes can also rock an ombre look. The blend might be more compressed, but it can still be very stylish and cute.
Conclusion
Ombre nail design ideas for coffin nails are incredibly versatile and offer a sophisticated way to express your personal style. Whether you opt for a subtle nude-to-white blend, a vibrant sunset fantasy, or a dazzling glitter gradient, the ombre effect adds depth and dimension that’s always on-trend. With the right tools and a little practice, mastering the sponge technique will unlock a world of beautiful manicures. Don’t be afraid to experiment with different color palettes and embellishments to make your coffin ombre nails uniquely yours. So go ahead, grab your sponges, pick your favorite polishes, and get ready to create some stunning works of art right on your fingertips!

