Ombre French tips are a stylish twist on the classic French manicure, blending colors for a soft, gradient effect on the nail tip. This guide breaks down how to achieve this chic look at home, making it easy for beginners to master this trendy nail art.
Dreaming of sophisticated nails that are a step up from the ordinary? That classic French manicure is lovely, but sometimes we crave a little more flair! If you’ve seen those gorgeous nails with a seamless color blend on the tips and thought, “Wow, that looks complicated,” I’ve got great news. You can totally achieve beautiful ombre French tips right at home, even if you’re new to nail art. Forget those intimidating salon prices; we’re going to break it down into simple, fun steps. Get ready to give your nails that stylish, blended magic we all love!
What Are Ombre French Tips?
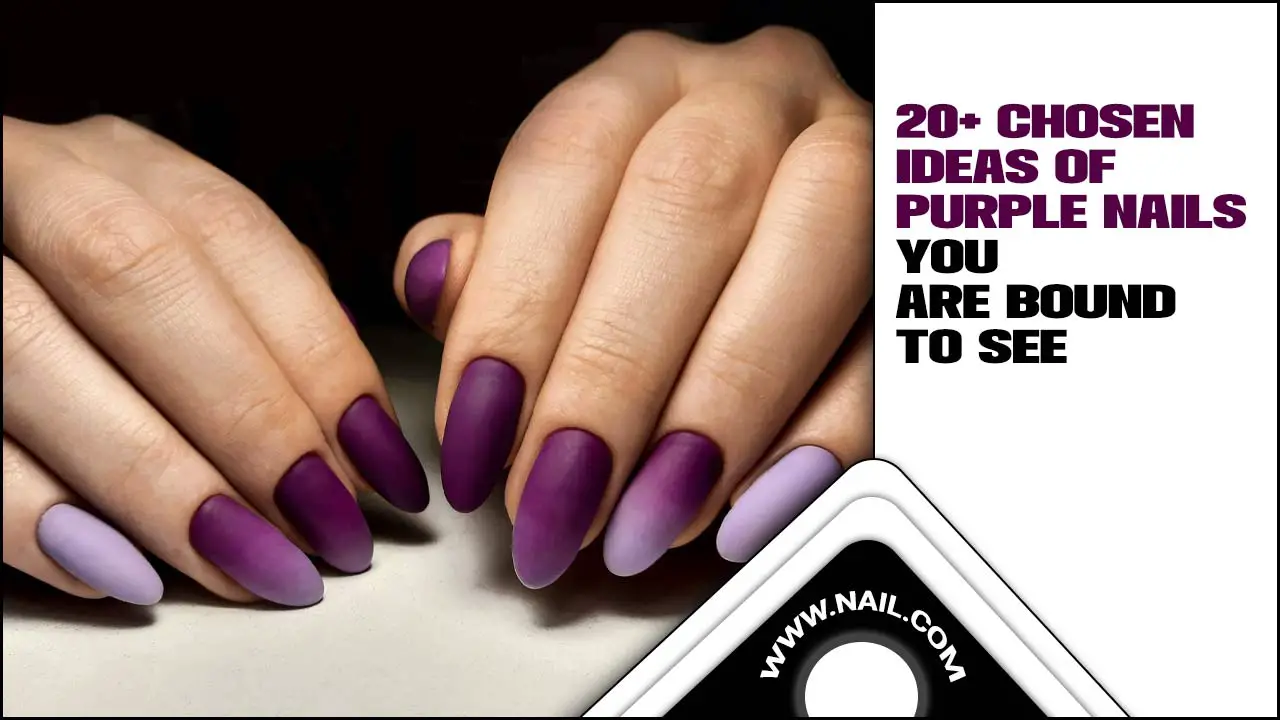
Ombre French tips take the traditional French manicure and give it a modern, captivating makeover. Instead of a stark white line, the tip of the nail features a gradient, or “ombre,” effect. This means colors transition smoothly from one shade to another. Think soft pinks melting into white, nudes blending into cream, or even bolder combinations like pastels fading into a sheer base. It’s all about that beautiful, diffused line where shades meet, offering a softer, more nuanced look than the classic French.
Why You’ll Love Ombre French Tips
There are so many reasons why ombre French tips have become a go-to for nail enthusiasts everywhere. Let’s dive into why they’re so fabulous:
- Chic & Trendy: They’re undeniably stylish and add a touch of modern elegance to any look.
- Versatile: From subtle nude blends to vibrant color pops, they can be customized to match any outfit or occasion.
- Soft Appearance: The blended effect is often softer and more flattering than a sharp white tip, making them a great choice for everyday wear.
- Freshens Up a Classic: If you love the French manicure but want something new, this is the perfect evolution.
- Surprisingly Achievable: With the right tools and a little practice, you can get salon-worthy results at home.
Essential Tools for Ombre French Tips
Before we jump into the steps, let’s gather our supplies. Having the right tools makes all the difference in achieving a smooth, beautiful ombre effect. Don’t worry if you don’t have everything at once; you can build your nail art kit over time!
For the Best Results, You’ll Need:
- Base Coat: Crucial for protecting your natural nail and helping polish adhere.
- Sheer Nude or Pink Polish: This will be your base color for the nail.
- Two Ombre Colors: These should complement each other. For a classic look, think white and a sheer nude. For something bolder, try two pastel shades.
- Cosmetic Sponge: A clean makeup sponge is key for blending the colors seamlessly. A denser sponge works best for a smoother gradient.
- Top Coat: To seal everything in and add shine.
- Cuticle Oil: To rehydrate your skin after polishing.
- Nail File & Buffer: For shaping and smoothing your nails.
- Optional: Cleanup Brush or Cotton Swabs: For tidying up any polish mistakes around the cuticles.
Step-by-Step Guide: Creating Your Ombre French Tips
Ready to get started? This guide will walk you through creating beautiful ombre French tips. Remember, practice makes perfect, and the goal is to have fun!
Step 1: Prep Your Nails
A good manicure always starts with proper nail prep. This ensures your polish lasts and looks its best.
- Cleanse: Start with clean, dry nails. Remove any old polish thoroughly.
- Shape: File your nails to your desired shape. A slightly rounded or squoval shape often looks great with French tips.
- Buff: Gently buff your nail surface to create a smooth canvas. This also helps polish adhere better.
- Cuticle Care: Gently push back your cuticles. If you have any excess skin, carefully trim it.
- Apply Base Coat: Apply a thin layer of your base coat and let it dry completely. This protects your nails from staining and helps the polish last longer.
Step 2: Apply the Base Color
This is the foundation for your ombre look.
- Apply one or two thin coats of your sheer nude or pink polish.
- Ensure each coat is completely dry before moving to the next step. A full dry nail is key to preventing smudging later.
Step 3: Prepare Your Ombre Sponge
This is where the magic begins! Your sponge is your blending tool.
- Cut a clean cosmetic sponge into a few smaller pieces, about 1-inch squares. This makes it easier to handle and use on each nail.
- To prevent your polish from being absorbed too quickly, you can lightly dampen the sponge with water and then gently squeeze out the excess. Pat it dry with a paper towel. This also helps create a smoother gradient.
Step 4: Apply Your Ombre Colors to the Sponge
Now, let’s load up our sponge with color!
- On your clean sponge piece, paint two parallel lines of your chosen ombre colors. Place the lighter color (often white or cream) towards the tip of the sponge that will touch your nail tip, and the darker or second color below it. For a traditional French ombre, you’d typically have white on top fading down into a sheer nude or pink.
- Work quickly! The polish will start to absorb into the sponge.
Pro Tip: You can also place the colors side-by-side on the sponge instead of in lines, then gently press the sponge together to pre-blend them slightly before applying to the nail.
Step 5: Blend the Colors Onto Your Nail
Here’s the crucial blending step. Patience is your friend!
- Gently press the sponge onto the tip of your nail. Use a dabbing or rolling motion to transfer the color.
- You’ll likely need to reapply polish to the sponge after each nail or two.
- For a more intense gradient, you can repeat this process a few times, applying more layers of color to the sponge and dabbing onto the nail.
- As you dab, move your sponge slightly down the nail to create the blended effect.
Step 6: Refine and Clean Up
This step makes your manicure look polished and professional.
- Use a small cleanup brush (which you can find at most beauty supply stores) dipped in nail polish remover to carefully clean up any polish that got onto your skin or cuticles. Alternatively, a toothpick or cotton swab can work, but a brush offers more precision.
- If the ombre isn’t as blended as you’d like, after it’s dry, you can use a clean sponge piece with just a tiny bit of the lighter color to gently dab and blend the harsh line.
Step 7: Apply Top Coat
The finishing touch for shine and durability.
- Once your ombre tips are completely dry, apply a generous layer of top coat.
- Ensure the top coat covers the entire nail, including the ombre tip, to seal in the design.
- Let your top coat dry thoroughly. This is essential to prevent smudging.
Step 8: Hydrate and Admire!
You’re almost done!
- Apply cuticle oil around your nails to rehydrate the skin.
- Admire your beautiful, salon-worthy ombre French tips!
Ombre French Tip Color Combinations
The beauty of ombre French tips is their incredible versatility. You can tailor them to your personal style and the season. Here are some popular and stunning color combinations to inspire you:
Classic & Elegant
- Nude-to-White: The quintessential ombre French. A sheer nude base fading into a classic white tip.
- Sheer Pink-to-White: A softer, more delicate version of the French tip, perfect for weddings or everyday grace.
- Creamy Beige-to-Ivory: A sophisticated and subtle blend that works for any occasion.
Modern & Trendy
- Peach-to-White: A warm, summery vibe that’s universally flattering.
- Lavender-to-Pink: A dreamy pastel blend that’s beautiful for spring.
- Baby Blue-to-White: A fresh, clean look reminiscent of a clear sky.
Bold & Fun
- Coral-to-Orange: A vibrant, energetic combo perfect for vacation or when you want to make a statement.
- Pink-to-Purple: A playful and romantic gradient that’s eye-catching.
- Teal-to-Turquoise: A cool, oceanic blend that’s both striking and chic.
- Rose Gold-to-Champagne: A metallic twist for a glamorous feel.
Common Ombre French Tip Mistakes (and How to Fix Them!)
Even with the best intentions, we all run into a few snags when trying new nail art. Here are common issues and how to navigate them:
Mistake 1: Sponge Too Wet or Too Dry
Problem: If your sponge is too wet, it disperses the polish too thinly, making the ombre patchy. If it’s too dry, it absorbs too much polish, creating a rough texture.
Fix: Lightly dampen the sponge, then gently squeeze and blot it on a paper towel until it’s just slightly moist. This balances absorption and transfer.
Mistake 2: Harsh Lines
Problem: The transition between colors looks more like two stripes than a smooth blend.
Fix: After the polish is dry, use a clean sponge piece with a very light touch of your transitioning color (usually the lighter one) to gently dab over the harsh line and soften it. You can also use a fine brush dipped in nail polish remover to gently feather the edges.
Mistake 3: Polish Absorbed Too Quickly
Problem: You apply the polish to the sponge, but it soaks in before you can get it to your nail.
Fix: Apply polish to the sponge quickly before it has a chance to soak in. You may need to reapply polish to the sponge for each nail or pair of nails.
Mistake 4: Uneven Coverage
Problem: Some parts of the ombre look more opaque than others.
Fix: Apply thin, even coats of polish to the sponge. You can build up opacity by dabbing multiple times with the sponge. Ensure you are pressing down with consistent pressure.
Mistake 5: Messy Cuticles
Problem: Polish ends up all over your skin.
Fix: This is where your cleanup brush or cotton swab comes in handy. Dip it in nail polish remover and carefully trace around your cuticle line to remove excess polish. Doing this while the polish is still wet is easiest!
Tools to Consider for Advanced Ombre Techniques
Once you’ve mastered the basic sponge technique, you might be curious about other ways to achieve ombre effects or refine your looks. Here are a few tools that can help:
Gradient Sponge Tools
These are specifically designed makeup sponges with different textures or shapes that can create unique gradient patterns. You can find them online or at beauty supply stores. They often have pre-cut edges that make it easier to apply the ombre just to the tip of the nail.
Airbrush Machines (for the serious hobbyist!)
For a perfectly seamless, airbrushed look, professional nail artists sometimes use small airbrush machines with specialized polishes or paints. This is a significant investment and requires a learning curve, but it delivers an unparalleled smooth finish.
Double-Ended Ombre Brushes
Some specialty nail art brushes have a small sponge tip on one end and a fine brush for cleanup on the other. These are great for portability and can offer more control for blending smaller areas or achieving very fine gradients.
Nail Stencils/Guides
While not strictly for ombre, using French tip guides can help you define the area where you want your ombre to start, ensuring a cleaner line between the ombre tip and the rest of your nail. You can then use the sponge to blend up from the guide.
Durability and Maintenance of Ombre French Tips
Ombre French tips, when applied correctly with a good base and top coat, can last just as long as a regular gel or polish manicure. With regular nail polish, you can typically expect them to last anywhere from 5-7 days. For gel polish, this can extend to 2-3 weeks. The key is in the prep and sealing:
- Seal the Edges: Make sure your top coat seals the free edge of the nail to prevent chipping and lifting.
- Avoid Harsh Chemicals: Prolonged exposure to harsh cleaning chemicals or submerging hands in water for long periods can break down polish.
- Moisturize: Keep your cuticles and hands moisturized to prevent dry, brittle nails, which can lead to polish chipping.
- Touch-Ups: If you get a tiny chip or wear starts to show, you can sometimes touch it up with a bit of top coat or carefully dab a little more color on the tip if needed.
If you’ve used regular nail polish, removal is straightforward. Soak a cotton ball in nail polish remover, place it on your nail for about 30 seconds to soften the polish, and then gently wipe it away. For gel polish, you’ll need a gel remover or soak-off solution, as per the gel polish manufacturer’s instructions, often involving buffing the top layer first.
It’s also worth noting that the ombre effect itself is quite forgiving! As your nails grow out, the blend can sometimes look more natural, or you can simply reapply and blend a fresh coat whenever you feel it’s needed.
Frequently Asked Questions About Ombre French Tips
What colors work best for ombre French tips?
For a classic look, nude to white or sheer pink to white are timeless. For a modern twist, you can use two complementary pastels, two shades of the same color family (like light pink to fuchsia), or even contrasting colors for a bolder statement. The key is that they blend smoothly.
How can I make the ombre blend smoother?
A good quality cosmetic sponge is crucial. Lightly dampening the sponge and dabbing a few layers of color with consistent pressure helps create an even gradient. Working quickly and re-applying polish to the sponge as needed also ensures a smooth transfer.
Can I do ombre French tips with regular nail polish?
Absolutely! The sponge technique described in this guide works perfectly with regular nail polish. Just ensure each layer is dry enough before sponging on the next color and finish with a good top coat.
How long do ombre French tips usually last?
With regular nail polish and proper application (including base and top coat), expect them to last 5-7 days. Using gel polish can extend this to 2-3 weeks. The blended nature can be quite forgiving as nails grow.
What’s the difference between ombre nails and ombre French tips?
Ombre nails typically refer to a gradient effect across the entire nail, from cuticle to tip. Ombre French tips specifically apply the gradient effect only to the tip of the nail, replacing the traditional solid white line with a blended color transition.
Is it hard to do at home?
It takes a little practice, but it’s very achievable for beginners! The key techniques—nail prep, sponge application, and cleanup—are straightforward. Don’t get discouraged if your first try isn’t perfect; each attempt will get easier!
Where can I find good quality cosmetic sponges for nail art?
You can find excellent cosmetic sponges at most drugstores, beauty supply stores (like Ulta or Sephora), and online retailers like Amazon. Look for densely packed makeup sponges or specifically designed nail art gradient sponges.
Conclusion: Your Stylish Ombre French Tip Journey Awaits!
There you have it! You’ve unlocked the secrets to creating stunning ombre French tips right in your own home. From understanding the beautiful blended effect to gathering the essential tools and mastering the step-by-step sponge technique, you are now equipped to give your nails a sophisticated, modern upgrade. Remember, nail art is all about self-expression and having fun. Don’t be afraid to experiment with different color combinations and find what makes you feel fabulous.
Whether you’re aiming for a subtle, everyday elegance or a vibrant pop of color, ombre French tips


