Olive branch nail designs are a chic and elegant way to add a touch of nature-inspired beauty to your manicure. These designs are surprisingly easy to create, even for beginners, offering a sophisticated look that’s perfect for any occasion. Learn how to achieve stunning results with simple techniques and essential tools.
Ever admired those beautiful, delicate designs on manicures and thought, “I could never do that!”? Well, it’s time to ditch that doubt! Olive branch nail designs are a trend that brings a touch of sophisticated nature right to your fingertips. They’re not as complicated as they look, and with a few simple tricks, you’ll be creating your own stunning looks in no time. Ready to elevate your nail game? Let’s dive into everything you need to know to make your nails bloom with olive branch beauty!
Why Olive Branches for Your Nails?
The olive branch has long been a symbol of peace, wisdom, and victory. Translating this timeless symbol onto your nails offers a unique way to express subtle elegance and a connection to nature. Beyond its symbolism, the aesthetic of an olive branch is inherently beautiful. Its slender leaves and graceful curves can be adapted to suit various nail shapes and lengths, making it a versatile design choice. Whether you prefer a minimalist touch or a more intricate pattern, the olive branch fits perfectly.
The Allure of Nature-Inspired Manicures
In the world of nail art, nature-inspired themes are always in vogue. Flowers, leaves, and natural patterns evoke a sense of calm and organic beauty. Among these, the olive branch stands out. It’s less common than floral designs, giving your manicure an air of understated uniqueness. It’s chic without being loud, sophisticated without being fussy. This makes it ideal for everyday wear, special events, or even as a calming addition to your professional look.
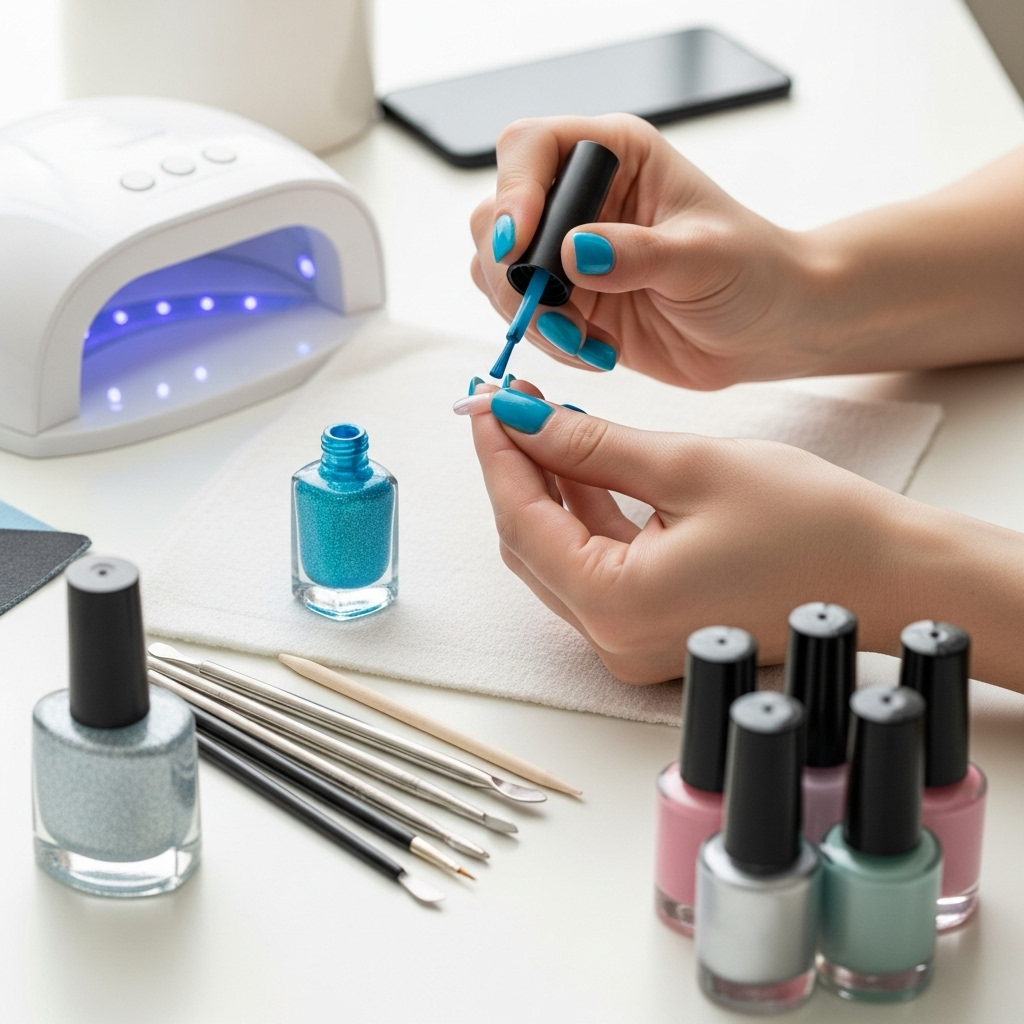
Getting Started: Essential Tools & Supplies
Before we start painting, let’s gather our supplies. Don’t worry, you don’t need a whole nail salon in your home! Most of these items are easily accessible and will serve you well for many future nail art adventures.
Must-Have Tools for Olive Branch Nails
- Base Coat: This protects your natural nails and creates a smooth canvas for your design. A good quality base coat will also help your polish last longer.
- Top Coat: Essential for sealing your design, adding shine, and preventing chips. Look for a quick-drying or gel-like formula for extra staying power.
- Nail Polish Colors: You’ll primarily need a creamy green or olive shade for the branches and leaves. A nude or soft neutral base color is also perfect for a subtle look. White or black can be used for outlining or contrasting elements.
- Detail Nail Art Brush: This is your magic wand! A fine-tipped brush is crucial for drawing thin lines and delicate leaves. Look for one with synthetic bristles that hold their shape.
- Dotting Tool (Optional): While not strictly necessary for olive branches, a dotting tool can be useful for adding small accents or creating a dotted effect if you desire.
- Nail Polish Remover & Cotton Swabs: For cleaning up any mistakes and tidying up the edges.
- Nail File & Buffer: To shape your nails and provide a smooth surface before applying polish.
Choosing the Right Colors
The classic olive branch design often uses shades of green. Think muted, sophisticated greens rather than bright, neon ones. An olive green, a sage green, or even a deep forest green can work beautifully. For the base color, consider soft neutrals like beige, cream, light grey, or a pale peachy pink. This allows the green branches to pop without being overwhelming. If you’re feeling bolder, a deep navy or even a matte black can create striking contrasts.
Basic Olive Branch Nail Design Techniques
Let’s get to the fun part! Here’s how to create a simple yet stunning olive branch design. We’ll start with the most fundamental approach.
The Single-Stroke Leaf Method
This is one of the easiest ways to get a realistic-looking leaf. It requires a bit of practice, but once you get the hang of it, you can create many leaves quickly.
- Prep Your Nails: Start with clean, dry nails. Apply your chosen base coat and let it dry completely. Then, apply one or two coats of your neutral base color and let it dry thoroughly. A perfectly smooth base is key!
- Load Your Brush: Dip your fine-detail nail art brush into your green polish. You don’t need a lot of polish – just a small bead on the tip of the brush.
- Create the Stem: On your nail, draw a thin, straight line. This will be the central stem of your olive branch. Don’t worry if it’s not perfectly straight; real branches have a natural flow.
- Form the First Leaf: With the same brush, starting from one end of the stem, press down gently with the tip of the brush and then pull away, creating a small, tapered leaf shape. Imagine you’re drawing a teardrop with a pointed end.
- Add More Leaves: Move along the stem and repeat the previous step, adding leaves on alternating sides. Vary the size and orientation of the leaves slightly to give a more natural appearance. You can make some leaves longer, some shorter, and angle them slightly differently.
- Refine and Detail (Optional): Once all your leaves are drawn, you can use the very tip of your brush to add a tiny central vein to a few of the larger leaves if you wish for extra dimension.
- Seal the Deal: Let your design dry completely. Then, carefully apply a layer of top coat to protect your artwork and add a beautiful shine.
Dip-Curing Method (for Gel Polish Users)
If you use gel polish, you can leverage a technique that allows for more control and less smudging.
- Apply Base & Color: Apply your base coat and neutral color, then cure under your UV/LED lamp.
- Draw with Polish: Use your detail brush and green gel polish to draw the olive branch directly onto the uncured gel surface. This allows you to reposition or wipe away mistakes easily before curing.
- Cure: Once you’re happy with the design, cure it under your lamp.
- Apply Top Coat: Finish with a gel top coat and cure again.
Using Stencils or Decals
For absolute beginners or those short on time, stencils and decals are a fantastic shortcut. You can find numerous olive branch nail stickers or water decals online.
- Apply Base & Color: Paint your nails with your base and chosen color, and let them dry completely (or cure if using gel).
- Apply Decal: Follow the instructions provided with the decal or sticker. Typically, you’ll peel and stick them onto your nail. For water decals, soak them briefly in water, slide them off the backing, and position them on your nail.
- Seal: Apply a generous layer of top coat to secure the decal and protect the design.
Stunning Olive Branch Nail Design Variations
Once you’ve mastered the basic technique, it’s time to play with different styles! Olive branches can be incorporated in so many creative ways.
Minimalist Accents
1. Single Branch: Paint one delicate olive branch curving along one side of your nail, perhaps from the cuticle to the tip. Keep the lines thin and the leaves sparse for an ultra-minimalist look.
2. Tiny Sprigs: Add just a few tiny sprigs on accent nails like your ring or middle finger. This is subtle and chic.
3. Outline Details: Use a fine brush with white or black polish to outline a simple green olive branch. This gives it a graphic, modern feel.
Full Nail Coverage
1. Repeating Pattern: Cover your entire nail with a repeating pattern of small olive sprigs. This creates a beautiful, textured effect.
2. Gradient Background: Start with a gradient base color – perhaps a soft nude fading into a light green. Then, overlay a delicate olive branch design on top.
3. Two-Toned Branches: Use two shades of green for your branches. You can use a lighter green for the leaves and a slightly darker green for the stem, or vice versa, for added depth.
Adding Other Elements
1. Berries: Add tiny dots of deep red, burgundy, or even gold using a dotting tool or the tip of your brush to represent the olives themselves. This adds a lovely pop of color and detail.
2. Gold or Silver Accents: Incorporate thin gold or silver lines alongside the branches, or use metallic green polish for a touch of glamour. A touch of metallic foil layered near the branches can also look stunning.
3. Birthstones or Gems: Place a tiny crystal or a small gem near the base of the branch for a touch of sparkle, especially on accent nails.
4. Matte Finish: After applying your top coat, you can go over it with a matte top coat for a sophisticated, velvety finish that truly makes the green tones pop.
Table: Olive Branch Nail Design Ideas at a Glance
Here’s a quick reference to help you choose your next olive branch nail design:
| Design Idea | Base Color Suggestion | Key Elements | Occasion Suitability |
|---|---|---|---|
| Minimalist Single Branch | Sheer Nude, Pale Grey | Thin green lines, sparse leaves | Everyday, Office, Casual |
| Full Nail Sprigs | Cream, Light Peach | Repeating small green branches | Bridesmaids, Spring Events, Chic Casual |
| Gold Accented Branch | Soft Beige, Deep Navy | Green branches with thin gold lines/accents | Evening Wear, Holidays, Special Occasions |
| Olive with Berries | Muted Green, Mauve | Green branches with tiny red/burgundy dots | Autumn, Rustic Weddings, Cozy Vibes |
| Graphic Outline | White, Black | Green branch with contrasting outline | Modern Style, Fashion-Forward Events |
Tips for Perfect Application Every Time
Even the simplest designs benefit from a few pro tips. These will help you achieve salon-worthy results at home.
- Patience is Key: Always let each layer of polish dry completely before moving to the next step. Rushing is the number one cause of smudges and messy lines.
- Thin Coats are Better: Apply polish in thin, even coats rather than thick, gloopy ones. This dries faster and looks smoother.
- Clean Your Brush: After each stroke, clean your detail brush on a lint-free pad with nail polish remover. This ensures your lines stay crisp and clean.
- Practice on a Surface: Before applying to your nails, practice drawing lines and leaves on a piece of paper or an old nail file. This helps you get a feel for your brush and the polish consistency.
- Steady Your Hand: Rest your wrists or forearms on a stable surface while painting. This significantly reduces hand tremors and allows for more precise lines. You can even use your non-dominant hand to steady your dominant painting hand.
- Don’t Forget the Cuticles: Clean up any polish that gets on your skin or cuticles immediately with a small brush dipped in nail polish remover for a super neat finish.
- Seal Well: A good top coat is crucial for longevity. Ensure you cap the free edge of your nail (paint a tiny bit of top coat along the very tip) to prevent chips.
Maintaining Your Olive Branch Manicure
You’ve created a beautiful design – now let’s make it last!
- Moisturize: Keep your cuticles and hands moisturized. Dry skin can lead to hangnails and can affect the appearance of your manicure. Use a cuticle oil daily.
- Wear Gloves: When doing household chores, especially washing dishes or cleaning with chemicals, wear rubber gloves to protect your nails from harsh elements.
- Avoid Harsh Chemicals: Try to limit prolonged exposure to acetone or strong cleaning agents, as they can dry out and weaken your nails and polish.
- Touch-Ups: If you notice a tiny chip or wear on an edge, a tiny touch-up with clear polish or the original color can help extend the life of your design.
Beyond Green: Creative Color Palettes
While green is the classic choice, don’t be afraid to experiment! The shape of the olive branch is what makes it recognizable, and playing with color can lead to unexpected and delightful results. Consider these ideas:
- Monochromatic: Shades of purple, blue, or even grey can create a sophisticated, artistic look. Imagine a deep indigo branch on a lighter lavender nail.
- Metallic: Rose gold, silver, or copper branches can add a luxurious touch, especially against dark or nude backgrounds.
- White Out: All-white olive branches on a sheer or nude base offer a delicate, almost ethereal feel, perfect for bridal manicures.
- Black and White: A classic pairing that always looks sharp. Try a crisp white branch on a black nail, or black branches on a white nail.
- Pastels: Soft pink, baby blue, or mint green branches can create a sweet and charming look for spring and summer.
Frequently Asked Questions (FAQ)
Q1: How do I make my nail art brush last?
A1: After each use, clean your brush thoroughly with nail polish remover and then a bit of soap and water. Store it flat or upright with the bristles up to prevent bending. If using gel polish, ensure all gel residue is fully removed with isopropyl alcohol before storing.
Q2: Can I do olive branch designs on short nails?
A2: Absolutely! Minimalist designs with single branches or small sprigs work wonderfully on short nails. You might want to keep the branches a little shorter and fewer in number to keep the proportions balanced.
Q3: My lines are wobbly. What can I do?
A3: Practice is key! Ensure your brush isn’t overloaded with polish. Use a very light touch and rest your hand for stability. Thin, multiple strokes are better than one shaky, thick line. You can also try drawing the line in sections.
Q4: How long do DIY olive branch nail designs typically last?
A4: With a good base and top coat, and proper care, a regular nail polish manicure can last anywhere from 3 to 7 days. Gel polish manicures can last 2-3 weeks.
Q5: What’s the difference between nail art brushes and regular polish brushes?
A5: Nail art brushes are specifically designed with much finer tips and firmer bristles to allow for precision work, intricate lines, and detailed designs. Regular polish brushes are typically wider and softer, meant for broader coverage.
Q6: Can I use regular nail polish for drawing lines?
A6: Yes, you can! You’ll just need a fine-tipped nail art brush. Dip the brush into the polish bottle and use it like a pen. For very fine lines, ensure you use just a small amount of polish on the brush.
Q7: What is a “quick-dry” top coat, and why is it recommended for nail art?
A7: A quick-dry top coat contains solvents that evaporate faster, setting your nail polish and design more rapidly. This is highly recommended for nail art because it helps seal the design quickly, minimizing the risk of smudging as you go about your day.
Where to Find Inspiration and Supplies
The internet is your best friend when it comes to nail art inspiration! Pinterest, Instagram, and popular nail blogs are brimming with stunning examples of olive branch designs. Search for hashtags like #olivebranchnails, #nailarttutorial, and #greenmanicure. For supplies, you can find detail brushes, quality polishes, and even decals and stencils at most drugstores, beauty supply stores, and online retailers. Reputable sources for nail care information include the U.S. Food & Drug Administration (FDA) for cosmetic safety guidelines.
Conclusion
Olive branch nail designs prove that you don’t need to be a professional nail artist to achieve beautiful, sophisticated results. With a little practice and the right tools, you can effortlessly bring a touch of nature’s elegance to your fingertips. Whether you opt for a subtle single branch or a full nail art statement, these designs offer a timeless and chic way to express your style. So, grab your favorite polish, a fine-tipped brush, and give