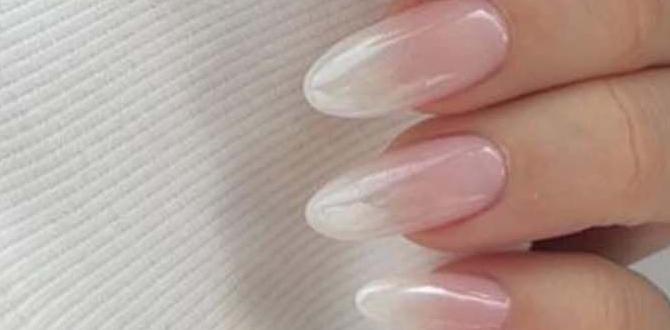
Nude swirl line nail art offers a chic, minimalist way to elevate your manicure with elegant, flowing designs on a clean nude base. It’s perfect for beginners seeking a sophisticated yet easy-to-achieve look that adds a touch of flair without being over the top.
Want to add a touch of elegance to your nails without a complicated design? Nude swirl line nail art is the answer! Sometimes, we just want nails that look polished and put-together without spending hours in front of a mirror. Traditional nail art can feel intimidating, with all those tiny brushes and intricate patterns. But this style is different. It’s about simple, graceful lines that look effortlessly chic. We’ll dive into everything you need to know to create this beautiful look yourself. Get ready to discover how easy it is to achieve stunning, sophisticated nails right at home!
Introducing Nude Swirl Line Nail Art: Your New Go-To Look
Nude swirl line nail art is a popular trend that combines the versatility of nude polish with the simple beauty of swirling lines. Think of it as elegant, flowing strokes that add personality to a neutral canvas. Why is this trend so beloved? It’s incredibly adaptable. The nude base works with virtually any skin tone, making it a universally flattering choice. The swirl lines, often done in contrasting colors like white, black, or gold, add just enough detail to catch the eye without being overwhelming. It’s the perfect blend of minimalist chic and subtle artistry.
This style is fantastic for anyone who loves a polished appearance but prefers simpler nail designs. It’s ideal for everyday wear, professional settings, and even special occasions. The beauty lies in its understated sophistication. You don’t need to be a nail art expert to master this look; with a few simple tools and techniques, you’ll be creating stunning swirl designs in no time.
Why Nude Swirl Line Nail Art is Perfect for Beginners
If you’re new to the world of nail art, you might feel a little daunted by the prospect of intricate designs. Luckily, nude swirl line art breaks down that barrier. Here’s why it’s a beginner’s best friend:
- Forgiving Medium: Nude polish is fantastic for hiding minor imperfections in your application. A slightly uneven coat often blends beautifully with the natural nail color, making it more forgiving than vibrant or dark shades.
- Simple Techniques: The “swirl” effect can be achieved with basic tools and very little pressure. It’s less about precision and more about the flowing movement of the lines.
- Minimal Tools Required: You don’t need a professional kit to get started. A few essential items are all it takes to create beautiful swirl designs.
- Endless Customization: While the nude base is classic, you can play with line colors, thickness, and swirl patterns to create endless variations.
- Professional Look, Easy Execution: This design genuinely looks like you’ve spent significant time and money at a salon, but the reality is it’s achievable in minutes once you get the hang of it.
The Essential Toolkit for Your Nude Swirl Line Manicure
To create beautiful nude swirl line nail art, you don’t need a whole arsenal of fancy gadgets. Here are the key items you’ll want to have on hand:
Nail Polish Essentials
- Base Coat: This is crucial for protecting your natural nails and helping your polish last longer. Choose a good quality, clear or strengthening base coat.
- Nude Nail Polish: Select a shade that complements your skin tone. Think beige, soft pink, peachy nude, or even a slightly deeper tan. Having a few shades can be fun!
- Swirl Line Color(s): White and black are classic choices for contrast. Gold, silver, deep brown, or even a muted pastel can also look stunning.
- Top Coat: This seals your design, adds shine, and protects against chipping. A quick-dry formula is incredibly helpful.
Application Tools
- Fine-Tipped Nail Art Brush: This is your primary tool for creating the lines. Look for brushes with very thin, precise bristles. A detail brush or a liner brush will work perfectly. Many beauty stores carry these, or you can find them online from reputable beauty supply retailers.
- Dotting Tool (Optional but helpful): This tool has a small ball on the end and can be used to create dots, which can then be swirled, or to add small accents to your design.
- Toothpick or Orange Stick (Alternative): If you don’t have a fine-tipped brush, a clean toothpick or an orangewood stick can be used in a pinch. Dip the tip into your swirl color and carefully draw your lines.
- Cuticle Pusher/Cleaner: To ensure clean lines, it’s important to have your cuticles neat.
- Nail Polish Remover & Cotton Pads/Swabs: Essential for cleaning up any mistakes and for prepping your nails.
Preparation & Finishing
- Nail File & Buffer: For shaping your nails and smoothing the surface.
- Cuticle Oil: To keep your nail beds hydrated after your manicure.
Step-by-Step Guide: Crafting Your Nude Swirl Line Nail Art
Ready to get creative? Follow these simple steps to achieve flawless nude swirl line nail art. Take your time, and enjoy the process!
Step 1: Prepare Your Canvas
A good manicure starts with well-prepped nails. This step ensures your polish adheres properly and looks its best.
- Cleanse: Wash your hands thoroughly and remove any old nail color with nail polish remover. Make sure your nails are completely dry.
- Shape: File your nails to your desired shape and length. Gently buff the surface of your nails to create a smooth canvas for the polish. This also helps polish adhere better.
- Cuticle Care: Gently push back your cuticles with a cuticle pusher. If needed, trim any excess hangnails carefully. Keeping cuticles neat makes your nail art look cleaner and more professional.
- Apply Base Coat: Apply a thin, even layer of your base coat. Let it dry completely (usually 1-2 minutes). This protects your nails from staining and creates a smooth surface.
Step 2: The Nude Base
Now for the foundation of your design. Choose a nude shade that you love!
- Apply Nude Polish: Apply your chosen nude nail polish in thin, even coats. Most polishes require two coats for opaque coverage.
- Allow to Dry: This is crucial! Let each coat of nude polish dry thoroughly before applying the next. Rushing this step can lead to smudges and a messy design. Ensure the final nude coat is completely dry before moving on to the art. You can use a quick-dry top coat here if you want to speed things up, but make sure it’s fully set before drawing lines.
Step 3: Creating the Swirl Lines
This is where the magic happens! Don’t be afraid to experiment with your lines.
- Load Your Brush: Dip your fine-tipped nail art brush into your swirl line color (e.g., white, black, gold). Wipe off any excess polish on the edge of the bottle opening so you have a controlled amount of polish on your brush.
- Start Drawing: Gently touch the tip of your brush to your nail. Starting from one side of the nail, or from the center, begin to draw a flowing line. Think of a gentle wave, a soft curve, or a loose spiral.
- Control Your Pressure: Use light strokes. The pressure you apply will determine the thickness of your line. For variable thickness, start light and apply slightly more pressure as you draw the curve.
- Connect or Drift: You can have your lines connect, or let them drift across the nail for a more abstract look. Try a single statement swirl or weave multiple lines together.
- Clean Up Mistakes: If you make a mistake, don’t panic! Quickly dip a cotton swab or a clean toothpick into nail polish remover and carefully clean up the line before it dries.
- Add More Lines (Optional): Once your first line is placed, you can add more. Experiment with thinner lines, thicker lines, or different swirl patterns. You can make them all flow in the same direction or create a more dynamic composition.
- Use a Dotting Tool (Alternative/Addition): If using a dotting tool, you can place a few dots of color and then gently drag them with the tool or a toothpick to create a swirled effect.
Step 4: Add Accents (Optional)
Want a little extra something? Accents can elevate your design.
- Tiny Dots: Use the tip of your nail art brush or a dotting tool to add tiny dots along or within your swirl lines for a touch of texture.
- Small Embellishments: For a touch of glam, consider adding a single tiny rhinestone or a small piece of foil near the cuticle or at the base of a swirl.
Step 5: Seal and Shine
The final step to a long-lasting, professional finish.
- Apply Top Coat: Carefully apply a generous layer of your top coat over the entire nail, making sure to cover your swirl design. Extend the top coat slightly over the free edge of your nail to help prevent chipping.
- Avoid Smudging: Be gentle as you apply the top coat. If your swirl lines are still slightly wet, the top coat can smudge them. You can use a brush dipped in remover to gently clean up any smudges before the top coat dries.
- Let it Dry: Allow your top coat to dry completely. A quick-dry top coat is a lifesaver here. You can also dip your nails in cold water for a few minutes to help speed up the hardening process, but be sure the polish is mostly dry first.
Nude Swirl Variations and Creative Ideas
The beauty of nude swirl line nail art lies in its adaptability. Once you’ve mastered the basic technique, you can explore a world of subtle variations to perfectly suit your style and occasion.
Color Play
While white and black are timeless for swirl lines, don’t be afraid to explore other hues:
- Metallic Shine: Gold, rose gold, or silver lines offer a touch of luxury. These are perfect for evening events or to add a bit of sparkle to an everyday look.
- Muted Tones: For a softer, more romantic feel, try swirls in dusty rose, pale grey, or a subtle sage green. This creates a harmonious, tone-on-tone effect.
- Deep Jewel Tones: A dark emerald, sapphire, or amethyst swirl on a nude base can be surprisingly sophisticated and eye-catching for a bolder statement.
Line Thickness & Placement
The way you apply your lines can drastically change the overall aesthetic:
- Delicate Lines: Using a very fine brush and light pressure, create thin, wispy lines that look like delicate embroidery or fine pen strokes.
- Bold Strokes: Opt for thicker lines or multiple parallel lines for a more graphic and impactful design.
- Accent Nail Focus: Apply the swirl art to just one or two accent nails (like your ring finger) while keeping the other nails a solid nude color for a minimalist approach.
- Full Coverage Swirls: Cover the entire nail with overlapping swirl patterns for a more intricate, yet still elegant, effect.
- Half-Moon Swirls: Create swirls that start at the base of the nail and curve upwards, mimicking the shape of a half-moon.
Texture and Finish
Playing with finishes can add another dimension:
- Matte vs. Glossy: Contrast a matte nude base with glossy black swirls, or vice versa. A matte top coat over the entire design can also create a chic, modern look.
- Holographic or Chrome Accents: Incorporate holographic stripes or a touch of chrome powder into your swirl design for a futuristic and dazzling effect.
Maintenance Tips for Your Nude Swirl Line Nails
Keeping your beautiful nude swirl line nails looking fresh is simple with a few key practices.
Daily Care
- Moisturize Regularly: Keep your hands and cuticles hydrated! Apply cuticle oil daily and hand lotion frequently. This not only keeps your nails healthy but also prevents the cuticle area from looking dry and detracting from your art.
- Wear Gloves: Protect your hands and nails from harsh chemicals and excessive water exposure by wearing gloves when doing household chores like washing dishes or cleaning.
Extending Wear
- Avoid Using Nails as Tools: Resist the urge to scrape, pry, or pick with your nails. This can easily chip or lift the polish.
- Touch-Ups: If you notice a tiny chip on an edge, you can sometimes carefully file it down and reapply a tiny bit of top coat to blend it in.
- Reapply Top Coat: Every few days, you can apply an extra thin layer of top coat to refresh the shine and reinforce the design, especially if you notice it starting to look a little dull.
Nude Swirl Line Nail Art: A Comparison Table
To help you understand the different aspects of nude swirl line nail art, here’s a quick comparison chart. It highlights various design elements you can play with.
| Design Element | Description | Beginner Friendliness | Impact Level | Best For |
|---|---|---|---|---|
| Classic Nude with White Swirls | A nude base with simple, flowing white lines. | Very High | Low to Medium | Everyday wear, office, minimalist style. |
| Nude with Black Abstract Swirls | Nude base with more dynamic, freeform black lines. | High | Medium | Adding a touch of edge, casual outings. |
| Nude with Metallic Gold Accent Swirls | Nude base with thin or statement gold line detailing, often on accent nails. | High | Medium to High | Evening events, adding glam, special occasions. |
| Nude with Muted Pastel Swirls | Nude base with subtle swirls in soft colors like blush pink or mint green. | High | Low | Romantic looks, spring/summer vibes, subtle elegance. |
| Full Coverage Swirls on Nude | Nude base with intricate, interwoven swirl patterns covering most of the nail. | Medium | High | Statement nails, fashion-forward looks. |
Troubleshooting Common Issues
Even the simplest nail art can come with its quirks. Here’s how to tackle common problems you might encounter with nude swirl line art:
- Smudged Lines: This is the most common issue! If your lines smudge, it’s usually because the polish underneath or the swirl color itself wasn’t dry enough. Solution: Be patient and allow ample drying time between coats. If it smudges slightly, you can carefully dip a fine brush or toothpick into nail polish remover and gently reshape the line before it fully sets. For deeper smudges, you might need to carefully paint over the area with your nude base color and reapply the swirl line once dry.
- Brush Strokes Too Thick/Thin: It can be tricky to get the perfect line thickness. Solution: Practice makes perfect! Start with a small amount of polish on your brush and adjust the pressure. For thinner lines, use the very tip of the brush with minimal pressure. For thicker lines, use a bit more polish and apply slightly more pressure. If you can’t get the hang of it with a built-in brush, invest in a dedicated nail art liner brush.
- Uneven Nude Base: Sometimes the nude base doesn’t go on perfectly smooth. Solution: Ensure you’re using thin coats of the nude polish and allowing them to dry fully. If the surface is still uneven after two coats, try a third thin coat. A good quality base coat can also help smooth out minor ridges.
- Swirls Not Flowing: Your lines look stiff or jagged instead of smooth and fluid. Solution: Focus on the movement of your wrist and arm, not just your fingers. Imagine drawing one continuous, elegant curve. Start with longer, sweeping motions rather than short, choppy strokes. Think about what a relaxed, flowing line looks like in nature or calligraphy.
- Polish Drying Too Fast on Brush: If your nail polish color is drying too quickly on your art brush, making it difficult to draw. Solution: Work quickly! Dip your brush into the polish and immediately start drawing your lines. You might need to refresh your brush with polish more often. Also, ensure your nail polish isn’t too old, as