Discover easy, stunning niche nail art ideas perfect for beginners! Elevate your manicure game with simple techniques and trendy designs that showcase your unique style. Get ready to impress with step-by-step guidance and inspiring looks.
Ever look at your nails and think, “I wish they were a little more… me?” We’ve all been there! Sometimes those elaborate nail art looks found online feel totally out of reach, especially when you’re just starting. But what if I told you that creating eye-catching, unique nail art is easier than you think? It’s all about tapping into “niche” ideas – designs that are a little different, a little personal, and totally achievable. Forget the overwhelm; let’s dive into some proven stunning looks that will have your nails saying hello to a whole new level of fabulous!
Unlocking Your Niche: What It Means and Why It Matters
So, what exactly are “niche nail art ideas”? Think of them as themed designs that go beyond the everyday. It’s about finding a small, specific interest, passion, or aesthetic that you love and translating it onto your fingertips. This could be anything from your favorite vintage movie and a specific color palette to a beloved hobby like gardening or astronomy. When you choose a niche, your nail art instantly becomes more personal and unique, a true reflection of your personality.
Why is this so great? For starters, it makes your nail art stand out. Instead of blending in with popular trends, you’re creating something that’s distinctly yours. It’s a fantastic conversation starter and a fun way to express yourself. Plus, for beginners, focusing on a niche theme can actually make the design process simpler. You have a clear vision, which can guide your color choices, patterns, and even the tools you might need.
Finding Your Nail Art Niche: A Spark of Inspiration
The first step to stunning niche nail art is finding your niche! Don’t worry if you don’t have one immediately. This is all about exploration and fun. Think about what brings you joy, what you’re passionate about, or what aesthetic really speaks to you.
Brainstorming Your Passions
Let’s get those creative juices flowing! Grab a notebook or open a notes app, and let’s jot down some ideas. Consider these categories:
- Hobbies & Interests: Gardening, reading, gaming, cooking, crafting, music, sports, hiking.
- Favorite Media: Books, movies, TV shows, video games, anime, specific characters.
- Aesthetics & Styles: Cottagecore, dark academia, retro vibes, minimalist, bohemian, celestial.
- Nature & Seasons: Sunflowers, ocean waves, autumn leaves, starry skies, snowflakes.
- Abstract Concepts: Moods, dreams, emotions, color gradients, geometric patterns.
- Food & Drink: Coffee beans, fruits, desserts, cocktails.
Don’t censor yourself here! Write down everything that comes to mind. We’re looking for that spark, that little thing that makes you smile.
Translating Ideas into Design Elements
Once you’ve got a list, start thinking about how these ideas can be visually represented on nails. For example:
- Gardening: Tiny painted flowers, leaf outlines, earthy color palettes (greens, browns, terracotta), even a matte finish to mimic soil.
- Starry Night Sky: Deep blues and blacks with tiny white or yellow dots for stars, maybe a swirl for a galaxy.
- Vintage Books: Faux book covers with tiny titles, sepia tones, aged paper textures (achieved with sponging).
- Coffee Lover: Coffee bean shapes, latte art swirls, warm brown and cream colors.
The key is to pick a core element or two and build around it. You don’t need to paint an entire scene; often, a simple symbol or color scheme is enough to capture your niche.
Proven Niche Nail Art Ideas: Beginner-Friendly Looks
Now for the fun part! I’ve gathered some proven, stunning niche nail art ideas that are surprisingly easy for beginners. We’ll break down what makes them special and how you can achieve them.
1. Celestial Wonders: Stars & Moons
This is a perennially popular niche because it’s so versatile and universally beautiful. It brings a touch of magic and mystery to your fingertips.
- Why it’s great for beginners: The elements are simple shapes, and mistakes can often be blended or look like part of a natural sky.
- Color Palette: Deep blues, blacks, purples, with accents of silver, gold, or white.
- Key Elements: Tiny dots for stars, crescent moons, simple star shapes.
How to Create:
- Paint your nails with your base color (e.g., deep navy or black).
- Once dry, use a fine-tipped dotting tool or a toothpick dipped in white, silver, or gold polish to create small dots for stars. Vary the sizes slightly for a more natural look.
- For a moon, use a curved stroke with a white or silver polish. You can also use small star or moon nail stickers if freehanding feels daunting.
- Apply a topcoat to seal everything in.
2. Botanical Bliss: Simple Florals & Leaves
Embrace the beauty of nature with delicate floral and leaf designs. This niche is perfect for those who love a touch of organic elegance.
- Why it’s great for beginners: You can start with very simple shapes and gradually add detail as you get more comfortable.
- Color Palette: Greens, pale pinks, whites, soft yellows, earthy browns.
- Key Elements: Tiny daisy petals, simple leaf outlines, small berry shapes.
How to Create:
- Start with a neutral or pastel base color.
- Using a fine brush or dotting tool:
- For a simple flower: Place 5 small dots in a circle, then add a central dot. Or, make tiny petal shapes radiating from a point.
- For leaves: Draw simple elongated oval shapes, or outline a leaf shape and fill it in.
- Experiment with different flowers like tiny roses (swirls) or simple wildflowers.
- A topcoat will keep your garden looking fresh.
3. Sweet Treats: Dessert-Inspired Manicures
Who doesn’t love dessert? This niche is all about fun, playful designs inspired by your favorite sweets!
- Why it’s great for beginners: Many desserts have simple shapes and textures that are easy to replicate.
- Color Palette: Pastels, browns, pinks, creams, reds, whites.
- Key Elements: Sprinkles, cherry shapes, cookie textures, frosting swirls.
How to Create:
- Sprinkle Nails: Paint nails a base color. Use a thin brush or toothpick to add tiny dots of various colors to mimic sprinkles. For a “funfetti” look, use a sponge to stipple multiple colors onto the nail.
- Cherry Accent: Paint nails a base color. Use a fine brush to paint a small red circle (for the cherry) and a tiny green line for the stem.
- Cookie/Wafer Nails: Use a nude or light brown polish and a sponge to create a slightly textured look resembling cookie dough or a wafer.
- Seal with a glossy topcoat.
4. Cozy Vibes: Knit Texture & Autumn Hues
For those who love the feeling of a warm sweater and a crisp autumn day, this niche is pure comfort.
- Why it’s great for beginners: The “knit” texture is forgiving and can be achieved with simple lines.
- Color Palette: Warm neutrals, deep oranges, rich browns, burgundy, forest green.
- Key Elements: Intersecting lines to create a knit pattern, matte finish.
How to Create:
- Paint nails with your chosen autumn color (e.g., a muted orange or deep brown). A matte topcoat is highly recommended for this look.
- Once fully dry, use a thin brush and a slightly darker or lighter shade of your base color (or a contrasting color like cream) to paint parallel lines across the nail.
- Then, paint another set of parallel lines running perpendicular to the first, creating a grid.
- Add short dashes across the intersecting lines to mimic the yarn of a knit sweater.
- Watch a quick video on “fake knit” nail art for visual guidance!
5. Retro Rewind: Simple Geometric Lines
Channel a bit of the 60s or 70s with clean, bold geometric patterns. This niche offers a sophisticated yet playful retro feel.
- Why it’s great for beginners: Basic shapes and lines are straightforward to achieve, especially with tape.
- Color Palette: Bold primary colors, pastels, black, white, orange, brown.
- Key Elements: Stripes, checkerboards, dots, color blocking.
How to Create:
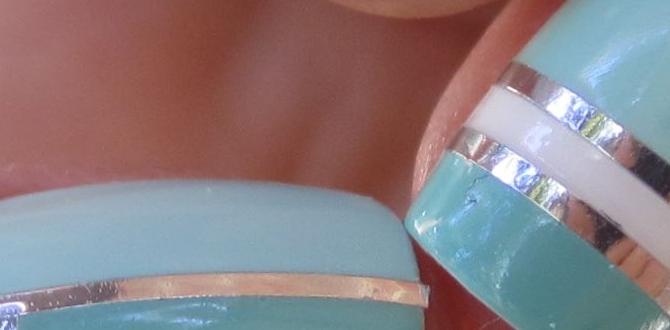
- Stripes: Paint nails with a base color. Once dry, use nail tape (available at most beauty stores) to create stripes. Apply the tape firmly, paint over it with a contrasting color, and carefully peel off the tape while the polish is still slightly wet.
- Checkerboards: Paint nails with a base color. Use thin tape (or a fine brush) to create a grid of lines. Alternate painting squares in two different colors.
- Color Blocking: Use tape to section off parts of the nail and paint each section a different color.
- A glossy topcoat will make the colors pop.
6. Ocean Depths: Watery Blues & Subtle Waves
Bring the calm and beauty of the ocean to your nails with this serene and stylish niche.
- Why it’s great for beginners: You can achieve a water effect with simple sponging or marbling techniques.
- Color Palette: Various shades of blue, aquamarine, white, sandy beige.
- Key Elements: Ombre blues, gentle wave lines, holographic glitter for a shimmer effect.
How to Create:
- Ombre Effect: Use a makeup sponge to blend two or three shades of blue polish. Start with a base coat, then apply lines of different blue polishes to the sponge. Dab the sponge onto the nail, layering until you get the desired blend.
- Simple Waves: After achieving an ombre or solid blue base, use a fine-tipped brush and white polish to paint thin, wavy lines near the tips or cuticles.
- Glitter Accents: Add a touch of holographic glitter polish for a shimmering, watery effect.
- Finish with a topcoat.
Essential Tools for Niche Nail Art Beginners
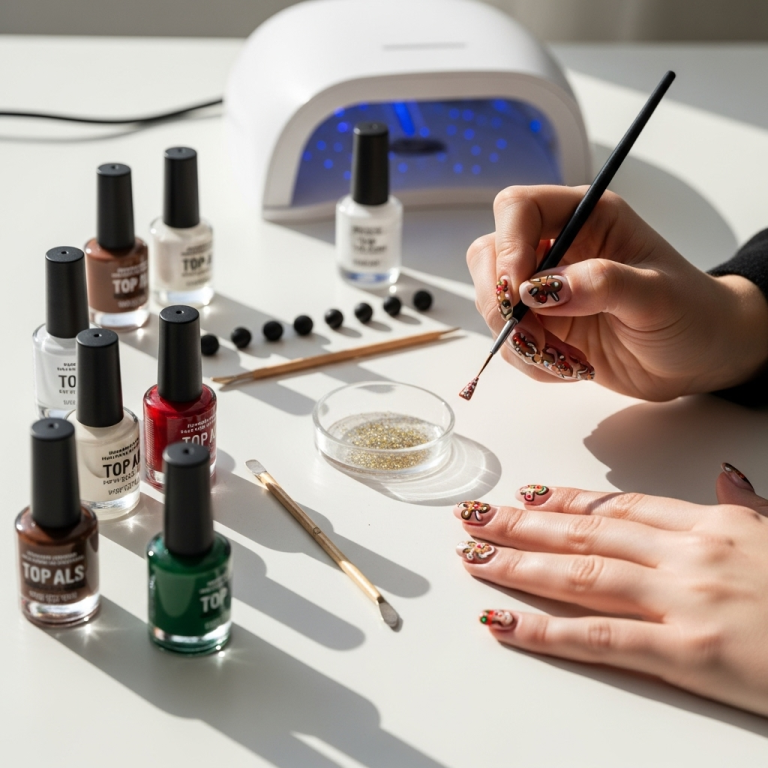
You don’t need a whole professional kit to start creating beautiful niche nail art. Here are some affordable and effective tools:
Beginner-Friendly Nail Art Tool Kit Essentials:
| Tool | What it’s Used For | Why it’s Great for Niche Art |
|---|---|---|
| Dotting Tools (Set of varying sizes) | Creating dots, small flowers, swirls, and precise details. | Perfect for stars, flower centers, and tiny accents in nearly any niche. |
| Fine-Liner Brushes | Drawing thin lines, outlines, delicate patterns. | Essential for stripes, leaf veins, simple lettering, and outlines. |
| Makeup Sponges (Cut into small pieces) | Creating blended effects like ombres, gradients, and textured looks. | Ideal for celestial skies, watery effects, and sunset gradients. |
| Nail Tape (Stripes or grids) | Creating clean lines, geometric patterns, and defined sections. | Fantastic for retro designs, checkerboards, and structured patterns. |
| Toothpicks | A readily available alternative to dotting tools for creating dots. | Good for beginners who want to experiment with dots before investing. |
| Nail Art Stickers/Decals | Adding instant, pre-designed elements. | Quickly add moons, stars, flowers, or other niche-specific imagery without freehand skill. |
| Base Coat & Topcoat | Protecting nails, ensuring polish adhesion, and providing a glossy finish. | Crucial for longevity and a professional look, no matter the design. |
Remember, you can find many of these tools at your local drugstore or online beauty retailers. Start with the basics, and expand your collection as your skills and interests grow!
Achieving a Flawless Finish: Tips for Longevity
Even the most beautiful niche nail art won’t shine if it chips the next day. Here are some tips from the pros to make your handiwork last:
- Prep is Key: Always start with clean, dry nails. Remove any old polish and gently push back your cuticles. For a smoother surface, lightly buff your nails. This helps your base coat and polish adhere better.
- Don’t Skip the Base Coat: A good base coat prevents staining (especially with dark polishes) and creates a smooth canvas for your art. It also gives your polish something to grip onto, improving wear time.
- Thin Coats are Better: Resist the urge to apply thick layers of polish. Multiple thin coats dry faster, are less prone to bubbling, and offer a more durable finish than one thick coat.
- Full Nail Polish Coverage: When applying your base colors or art elements, make sure to swipe the polish all the way to the free edge of your nail. This “capping” technique helps prevent chips.
- Seal with a Quality Topcoat: This is non-negotiable! A good topcoat seals in your design, adds shine, and protects your art from everyday wear and tear. Reapply a quick-dry topcoat every couple of days to refresh your manicure.
- Be Gentle: Try to avoid using your nails as tools. Open cans, scratch labels, or scrape things with your fingertips, not your nail edge! This is one of the biggest culprits of chipped polish.
- Moisturize: Keep your cuticles and hands moisturized. Dry skin can lead to hangnails, which can snag and lift polish.
For an in-depth look at nail health and longevity, the team at NHS UK’s Live Well section offers excellent guidance on nail care practices.
Beyond the Basics: Elevating Your Niche Designs
Once you’ve mastered the simpler niche designs, you might be eager to try something a little more advanced. Here are a few ways to bring your niche creations to the next level:
- Experiment with Textures: Try matte topcoats for a more sophisticated feel (great for cozy or earthy themes), or use glitter polishes strategically for a celestial sparkle or a cake-like shimmer.
- Combine Niches: Why stick to just one? Blend your love for vintage books with a touch of floral art, or combine celestial elements with a deep, rich color palette.
- Master the Ombre: Learn to create smooth color transitions using a sponge. This is perfect for sunsets, galaxies, or ocean scenes.
- Practice Freehand Details: Even simple outlines get a boost from skillful freehand work. Invest time in practicing basic lines and shapes with your fine-liner brushes.
- Use Stencils: For intricate patterns within your niche (like complex geometric shapes or specific symbols), stencils can be a lifesaver and offer professional-looking results.
- Consider Nail Art Foils: These transfer metallic designs onto your nail for a high-impact look, perfect for adding intricate patterns or holographic effects.
The most important thing is to have fun and not be afraid to experiment. Nail art is a form of self-expression, and the journey of learning is just as rewarding as the final result.
Frequently Asked Questions about Niche Nail Art
Q1: What is the easiest nail art to do for beginners?
The easiest nail art for beginners involves simple techniques like applying solid colors, creating dots with a dotting tool or toothpick, and using nail stickers or decals. Sponged ombres and simple stripe designs using nail tape are also quite beginner-friendly.

