New Year Glitter French Nails: Your Essential Guide for a Dazzling Start! Learn how to achieve stunning, beginner-friendly glitter French manicures that will sparkle all season long, perfect for ringing in the new year with style and confidence.
Ready to kick off the new year with a manicure that truly shines? New Year glitter French nails are the perfect way to add a festive sparkle to your look. Forget complicated nail art; this classic design with a glittering twist is surprisingly easy to master. If you’ve ever admired those dazzling fingertips and thought, “I could never do that!” – think again! This guide is here to show you how simple it can be. We’ll walk you through everything you need to create salon-worthy glitter French nails right at home, making your hands the star of any celebration.
Getting your nails ready for the New Year doesn’t have to be stressful. We’ll cover the essential tools, the simple steps, and even a few pro tips to ensure your glitter French nails look absolutely stunning. Get ready to embrace your inner nail artist and step into the new year with confidence and a touch of glamour. Let’s dive in and make those nails unforgettable!
Why New Year Glitter French Nails Are a Must-Try Trend
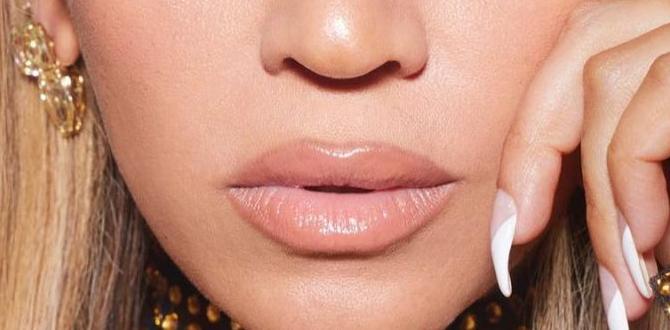
New Year’s Eve is all about sparkle, celebration, and a fresh start. What better way to embody that spirit than with your nails? Glitter French nails offer the perfect blend of sophistication and festivity. They take the timeless elegance of a French manicure and inject it with a generous dose of New Year’s magic – glitter!
This trend is fantastic because it’s incredibly versatile. You can go for a subtle shimmer or a full-on disco ball effect. It’s a look that’s appropriate for parties, family gatherings, or even just brightening your everyday routine as you embrace the new year. Plus, it’s a DIY-friendly design that can be achieved with a few simple techniques, making it perfect for beginners who want to try something a bit special.
Essential Tools for Your Glitter French Manicure
Before we start painting, let’s gather our supplies. Having the right tools makes the process so much smoother and the results so much better. Don’t worry if you don’t have everything; many are basic nail care items you likely already own!
- Base Coat: This protects your natural nails and helps polish adhere better.
- Top Coat: Seals your design, adds shine, and prevents chipping.
- Nail Polish Colors: You’ll need a neutral shade for the nail bed (like sheer pink, nude, or milky white) and your chosen glitter polish.
- Glitter Top Coat or Loose Glitter: A glitter top coat is easiest for beginners. Loose glitter offers more control and a bolder effect.
- Fine-Tipped Brush or Dotting Tool: For precise application of glitter or polish along the tips.
- Nail Polish Remover: For clean-up and mistakes.
- Cotton Balls or Pads: For applying remover.
- Cuticle Pusher or Orangewood Stick: To prep the nail bed.
- Nail File: To shape your nails.
- Optional: Stencils or Guide Strips: These can help create a crisp white French tip line, though freehand is also achievable!
Step-by-Step Guide: Creating Your Glitter French Nails
Ready to get started? Follow these simple steps to achieve beautifully dazzling New Year glitter French nails. Take your time, have fun, and don’t stress about perfection – that’s what nail polish remover is for!
Step 1: Prep Your Nails
A good manicure starts with properly prepped nails. This ensures a smooth canvas and helps your polish last longer.
- Cleanse: Remove any old polish with nail polish remover.
- Shape: File your nails to your desired shape. A classic square or squoval shape works well for French tips. Make sure to file in one direction to prevent weakening the nail.
- Cuticle Care: Gently push back your cuticles with a cuticle pusher. This makes your nail bed look longer and cleaner.
- Buff (Optional): Lightly buff the nail surface to create a smooth base for polish.
- Cleanse Again: Wipe your nails with nail polish remover to get rid of any dust or oils.
Step 2: Apply the Base Coat
This is crucial! A good base coat prevents staining and acts as a sticky layer for your color polish to grip onto.
- Apply one thin layer of your chosen base coat to each nail.
- Let it dry completely – this usually takes about 60 seconds.
Step 3: Apply the Nude or Sheer Color
This forms the base of your French manicure, giving your nails a clean and polished look.
- Apply one or two thin coats of your nude, sheer pink, or milky white polish.
- Allow each coat to dry thoroughly before applying the next. Thin coats dry faster and look smoother.
Step 4: Create the French Tip (The Glitter Part!)
This is where the magic happens! You have a couple of options here, depending on the look you want and your comfort level.
Option A: Glitter Top Coat for a Subtle Shimmer
This is the easiest method for beginners and offers a beautiful, delicate sparkle.
- Once your base color is completely dry, carefully apply a glitter top coat only to the tips of your nails. You can dab it on with the brush or try to sweep it across the tip.
- For a more concentrated glitter line, apply two coats of the glitter top coat to the tips, allowing each to dry slightly.
- If you want a more defined line, you can use a fine-tipped brush dipped in the glitter polish to create a cleaner edge.
Option B: Loose Glitter for a Bold Statement
This method gives you more control and can create a very vibrant glitter effect.
- Apply a thin, wet layer of a clear top coat or a coordinating polish (like a sheer white or nude) along the tips of your nails where you want the glitter to be. Work on one nail at a time so the polish stays wet.
- Dip a brush into your loose glitter (make sure it’s cosmetic grade glitter!) or sprinkle it directly onto the wet polish. Tap off any excess. For a more precise line, you can use a small brush to pat the glitter exactly where you want it.
- Gently brush away any loose glitter particles from the rest of your nail and surrounding skin.
- If the glitter line isn’t as opaque as you’d like, you can go over it with another sheer layer of top coat and more glitter.
Option C: Using a Fine-Tipped Brush with Glitter Polish
This technique is great for creating a more defined glitter line freehand.
- Dip a clean, fine-tipped brush into your glitter nail polish.
- Carefully glide the brush along the tip of your nail to create a clean, shimmering line. You can do this on wet or dry base color, but it might be easier to get a clean edge if the base color is fully dry.
- Work slowly and deliberately. If you make a mistake, you can clean it up with a brush lightly dipped in nail polish remover.
Pro Tip: If you’re struggling to get a straight line freehand, try using nail guide strips or even a piece of tape cut into the desired shape. Apply the tape to cover the nail bed below the tip, paint the glitter on the exposed tip, and then carefully peel off the tape while the polish is still slightly wet.
Step 5: Apply the Top Coat
This is the final, crucial step to seal everything in and add that beautiful shine.
- Once your glitter tips are completely dry (and you’ve applied any additional glitter layers), apply a generous layer of clear top coat over your entire nail.
- Be sure to cap the free edge of your nail by swiping the brush along the very tip. This helps prevent chips and extends the life of your manicure.
- Let your nails dry completely. This can take a bit longer with multiple layers, so be patient! You can use a quick-dry top coat to speed things up.
Variations to Sparkle Even More
Once you’ve mastered the basic glitter French, why not play with different variations? The New Year is the perfect time to experiment!
- Color Block Glitter: Instead of the classic white tip, use a bold color (like a deep red or a sapphire blue) as your base, and then add the glitter tip.
- All-Over Glitter Fade: Apply a sheer color, then use a sponge or dabbing brush to create a glitter fade from the tips down onto the nail bed.
- Accent Nail: If a full glitter French feels like too much, try creating it on just one or two accent nails and keeping the others a simple solid color.
- Dual Glitter Tips: Use two different glitter polishes for the tip – perhaps a silver and a gold, or a fine glitter and a chunkier glitter.
- Under-the-Tip Glitter: This is a bit more advanced, but you can carefully paint a layer of glitter underneath the white French tip line for a hidden sparkle effect.
Caring for Your New Year Glitter French Nails
To keep your stunning manicure looking its best, a little TLC goes a long way. Especially during the busy New Year period!
- Wear Gloves: When doing chores that involve water or harsh chemicals (like washing dishes or cleaning), always wear gloves. This is one of the biggest secrets to making any manicure last longer.
- Moisturize: Keep your hands and cuticles hydrated. Apply hand cream regularly, especially after washing your hands. Cuticle oil is also fantastic for keeping your nail area healthy and preventing dryness. You can find great cuticle oils at most drugstores or beauty supply stores.
- Avoid Using Nails as Tools: Try not to use your nails to scrape, pry, or open things. This can lead to chipping and breakage.
- Gentle Removal: When it’s time for a change, use a good quality nail polish remover. For stubborn glitter polishes, try the foil method: soak a cotton ball in remover, place it on your nail, wrap with foil, and leave for 5-10 minutes before gently sliding the polish off.
A Look at Glitter Nail Polish Types
Not all glitter polishes are created equal! Understanding the different types can help you achieve the exact look you desire.
| Glitter Type | Description | Best For |
|---|---|---|
| Glitter Top Coat | Clear polish packed with fine, medium, or chunky glitter particles. | Beginners, subtle shimmer, easily layered over any color. |
| Glitter Polish (Colored Base) | Colored polish with glitter suspended in it. Available in opaque or sheer formulas. | bolder glitter looks, creating colored glitter tips or full glitter nails. |
| Loose Cosmetic Glitter | Pure, fine, or chunky glitter particles designed for cosmetic use. | Pro-level control, maximum sparkle, custom glitter mixes. Requires a sticky base (like clear polish) to adhere. |
| Fine Glitter | Very small glitter particles. | Smooth, sophisticated shimmer, good for blending. |
| Chunky Glitter | Larger glitter pieces. | Dramatic statement, visible sparkle, can be trickier to smooth out. |
Frequently Asked Questions About Glitter French Nails
Here are some common questions beginner nail enthusiasts have about creating New Year glitter French nails.
Q1: Can I do glitter French tips without a special brush?
A: Absolutely! You can use a fine-tipped polish brush, a clean toothpick, or even the edge of your nail file to gently sculpt the glitter line when using loose glitter. A cosmetic sponge can also be used to dab glitter onto the tips.
Q2: How do I prevent chunky glitter from looking bumpy?
A: The key is applying thin layers of top coat and capping the free edge. For chunky glitter, you might need multiple layers of top coat to create a smooth surface. Gently filing down any significantly raised edges before your final top coat can also help. Some polishes are formulated to lay flatter, so keep an eye out for those!
Q3: My glitter French tips look uneven. How can I fix it?
A: Don’t worry! Gently dip a small brush (like an old, clean makeup brush or a fine-tipped nail art brush) into nail polish remover and carefully neaten the line of your glitter tip. You can also go over the line with a bit more glitter polish or loose glitter to refine it.
Q4: My glitter polish is hard to remove. What’s the best way?
A: Glitter is notoriously stubborn! The most effective method is soaking. Cut small pieces of cotton ball, soak them in acetone-based nail polish remover, place one on each glitter nail, and then wrap them tightly with aluminum foil. Let it sit for 5-10 minutes, then gently slide the foil and cotton off. The glitter should come with it. You can find more tips on glitter removal here.
Q5: Can I use craft glitter on my nails?
A: It’s strongly recommended to only use cosmetic-grade glitter. Craft glitter can have sharp edges that can damage your nails and skin, contain unsafe chemicals, and won’t adhere as well or look as smooth as cosmetic glitter designed for nail use. Look for glitter specifically labeled for crafts or makeup.
Q6: How long do New Year glitter French nails typically last?
A: With proper application and care, your New Year glitter French nails can last anywhere from 5 to 14 days. This depends on the quality of your polish, how well you prepped your nails, and how gentle you are with your hands. Using a good base and top coat is essential for longevity.
For more in-depth nail care advice, including how to keep your natural nails healthy, the National Center for Biotechnology Information (NCBI) offers valuable insights into nail health and hygiene.
Conclusion: Shine Bright This New Year!
There you have it! Your ultimate guide to creating New Year glitter French nails that are as stunning as they are achievable. We’ve covered everything from the essential tools to step-by-step instructions and handy tips to keep your manicure sparkling. Whether you opt for a subtle shimmer or a bold glitter statement, this classic design with a festive twist is sure to make your hands the highlight of any celebration.
Remember, the beauty of nail art is in the self-expression. Don’t be afraid to experiment with different glitter colors, shades, and application techniques. The most important thing is to have fun and feel confident with your dazzling results. So, grab your polishes, put on your favorite festive tunes, and get ready to welcome the new year with nails that shine as brightly as your aspirations. Here’s to a fabulous new year, filled with sparkle and joy, one fabulous nail at a time!

