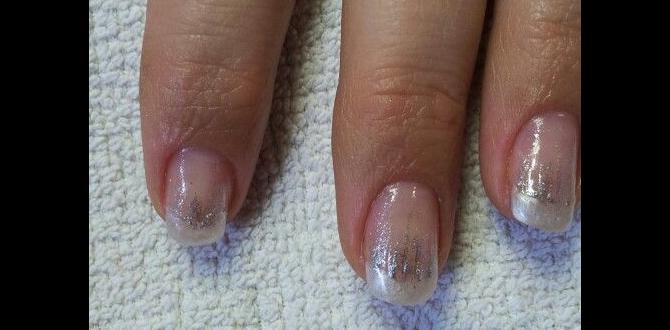
New Year’s Eve nail design glitter style is all about adding that essential sparkle to ring in the celebrations! This guide breaks down easy-to-follow steps for dazzling DIY glitter nails, from simple accents to full-on shimmer, ensuring your tips are as festive as your party outfit. Get ready for a fabulous, sparkly manicure perfect for welcoming the New Year!
New Year’s Eve is the ultimate night for a bit of glam, and your nails are the perfect canvas! You want them to sparkle, shine, and feel as festive as the countdown itself. But where do you start with glitter? Maybe you’ve tried before and ended up with a glitter explosion that’s hard to control, or perhaps you’re just unsure which glitter is best. Don’t worry! Getting that perfect New Year’s Eve nail design glitter style is easier than you think.
This guide is your friendly roadmap to achieving show-stopping glitter nails at home. We’ll walk through everything you need, share simple techniques for gorgeous results, and offer tips to make your sparkle last. By the end, you’ll be ready to create dazzling designs that will have everyone complimenting your nails all night long. Let’s get ready to shine!
Navigating the World of NYE Glitter Nails
When it comes to New Year’s Eve nail designs, glitter is practically a required accessory! It’s festive, fun, and instantly elevates any look. But the world of glitter can be a little overwhelming. From chunky glitters that make a statement to fine glitters that add a delicate shimmer, there’s a perfect type for everyone.
Choosing the right glitter, along with the right technique, is key to a polished and chic look, not a messy one. The goal is to look like you’ve stepped right out of a high-fashion magazine, effortlessly pulling off that dazzling glitter style for your New Year’s Eve nail design.
Essential Tools and Materials for Your Sparkly Mani
To create stunning New Year’s Eve nail designs with glitter, you’ll need a few key items. Don’t worry if you’re new to this; these are all pretty straightforward and easy to find. Having the right tools makes all the difference between a pro-looking manicure and a DIY attempt.
Here’s your quick checklist:
- Base Coat: This protects your natural nails from staining and helps your polish adhere better. It’s a must for any manicure!
- Glitter Nail Polish: These come in various finishes, from sheer with glitter to opaque and packed with sparkle.
- Loose Glitter: For more control and a custom look. Available in many sizes and colors.
- Top Coat: Seals your design, adds shine, and helps prevent chipping. Essential for making glitter last!
- Tweezers: Perfect for picking up individual glitter pieces for precise placement.
- Small Brush or Toothpick: Great for applying glitter and cleaning up edges.
- Rubbing Alcohol or Nail Polish Remover: For cleaning up any mistakes or prepping nails.
- Optional: Nail Files and Buffer: For shaping and smoothing your nails before you start.
Choosing Your Glitter: Perfect for NYE
The type of glitter you choose will significantly impact the final look of your New Year’s Eve nail design. Think about the vibe you’re going for!
- Fine Glitter: This is like fairy dust! It applies smoothly and gives a subtle, all-over shimmer or a soft glow. It’s great for a sophisticated sparkle.
- Chunky Glitter: These are larger pieces that catch the light dramatically. They’re perfect for accent nails or creating bold, eye-catching designs. Think larger flecks of holographic or metallic glitter.
- Glitter Flakes: These are irregular-shaped, thin pieces of glitter that can create a beautiful mosaic or shattered glass effect. Very trendy and eye-catching!
- Glitter Pigments/Chrome Powders: These are superfine powders that create a metallic or iridescent sheen when rubbed onto the nail. They offer a unique, high-impact shine.
| Glitter Type | Best For | Pros | Cons |
|---|---|---|---|
| Fine Glitter | All-over shimmer, subtle sparkle, adding depth | Smooth application, sophisticated, versatile | Can be subtle if not layered |
| Chunky Glitter | Accent nails, bold statements, festive focal points | High impact, catches light well, very festive | Can be bulky if overapplied, requires careful placement |
| Glitter Flakes | Unique textures, holographic effects, modern looks | Trendy, eye-catching, creates interesting depth | Can be tricky to get even coverage without gaps |
| Glitter Pigments/Chrome | Mirror-like finish, iridescent shine | Ultra-shiny, unique look, smooth surface | Requires a sticky gel top coat or specific application method |
Beginner-Friendly NYE Glitter Nail Designs & How-To
Ready to get your sparkle on? Here are some super simple, yet super chic, New Year’s Eve nail design glitter style tutorials perfect for beginners. You don’t need to be a nail pro to achieve these!
Method 1: The Glitter Gradient
This is one of the easiest ways to incorporate glitter and looks incredibly festive. It gives a lovely ombré effect, fading from glittery to plain.
What You’ll Need:
- Your chosen nail polish color (a dark or vibrant shade looks great with silver or gold glitter)
- Glitter nail polish (fine or medium glitter works best)
- Sponge (a makeup sponge or even a regular kitchen sponge cut into small pieces)
- Base coat and top coat
Step-by-Step Guide:
- Prep Your Nails: Start with clean, dry nails. Apply a base coat and let it dry completely.
- Apply Your Base Color: Paint your nails with your chosen nail polish color. You might need two coats for full opacity. Let the second coat dry for a minute or two, but not completely until it’s hard.
- Apply the Glitter: Dip a sponge into your glitter nail polish, or dab a small amount of loose glitter onto the sponge. Gently dab the sponge onto the tips of your nails, concentrating the glitter where you want the shimmer to be most intense (usually the tips).
- Create the Fade: As you dab, move the sponge gradually upwards towards the cuticle, using less pressure and picking up less glitter with each dabbing motion. This creates a beautiful fade effect.
- Add More Layers (Optional): If you want more glitter, especially in certain areas, repeat steps 3 and 4. You can also apply another coat of plain glitter polish over the top.
- Clean Up: Use a small brush dipped in nail polish remover to clean up any glitter or polish smudges around your cuticles and fingertips.
- Seal the Deal: Once everything is dry, apply a generous coat of top coat. This will smooth out any texture from the glitter and lock it in place.
Method 2: The Glitter Accent Nail
This is a classic for a reason! It’s chic, easy, and lets you play with different glitters without overwhelming your whole hand.
What You’ll Need:
- Base coat and top coat
- Nail polish in your desired color for accent nails
- Loose glitter or chunky glitter polish
- Tweezers (if using loose glitter)
- Small brush or toothpick
Step-by-Step Guide:
- Prep and Base: Apply base coat to all nails and let dry.
- Apply Color: Paint all your nails with your chosen color, except for your accent nails (usually the ring finger). Apply a second coat if needed and let it dry almost completely – it should still be a little tacky.
- Apply Glitter:
- Using Loose Glitter: Carefully tap a good amount of loose glitter onto your still-tacky accent nail. You can cover the whole nail or create a design (like a glitter tip). Gently press the glitter down with your finger or the back of a brush to help it adhere.
- Using Glitter Polish: Apply a coat or two of your chunky glitter polish to the accent nail. You can dab it on to build up the coverage or use a brush to create a specific pattern.
- Clean Up: Gently brush away any excess loose glitter. Use a brush dipped in nail polish remover to clean up the edges of your accent nail if needed.
- Add More Glitter (Optional): For extra sparkle, you can apply a thin layer of clear polish or top coat over the glitter and add another light dusting of glitter.
- Top Coat Time: On the accent nail, apply a thick, generous coat of top coat. This is crucial for smoothing down chunky glitters and ensuring they don’t snag or fall off. Apply top coat to all other nails as well.
Method 3: The Full Glitter Mani (Made Easy!)
Want to go all out with sparkle? A full glitter mani is perfect for New Year’s Eve. Here’s how to do it without ending up with a chunky mess.
What You’ll Need:
- Base coat and top coat
- Opaque glitter nail polish (or a solid color polish with loose glitter)
- Clear nail polish (if using loose glitter)
- A small brush or your nail polish brush
Step-by-Step Guide:
- Prep: Apply base coat to all nails and let it dry.
- Apply First Coat: Apply one coat of your opaque glitter polish or your solid color polish. Let it dry completely.
- Prepare Your Glitter: If using loose glitter, pour a small amount onto a piece of paper or a tray.
- Apply Second Coat and Glitter:
- With Glitter Polish: Apply a second coat of your opaque glitter polish. Apply it evenly and allow the glitter to settle.
- With Loose Glitter: Apply a coat of clear nail polish to your nails. While the clear polish is still wet, dip your nails into the loose glitter, or use a brush to carefully pat the glitter onto the wet polish. Layering is key here – you might need 2-3 coats of clear polish and glitter to get good coverage.
- Build Coverage: If using loose glitter and clear polish, apply another layer of clear polish, then more glitter, to build up the density. You can also apply a final coat of glitter polish over the top for extra shine.
- Smooth and Seal: This is the most important step for a full glitter mani. Once your glitter layers are dry, apply a thick, generous coat of top coat. You might need two coats of top coat to make the surface smooth and sleek. The top coat will fill in the gaps between glitter particles.
- Clean Up: Carefully clean any stray glitter or polish from around your cuticles.
Tips for Glitter Application, Control, and Removal
Glitter is fun, but it can sometimes be a little unwieldy. Here are a few pro tips to make your New Year’s Eve nail design glitter style experience smoother and cleaner.
Application Tips:
- Work in thin layers: It’s better to build up glitter coverage with multiple thin coats than one thick, clumpy one.
- Use an old brush: If you’re using loose glitter, an old makeup brush or a dedicated craft brush can be great for applying and blending.
- Don’t forget the clean-up brush: Keep a small brush (an old eyeliner brush works well) dipped in nail polish remover nearby. It’s a lifesaver for cleaning up stray glitter and polish around your cuticles.
- The Foil Method: For applying loose glitter, place a small amount of glitter onto a piece of foil. You can then dip your wet nail polish directly into the foil or use your brush to pick it up. This helps contain the glitter.
- Check out reputable resources: For the best techniques, look at guides from reputable beauty organizations like the Professional Beauty Association, which often share tips on application and nail care.
Removal Tips:
Removing glitter polish can be a bit of a chore, but there’s a trick!
- The Foil Method for Removal:
- Soak cotton balls in acetone-based nail polish remover.
- Place a soaked cotton ball on each glitter-covered nail.
- Wrap each finger tightly in a small piece of aluminum foil.
- Let it sit for 5-10 minutes. The foil traps the acetone and helps dissolve the glitter polish.
- Gently slide the foil and cotton ball off your nails. Most of the glitter should come off with it.
- Clean up any remaining glitter with a nail brush and remover.
- Use a good quality acetone remover: Pure acetone is the most effective at breaking down stubborn glitter polishes.
- Don’t rub too hard: This can damage your nails. Let the remover do the work.
Long-Lasting Glitter Tips for Your NYE Mani
You’ve created a stunning New Year’s Eve nail design with glitter style. Now, you want it to last through all your celebrations! Here’s how to keep that sparkle bright and chip-free.
- Start with Properly Prepped Nails: Ensure your nails are clean, dry, and free of oils. Use a nail dehydrator if you have one, or wipe them with rubbing alcohol before applying your base coat.
- Apply a Good Quality Base Coat: This creates a smooth surface and prevents your natural nail from getting stained by polish pigments.
- Use a High-Quality Top Coat (and be generous!): This is your glitter’s best friend. A good top coat seals in the glitter, smooths out the surface, and protects against chipping. For glitter manicures, especially those with chunky glitter, a thicker top coat is often best. You might even need two coats of top coat to really smooth things out and add durability. Brands like Seche Vite or Essie’s Gel-Setter are popular for their quick-drying and high-shine finish.
- Cap Your Free Edge: When applying your color and top coat, make sure to “cap” the free edge of your nail. This means running your brush horizontally along the very tip of your nail. This creates a seal that helps prevent polish from lifting or chipping.
- Avoid Harsh Chemicals: Try to wear gloves when doing chores that involve prolonged contact with water or cleaning products. These can break down nail polish and lead to chipping.
- Reapply Top Coat: If you notice your top coat starting to lose its shine during your New Year’s Eve festivities, you can always add another thin layer of top coat to revive your manicure.
Frequently Asked Questions About NYE Glitter Nails
Q1: Can I use craft glitter on my nails?
While you can technically apply craft glitter, it’s generally not recommended. Craft glitter is often made from plastic or metal that isn’t cosmetic-grade. This means some glitters can be sharp, rough, or even contain chemicals that aren’t safe for contact with skin and nails and could cause damage or irritation. Always opt for nail-specific glitter or cosmetic-grade glitter to ensure safety and a smoother finish.
Q2: How do I get chunky glitter to lie flat?
The key to flat, smooth chunky glitter is layering and a good top coat. Apply the glitter in thin layers over a slightly tacky polish. After applying the glitter, swipe over it with your fingertip or a clean brush to gently press it down. Once dry, apply a generous, thick top coat. You might need two coats of top coat to really smooth out the texture and seal the glitter effectively.


