Neutral office nails are the key to effortlessly polished and professional style. Achieve polished, sophisticated, and subtle manicures with easy-to-follow tips and timeless shades that enhance your natural beauty and boost your confidence at work.
Walking into a professional setting, you want your appearance to speak volumes about your competence and attention to detail. Your nails are a small, yet significant, part of that impression. But achieving that perfect, polished look for the office can sometimes feel like a challenge, especially when busy schedules leave little time for elaborate nail art. Many of us wonder, “What’s the best way to have nails that look neat, professional, and stylish without being distracting?” It’s a common concern, and the good news is that embracing neutral office nails is simpler than you think! We’re diving into the world of subtle shades and effortless elegance to help you achieve chic, work-appropriate manicures that feel totally ‘you’. Get ready to discover your new go-to nail game!
Why Neutral Office Nails Are Your Secret Weapon
Neutral office nails are more than just a trend; they’re a confidence booster and a professional staple. Think of them as your understated accessory that complements every outfit and every scenario. They exude sophistication without demanding attention, making them perfect for any workplace, from creative agencies to corporate boardrooms. The beauty of neutrals lies in their versatility and timeless appeal. They never go out of style and always look put-together. Plus, they’re incredibly forgiving – minor chips are less noticeable than on vibrant or dark shades, meaning your manicure stays looking fresh for longer.
The Psychology of Color in the Workplace
Color psychology plays a fascinating role in how we perceive ourselves and others, especially in professional environments. While bold colors can express creativity and personality, neutral tones often convey a sense of calm, stability, and trustworthiness. Think about it: soft beiges, delicate pinks, and muted greys are colors associated with reliability and elegance. They don’t compete for attention but rather enhance your overall presence. According to research from institutions like the Color Psychology website, specific colors can influence perceptions of us in business, and neutrals tend to project professionalism and approachability.
Effortless Style for Every Professional
The term “effortless style” is all about looking chic and put-together without seeming like you tried too hard. Neutral office nails embody this perfectly. They’re the ultimate low-maintenance yet high-impact choice. Whether you have a quick meeting at 9 AM or a client dinner at 7 PM, neutral nails provide that finishing touch that says you’re organized and polished. They allow your skills and personality to shine, rather than your nail color.
Choosing Your Perfect Neutral Palette
The world of neutral nails is surprisingly diverse! It’s not just about plain beige. From the softest blush to the deepest taupe, there’s a shade to match every skin tone and personal preference. The key is to find shades that harmonize with your natural complexion, making your hands look refreshed and elegant.
Skin Tone and Neutral Shade Pairing
Finding the right neutral shade that complements your skin tone is crucial for that truly effortless look. A shade that looks stunning on one person might wash out another. Here’s a simple guide:
- For fair to light skin tones: Opt for pale pinks, soft nudes with a hint of peach, and light greys with a cool undertone. Think of shades that are slightly warmer than your skin.
- For medium to olive skin tones: Warm nudes, creamy beiges, peachy neutrals, and taupes with warm undertones work beautifully. These shades will enhance your olive undertones.
- For deep to dark skin tones: Rich caramels, deep browns, mocha shades, and mauves with berry undertones look absolutely gorgeous. These deeper neutrals provide a beautiful contrast and highlight the richness of your skin.
Popular Neutral Nail Polish Shades
Let’s explore some of the most popular and versatile neutral shades that are perfect for any office environment:
Sheer & Milky Nudes
These are your go-to for a “your nails but better” look. They offer a translucent wash of color that looks natural and clean. They’re incredibly forgiving and perfect for those who prefer a very minimalist aesthetic.
Soft Pinks & Blushes
Ranging from delicate baby pink to more muted rosy hues, these shades add a hint of color and life to your nails without being overpowering. They’re universally flattering and can add a touch of femininity.
Creamy Beiges & Tans
These are classic neutrals that offer warmth and sophistication. They can range from pale sandy tones to richer tan shades, providing a polished and elegant finish.
Muted Greys & Taupes
Grey and taupe are fantastic modern neutrals. Muted greys often have a sophisticated, almost stone-like quality, while taupes blend brown and grey for a complex, chic look. They offer a cooler, more contemporary vibe.
“Your Skin But Better” Tones
This category is all about finding a polish that perfectly matches or slightly deepens your natural skin tone. The result is a seamless, incredibly polished look.
Pro Tip: Don’t be afraid to grab a few shades and swatch them on your fingertips in natural light to see how they look against your skin before making a purchase!
The Essential Tools for a Flawless Neutral Manicure
You don’t need a professional salon to achieve stunning neutral office nails. With a few key tools and a little patience, you can create a salon-worthy manicure at home. Having the right tools makes the process smoother and the results more professional.
Your Starter Kit for Home Manicures
Here’s what you’ll want to have on hand:
- Nail File: For shaping your nails. A medium-grit file is versatile for most nail types.
- Nail Buffer: To smooth the nail surface and add a natural shine.
- Cuticle Pusher/Orange Stick: To gently push back cuticles.
- Nail Polish Remover: Acetone-free removers are gentler on the nails and surrounding skin.
- Cotton Pads/Balls: For applying nail polish remover.
- Base Coat: This protects your nails from staining and helps polish adhere better.
- Neutral Nail Polish: Your chosen shade(s)!
- Top Coat: Seals in your polish, adds shine, and protects against chipping.
- Cuticle Oil: To keep cuticles moisturized after your manicure.
Optional (But Recommended!) Tools
These can elevate your at-home manicure further:
- Nail Clippers: For trimming if nails are too long.
- Glass Nail File: Gentler and can help prevent splitting on natural nails.
- Lint-Free Wipes: Prevent cotton fuzzies from sticking to your wet polish.
- Manicure Bowl: For soaking hands to soften cuticles.
Step-by-Step: Achieving Perfect Neutral Office Nails
Ready to get those flawless neutral nails? Follow these simple steps for a manicure that looks like it came straight from the salon.
Preparation is Key for Longevity
Don’t skip these crucial prep steps! They make all the difference in how smooth your application is and how long your manicure lasts.
- Remove Old Polish: If you have any old polish on, gently remove it with nail polish remover and a cotton pad until the nail is clean.
- Shape Your Nails: Using your nail file, gently file your nails in one direction. Avoid sawing back and forth, as this can weaken them. Aim for a shape that complements your fingers – a soft square or squoval is often professional and chic.
- Soften and Push Back Cuticles: Apply a cuticle remover or push your nails into a bowl of warm water for a few minutes. Gently push back your cuticles using an orange stick or cuticle pusher. Avoid cutting them, as this can lead to infection.
- Buff the Nail Surface: Lightly buff your nails with a nail buffer to create a smooth surface for the polish to adhere to. This also helps remove any natural oils that might prevent polish from sticking.
- Cleanse Your Nails: Wipe down each nail with nail polish remover again to ensure there are no oils or dust particles left. Let them dry completely.
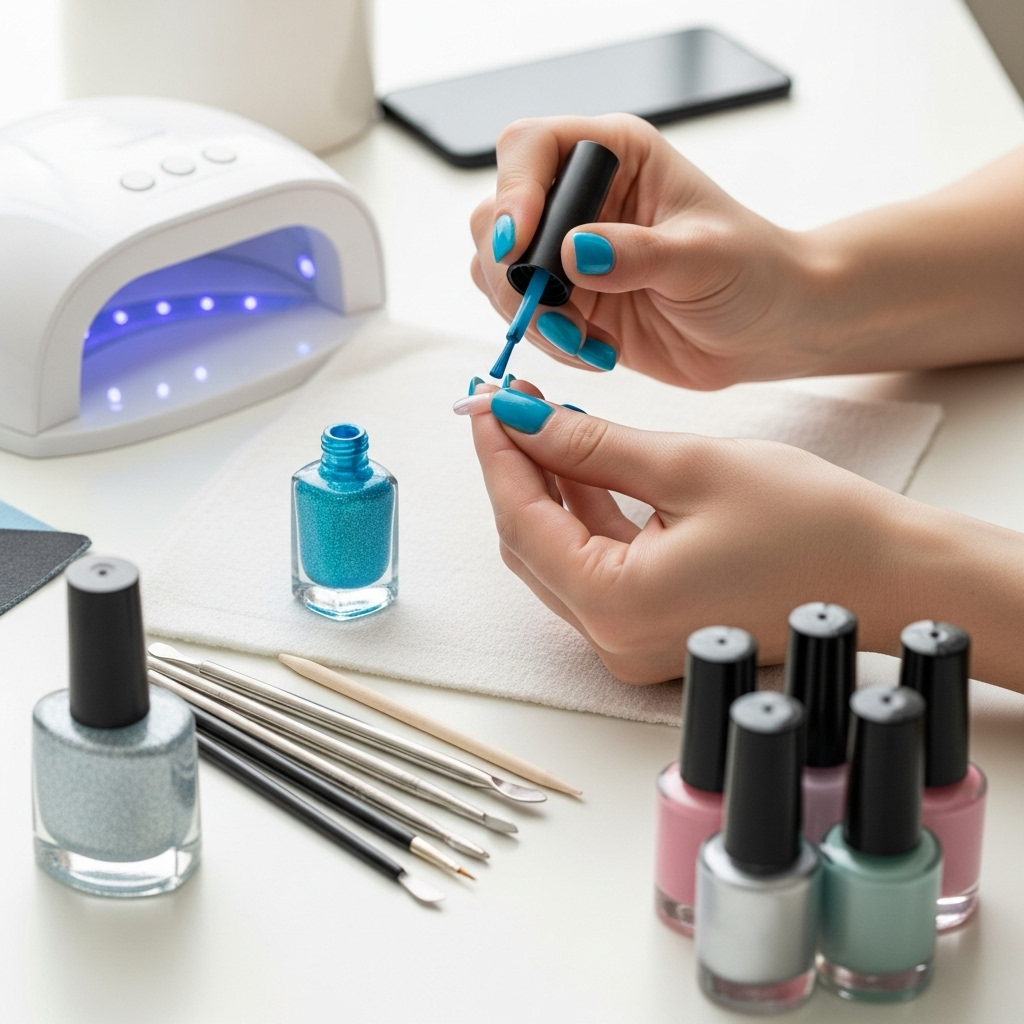
Applying Your Neutral Polish Like a Pro
Now for the fun part! With your nails prepped, let’s apply that beautiful neutral shade.
- Apply Base Coat: Paint one thin layer of base coat onto each nail. This protects your natural nail from staining and provides a grippy surface for the color. Let it dry completely.
- Apply First Coat of Color:
- Dip your brush into the polish, but don’t overload it. Wipe one side of the brush on the neck of the bottle to remove excess polish.
- Start painting from the base of your nail, near the cuticle.
- Gently push the brush up towards the cuticle, then stroke down the center of the nail.
- Follow with two more strokes: one on each side of the center stroke, ensuring you cover the entire nail surface.
- Aim for thin, even coats. A thin coat dries faster and looks smoother than a thick one.
- Let the First Coat Dry: Allow the first coat to dry for at least 1-2 minutes. Patience here prevents smudging.
- Apply Second Coat of Color: Repeat step 2 for your second coat. This coat should even out any streaks and provide opaque coverage. Again, apply thinly and evenly.
- Apply Top Coat: Once the second coat is dry to the touch (about 2-3 minutes), apply a generous layer of top coat. This is your protective shield! Ensure you cap the free edge by running the brush horizontally across the tip of your nail – this is crucial for preventing chips and prolonging wear.
- Clean Up Edges: Dip a small, flat brush (an old eyeliner brush works well!) or an orange stick wrapped in a tiny piece of cotton into nail polish remover. Carefully trace around your cuticle and sidewalls to clean up any polish that got on your skin.
- Dry Time & Cuticle Oil: Allow your nails to air dry for at least 15-20 minutes. Avoid doing anything strenuous with your hands during this time. Once dry, massage a drop of cuticle oil onto each nail and cuticle to rehydrate and nourish.
Quick Dry Tips
If you’re really pressed for time, consider these quick dry methods (use with caution, as excessive heat or cold can sometimes make polish brittle):
- Cool Water Dip: After about 5 minutes of air drying, submerge your fingertips in a bowl of cool (not ice-cold) water for a minute or two.
- Quick Dry Top Coats: Many brands offer top coats specifically formulated to speed up drying time.
- Fans: A gentle fan can help circulate air and speed evaporation.
Maintaining Your Neutral Office Nails
A beautiful manicure deserves to be maintained! With a few simple habits, you can keep your neutral office nails looking fresh and pristine throughout the week.
Daily Habits for Long-Lasting Nails
- Wear Gloves: When doing dishes, cleaning, or any task involving prolonged contact with water or harsh chemicals, wear rubber gloves. Water is the enemy of nail polish wear!
- Avoid Using Nails as Tools: Resist the urge to scratch, pry, or open things with your nails. This is a fast track to chips and breaks.
- Touch Up Strategically: If you notice a tiny chip on the edge of a nail, you can often fix it with a tiny dab of top coat. If it’s more significant, a quick, thin re-coat of your neutral shade on that one nail can work wonders if done carefully.
Weekly Refresh
Once a week, or whenever you feel your nails need a little boost:
- Reapply Top Coat: A fresh layer of top coat every 2-3 days can add extra shine and protection, significantly extending the life of your manicure.
- Moisturize: Keep your hands and cuticles hydrated. Dry skin and cuticles can make even the most perfect manicure look less polished.
Troubleshooting Common Neutral Nail Issues
Even with the best intentions, sometimes things don’t go perfectly. Here are some common issues and how to fix them for flawless neutral nails.
Streaky Application
The Fix: Streaky polish is often a sign of a too-thin first coat or uneven application. Ensure your second coat is applied evenly. If it’s still streaky, a third thin coat might be needed. Also, ensure you’re not using old, gloopy polish. Thinning it with a dedicated nail polish thinner (not remover!) can sometimes help.
Bubbles in Polish
The Fix: Bubbles usually form when polish is applied too thickly, or if the layers aren’t allowed to dry sufficiently between coats. Try applying thinner coats and giving each layer more time to dry. Avoid shaking your polish bottle vigorously; instead, roll it between your hands to mix. Also, ensure your nail surface is clean and free of oils.
Chipped or Peeling Polish
The Fix: This is often due to inadequate prep (oils on the nail), not using a base coat, or not capping the free edge with your top coat. Re-applying a thin layer of your neutral polish carefully to the chipped area and then sealing it with a fresh layer of top coat can be a temporary fix. For a longer fix, you might need to remove and reapply.
Polish Staining Nails
The Fix: This usually happens with darker or vibrant shades, but can occur with some nudes if they have strong pigments. Always use a good quality base coat! If staining occurs, a nail whitening product or a soak in hydrogen peroxide and baking soda paste can help lift the discoloration. In severe cases, it will grow out.
Beyond the Basics: Elevating Your Neutral Office Nails
Once you’ve mastered the basics, you might want to add a little extra flair to your neutral office nails without compromising professionalism. These subtle enhancements can make your manicure feel more special.
Subtle Accents
Minimalist French Tips: Instead of bright white tips, opt for a sheer nude base with a thin line of a slightly lighter neutral or even a subtle metallic shade (like a soft rose gold) on the tips.
Delicate Dot or Line: A single tiny dot at the base of the nail or a fine vertical or horizontal line in a complementary neutral or metallic shade can add a touch of artistry.
Matte Finish: A matte top coat can transform a standard neutral shade into a sophisticated, velvety finish that feels very modern and chic. This is a fantastic way to change the look of your favorite neutral polishes.
Nail Art for the Office
When done subtly, nail art can be office-appropriate:
- Negative Space Designs: Using tape to create geometric shapes or lines, and filling in sections with your neutral polish while leaving some nail bare.
- Ombre Effect: A very subtle ombre blending two complementary neutral shades can be incredibly chic and artistic.
- Accent Nail: Keep the nail art confined to one accent nail (usually the ring finger). This could be a very fine glitter polish in a neutral tone or a minimalist design.
Table: Neutral Nail Finish Options
The finish of your nail polish can drastically change its appearance. Here’s a look at different finishes and how they work for office nails:
| Finish Type | Description | Office Appropriateness | Tips for Use |
|---|---|---|---|
| Cream/Jelly | Smooth, opaque, or slightly translucent color with no shimmer or glitter. | High | The classic choice. Always looks polished and professional. |
| Shimmer | Contains fine, subtle shimmer particles that catch the light. | Medium-High | Choose shimmers with very fine particles for a sophisticated glow, not chunky glitter. |
| Matte | Absorbs light, giving a flat, velvety finish. | High | Can be achieved with a matte top coat over any cream polish. Offers a modern, sophisticated look. |
| Sheer/Glass | Translucent, buildable color that gives a “lip gloss” effect. | Very High | Perfect for a “your nails but better” look. Incredibly delicate and refined. |
| Glitter | Contains noticeable glitter particles, ranging from fine to chunky. | Low | Generally too flashy for most offices. If used, opt for very fine, subtle neutral-toned glitter on an accent nail only. |