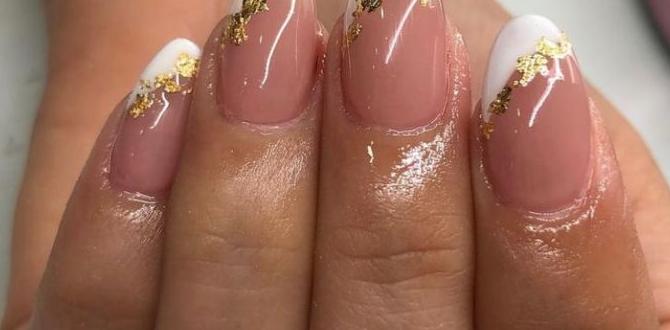
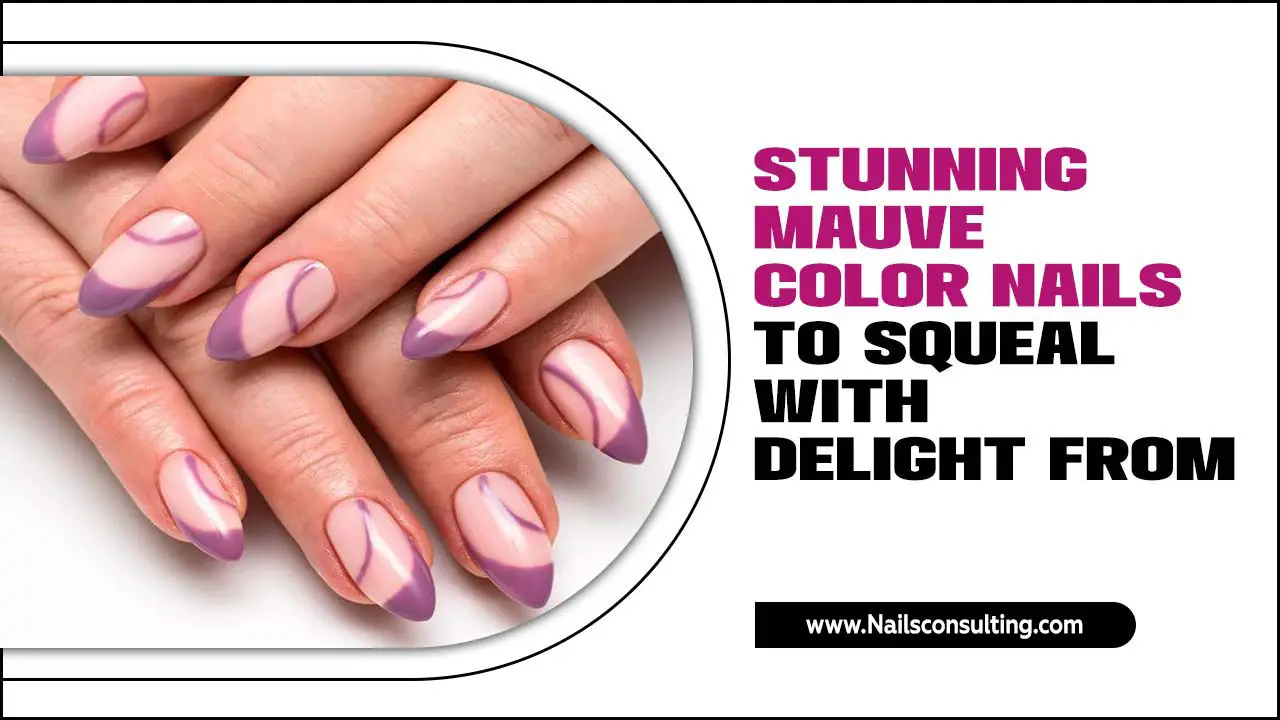
Negative space nail designs are your secret weapon for making short nails look longer and more stylish! This technique plays with unpolished areas, creating chic optical illusions that flatter any nail length, especially shorter ones. It’s easy to learn and perfect for beginners looking for sophisticated, minimalist nail art.
Short nails are fabulous! But sometimes, finding nail designs that truly shine on a shorter canvas can feel a little tricky. You want something stylish, something that makes your nails pop, but also something that doesn’t overpower your petite nail beds. The good news is, there’s a trend that’s absolutely perfect for this: negative space nail designs!
Think of negative space as the art of leaving a little “empty” or unpolished area on your nails. It’s not about having bare nails; it’s about strategically using the natural nail, or a sheer base, as part of the design. This clever trick can make your nails look longer, more elegant, and incredibly chic. It’s like a visual illusion for your fingertips!
Don’t worry if you’re new to nail art. Negative space designs are surprisingly simple to achieve, even for beginners. We’ll walk you through everything you need to know, from the basic concept to easy techniques and stunning ideas that will transform your short nails into works of art. Get ready to fall in love with your nails all over again!
What Exactly is Negative Space in Nail Design?
Negative space in nail art refers to the areas of the nail that are left intentionally unpolished or painted with a clear, sheer polish. Instead of covering the entire nail with opaque color or intricate patterns, you’re using the bare nail itself as a design element. It’s all about balance and strategic placement of color and emptiness.
Imagine a painting where the artist uses the canvas itself as part of the composition. That’s what we do with negative space nails! It creates a sense of depth and sophistication. For short nails, this technique is a game-changer because it avoids making the nail appear cluttered or shorter than it is. The unpolished sections can visually elongate the nail bed, giving the illusion of more length.
Why Negative Space is a Must for Short Nails
Short nails often get a bad rap when it comes to trendy nail art. Many elaborate designs can look overwhelming or even make short nails appear stubbier. Negative space nail designs come to the rescue by:
- Creating an Illusion of Length: By leaving parts of the nail bare, you draw the eye in a way that can visually stretch your nail plate.
- Looking Chic and Sophisticated: The minimalist aesthetic of negative space is inherently elegant and modern.
- Being Versatile: It works with almost any color palette, from bold neons to subtle pastels and classic nudes.
- Requiring Less Precision: Some negative space designs are forgiving, making them perfect for DIY manicures.
- Being Low Maintenance (Visually): As your nail grows out, the unpolished section is less obvious than a solid color, meaning touch-ups might not be needed as frequently.
It’s a brilliant way to experiment with nail art without committing to a full-coverage design that might not flatter your nail shape or length.
Essential Tools for Negative Space Nail Designs
You don’t need a whole salon’s worth of supplies to create beautiful negative space nails, especially for beginners. Here are the essentials:
- Base Coat: This protects your natural nail and helps polish adhere better. A clear or sheer tinted base can also be your “negative space” element.
- Top Coat: Crucial for sealing your design, adding shine, and making your manicure last longer.
- Nail Polish in Your Chosen Colors: You’ll likely use just one or two colors along with the negative space.
- Thin Nail Art Brushes or Dotting Tools: These are great for creating clean lines, dots, or small shapes within the design. You can find affordable sets online or at beauty supply stores.
- Striping Tape or Stencils (Optional but helpful): These can guide you in creating clean, straight lines or geometric shapes, which are popular in negative space designs. Brands like NailArtistry offer good quality, beginner-friendly tools.
- Rubbing Alcohol or Nail Polish Remover: For cleaning brushes and correcting mistakes.
- Cuticle Pusher and Nail File: For preparing your nails.
The beauty of negative space is that it often doesn’t require complex tools. You can even use the edge of a polish brush for some designs!
Simple Negative Space Techniques for Beginners
Ready to dive in? Here are a few easy techniques to get you started:
1. The Half-Moon Outline
This is a classic and super easy way to incorporate negative space. It’s a twist on the French manicure, focusing on the cuticle area.
- Prep: File your nails to your desired shape and apply a base coat. Let it dry completely.
- Apply Color (Optional): If you want a sheer color as your base, apply one thin coat and let it dry. You can also skip this and use a clear base coat as your negative space.
- Create the Outline: Using a fine nail art brush or the tip of your polish bottle, carefully paint a curved line along your cuticle, mimicking a half-moon shape. You can either stop here for a barely-there look, or fill in the half-moon with a contrasting color. Another option is to paint a solid color on the whole nail and then use white or a contrasting color to paint a half-moon outline at the cuticle.
- Clean Up: Use a small brush dipped in nail polish remover to clean up any smudges around the edges.
- Top Coat: Apply a top coat to seal the design.
2. Geometric Blocking
This technique uses clean lines to divide the nail into sections, leaving some areas unpolished.
- Prep: Apply base coat and let it dry.
- Apply Sheer Color (Optional): If desired, apply a sheer polish.
- Use Tape: Apply striping tape or nail art tape diagonally, horizontally, or vertically across your nail to create two or more sections. Press the tape down firmly to prevent polish from bleeding underneath.
- Paint a Section: Paint one of the sections with your chosen nail polish color.
- Remove Tape: While the polish is still wet, carefully peel off the tape. This is key to getting a clean line! Let the polish dry completely.
- Add More Sections (Optional): Once dry, you can apply tape again to create new sections and add more colors, always leaving at least one section as negative space.
- Top Coat: Finish with a top coat once all polish is dry.
3. Minimalist Lines and Dots
This is the simplest form of negative space, focusing on delicate accents.
- Prep: Apply base coat and let it dry. Use a sheer nude or clear polish for a subtle base if you like.
- Add Accents: Using a fine nail art brush or a dotting tool, carefully add a single dot near the cuticle, a thin vertical line up the center, or a few scattered dots near the tip.
- Keep it Simple: The beauty here is in the subtlety. You don’t need many elements.
- Top Coat: Seal with a top coat.
Experiment with different color pairings and placements. A metallic accent on a nude nail, or a black line on a clear base, can look incredibly sophisticated.
Stunning Negative Space Nail Design Ideas for Short Nails
Now for the fun part – inspiration! These ideas are perfect for shorter nail lengths and are easily adaptable.
1. The Modern Frenchie
Forget the traditional white tip! Think colored tips or a colored line at the cuticle.
- How-to: Apply a sheer nude or clear polish. Use a fine brush to paint a thin line of a bold color (like red, electric blue, or hot pink) across the tip of your nail, resembling a classic French tip but thinner. Alternatively, create a similar thin line just at the cuticle.
- Why it works: The thin line and the unpolished nail make the nail appear longer and more delicate.
2. Geometric Halves
Divide your nail diagonally or horizontally with a solid color and leave the rest bare.
- How-to: Apply base coat. Use striping tape to divide your nail in half (diagonally or horizontally). Paint one half with a solid color (e.g., black, white, or a metallic shade). Remove the tape while the polish is still wet. Let dry.
- Why it works: The sharp, clean division of color against the bare nail creates a graphic, elongating effect.
3. Sheer with a Pop
A subtle sheer color base with a small accent.
- How-to: Apply one or two thin coats of a sheer polish (pink, peach, or milky white). Once dry, add a single dot with a contrasting color near the cuticle, or a thin vertical stripe down the center of the nail.
- Why it works: The sheer base keeps the nail looking light and natural, while the small accent adds just enough interest and elegance.
4. The “Peek-a-Boo” Cuticle Design
A playful design where a shape or line is placed right at the base of the nail.
- How-to: Apply a clear or sheer polish. Using a fine brush, paint a small metallic or bright color shape (like a tiny triangle or a curved line) right against your cuticle line.
- Why it works: This draws attention to the base of the nail, making the nail bed look longer.
5. Abstract Swirls
Loose, artistic swirls in one or two colors over a clear or sheer base.
- How-to: Apply a clear or nude sheer polish. Load a detail brush with a contrasting color and gently swirl it across the nail, leaving plenty of the base color visible.
- Why it works: The flowing lines can create a sense of movement and length, and the transparency prevents it from looking heavy.
Pros and Cons of Negative Space Nail Designs
Like any nail art technique, negative space has its advantages and a few things to consider. Understanding these can help you decide if it’s the right choice for you.
| Pros | Cons |
|---|---|
| Visually Elongates Nails: Excellent for short or wide nail beds, creating an illusion of length and slimmer shape. | Requires a Clear Base: If you don’t have naturally healthy-looking nails, you might need a sheer or clear polish base, which requires application. |
| Sophisticated & Modern Aesthetic: Appeals to those who love minimalist, chic, and elegant styles. | Polish Application Must Be Neat: While some designs are forgiving, clean lines and edges are crucial for the intended look. Smudges can be more noticeable against the bare nail. |
| Versatile for Any Occasion: Easily dressed up or down with color choices and accent placement. | Can Show Imperfections: The unpolished areas mean any rough surface or ridges on your natural nail may be more visible. A good base coat is essential. |
| Beginner-Friendly: Many designs are simple to recreate at home with minimal tools. | May Require Practice for Complex Lines: Achieving perfectly straight lines or intricate shapes might take a few tries. |
| Less Noticeable Growth: As nails grow, the transition from colored polish to the unpolished cuticle area can be less stark than with full-coverage colors. | Not Ideal for Everyone Seeking Boldness: If you love opaque, vibrant, all-over colors and complex, intricate patterns, negative space might be too subtle for your taste. |
Tips for Maintaining Your Negative Space Manicure
Keeping your negative space nails looking fresh is easy with a little care:
- Always Use a Top Coat: This is non-negotiable! A good top coat protects the polish, adds shine, and helps prevent chipping. Reapply every few days if needed.
- Moisturize Regularly: Keep your cuticles and hands hydrated with cuticle oil and hand cream. This not only keeps your skin looking good but also helps maintain the overall appearance of your manicure, especially around the unpolished areas.
- Be Gentle: Avoid using your nails as tools to open cans or scrape things. This is good advice for any manicure, but particularly important when you have unpolished sections that could be damaged.
- Clean Up Smudges Immediately: If you notice a small smudge on the colored portion, use a small brush dipped in nail polish remover for a precise cleanup.
- Consider a Quick Refresh: If you feel the bare nail area is looking dull, a quick swipe of a clear polish or buffing (gently!) can refresh it.
A well-maintained negative space manicure looks polished and intentional for longer!
Frequently Asked Questions About Negative Space Nail Designs
Q1: Can I really do negative space designs on very short nails?
A: Absolutely! Negative space is fantastic for short nails. It helps create the illusion of length and prevents designs from looking too busy or overwhelming on a small nail bed. Think minimalist lines, simple shapes, or graphic blocks of color.
Q2: Do I need special tools for negative space nail art?
A: Not necessarily! While fine-tipped brushes, dotting tools, and striping tape can make things easier and help create cleaner lines, you can often achieve simple negative space designs (like a single dot or a thin line) with just a regular nail polish brush. The key is patience and a steady hand.”
Q3: What kind of polish should I use for the “negative space” part?
A: The “negative space” is typically the unpolished part of your natural nail. However, many people like to apply a clear, sheer, or milky polish as a base. This adds a bit of subtle color and can help smooth out any nail imperfections, making the whole nail look more refined.”
Q4: How do I get clean lines in my negative space designs?
A: Clean lines are crucial! For geometric designs, use striping tape or nail art tape, pressing it down very firmly. Apply polish and then remove the tape while the polish is still wet. For freehand lines, use a very fine-tipped brush and a steady hand, and don’t overload the brush with polish. Having rubbing alcohol nearby for a cleanup brush is a lifesaver!”
Q5: Do negative space designs last as long as regular manicures?
A: Yes, they can last just as long, provided you use a good base coat and top coat! The longevity depends more on the quality of the polish and how well you care for your nails than on the design itself. Always finishing with a solid top coat is key.
Q6: What colors work best for negative space nail designs on short nails?
A: You can use any colors that you love! However, for a more elongating effect, consider pairing lighter, sheer bases with pops of brighter or bolder colors. Metallics (gold, silver, rose gold) also look stunning against a bare or sheer nail. Simple black or white accents on a nude base are always chic and modern.”
Conclusion
Negative space nail designs are more than just a trend; they’re a smart, stylish, and accessible way to elevate your manicure, especially when you have short nails. By embracing the unpolished areas, you can create sophisticated looks that visually lengthen your nails, add a touch of artistry, and express your personal style with ease.
Whether you’re a complete beginner or looking to switch up your nail game, the techniques and ideas we’ve explored are designed to be simple, fun, and achievable. They prove that you don’t need long nails or advanced skills to have stunning, eye-catching nails. So, grab your polish, experiment with these easy methods, and start enjoying the gorgeous results.
Your nails are a fantastic canvas for creativity. With negative space, you can unlock a whole new level of chic nail art that’s perfect for your everyday style. Happy polishing!


