Unlock stunning, modern nails with negative space designs! This technique uses unpolished areas of your nail to create unique patterns. It’s surprisingly easy for beginners and looks super chic. Get ready to elevate your manicure game!
Ever scroll through nail art inspo and feel a little intimidated? You see these gorgeous designs, and they look so complex! If you’re new to nail art, you might think intricate patterns are out of reach. But what if I told you that the secret to chic, modern nails often lies in what you don’t add? That’s where negative space nail designs come in. They are the trendy, minimalist superheroes of the nail world, and guess what? They’re totally achievable for beginners. Forget complicated techniques; we’re going to break down how to create these stunning looks with ease. Get ready to discover a whole new way to express yourself through your nails!
What Exactly Are Negative Space Nail Designs?
Negative space nail designs are all about embracing the unpainted parts of your nail. Instead of covering your entire nail with polish, you strategically leave sections bare. These unpolished areas become a key part of the design, creating contrast and depth. Think of it like a sketch where the white of the paper is just as important as the pencil lines. It’s a minimalist approach that can look incredibly sophisticated and eye-catching. Since you’re working with less polish, it can also be a fantastic way to make your manicure last longer between fills or touch-ups!
Why Are They So Popular?
Negative space designs have taken the nail art world by storm, and it’s easy to see why:
- Chic & Modern: They offer a clean, contemporary aesthetic that pairs well with almost any outfit and occasion.
- Versatile: From subtle accents to bold geometric patterns, the possibilities are endless, catering to every style.
- Beginner-Friendly: Many negative space designs are simpler to execute than full-coverage art, making them accessible for DIYers.
- Visually Interesting: The interplay of color and bare nail creates a unique visual appeal that stands out.
- Hides Imperfections: The unpolished areas can sometimes help camouflage minor nail growth or slight imperfections, making them a forgiving choice.
Essential Tools for Negative Space Nail Designs
You don’t need a professional nail salon in your bathroom to master negative space designs. A few key tools will set you up for success. Most of these are probably already in your nail kit!
The Must-Haves:
- Base Coat: Always start with a good base coat to protect your natural nails and help polish adhere better.
- Top Coat: Essential for sealing your design, adding shine, and making your manicure last.
- Nail Polish Colors: Choose the colors you love! You’ll need at least one color for the design itself, but you can use multiple.
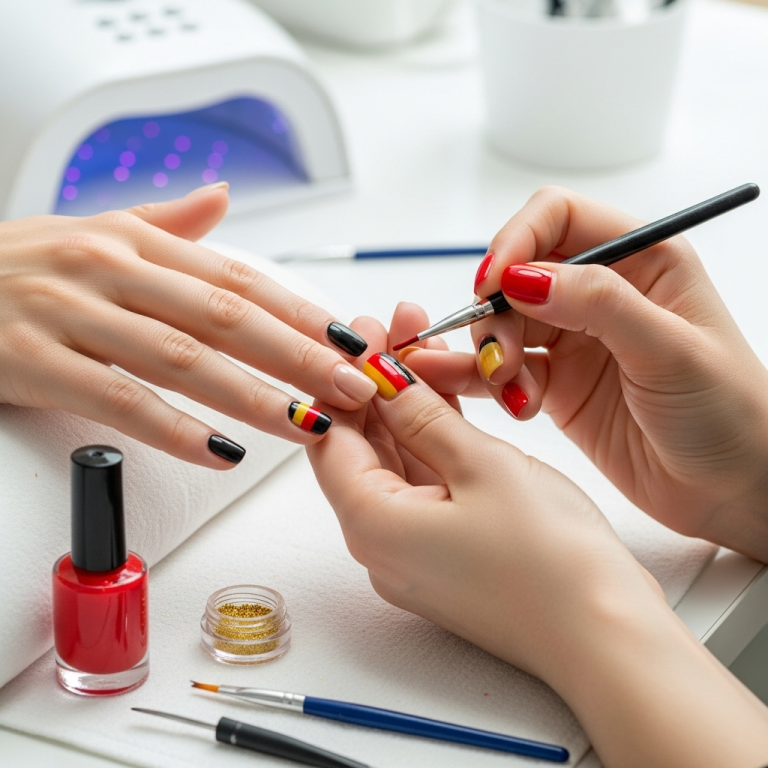
- Thin Nail Art Brushes or Dotting Tools: These are your best friends for creating fine lines, shapes, and dots. A good set can be found on Amazon or at your local beauty supply store.
- Tweezers (Optional but Handy): Great for placing small nail gems or decals.
- Nail Polish Remover & Cotton Swabs/Pads: For cleaning up any mistakes – because even pros make them!
- Cuticle Pusher/Orange Stick: To neatly push back cuticles for a clean canvas.
Optional (but Fun!) Tools:
- Stencils or Tape: For creating crisp geometric shapes.
- Nail Stickers or Decals: A super easy way to add elements to your design.
- Cuticle Oil: For nourishing your nails and cuticles after your manicure.
Step-by-Step: Creating Your First Negative Space Nail Design
Let’s dive into creating a simple yet stunning negative space design. We’ll focus on a classic look – geometric lines using tape. This method is fantastic for beginners because it guides your hand and ensures clean edges.
Prep Your Canvas:
- Clean Your Nails: Start with clean, dry nails. Remove any old polish.
- Shape Your Nails: File your nails to your desired shape.
- Apply Base Coat: Apply one layer of your favorite base coat. Let it dry completely. This protects your nails and helps polish adhere smoothly.
Design Time – Geometric Lines:
- Apply Your Base Color (or Not!): You have two main options here:
- Option A (Full Color Base): Apply one or two thin coats of your chosen polish color. Let it dry completely. This is crucial; otherwise, the tape will peel off the polish.
- Option B (Bare Nail Base): Skip the color polish and let your natural nail be the base. Just ensure it’s smoothly buffed and clean.
- Apply The Tape: Carefully place strips of nail tape or painter’s tape (thin strips work best) onto your dried polish. Press down firmly along the edges to ensure a good seal. Think about creating geometric shapes – triangles, squares, or stripes. You can apply tape to entire nails or just sections.
- Paint Over the Tape: Apply one or two thin coats of a contrasting polish color over the taped areas. Make sure to cover all the polish you want to show.
- The Big Reveal (While Wet!): This is the exciting part! While the new polish is still wet, carefully peel off the tape. It’s best to peel it away at an angle. If you wait for the polish to dry, you risk smudging or peeling off the design you’ve already created.
- Clean Up Mishaps: If any polish has bled under the tape, or you have any wobbly lines, use a small brush dipped in nail polish remover to carefully clean up the edges. A fine-tipped cotton swab is also great for this.
- Apply Top Coat: Once your design is completely dry, apply a generous layer of top coat. This seals everything in, adds shine, and makes your design last. Be gentle with the first swipe of the brush to avoid smudging.
And there you have it! Your first stunning negative space nail design.
Exploring Different Negative Space Nail Design Styles
The beauty of negative space is its adaptability. Once you’ve mastered the basics, you can explore a world of different looks. Here are some popular styles to inspire your next manicure:
1. Geometric Patterns
This is what we touched on with the tape method, but you can get much more creative. Think clean lines, sharp angles, triangles, squares, and chevrons. You can use thin brushes or even nail art pens for more intricate geometric work. Metallics like gold or silver look particularly striking against a bare nail or a muted base color.
2. Abstract Swirls and Wavy Lines
Achieve a more fluid, artistic vibe with abstract shapes. Use a thin brush to freehand gentle curves, swirls, or wave-like patterns. These designs don’t need to be perfect; the organic feel is part of their charm. A gradient effect within the painted portion can add another layer of visual interest.
3. Polka Dots and Moons
Simple dots are a classic for a reason! Use a dotting tool to place dots of various sizes on a bare nail. You can also create a “moon” shape near the cuticle with a contrasting color, leaving the rest of the nail bare. This is a super easy way to add a pop without much effort.
4. Cut-Out or Window Designs
This involves painting a shape onto your nail, but leaving a portion within that shape unpainted, revealing the natural nail color underneath. For example, you could paint a large square, but leave a smaller square or a circle unpolished in the center. This requires a bit more precision, often using reverse stamping techniques or careful brushwork.
5. Minimalist Accents
Sometimes, less is truly more. A single fine line at the base of the nail, a tiny dot on one nail, or a thin stripe across the tip can make a beautiful statement without overwhelming your hands. These are incredibly easy to do and look effortlessly chic.
6. Color Blocking
This involves using a strip of tape or a brush to create distinct blocks of color, separated by unpolished nail space. You can block out half the nail, create an L-shape, or arrange multiple blocks in a mosaic-like pattern.
Advanced Tips & Tricks for Negative Space Designs
Ready to take your negative space skills up a notch? Here are a few pro tips to help you achieve even more stunning results:
- Patience is Key: Seriously, let each layer dry. Rushing is the number one cause of smudges and lifted polish.
- Thin Coats are Better: Multiple thin coats of polish are always better than one thick, gloopy coat. They dry faster and look smoother.
- Clean Your Brush: If you’re using a brush for painting, clean it thoroughly with polish remover between different colors or before it dries.
- Practice Your Lines: If freehanding lines, practice on a piece of paper or a nail wheel first. A steady hand comes with practice!
- Use a Gel Top Coat: For ultimate smoothness and to help “fill in” any slight imperfections in lines, a good quality gel top coat (cured under a UV/LED lamp) can give a flawless finish.
- Nail Art Foil: For a quick metallic boost, apply a foil adhesive and then press on holographic or metallic transfer foils onto the unpolished areas or over painted sections.
- Consider Your Nail Shape: Certain negative space designs complement specific nail shapes. For example, vertical lines can make shorter nails appear longer.
Maintaining Your Negative Space Manicure
The good news is that negative space designs often have a natural advantage when it comes to longevity. Because there’s unpolished space, the visible growth line at your cuticle is less apparent compared to a full-coverage manicure. However, here’s how to keep your masterpiece looking fresh:
- Reapply Top Coat: Every few days, swipe on an extra layer of top coat, especially on the painted areas, to maintain shine and protection.
- Moisturize: Keep your hands and cuticles hydrated with cuticle oil and hand cream. Healthy cuticles make any nail design look better.
- Be Gentle: Avoid using your nails as tools. Don’t scrape or pick at them.
- Protect Your Hands: Wear gloves when doing household chores, especially washing dishes or cleaning, as harsh chemicals can break down top coats and polish.
Common Mistakes and How to Fix Them
Don’t worry if your first few tries aren’t perfect. We all have those moments! Here are common hiccups and how to salvage your design:
The Smudge Struggle
Mistake: You smudged a line or a painted area while peeling tape or applying top coat.
Fix: Gently use a fine-tipped brush dipped in nail polish remover to carefully clean up the smudge before it dries completely. If it’s a small smudge in an open area, you can sometimes carefully dab a tiny bit of polish remover with a toothpick to isolate and clean the area. For larger smudges, you might have to remove the polish from that section and repaint, or strategically add a dot or small detail to cover the imperfection.
Peeling Polish with Tape
Mistake: When you peeled off the tape, it took some of the base polish with it.
Fix: This usually happens when the base polish isn’t fully dry. Let it dry completely next time! For a current fix, carefully use a fine brush and polish remover to clean up the edges where the polish lifted. You can then try to repaint the lines with your nail art brush, aiming for precision.
Wobbly or Uneven Lines
Mistake: Your lines aren’t as straight as you’d like.
Fix: This is where the cleanup brush excels. Dip a small, stiff brush into nail polish remover and use it to sharpen and straighten your lines. You can also try using a polish with a finer brush or even nail art pens for more control.
Too Much Product
Mistake: Your painted areas look thick and gloopy.
Fix: This is best avoided by using thin coats. If it’s already done, there’s not much to do except let it dry and perhaps carefully try to buff down any huge bumps (though this is risky). Ensure your next attempt uses thinner coats.
Negative Space Design Ideas & Inspiration
To get your creative juices flowing, here are some specific design ideas:
1. The Half-Moon Chic:
Paint a perfect semi-circle at the base of your nail, near the cuticle, in your chosen color. Leave the rest of the nail bare. You can vary the size of the moon or use a metallic polish for an extra pop.
2. The Minimalist Stripe:
Apply a single, thin vertical or horizontal line of polish across your nail, or just along one edge. Black, white, or metallic lines are incredibly effective.
3. The Geometric Play:
Use tape to create a large “X” across your nail, or divide a nail into several triangles or squares. Paint one or two of these sections, leaving the others bare.
4. The “Window” Effect:
Paint a bold shape (like a square or a rounded rectangle) on your nail, but leave a smaller shape unpainted in the center. This creates a graphic, almost framed effect.
5. The Abstract Swirl:
With a thin brush, paint a loose, abstract swirl or a couple of graceful curves on your bare nail. Think sophisticated, not messy.
6. The Dot Dash Delight:
Place a few strategically spaced dots with a dotting tool, or use a fine brush to create short, delicate dashes along the edge or base of your nail.
Frequently Asked Questions About Negative Space Nail Designs
Q1: Are negative space nail designs good for beginners?
A: Absolutely! Many negative space designs are simpler than full-coverage art because you’re working with bare nail as part of the design. Techniques like using tape for geometric shapes are very beginner-friendly.
Q2: What colors work best for negative space nail designs?
A: Any colors you love! Neutrals, pastels, brights, metallics – they all work beautifully. The key is contrast. Often, a bold color against the natural nail looks stunning, or a metallic accent can add that extra sparkle to a bare base.
Q3: How do you get clean lines with negative space designs?
A: Patience and the right tools are crucial! Ensure your base polish is completely dry before applying tape. Press the tape down firmly to create a seal. For freehand lines, use thin nail art brushes and a steady hand. Always have nail polish remover and a fine brush handy for cleanup.
Q4: Can I use nail stickers or decals with negative space designs?
A: Yes! Stickers and decals are a fantastic way to add elements to your negative space design. You can apply them directly to a bare nail and then paint around them, or layer them over a colored polish base. Just be sure to seal them well with a top coat.
Q5: How long do negative space manicures typically last?
A: With proper application and care, negative space manicures can last as long as any other well-applied polish manicure, often 1-2 weeks. The unpolished areas can also help camouflage nail growth, making touch-ups less noticeable.
Q6: Do I need a special polish for negative space?
A: No special polish is required! Standard nail polish is perfect. You’ll need a good base coat and top coat, and of course, your color(s) of choice. If you want extra durability and a super smooth finish, a UV/LED lamp and gel polish/top coat can be used, but it’s not essential for creating the designs.
Conclusion
Negative space nail designs are a breath of fresh air in the world of nail art. They prove that you don’t need to be a professional artist to create sophisticated, eye-catching looks. By strategically using the unpolished parts of your nail, you can achieve a modern, minimalist, and incredibly versatile aesthetic. Whether you’re aiming for sharp geometric patterns with tape, freehand abstract swirls, or simple dots


