Mastering negative space nail designs is all about strategically leaving parts of your natural nail visible for a chic, modern look. This guide offers essential tips, tool recommendations, and easy techniques for beginners to create stunning negative space manicures at home.
Ever looked at a nail design and thought, “Wow, that’s so cool, but I could never do that”? Negative space nail art might seem a bit intimidating at first glance. It involves playing with empty areas on your nail, letting your natural nail color or a clear base shine through, which creates a really modern and elegant vibe. But don’t worry! It’s actually one of the most forgiving and versatile nail art trends out there, perfect for beginners. We’ll break down everything you need to know to achieve those effortless-looking designs without any stress. Get ready to unlock a whole new world of nail art creativity – it’s easier than you think!
What Exactly is Negative Space Nail Design?
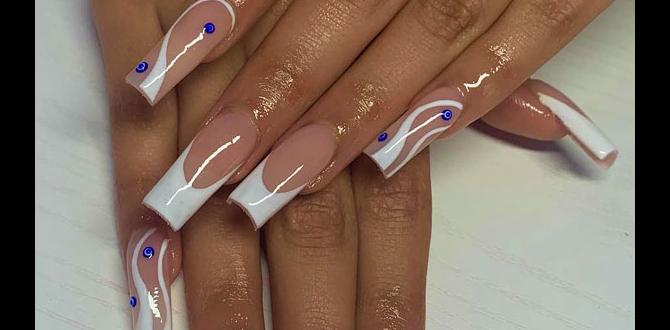
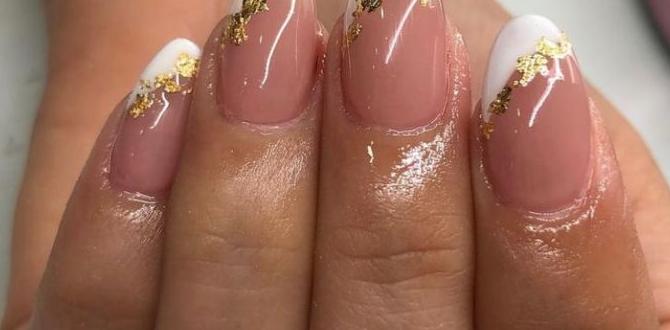
Negative space nail design is a nail art technique where the absence of polish in certain areas is a key part of the design. Instead of covering the entire nail with color or pattern, you intentionally leave sections bare, allowing your natural nail, a sheer polish, or a clear topcoat to show through. This contrast between colored or patterned areas and the “empty” space creates depth, dimension, and a sophisticated, often minimalist aesthetic. It’s like drawing with both color and emptiness!
Think of it like a beautiful painting where the canvas itself is integral to the artwork. In nail art, that “canvas” is your natural nail or the clear layer. This technique can be applied to any nail shape, from short and chic to dramatic coffin or stiletto styles, making it incredibly versatile. Whether you love bold geometric patterns or delicate, wispy lines, negative space can elevate your manicure.
Why Try Negative Space Nail Designs?
There are so many reasons why negative space nail designs have become a huge hit, especially for those who are new to nail art or prefer a more understated yet stylish look. Here’s why you should give it a try:
- It’s Beginner-Friendly: You don’t need to be a pro artist to create stunning negative space nails. Many designs involve simple lines, shapes, or strategic color blocking, making them very achievable.
- Versatility is Key: Negative space works with almost any color combination and design style. Whether you’re into minimalist chic, bold geometric art, or even subtle floral accents, this technique can enhance it.
- Chic and Modern Aesthetic: It offers a sophisticated, contemporary look that’s always in style. The contrast of color and bare nail is inherently elegant.
- Low Maintenance Appearance: Designs with negative space can often look good even as your nails grow out, as the bare nail sections blend more seamlessly.
- Great for All Nail Shapes: From short squares to long coffin or almond nails, negative space designs adapt beautifully to different nail lengths and shapes, including negative space nail design for coffin nails.
- Budget-Friendly: You often need less polish than a full-coverage design, and the forgiving nature means fewer “oops” moments, saving you polish and time.
Essential Tools for Negative Space Nail Designs
Getting started with negative space nail art doesn’t require a full professional kit. A few key tools can make the process much easier and help you achieve cleaner results. Here’s what I recommend:
| Tool | Purpose | Beginner Tip |
|---|---|---|
| Base Coat | Protects your natural nail and provides a smooth surface for polish. It’s crucial for bare nail areas. | Always use a good quality base coat to prevent staining and ensure polish adherence. |
| Top Coat | Seals the design, adds shine, and protects against chipping. | A good, non-wipe top coat is ideal so you don’t accidentally smudge your design while cleaning up. |
| Thin Nail Art Brushes/Pens | For drawing precise lines, dots, or intricate details. | Start with a brush with fine bristles. Even a well-sharpened eyeliner brush can work in a pinch! |
| Striping Tape or Stencils | To create clean, straight lines or geometric shapes by blocking off areas. | Experiment with different tape widths and stencil shapes to see what you like. Ensure they adhere well to your nail. |
| Cotton Swabs & Clean-up Brush | For cleaning up any polish mistakes around the cuticle and nail edges. | Dip a cotton swab in nail polish remover and twist it to a fine point for precision clean-ups. |
| Your Favorite Polishes | The colors you’ll use to create the design elements. | Choose colors that complement each other and your skin tone for a harmonious look. |
| Clean-up Solution (Optional) | A small brush dipped in acrylic remover can be more precise for detailed clean-up than regular polish remover. | Use sparingly and ensure good ventilation when using acrylic remover. |
| Palette or Surface | A piece of plastic, paper, or a dedicated palette to place small amounts of polish for dipping brushes. | A silicone mat works great as polish won’t stick to it permanently. |
Having these basic tools will set you up for success. Don’t feel like you need the most expensive items; quality basics are often all it takes to achieve professional-looking results.
Step-by-Step Guide to Creating Negative Space Nail Designs
Ready to dive in? Creating your first negative space nail design is simpler than you might think. We’ll walk through a basic geometric design that’s perfect for beginners, adaptable for any nail shape, including that sought-after negative space nail design for coffin nails.
Step 1: Prep Your Nails
Proper nail preparation is the foundation for any great manicure. It ensures your polish lasts longer and looks smoother.
- Clean and Dry: Make sure your nails are clean, completely dry, and free of any old polish or oils.
- Shape and File: File your nails to your desired shape. For coffin nails, ensure a clean, sharp taper.
- Cuticle Care: Gently push back your cuticles. You can use an orange wood stick or a cuticle pusher. Avoid cutting them unless absolutely necessary, as healthy cuticles are key to a polished look.
- Buff (Optional): Lightly buff the surface of your nails to create a smooth canvas. This also helps polish adhere better.
- Apply Base Coat: Apply one thin layer of your favorite base coat. This protects your natural nail from staining and creates a smooth surface for your design. Let it dry completely.
Step 2: Plan Your Design
For your first few attempts, it’s helpful to have a simple design in mind. For a geometric look, consider using striping tape:
- Think about where you want your color blocks and where you want the negative space.
- For coffin nails, you might want to create a V-shape at the tip, leaving the rest bare, or create diagonal lines that divide the nail diagonally.
Step 3: Apply Your First Color (or Leave Bare)
You have two main approaches here:
- Option A: Start with Color: Apply one or two thin coats of your main color to the sections you want to be opaque. Let it dry THOROUGHLY. This is crucial if you’re using striping tape, as wet polish will lift.
- Option B: Start with Negative Space: If your design relies heavily on the natural nail showing through, you might only be adding small accents. In this case, after the base coat, you can proceed to adding elements on top of the bare nail or a sheer polish.
Step 4: Use Striping Tape for Clean Lines
This is where the magic happens for sharp, defined edges.
- Apply Tape: Once your polish is completely dry (wait at least 10-15 minutes, or use a quick-dry topcoat), carefully apply your striping tape onto the nail. Press down the edges firmly to prevent polish from seeping underneath.
- Apply Second Color: Paint over the tape and the areas you want to cover with your second color. Apply thinly and evenly.
- Remove Tape: While the second color is still wet (this is important!), carefully and slowly peel off the striping tape using tweezers or your nails. If you wait for it to dry, the polish might peel off with the tape, or the edges will be jagged.
- Let it Dry: Allow this layer to dry completely.
Step 5: Add Details (Optional)
If your design includes fine lines or dots, now is the time.
- Use Nail Art Brush/Pen: Dip a fine brush into polish or use a nail art pen to draw thin lines, dots, or other embellishments.
- Work on Dry Surface: Ensure the previous layer of polish is dry before adding delicate details to avoid smudging.
Step 6: Clean Up Mistakes
No design is perfect without a little clean-up!
- Use Cotton Swab: Dip a pointed cotton swab in nail polish remover.
- Precision Cleaning: Carefully run the moistened swab around your cuticle line and the edges of your nail to remove any stray polish. A clean-up brush (a small, firm, flat brush) dipped in remover can be even more precise for tidying lines.
Step 7: Seal with Top Coat
The final and most important step!
- Generous Layer: Apply a generous, smooth layer of top coat over your entire nail, ensuring you cap off the free edge (paint a tiny bit on the very tip of your nail).
- Protect Design: The top coat not only adds shine but also seals your design, preventing chipping and helping your manicure last longer.
- Dry Completely: Allow the top coat to dry thoroughly. Be patient! Rushing this step can ruin your hard work.
And there you have it! A chic negative space nail design created by you. Don’t be discouraged if your first attempt isn’t salon-perfect. Practice makes progress!
Popular Negative Space Nail Design Ideas
Negative space is incredibly versatile. Here are some popular ideas to get your creative juices flowing:
- Geometric Halves: Paint one half of the nail a solid color and leave the other half bare. You can create a sharp divide with striping tape.
- Striped and Sheer: Apply thin, colored stripes over a sheer nude polish or your natural nail.
- Half Moon Manicure: Paint the lunula (the half-moon shape at the base of the nail) in a contrasting color or leave it bare while painting the rest of the nail.
- Chevron and V-Shapes: Use tape to create V-shaped or chevron patterns, leaving the unpainted areas as negative space. This is fantastic for elongating nail beds on shorter nails or adding flair to negative space designs for coffin nails.
- Peek-a-Boo Accents: Paint intricate patterns or solid blocks of color, but strategically leave small “windows” of negative space within the design itself.
- Outline Designs: Instead of filling in a shape, just use a fine-tip brush to outline it, leaving the interior bare.
- Color Blocking with Gaps: Apply different colors in sections with deliberate, clean gaps between them.
The beauty of negative space is its adaptability. You can combine these techniques, play with different color palettes, and let your personal style shine through.
Negative Space Nail Design for Coffin Nails: Specific Tips
Coffin nails, also known as ballerina nails, are long and tapered with a squared-off tip. Their dramatic shape is a perfect canvas for playing with negative space. Here’s how to make it work beautifully:
- Accentuate the Taper: Designs that follow the natural taper of the coffin nail can be very flattering. Think diagonal lines or V-shapes that meet at the tip, leaving sections of the nail bare.
- Vertical Lines for Elongation: Thin vertical lines of color against a bare nail can make coffin nails appear even longer and more elegant.
- Base Color Choice Matters: A sheer nude, milky white, or even a clear topcoat as your base negative space color can make the tips and accent colors pop beautifully.
- Tip Designs: Create a classic French tip but with a twist – a colored outline at the very tip, or a geometric shape at the tip with the rest bare.
- Balance is Key: With the length of coffin nails, you can afford to be a bit more creative with placement. Don’t be afraid to experiment with asymmetrical designs.
- Clean Edges are Crucial: Because coffin nails are often longer and more prominent, any smudges or messy lines will be more noticeable. Take extra care with your clean-up steps.
Using a good quality base coat provides a smooth canvas, and a reliable top coat will keep your intricate designs from chipping. For more on nail care and healthy nails, the American Academy of Dermatology Association offers excellent resources.
Achieving Flawless Application: Common Pitfalls and How to Avoid Them
Even with simple techniques, a few common mistakes can trip up beginners when creating negative space designs. Let’s tackle them:
| Common Pitfall | Why It Happens | How to Fix It |
|---|---|---|
| Smudged Polish | Applying a new layer too soon, or removing tape while polish is wet but not letting it get too dry. | Be patient! Ensure each layer is completely dry before adding tape, polish, or details. When removing tape, pull it slowly while the polish is still wet and shiny for the cleanest line without lifting. |
| Ragged or Uneven Lines | Using low-quality tape, not pressing tape down firmly, or removing tape when polish is too dry. | Invest in good quality striping tape or stencils. Press down edges firmly with a cuticle pusher or toothpick. Remove tape while polish is still setting but not fully hard. |
| Polish Seeping Under Tape | Tape not being sealed down properly, or applying polish too thickly over tape. | Press tape down firmly along all edges. Apply polish in thin, even coats. A slightly thicker coat can seal the tape edge, but avoid flooding it. |
| Stained Nails | Skipping the base coat, especially when using dark or vibrant polishes. | ALWAYS use a good base coat. It creates a barrier and prevents staining. |
| Designs Looking “Flooded” or Messy | Using too much polish, especially with fine detail brushes, or not cleaning up correctly. | Use a palette! Dip your brush lightly into polish and wipe off excess. Practice clean-up with a pointed cotton swab or clean-up brush dipped in remover for sharp edges. |
| Top Coat Lifting or Smudging | Applying top coat unevenly, or when underlying polish isn’t fully dry. | Apply top coat in smooth, even strokes, letting it glide over the design. Ensure all colored layers underneath are dry. Avoid “scrubbing” motions. |
By being mindful of these common issues and implementing the suggested solutions, you’ll find your negative space nail art looks much more professional and polished. Remember, practice is key, and even experienced nail artists have off days!
Caring for Your Negative Space Nails
To make your beautiful negative space manicures last, a little extra care goes a long way:
- Wear Gloves: Protect your hands and nails when doing chores, washing dishes, or gardening. Harsh chemicals and prolonged water exposure can weaken polish and natural nails.
- Avoid Using Nails as Tools: Resist chipping away at labels or prying things open with your nails. This can lead to chips and breaks.
- Moisturize Regularly: Keep your cuticles and the skin around your nails hydrated with cuticle oil or hand cream. Healthy cuticles make any manicure look better.
- Re


