To create stunning negative space nail art easily, focus on intentionally leaving parts of your natural nail exposed while applying polish or designs. This technique makes manicures look chic, modern, and easier to achieve. Learn how to master this essential nail art skill with our simple guide!
Ever looked at a nail design and thought, “Wow, that’s so cool, but way too complicated for me”? You’re not alone! Many beautiful nail art trends can seem intimidating, especially when you’re just starting. But what if I told you there’s a way to achieve really stylish, eye-catching manicures that are surprisingly simple and don’t require a whole lot of special skills? That’s where negative space nail art comes in. It’s a trick that makes your nails look sophisticated, modern, and totally on-trend, all while being incredibly beginner-friendly. Ready to discover how this magic works and how you can do it yourself? Let’s dive in!
What is Negative Space Nail Art?
Negative space nail art is a design technique where you intentionally leave parts of your natural nail (or a sheer base coat) visible. Instead of covering the entire nail with opaque color or intricate patterns, you strategically use empty areas to create a balanced and visually interesting look. Think of it like an artist using the canvas itself as part of the artwork. This approach is incredibly versatile and can be adapted to almost any style, from minimalist chic to bold graphic designs.
The beauty of negative space is that it doesn’t require perfect, opaque coverage everywhere. This means you can get away with minor imperfections and still achieve a stunning result. It’s a fantastic way to add a touch of artistry to your nails without needing advanced painting skills. It’s all about using the absence of color to enhance the presence of what you do paint!
Why is Negative Space Nail Art So Essential?
Negative space nail art has become a staple in the nail art world for several compelling reasons:
- Universally Flattering: Designs often feature clean lines and open areas, making them suitable for all nail shapes and lengths.
- Modern & Chic Aesthetic: It lends an effortlessly sophisticated and contemporary vibe to any manicure.
- Beginner-Friendly: Many negative space designs are forgiving, as the exposed nail acts as a natural element of the art.
- Versatile: It can be minimalist or elaborate, matching any outfit or occasion.
- Saves Time: You don’t need to paint the entire nail, which can speed up the manicure process.
- Elegant Growth: As your nails grow out, the transition isn’t as stark, often looking chic for longer.
It’s an essential technique because it opens up a world of stylish possibilities without the need for overly complex methods. It’s a smart way to elevate your nail game!
Getting Started: Essential Tools & Prep
Before you start creating your negative space masterpieces, having the right tools and preparing your nails is key. Don’t worry, you probably have most of this already!
Your Nail Art Toolkit
Here’s what you’ll want to have on hand:
- Nail Polish or Gel Polish: Your base colors and accent colors.
- Clear Top Coat: Essential for sealing your design and adding shine.
- Base Coat: Protects your natural nail and helps polish adhere better.
- Nail Polish Remover: For any oops moments.
- Cotton Pads or Lint-Free Wipes: To apply remover.
- Fine-Tipped Polish Brush or Dotting Tool: For precise lines and details (optional, but very helpful).
- Thin Striping Tape or Stencils: For creating sharp geometric lines (optional).
- Tweezers: If using striping tape or small nail art elements.
Nail Prep for the Best Results
Proper nail prep ensures your manicure lasts longer and looks its best:
- Clean Your Nails: Wash your hands and thoroughly remove any old polish.
- Shape Your Nails: File them to your desired shape. Smooth ridges with a fine-grit buffer if needed.
- Push Back Cuticles: Gently push back your cuticles with an orangewood stick or a cuticle pusher. Trim any hangnails if necessary.
- Buff Lightly: A very light buffing of the nail surface can help base coat and polish adhere better.
- Apply Base Coat: This is crucial, especially for negative space where the natural nail is exposed. A good base coat protects your nails from staining and provides a smooth canvas.
For more in-depth nail care, understanding the importance of cuticle health can significantly impact your manicure’s longevity and appearance. Resources from dermatological associations often highlight proper cuticle care techniques.
Easy Negative Space Nail Art Techniques for Beginners
Let’s get creative! These techniques are super simple and perfect for your first foray into negative space nail art.
1. The Geometric Block
This is a classic and incredibly easy way to use negative space. It’s all about creating clean lines and shapes.
How to do it:
- Start with a clean, prepped nail with a base coat applied.
- Paint your desired color onto a section of your nail. For example, paint a triangle in the corner, a stripe across the middle, or just one half of the nail.
- Let this dry completely.
- Use striping tape or a fine brush to add another color on top or to create a border, leaving a section of your natural nail (or the first polish color) exposed.
- Alternatively, simply use two different colors, painting sections strategically so that natural nail shows through.
- Seal with a clear top coat.
Tip: If using striping tape, ensure it’s pressed down firmly to prevent polish from seeping underneath. Apply the second color, and then carefully peel off the tape while the polish is still slightly wet.
2. The Half Moon Manicure
This retro-inspired look is timelessly chic and uses negative space at the base of the nail.
How to do it:
- Apply a base coat.
- Using a contrasting polish color, paint the tip of your nail.
- Let it dry completely.
- Now, here’s the trick: you want to create a “half moon” or a curved line where the two colors meet at the cuticle. You can use a fine-tip brush or a small dotting tool to carefully paint a curved line defining the bottom edge of your colored tip. Or, use a circular stencil or the tip of a nail polish brush to guide your curve.
- Alternatively, paint the entire nail one color, let it dry, then apply a circular sticker or stencil over the cuticle area. Paint the tip of the nail with a second color, covering the sticker. Peel off the sticker carefully once dry.
- Apply a top coat to seal.
Tip: For a super clean line, try a French tip guide or even a small circular sticker placed at the base of the nail to help you outline the moon shape.
3. The Abstract Splash
This is for when you want to be a little more free-form! It’s all about playful placement and letting your creativity flow.
How to do it:
- Apply a base coat.
- You can use a dotting tool, a fine brush, or even the polish brush itself to create abstract shapes, lines, or dots on your nail.
- The key is to not cover the entire nail. Leave significant areas of your natural nail showing through.
- Think about flow and balance. Where do you want the color to draw the eye?
- Let it dry completely.
- Add a top coat.
Tip: Experiment with different brush strokes. You can do thin lines, bold dabs, or scattered dots. The more unexpected, the better for abstract!
4. The French Tip Reinvented
Give the classic French manicure a modern twist with negative space.
How to do it:
- Apply a base coat.
- Paint the tip of your nail with a contrasting color.
- Let it dry completely BUT leave the rest of the nail bare or with just a clear coat.
- To make it negative space, you can either:
- Apply another thin line under the white tip with a different color, leaving skin exposed between the colors.
- Create a thin, sharp line under or above the tip using striping tape or a fine brush, leaving the natural nail visible between the tip color and the rest of the nail.
- Go for a “reverse French” where the colored tip is at the cuticle, leaving the rest of the nail bare or clear.
- Finish with a top coat.
5. The Accent Line
Sometimes, all you need is a single, precise line to make a statement.
How to do it:
- After applying your base coat, paint your entire nail with a color you love, or leave it bare if you’re going for a super minimalist look.
- Using a fine-tipped striper brush or thin striping tape, create a single, clean line across the nail. This could be horizontal, vertical, diagonal, or even a geometric shape.
- The line itself is the design, and the rest of the nail is the negative space.
- Let it dry and apply a top coat.
Tip: Metallic or neon colors make for striking accent lines against a nude or clear nail.
Table: Negative Space Design Ideas Comparison
Here’s a quick look at some popular negative space designs and their simplicity:
| Design Style | Beginner Friendliness | Visual Impact | Key Technique |
|---|---|---|---|
| Geometric Block | High | Modern, Sharp | Using tape or freehand to create distinct shapes. |
| Half Moon | Medium | Retro, Chic | Careful application of color around the cuticle or tip. |
| Abstract Splash | High | Artistic, Playful | Freeform application of dots, lines, or shapes. |
| French Tip Reinvented | Medium | Elegant, Updated Classic | Strategically placed color tips with exposed nail. |
| Accent Line | High | Minimalist, Bold | A single, precise line as the focus. |
Pro Tips to Elevate Your Negative Space Nails
Ready to take your negative space game to the next level? Here are some tips from the pros:
- Use a Sheer Base: Instead of a completely clear base coat, try a sheer nude, pink, or milky white polish. This can subtly enhance the “negative space” and give your nails a polished look even before you add color.
- Don’t Forget the Top Coat: This is non-negotiable! A good top coat seals your design, adds shine, and protects the polish from chipping, making your manicure last longer. Apply it carefully, ensuring it covers all polished areas and smoothly transitions over the exposed nail.
- Play with Finishes: Mix matte and glossy finishes for an added dimension. For example, a glossy color stripe over a matte nude nail can look incredibly sophisticated.
- Consider Color Combinations: Think about how your chosen colors will interact with the natural nail tone. Neutrals, pastels, metallics, and even neons can work beautifully.
- Clean Up is Key: Even with negative space, sharp lines and clean edges make a huge difference. Keep a fine-tipped brush dipped in nail polish remover handy for tidying up any smudges or wobbly lines. Check out NailPro’s guide on cleanup tools for inspiration.
- Experiment with Placement: Negative space doesn’t have to be at the base or tip. Try creating a design on the side of the nail, or leaving a “window” of negative space in the center of a colored design.
- Don’t Be Afraid of Color: While many associate negative space with subtle looks, vibrant colors can also be stunning. A bold graphic shape in bright pink, with the rest of the nail exposed, is incredibly impactful.
Common Negative Space Nail Art Questions (FAQ)
Q1: Do I need special tools for negative space nail art?
Not necessarily! While fine-tipped brushes, dotting tools, and striping tape can make it easier to create precise lines, you can achieve many negative space looks with just regular nail polish bottles and a steady hand. A good cleanup brush and nail polish remover are also very helpful.
Q2: Can I do negative space on short nails?
Absolutely! Negative space designs are fantastic for short nails. They can make nails appear longer and more elegant. Simple geometric shapes, accent lines, or minimalist patterns work especially well.
Q3: How do I prevent my polish from chipping with negative space designs?
Proper nail prep, a good base coat, and a generous top coat are your best friends. Make sure to cap the free edge of your nails with the top coat, as this is where chipping usually starts.
Q4: What if I’m bad at painting straight lines?
Don’t worry! That’s where striping tape or stencils come in handy. You can also use the edge of a business card or a guide sticker with nail polish. For abstract designs, “wobbly” lines can even add to the artistic charm!
Q5: How long should I let my polish dry between coats for negative space designs?
It’s crucial to let each layer of polish dry completely before applying the next color or using tape. This prevents smudging and lifting. Depending on the polish type, this could take anywhere from 5 to 15 minutes per coat. Gel polish requires curing under a UV/LED lamp.
Q6: Can I combine negative space with other nail art elements?
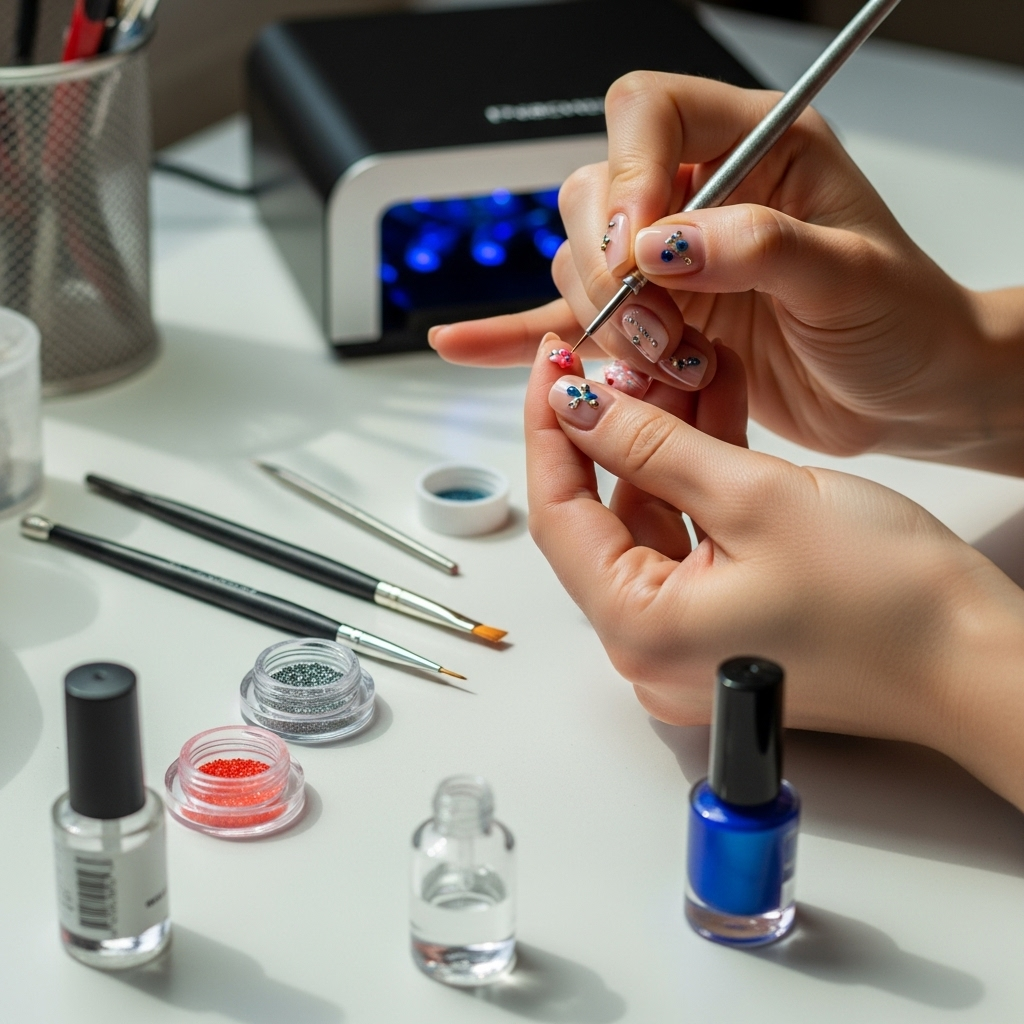
Yes! Negative space can serve as a beautiful canvas for adding small accents like glitter, rhinestones, or simple hand-painted details. The key is to keep the overall design balanced and not overcrowd the negative space areas.
Q7: Will negative space make my nails look stained?
A good quality base coat is essential to prevent staining, especially if you’re using darker or vibrant polish colors. Always apply a base coat before your color, and use nail polish remover and a clean-up brush to keep the edges neat.
Conclusion
Mastering negative space nail art is a journey towards effortlessly chic and modern manicures. It’s less about having perfect coverage and more about strategic design and embracing the beauty of what you leave unpainted. From sharp geometric blocks to playful abstract splashes, the possibilities are endless and achievable for every skill level. Remember to prep your nails well, use your tools wisely, and don’t shy away from experimentation. You’ve got this! With these techniques and tips, you’re well on your way to creating stunning, stylish, and sophisticated negative space nail art that will make your hands the talk of the town. So, grab your polish and let your creativity shine through the spaces!