Quick Summary:
Master naturally stunning nail designs with these beginner-friendly tips. Focus on healthy nail prep, subtle enhancements, and simple, elegant artistry. Achieve beautiful, “your nails but better” looks with easy techniques and minimal fuss.
Naturally Stunning Nail Design Tips for the Everyday Enthusiast
Ever look at gorgeous, understated nails and wonder how to achieve that effortlessly chic vibe? It can feel like a secret club, but I’m here to let you in on it! Many think a ‘natural’ nail look means no design at all, but it’s actually about enhancing your nails’ beauty in a subtle, sophisticated way. We’re talking about nails that look polished, healthy, and chic without being over the top. Whether you’re a complete beginner or just want to refine your style, these tips will guide you to that perfect, natural glow. Get ready to fall in love with your nails all over again!
The Foundation: Healthy Nails Are Your Best Canvas
Before we even think about designs, let’s talk about the absolute must-have: healthy nails. Think of it like baking a cake – the better your ingredients, the tastier the result. Strong, well-maintained nails are the secret to any beautiful design, natural or otherwise.
Nail Care Essentials for That “My Nails But Better” Look
Caring for your nails doesn’t have to be complicated. A few simple habits make a world of difference.
- Moisturize, Moisturize, Moisturize! Dry cuticles and nails can look ragged and detract from any polish. Use a cuticle oil daily, and a good hand cream after washing your hands. Look for ingredients like jojoba oil, vitamin E, or shea butter.
- Gentle Filing is Key. Always file your nails in one direction to prevent splitting and breaking. Use a fine-grit file (around 240 grit or higher) for natural nails. Avoid sawing back and forth.
- Push, Don’t Cut, Cuticles. Your cuticles are a protective barrier for your nail bed. Gently push them back after a shower or soak using an orange stick or a specialized cuticle pusher. Resist the urge to cut them, as this can lead to infection.
- Protect Your Hands. Wear gloves when doing household chores, especially washing dishes or using cleaning products. These can dry out and damage your nails significantly.
- A Balanced Diet Matters. Believe it or not, what you eat affects your nails! Biotin, found in eggs, nuts, and whole grains, is often recommended for nail strength. Staying hydrated also plays a role.
Choosing the Right Colors for Subtle Elegance
When we say “natural nail design,” color choice is paramount. We’re aiming for shades that complement your skin tone and look polished, not loud.
Neutrals and Nudes: The Versatile Powerhouses
Neutrals and nudes are the workhorses of natural nail designs. They’re chic, sophisticated, and go with everything.
- Sheer or Milky Pastels: Think soft pinks, beiges, and whites. These add a touch of color and shine without looking like a bold statement. They give that “clean girl” aesthetic.
- Muted Earth Tones: Soft browns, taupes, and blush tones create a warm, natural look. These are particularly beautiful for those with warmer skin tones.
- Pale Greys and Whites: A delicate, almost translucent white or a light, cool grey can be incredibly chic and modern.
When selecting your nude shade, aim for one that’s one to two shades lighter than your natural skin tone for a seamless blend, or one that has undertones matching your skin for a more contrasting but still elegant look.
The “French Twist”: Modernizing a Classic
The classic French manicure gets a natural makeover with subtle twists. Instead of stark white tips, opt for softer, more organic colors.
Consider using a sheer pink polish for the base and a milky white or sheer nude for the tips. Another popular variation is the “baby boomer” or ombre French, where the white tip gently fades into the pink base, creating a soft gradient effect.
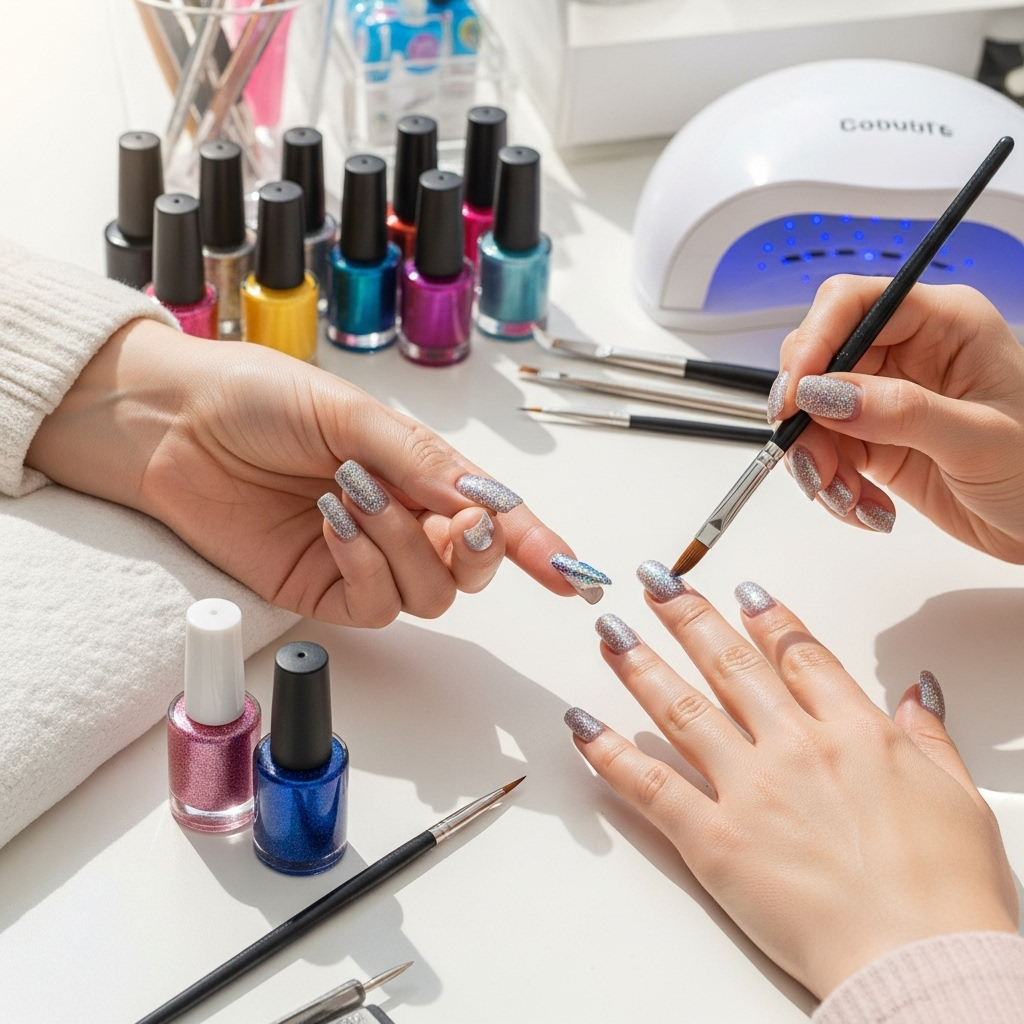
Simple Design Techniques for Maximum Impact
You don’t need to be a nail art pro to create stunning, natural-looking designs. These techniques are easy to master and require minimal tools.
The Power Duo: Negative Space and Minimalist Lines
Negative space designs are perfect for that super chic, modern look. They utilize the natural nail, or clear polish, as part of the design.
- Half-Moon Manicure: Paint only the upper half or outer edge of your nail, leaving the cuticle area bare.
- Vertical or Horizontal Lines: Use a fine-tipped brush or striping tape to add a single, thin line in a contrasting or complementary color. Black, gold, or metallic shades often look striking against a nude or sheer base.
- Dotting Tools for Delicate Accents: A single, tiny dot near the cuticle or at the tip of the nail can add a touch of personality without being overwhelming.
Subtle Embellishments: Little Details, Big Difference
Sometimes, all your natural nail design needs is a tiny touch of something extra.
- A Touch of Glitter: A sheer polish with a subtle shimmer or a tiny amount of fine glitter near the cuticle can add sparkle without being gaudy.
- Tiny Studs or Gems: One or two very small rhinestones or metallic studs placed strategically can elevate a simple manicure. Think one stud at the base of the nail.
- Mattes vs. Glossy: Playing with finishes can create depth. A matte topcoat over a glossy color, or vice versa, can add sophistication.
Nail Prep and Application: The Secret to Longevity
Even the prettiest design won’t last if not applied correctly. Proper prep and application are crucial for a smooth, long-lasting manicure that looks professionally done.
Step-by-Step: Achieving a Flawless Natural Manicure
Follow these steps for a beautiful and durable natural nail look.
- Cleanse Your Nails: Start with clean, dry nails. Remove any old polish thoroughly with a non-acetone remover, which is gentler on natural nails.
- Shape and Buff Gently: File your nails to your desired shape. Then, use a fine buffer to gently smooth the surface. This helps polish adhere better. Don’t over-buff, as this can thin the nail.
- Apply a Quality Base Coat: A good base coat is essential. It protects your nails from staining, provides a smooth surface, and helps your polish adhere. Let it dry completely.
- Apply Thin Coats of Color: For most polishes, two thin coats are better than one thick coat. This ensures even application, faster drying, and prevents chipping. Allow each coat to dry for a couple of minutes before applying the next.
- Add Your Design Element (If Any): If you’re adding a line, dot, or accent, do it after your color coats have dried. For lines, striping tape is your best friend – apply it firmly to a dry nail, paint over it, and remove it while the paint is still wet for a crisp edge.
- Seal with a Top Coat: This is non-negotiable! A good top coat seals in your design, adds shine, and protects against chips. For extra longevity, consider a quick-dry top coat. Reapply your top coat every few days to refresh your manicure.
Essential Tools for Natural Nail Artistry
You don’t need a salon’s worth of tools to create beautiful natural nail designs. Here are a few basics that will serve you well.
Your Starter Kit: What Every Beginner Needs
Starting with the right tools makes the process much smoother and more enjoyable.
- Emery Board or Fine-Grit Nail File: As mentioned, crucial for shaping without damage.
- Cuticle Pusher (Metal or Orange Stick): For gently tidying up the cuticle area.
- Cuticle Oil: For nourishing and keeping nails and skin hydrated.
- Base Coat and Top Coat: Invest in good quality ones; they make a significant difference in the final look and wear time.
- A Good Quality Nail Polish Remover: Preferably non-acetone for gentleness.
- Fine-Tipped Detail Brush: For drawing thin lines or dots. You can find these at most beauty supply stores or online. Many brands sell inexpensive sets.
- Dotting Tools: These come with different sized balls on the end and are perfect for creating polka dots or small accents.
- Striping Tape: For creating crisp, clean lines.
Product Recommendations: Polishes That Shine
For that natural look, opt for polishes that are known for their subtle hues and good formula. Brands that offer sheer finishes, milky colors, and long-wear formulas will be your go-to.
A Comparison of Natural-Look Polish Finishes
| Finish Type | Description | Best For |
| :————– | :————————————————– | :————————————————————- |
| Sheer | Translucent with a hint of color; allows nail bed to show through. | Everyday elegance, subtle enhancement, French manicures. |
| Milky/Creme | Opaque but soft, often with a slight chalky finish. | Clean girl aesthetic, modern nudes, soft gradients. |
| Shimmer | Contains fine glitter particles for a subtle glow. | Adding a touch of sparkle without being overly flashy. |
| Glossy/High Shine | Standard smooth finish that reflects light. | Classic polished look, base for most natural designs. |
| Matte | Non-reflective, velvety finish. | Sophisticated, modern designs, can be used as a topcoat. |
Troubleshooting Common Natural Nail Design Challenges
Even with the best intentions, a few bumps can appear on the road to nail perfection. Here’s how to handle them.
- Chipped Polish: The quickest fix is to file down the nail slightly below the chip and reapply a fresh coat of top coat to seal the edge. If the chip is significant, it might be best to remove the polish and start fresh. Remember to reapply your top coat every 2-3 days!
- Streaky Application: This often happens with lighter or sheerer polishes. Ensure you’re applying very thin coats and allowing each to dry partially before the next. Using a good base coat also helps create a more even surface.
- Bubbles in Polish: Bubbles are usually caused by applying polish too thickly, or by shaking the bottle vigorously before use (swirl instead!). If you see bubbles forming, stop and let that layer dry completely before proceeding, or remove and start again.
- Design Smudging: This typically occurs when you apply a second coat or a top coat too soon. Always ensure the layer underneath is dry to the touch before applying the next. A quick-dry top coat can also help “cap” your design and prevent smudging.
Frequently Asked Questions About Natural Nail Designs
Q1: What is considered a “natural” nail design?
A1: A natural nail design focuses on subtle enhancements, healthy-looking nails, and understated elegance. It often involves neutral or nude colors, sheer polishes, and minimalist artwork rather than bold patterns or bright, attention-grabbing colors.
Q2: How do I make my natural nails stronger?
A2: Focus on consistent cuticle oil application, gentle filing, protecting your hands from harsh chemicals, using a good base coat to prevent breakage and staining, and maintaining a balanced diet rich in biotin and hydration.
Q3: Can I achieve a natural look with gel polish?
A3: Absolutely! Gel polish can be excellent for natural designs, offering durability and shine. Choose sheer or nude gel colors and apply minimalist designs like thin lines or dots. Just ensure proper removal to avoid nail damage.
Q4: How often should I moisturize my nails and cuticles?
A4: For best results, aim to apply cuticle oil at least once a day, ideally before bed. Hand cream should be used after every hand wash, especially if you work with your hands a lot.
Q5: What’s the best way to remove nail polish gently?
A5: Non-acetone nail polish removers are the gentlest option for natural nails as they are less drying. Soak a cotton pad, press it onto your nail for about 30 seconds to allow the remover to break down the polish, then gently wipe away. Avoid aggressive rubbing.
Q6: How can I make my manicures last longer without chipping?
A6: Quality prep is key. Make sure your nails are clean and dry, use a good base coat, apply thin coats of polish, and always finish with a protective top coat. Reapply your top coat every 2-3 days to refresh the color and seal against chipping.
Q7: I have ridged nails. How can I get a smooth finish for my natural designs?
A7: Ridges can be gently smoothed with a fine-grit buffer. However, avoid over-buffing. For a much smoother finish and to conceal ridges, a good ridge-filling base coat is your best friend. It creates a perfectly smooth canvas for your polish.
Conclusion: Embrace Your Natural Nail Beauty
Creating “naturally stunning” nail designs is all about celebrating your own unique nail shape and health. It’s a journey of simple, effective care and understated artistic touches. By focusing on a strong foundation of nail health, choosing flattering and subtle colors, and employing easy design techniques, you can achieve that coveted polished look that feels both effortlessly chic and perfectly you.
Remember, the goal isn’t perfection, but personal expression and confidence. Don’t be afraid to experiment with different shades, subtle lines, or tiny dots. With practice, these tips will become second nature, and you’ll be creating beautiful, natural nail designs that make you feel amazing every day. So go ahead, embrace your inner nail artist and let your naturally stunning nails shine!