Natural nail art ideas are all about enhancing your nails’ beauty with simple, chic designs that don’t require extensions or complex techniques. You can achieve stunning and effortless looks with basic tools and a little creativity, perfect for everyday wear and special occasions.
Dreaming of gorgeous nails but don’t have hours to spend at the salon or complex skills to master? You’re not alone! Many of us love the idea of beautiful nail art but feel intimidated by intricate designs or the need for artificial enhancements. The good news is, stunning nail looks don’t have to be complicated or costly. You can totally elevate your everyday style with simple, elegant designs right on your natural nails. Get ready to discover how easy it is to create eye-catching manicures that express your personal style.
Your Guide to Effortless Natural Nail Art
At Nailerguy, we believe everyone can have beautiful nails. Forget acrylics and gels for a moment, and let’s celebrate the beauty of your natural canvas! This guide is packed with easy-to-follow natural nail art ideas that are perfect for beginners and busy bees alike. We’ll cover everything from essential tools to simple techniques that will have your nails looking salon-worthy in no time. So grab your favorite polish, and let’s get painting!
Essential Tools for Your Natural Nail Art Journey
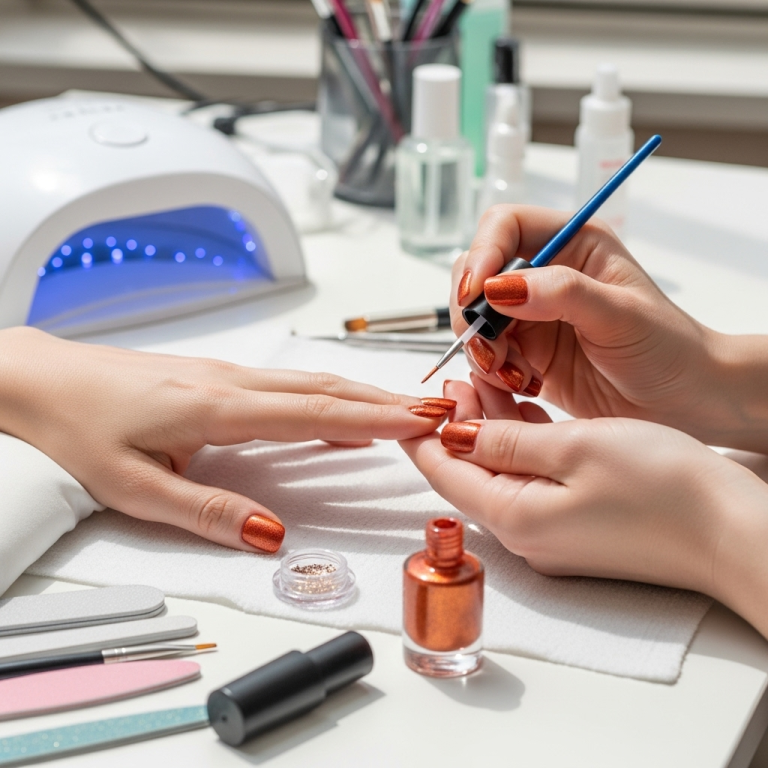
Before we dive into the fun designs, let’s gather the basic tools you’ll need. You probably have most of these already! Having these on hand will make creating your natural nail art a breeze.
- Nail File: For shaping your nails. Opt for a fine-grit file to avoid damaging your natural nails.
- Nail Buffer: To smooth out ridges and add a natural shine.
- Cuticle Pusher/Orange Stick: To gently push back your cuticles for a clean base.
- Base Coat: Essential for protecting your natural nails and helping polish adhere better.
- Top Coat: Seals your design and adds extra shine and longevity.
- Nail Polish Remover: For cleaning up mistakes or changing your polish. Check out Nails Magazine’s guide on safe polish removal.
- Thin Nail Art Brush or Toothpick: For creating fine lines, dots, or small details.
- Dotting Tools: If you want to create perfect dots easily.
- Your Favorite Nail Polishes: In a variety of colors and finishes!
Step-by-Step: Prepping Your Natural Nails
A great manicure starts with healthy, well-prepped nails. This step is crucial for any nail art, ensuring your polish lasts longer and looks its best. Follow these simple steps before you start decorating.
- Clean Your Nails: Start with clean, dry nails. Remove any old polish with nail polish remover. Wash your hands with soap and water to remove any oils.
- Shape Your Nails: Using your nail file, gently file your nails in one direction. Avoid sawing back and forth, as this can weaken them. Choose a shape that suits you – squoval, round, or almond are popular and easy to maintain.
- Push Back Cuticles: Apply a cuticle remover or a bit of cuticle oil. Gently push back your cuticles with a cuticle pusher or an orange stick. Do not cut your cuticles unless you are experienced, as this can lead to infection.
- Buff Your Nails: Use a nail buffer to gently smooth any ridges on your nail surface. This also creates a nice smooth canvas for polish. Be gentle; you don’t need to buff too hard.
- Apply Base Coat: Apply one thin layer of a good base coat. Let it dry completely. This protects your nails from staining and helps your polish adhere better.
Effortless Natural Nail Art Ideas to Try Today
Now for the fun part! These natural nail art ideas are designed to be super simple, requiring minimal skill but delivering maximum impact. Let’s explore some stunning looks you can create right at home.
1. The Classic French Manicure (with a Twist!)
The French manicure is timeless, but we can give it a modern, easy update. Instead of crisp white tips, try a subtle color or a thin, metallic line.
- How to do it: After applying your base coat and a sheer nude or pink polish on your entire nail, use a thin brush and a contrasting polish (like white, black, blush pink, or even a metallic) to draw a delicate line along your natural nail tip. For an even simpler version, just use a nude or pink polish.
- Pro Tip: Don’t worry about perfect symmetry. A slightly imperfect line can look charmingly artsy!
2. Minimalist Dots
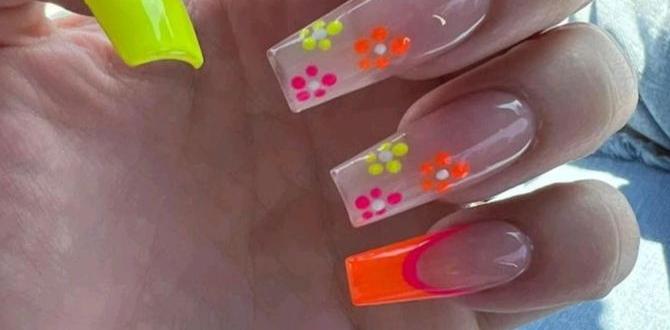
Dots are incredibly versatile and easy to achieve. They add a playful touch without being overwhelming.
- How to do it: After applying your base coat and a solid color polish (like nude, white, or a pastel shade), use a dotting tool or the tip of a toothpick dipped in a contrasting polish to place dots along the base of your nail, on the tip, or scattered across the nail.
- Design Ideas:
- Accent Nail: Place a few dots on just one accent nail.
- Gradient Dots: Start with larger dots near the cuticle and get smaller towards the tip.
- Constellations: Randomly place dots of varying sizes for a starry effect.
3. Simple Stripes
Lines can add a sophisticated and modern feel. They’re easier than you think!
- How to do it: Apply your base color. Once dry, use a thin nail art brush or a striping tape (available at most beauty stores) dipped in a contrasting color to draw thin, vertical or horizontal lines across your nail. For a different look, try diagonal stripes.
- Tips for Straight Lines: If using a brush, steady your hand by resting your pinky finger on your desk. For tape, press it down firmly to prevent polish from bleeding underneath.
4. Ombre Effect
Gradual color transitions look chic and are surprisingly easy to create with a makeup sponge.
- How to do it: Apply a base coat and a light color polish. Take a makeup sponge (a regular cosmetic sponge works fine!) and apply two polishes next to each other on the sponge’s surface – one light shade and one slightly darker. Gently dab the sponge onto your nail, blending the colors. Repeat until you achieve your desired gradient.
- Easy Blend Tip: You can also achieve a simpler ombre by applying one color and then gently blending a second color towards the tip of the nail with a brush or sponge.
5. Glitter Accents
A touch of glitter can instantly elevate any manicure. It’s the easiest way to add sparkle!
- How to do it: After your base polish is dry, apply glitter polish on the tips, the base of the nail, or simply dab it randomly across the nail. You can also use a fine brush to apply glitter precisely to create a glitter “French tip” or a glitter stripe.
- Where to Sparkle: Try a full glitter accent nail, a glitter gradient fade, or just a bit of sparkle on the cuticle line.
6. Negative Space Manicures
This trend is all about embracing the unpainted parts of your nail. It looks modern and is forgiving!
- How to do it: Apply a clear base coat. Use nail art tape or a stencil to create geometric shapes or lines. Paint over the taped areas with your chosen polish color. Once the polish is dry, carefully remove the tape to reveal the unpainted “negative space.”
- Simple Geometric: Even just painting a single stripe of color down your nail, leaving most of the nail bare, is a chic negative space look.
7. Two-Tone Elegance
Sometimes, all you need is two complementary colors to create a sophisticated look.
- How to do it: Paint your nails with a base color. Once dry, paint a different color on the tips or about two-thirds of the nail. You can also create a clean dividing line with a thin brush or tape for a more defined look.
- Color Combinations: Think beyond the French tip! Try a half-moon at the base, a diagonal split, or even just alternating colors on different nails.
8. Abstract Swirls and Blobs
Embrace imperfection with abstract designs. They look intentional, even if they’re not!
- How to do it: After applying a base color, use a thin brush to create freeform swirls, blobs or even zigzags. Don’t aim for perfection; just let the brush move organically.
- Creativity Unleashed: Mix and match colors for a bohemian vibe, or keep it monochrome for a sleek look.
Tools for Different Natural Nail Art Styles
Choosing the right tools can make all the difference, even for simple designs. Here’s a breakdown of how different tools can help you achieve various natural nail art looks:
| Tool | Best For | Effort Level | Example Designs |
|---|---|---|---|
| Thin Nail Art Brush | Fine lines, intricate details, freehand designs | Medium | Stripes, tiny dots, delicate swirls, French tips |
| Dotting Tools (various sizes) | Perfectly round dots, creating patterns | Easy | Polka dots, ‘smiley face’ moons, clustered dots |
| Toothpick | Small dots, tiny details, smudging | Easy | Simple dots, spreading small amounts of glitter, minor touch-ups |
| Nail Art Tape/Strips | Crisp geometric lines, French tips, negative space | Easy | Stripes, color blocking, checkerboards, sharp French tips |
| Makeup Sponge | Gradient effects (ombre) | Easy | Smooth color transitions, subtle washes of color |
| Old T-shirt Fabric | Creating unique textures or distressed looks | Medium | Marbling, textured patterns (when dipped in polish remover and dabbed) |
Maintaining Your Natural Nail Art
Once you’ve created your masterpiece, a little care goes a long way to keep it looking fresh. Natural nail art, especially simpler designs, can last quite a while with the right maintenance.
- Reapply Top Coat: Adding a fresh layer of top coat every 2-3 days can refresh the shine and seal your design, preventing chips and fading.
- Avoid Harsh Chemicals: When doing chores, wear gloves! Exposure to cleaning supplies can break down nail polish quickly.
- Hydrate: Keep your cuticles and nails moisturized with cuticle oil or hand cream to prevent dryness and breakage, which can affect the look of your polish.
- Touch Up Small Imperfections: If a tiny chip occurs, a small dab of polish or a carefully placed dot can often fix it.
When to Give Your Nails a Break
Even the most beautiful natural nail art needs a rest. It’s a good idea to give your nails a break from polish every so often. A good rule of thumb is to go polish-free for a few days every few weeks. This allows your nails to “breathe” and can help prevent them from becoming weak or discolored. During this break, focus on nourishing your nails with cuticle oil and a strengthening treatment if needed. For extensive information on nail health, the American Academy of Dermatology Association offers excellent resources.
FAQs: Your Natural Nail Art Questions Answered
Here are some common questions beginner nail art enthusiasts often ask.
Q1: How can I make my nail art last longer?
A1: The key is proper prep and a good top coat. Ensure your nails are clean and dry, apply a base coat, and finish with two thin layers of a quality top coat. Reapply the top coat every few days. Avoid prolonged contact with water and harsh chemicals.
Q2: My nail polish always chips quickly. What can I do?
A2: Chipping is often due to weak nails or imperfect application. Ensure your base coat is fully dry, and apply thin, even coats of color. Capping the free edge (painting a thin line across the tip of your nail after applying color or top coat) can significantly reduce chipping.
Q3: I’m really bad at drawing straight lines. Any tips?
A3: Don’t worry, many people struggle with this! Using nail art tape or striping tape is the easiest way to get perfect lines. If you’re freehanding, try resting your pinky finger on your desk for stability and use a very thin brush with minimal polish on it.
Q4: Can I do nail art on short natural nails?
A4: Absolutely! Short nails are perfect for nail art. Simpler designs like dots, small accents, or subtle stripes often look best and are very chic on shorter lengths. Negative space designs also work wonderfully.
Q5: What are the best polishes for beginners?
A5: Look for polishes with a good formula that isn’t too thick or too thin. Cream finishes are usually the easiest to work with. For nail art, having a few basic colors (black, white, nude) and a metallic or glitter polish is a great start. Specialty nail art polishes with fine brushes are also helpful.
Q6: How do I prevent polish from getting on my skin?
A6: You can apply a thin layer of liquid latex or an Elmer’s glue around your cuticle before painting. Once your polish is dry, peel off the latex/glue, taking any excess polish with it. Alternatively, a small brush dipped in nail polish remover can be used for cleanup after painting.
Q7: Is it okay to use everyday items for nail art?
A7: Yes! Many common household items can be great for nail art. Toothpicks, sewing needles, bobby pins, and even the tip of an old ballpoint pen can be used to create dots and small designs. Makeup sponges are excellent for creating ombre effects.
Conclusion: Express Yourself with Natural Nail Art
See? Stunning natural nail art doesn’t require a professional license or a trip to the salon. With a few basic tools and some simple inspiration, you can create beautiful, eye-catching designs that reflect your personality and enhance your natural beauty. Whether you opt for a subtle accent or a playful pattern, remember that the most important element is having fun and embracing your creativity.
Don’t be afraid to experiment! Try out the ideas we’ve shared, mix and match them, or let them inspire entirely new creations. Your nails are a fantastic canvas for self-expression, and with these effortless techniques, you’re well on your way to achieving gorgeous, magazine-worthy manicures right at home. Happy painting!

