Nail designs for kids with stickers are a super fun, easy, and safe way to add a pop of personality to little fingers. They require minimal skill and offer endless creative possibilities with just a few simple supplies!
Getting creative with nails shouldn’t be complicated, especially for kids! Sometimes, thinking up unique nail designs can feel overwhelming, or maybe you think you need a whole art studio’s worth of tools. But what if I told you that dazzling, personalized nail art is just a few sticker steps away? It’s true! Glitter, cute characters, and sparkly gems can transform plain nails into miniature masterpieces. This guide is here to show you how simple and enjoyable creating adorable nail designs for kids with stickers can be. Get ready to unleash your inner artist – no fancy skills required!
Why Nail Stickers are a Kid’s Best Friend for Manicures
When it comes to nail art for children, safety, ease, and fun are top priorities. Nail stickers hit all these marks perfectly, making them an ideal choice for little ones eager to express themselves through their style. Unlike paint or polish that can be messy and difficult for small hands to control, stickers offer a mess-free application. Plus, they come in an incredible variety of designs, from whimsical animals and sparkling stars to popular cartoon characters and vibrant patterns. This wide selection means there’s a sticker out there to match every child’s imagination and personality. It’s a fantastic way to encourage creativity and self-expression without the frustration of difficult techniques or potentially harmful chemicals often found in adult nail polishes.
The Magic of Sticker Manicures for Little Hands
Sticker-based nail art is brilliant for several reasons:
- Effortless Application: Peel and stick – it’s that simple! No drying time, no smudging.
- Vast Design Options: From tiny flowers to bold superheroes, the choices are limitless.
- Kid-Friendly & Safe: Most stickers are made from safe, non-toxic materials, and the process avoids messy polish.
- Creativity Unleashed: Children can mix and match designs, creating unique looks.
- Temporary Fun: Perfect for special occasions or just a day of imaginative play, as most stickers can be easily removed.
Are Nail Stickers Safe for Children?
Generally, yes! Most nail stickers designed for children are made from vinyl, plastic, or paper and are considered safe for temporary use. They don’t involve the chemicals found in nail polish, making them a worry-free option. However, it’s always a good idea to check the product packaging for any specific age recommendations or ingredient information, especially if the child has sensitive skin or allergies. For even more reassurance, you can explore resources like the U.S. Food and Drug Administration (FDA) page on cosmetics to understand what ingredients are generally considered safe in beauty products.
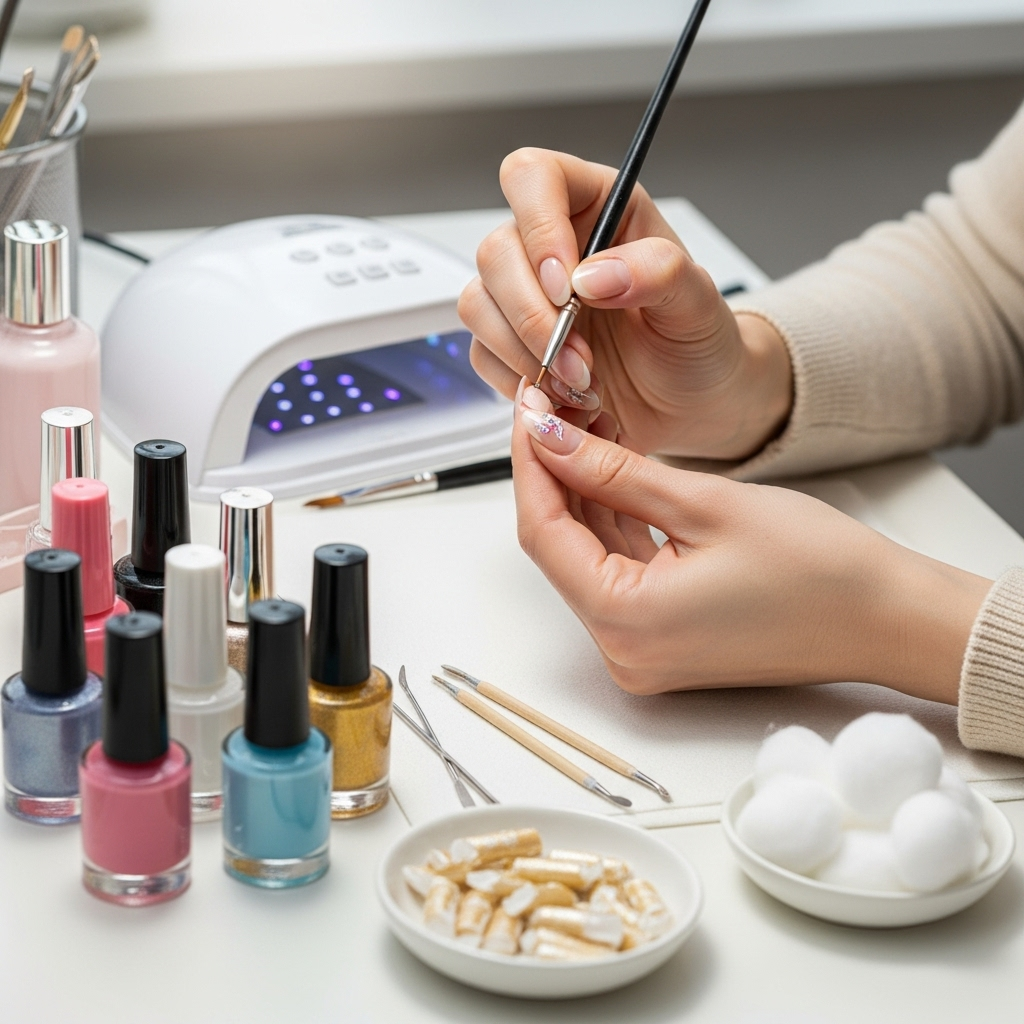
Essential Supplies for Sticker Nail Designs
You don’t need a professional nail kit to create amazing designs for kids with stickers. Here’s a simple list of what you’ll need to get started:
Must-Have Tools
- Nail File: To shape and smooth the nails.
- Nail Polish (Optional Base Coat): A clear or solid color polish can provide a smooth canvas and help stickers adhere better.
- Nail Stickers: The stars of the show! Choose a variety of themes and sizes.
- Top Coat (Optional): A clear top coat can help seal the stickers and make the design last longer.
- Tweezers (Optional but helpful): For precise placement of small stickers.
- Rubbing Alcohol or Nail Polish Remover (for cleanup): To easily remove any stray polish or sticker residue.
Choosing the Right Stickers
The world of nail stickers is vast! Consider these options when picking out designs for your little ones:
- Character Stickers: Featuring beloved cartoon characters, superheroes, or movie stars.
- Glitter & Gem Stickers: For a touch of sparkle and bling.
- Themed Stickers: Holidays (Halloween, Christmas, Easter), seasons (spring flowers, summer suns), or interests (animals, space, sports).
- Shape Stickers: Simple shapes like hearts, stars, moons, and dots.
- 3D Stickers: These offer a bit of texture and dimension.
A good tip is to buy a multi-pack that offers a variety of designs. This allows for more creative combinations and keeps things exciting for repeat manicures.
Step-by-Step Guide: Creating Adorable Nail Designs
Let’s get ready for some nail art fun! Follow these easy steps to create fantastic sticker nail designs for kids.
Step 1: Prepare the Nails
Cleanliness is key for any manicure to last. Start by ensuring the nails are clean and dry. If there’s any old polish, remove it completely. Then, gently file the nails into the desired shape. You can go for a squared-off look, a rounded shape, or a gentle oval. Smoothing the edges will make the surface ready for stickers.
Pro Tip: If you’re using nail polish as a base, apply a thin, even coat now. Let it dry completely before moving to the next step. A clear base coat can help the stickers adhere better and make any color pop.
Step 2: Apply the Base Polish (Optional)
This step is entirely optional but can enhance the look and longevity of your designs. Choose a color that complements your chosen stickers but ensure it’s completely dry before applying stickers. If you’re using only stickers on bare nails, you can skip this step. For kids, simple, bright colors often work best. Think pastels, neons, or classic reds and blues.
Drying Time: Make sure the polish is bone dry. This might take 5-10 minutes, depending on the polish. A quick way to speed this up is by using a cool setting on a hairdryer for a minute or two.
Step 3: Select and Place Your Stickers
This is where the creativity really shines! Let the child choose their favorite stickers. Consider the size of the nail and the sticker. Smaller stickers work well on shorter nails, while larger ones can cover the entire nail or be used as statement pieces on accent nails.
- Peeling: Gently peel the sticker from the backing sheet. Using tweezers can be helpful for tiny or intricate stickers, preventing them from sticking to your fingers.
- Placement: Carefully position the sticker onto the nail. Press down firmly, especially around the edges, to ensure it adheres well.
- Overlapping: You can overlap stickers for a layered effect or use them side-by-side to fill a nail.
Tip for Oddly Shaped Nails: If a sticker is slightly too big, you can carefully trim it with small scissors before applying. Gently press it down, starting from the center and moving outwards to smooth out any bubbles or wrinkles.
Step 4: Add Finishing Touches (Optional)
Once all the stickers are in place and smoothed down, you can add an extra protective layer. A clear top coat can seal the stickers, prevent them from peeling up at the edges, and add a nice glossy finish. Apply a thin layer of top coat over the entire nail, making sure to cap the free edge (the tip of the nail) to help prevent lifting.
What to Avoid: Be careful not to apply the top coat too thickly, as it might wrinkle or smudge the stickers.
Step 5: Clean Up
Use a cotton swab dipped in a tiny bit of nail polish remover or rubbing alcohol to clean up any stray polish smudges or sticker residue around the nails and cuticles. This gives the manicure a neat, polished look.
Creative Nail Design Ideas Using Stickers
Ready for some inspiration? Here are a few easy and popular nail design ideas using stickers that kids will love!
1. Themed Accent Nails
Choose one or two nails on each hand to be the “accent” nails. These are perfect for showcasing more detailed or favorite stickers, like a superhero logo, a sparkly unicorn, or a festive holiday icon. The other nails can be a solid color that matches the accent sticker theme, or simply left bare.
Example: For a space theme, put a rocket ship sticker on the ring finger, and use a dark blue or black polish on the other nails. Add star-shaped glitter stickers around the rocket for extra magic.
2. Pattern Play
Mix and match different small stickers to create fun patterns. Think rows of tiny hearts, a checkerboard of fruit stickers, or a random scattering of polka dots. This allows for a lot of creativity and can fill the whole nail space.
Example: Use a base of pink polish, then apply alternating stickers of tiny cherries and sunflowers across all nails. This is cheerful and summery!
3. Glitter & Gem Galore
Combine plain stickers with glitter or gem stickers. For instance, apply a sticker of a butterfly, then place tiny silver gem stickers along its wings. Or, simply cover a nail with a solid color and then strategically place a few sparkly gem stickers for a dazzling effect.
Example: Paint nails light blue. On one nail, place a white cloud sticker. Then, surround it with small silver glitter stickers to represent rain or sparkle, making it look like a magical sky.
4. Character Mash-Up
Let kids pick their favorite characters and combine them across different nails. A princess on one nail, a friendly monster on another, and a sparkling star on a third. This is a great way to incorporate multiple interests into one manicure.
Example: On one hand, put a mermaid sticker on the thumb, a seashell sticker on the index finger, and a bubble sticker on the middle finger. Use a shimmery teal polish for the rest. Perfect for a ‘under the sea’ theme!
5. Shape Storytelling
Use simple shape stickers to create a story or pattern. A line of hearts leading up the nail, a crescent moon and stars, or a smiley face on each nail. This is especially good for younger children who might find detailed placement tricky.
Example: On a yellow-painted nail, create a simple smiley face using black dot stickers for the eyes and a curved sticker for the mouth. So cute and easy!
Pros and Cons of Using Nail Stickers for Kids
Like any craft or beauty product, nail stickers have their good points and things to consider.
| Pros | Cons |
|---|---|
| Easy to Use: No artistic skill required, just peel and stick. | Durability Varies: Some stickers may peel up at the edges after a day or two without a good top coat. |
| Mess-Free: Unlike nail polish, there’s no wet mess or smudging during application. | Potential for Wrinkling: Larger stickers can sometimes wrinkle if not applied smoothly. |
| Wide Variety: Huge selection of themes, characters, and colors available. | Limited Design Complexity: While great for simple designs, complex artwork isn’t possible with stickers alone. |
| Safe for Kids: Generally made from non-toxic materials, suitable for children. | Can be Tricky for Small Fingers: Very tiny stickers can be fiddly for little hands to position accurately. |
| Quick Application: Designs can be completed in minutes. | Adhesion Issues: Some stickers may not stick well to oily or uneven nail surfaces. |
| Affordable: Sticker packs are usually very budget-friendly. | Removal: While usually easy, some sticker backs can leave a sticky residue that needs cleaning. |
Understanding Adhesive and Skin Sensitivity
While most nail stickers are designed for body art and are non-toxic, it’s wise to be aware of how they’re made. The adhesive used is typically skin-safe and designed to be temporary. However, sensitivities can occur. Always check for labels like “non-toxic” or “hypoallergenic” if you have concerns. If a red rash or irritation appears after using stickers, remove them immediately and wash the area with mild soap and water. For best practices on cosmetic ingredients and safety, the FDA’s Cosmetics page offers valuable consumer information.
Tips for Making Sticker Designs Last Longer
Want those cute designs to stay put for a special party or a fun week? Here are a few tricks:
- Start with Clean, Dry Nails: Any oil or moisture on the nail can prevent stickers from adhering properly.
- Use a Base Coat: A thin layer of clear or colored nail polish provides a smooth, slightly adhesive surface for the sticker. Ensure it’s completely dry!
- Press Firmly: Once the sticker is in place, use your fingertip or a clean orangewood stick to press down firmly, especially around the edges.
- Apply a Top Coat: This is the most crucial step for longevity. After applying all stickers, carefully brush on one or two thin layers of a good quality clear top coat. Make sure to seal the edges of the sticker by extending the top coat over the entire nail, including the tip.
- Avoid Water Exposure Immediately: Try to keep hands dry for at least an hour after applying the top coat to allow it to fully cure.
- Be Gentle: Encourage kids to be mindful of their nails. Picking at edges can lead to peeling.
A quality top coat, such as those recommended for ensuring manicure durability, can make a significant difference. Look for quick-dry formulas if you’re in a hurry!
Removing Sticker Nail Designs
When it’s time to remove the designs, you have a few easy options:
- Peeling Them Off: For most stickers, you can simply gently peel them off the nail. If they resist, try lifting an edge with a fingernail or an orangewood stick.
- Warm Soapy Water: Soaking nails in warm water for a few minutes can loosen the adhesive, making removal easier.
- Nail Polish Remover: For stubborn stickers or any leftover adhesive residue, a cotton ball soaked in nail polish remover (non-acetone is gentler) can do the trick. Gently rub the sticker until it dissolves or lifts off.
Always remember to moisturize the cuticles and nails after removal, especially if using nail polish remover.
FAQs About Nail Designs for Kids with Stickers
Q1: Can I use stickers on artificial nails?
A: Yes, nail stickers can work very well on artificial nails like acrylics or gel nails. Ensure the surface is clean and smooth before application for best adhesion.
Q2: How long do sticker nail designs typically last on kids’ nails?
A: With a good top coat, sticker designs can last for several days, sometimes up to a week, depending on how active the child is and how well they are cared for. Without a top coat, they might only last a day or two.
Q3: Are there any alternatives to nail polish for preparing the nails?
A: Absolutely! You can use clear nail strengtheners, specific nail adhesives for decorations, or simply apply the stickers directly onto clean, dry natural nails. For very young children, bare nails are often the easiest canvas.
Q4: My child has very short nails. Can I still use nail stickers?
A: Yes! Small stickers or stickers that can be trimmed are perfect for short nails. You can also use stickers with fun patterns that only cover part of the nail to create a unique look.
Q5: Can kids remove the stickers themselves?
A: Most kids can gently peel off stickers on their own. For any sticky residue, they might need a little help from a parent using nail polish remover, or you can opt for natural oils like olive or coconut oil to gently rub away remaining adhesive.
Q6: Is it safe to put stickers over regular nail polish?
A: Yes, it’s generally safe, provided the nail polish is completely dry before applying the stickers. This combination can help the stickers adhere better and last longer.
Q7: Where can I find a good variety of nail stickers for kids?
A: You can find a huge selection of nail stickers at most drugstores, beauty supply stores, craft stores, and online retailers like Amazon. Look in the kids’ beauty or craft sections. For up-to-date information on cosmetic safety regulations, the FDA guidance on cosmetic labeling is a helpful resource