Nail Design Tutorial for Beginners: Proven Essential
Ready to level up your nail game? This beginner-friendly nail design tutorial breaks down essential techniques and tools, making stunning DIY manicures totally achievable. You’ll learn simple steps to create beautiful nail art right at home. Get ready to express your creativity and rock gorgeous nails!
Hello, nail lovers! Lisa Drew here from Nailerguy, your go-to source for all things nails. Ever look at those intricate nail designs online and think, “There’s no way I can do that”? I’ve been there! But trust me, creating beautiful nail art isn’t just for pros. It’s accessible, fun, and a fantastic way to show off your style. This guide is designed to make your first steps into the world of nail design incredibly easy and enjoyable. We’ll cover everything you need to know, from the basic tools to simple, eye-catching designs. Get ready to unleash your inner artist, one nail at a time!
Getting Started: Your Nail Design Toolkit
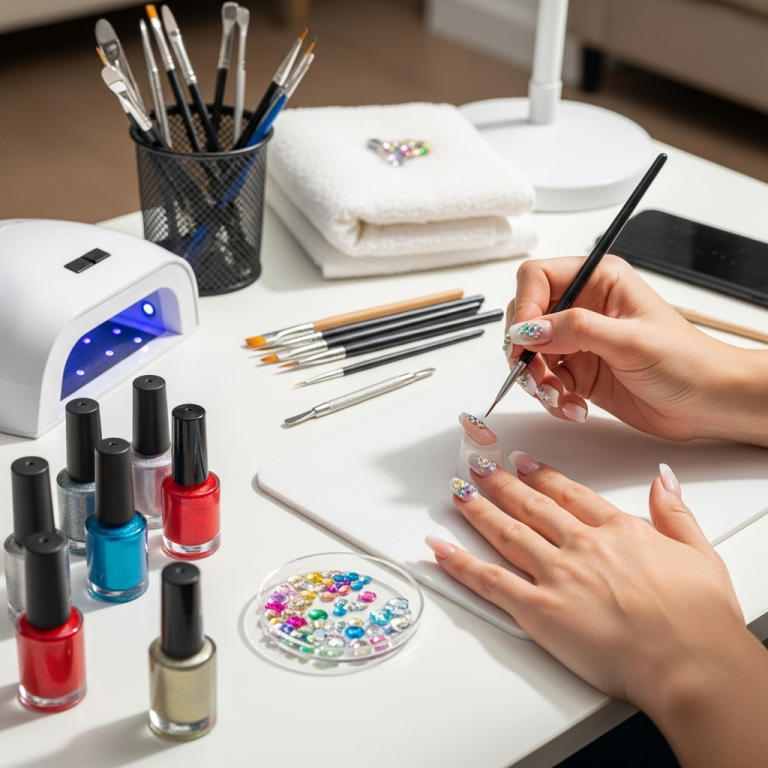
Starting with the right tools makes all the difference! Don’t worry, you don’t need a professional salon’s worth of equipment. A few essential items will set you up for success. Think of these as your trusty sidekicks in creating amazing nail art.
The Absolute Must-Haves:
- Nail Polish: This is your primary color canvas! Start with a few basic shades you love, like a classic red, nude, black, and white.
- Base Coat: This is crucial for protecting your natural nails from staining and helping your polish last longer. It creates a smooth surface for color application.
- Top Coat: This seals your design, adds shine, and prevents chips. A good top coat is your best friend for long-lasting manicures.
- Dotting Tools: These come in various sizes with a small ball at the end. They are perfect for creating dots, swirls, and small details. You can often find sets with multiple sizes.
- Thin Nail Art Brush: Look for a brush with fine bristles. This is perfect for drawing thin lines, delicate patterns, and filling in small areas.
- Nail Polish Remover: Essential for quick cleanups and fixing mistakes. Cottage cheese-sized cotton balls are ideal.
- Cuticle Pusher/Orange Stick: To gently push back your cuticles before you start painting for a clean canvas.
Nice-to-Haves (For Future Designs!):
- Striping Tape: Thin, adhesive tape that creates crisp, clean lines for geometric designs.
- Stencils: Pre-cut shapes that you can place on your nail to paint over, creating instant patterns.
- Rhinestones or Glitter: For adding a little sparkle and dimension to your nails.
- Dotting Wheel: A tool with multiple small balls of different sizes for consistent dot creation.
Preparing Your Nails: The Foundation of Great Art
Before any design can shine, your nails need to be prepped. This step ensures your polish adheres properly and your art looks polished (pun intended!).
Step-by-Step Prep Guide:
- Cleanse: Wash your hands thoroughly to remove any dirt or oil.
- Remove Old Polish: If you have any old nail polish on, use nail polish remover to get a clean slate.
- Shape Your Nails: Gently file your nails into your desired shape. Always file in one direction to prevent weakening your nails.
- Push Back Cuticles: Use a cuticle pusher or orange stick to gently push back your cuticles. Avoid cutting them, as this can lead to damage. Keep your cuticles moisturized!
- Buff (Optional): Lightly buff the surface of your nails to create a smooth canvas. Don’t over-buff, as this can thin your nail plates.
- Clean Again: Wipe your nails with nail polish remover one last time to remove any dust or oils from filing and buffing.
Your First Nail Design: The Easy-Peasy Dot Mani!
Let’s start with a design that’s super simple but looks incredibly chic: the humble dot manicure. It’s a perfect way to practice using your dotting tools.
What You’ll Need for This Design:
- Base Coat
- Your favorite nail polish color (let’s call this your “base color”)
- A contrasting nail polish color for dots
- A dotting tool (or a toothpick can work in a pinch!)
- Top Coat
The Step-by-Step Process:
- Apply Base Coat: Start by applying one coat of your base coat and let it dry completely. This is essential for a smooth finish and to protect your nails.
- Apply Base Color: Paint your nails with your chosen base color. Apply two thin coats for full opacity, allowing each coat to dry for a minute or two before applying the next.
- Get Your Dotting Tool Ready: Place a small drop of your contrasting polish onto a piece of paper or a palette. Dip the ball end of your dotting tool into the polish. You don’t need a lot – a little goes a long way.
- Start Dotting: Gently touch the dotting tool to your nail where you want your first dot. Lift it straight up to create a clean dot.
- Create Your Pattern: You can create random dots all over your nail, make a straight line of dots, or even try to cluster them in a corner. Experiment with different sizes by using different dotting tool tips or by varying the pressure.
- Clean Your Tool: Between dots, it’s a good idea to wipe your dotting tool on a piece of paper or a lint-free wipe to remove excess polish and ensure your next dot is clean.
- Let it Dry: Allow the dots to dry completely. This is important before applying your top coat so you don’t smudge your hard work!
- Apply Top Coat: Once the dots are dry, apply a generous coat of your top coat. Be sure to cap the free edge of your nail by running the brush along the tip. This helps prevent chipping.
Beginner-Friendly Nail Art Ideas to Try Next
Once you’ve mastered the dot manicure, you’re ready to explore! These ideas are still super accessible for beginners and a great way to build your nail art skills.
The Simple Stripe:
Using your thin nail art brush, dip a tiny bit of polish and carefully draw a straight line across your nail. You can also use striping tape for perfectly straight lines! Try a diagonal stripe, a French tip accent, or even multiple thin stripes.
The Half-Moon Mani:
This is a modern twist on the classic French manicure. Once your base color is dry, use a small dotting tool or the tip of your brush to create a semi-circle shape at the base of your nail, near the cuticle. You can fill it in with a contrasting color or leave it as a negative space.
The Ombre Effect (Using a Sponge):
For a soft, blended look, grab a makeup sponge! Apply two or three colors of polish horizontally onto the sponge, close to each other. Then, gently dab the sponge onto your nail, pressing down lightly to transfer the colors. A bit of cleanup with a brush and remover around the cuticle will make it look super clean. This technique is easier than it looks!
This ombre technique is also a great way to experiment with color combinations. Check out resources from beauty bloggers who often demonstrate this technique visually, helping you get the perfect blend every time.
Comparing Nail Art Techniques for Beginners
Here’s a quick look at how some beginner-friendly techniques stack up:
| Technique | Ease of Use | Required Tools | Visual Impact |
|---|---|---|---|
| Dotting | Very Easy | Dotting tool, polish | Cute, playful, versatile |
| Striping | Easy | Thin brush OR striping tape, polish | Chic, precise, modern |
| Half-Moon | Easy | Dotting tool OR brush, polish | Elegant, retro-modern |
| Sponge Ombre | Medium | Makeup sponge, 2-3 polishes, cleanup brush | Soft, blended, eye-catching |
Tips for Longevity and Flawless Finishes
Creating a beautiful design is one thing, but making it last is another! Here are some pro tips to keep your nail art looking amazing.
- Thin Coats are Key: Always apply thin coats of polish and design elements. Thick layers are more prone to smudging, chipping, and take longer to dry.
- Patience is a Virtue: Let each layer of polish and each design element dry properly before moving on. Rushing will lead to smudges.
- Seal the Deal: A good quality top coat is non-negotiable. Make sure to cap the free edge of your nail to seal in your design and prevent lifting.
- Proper Removal: When it’s time to change your design, gently soak your nails with remover rather than scrubbing aggressively. This helps protect your nail art from damage. For glitter polishes, consider using foil wraps for easier removal—a technique often demonstrated on reputable beauty education sites.
- Hydration is Important: Keep your cuticles moisturized with cuticle oil. Healthy cuticles make for a better-looking manicure overall.
Troubleshooting Common Beginner Nail Art Problems
Even the best of us make mistakes! Here’s how to fix some common hiccups.
- Smudged Polish: Don’t panic! If it’s still wet, try to gently smooth it out with a clean brush dipped in top coat. If it’s dry, you might need to carefully reapply the affected polish layer or design element. For bigger smudges, nail polish remover on a fine brush can help clean up edges.
- Wobbly Lines: Steady your hand by resting your pinky finger on the table. If the line is too wobbly, you can often clean up the edges with a brush dipped in nail polish remover to make them straighter. Practice makes perfect!
- Uneven Dots: If your dots aren’t perfectly round or are different sizes, try using different ends of your dotting tool or even a toothpick. Ensure you’re dipping the tool into polish consistently.
- Bubbles in Polish: This usually happens when polish is applied too thickly or isn’t dry enough between coats. Make sure to apply thin coats and let them dry sufficiently.
Frequently Asked Questions About Beginner Nail Design
Q1: How long does DIY nail art usually take to dry?
Drying time can vary depending on the polish and the number of layers. Generally, a good rule of thumb is to wait at least 5-10 minutes between polish coats. For nail art designs, allow them to dry for at least 15-20 minutes (or even longer for intricate designs) before applying a top coat to prevent smudging.
Q2: Can I use regular nail polish for nail art?
Absolutely! Standard nail polishes are perfect for beginners and for most nail art. For very fine details, you might consider “nail art polish” which often has a thinner consistency and a finer brush, but regular polishes work great with the right tools like dotting tools and thin brushes.
Q3: What is the best way to clean my nail brushes?
After each use, wipe your nail art brush on a lint-free wipe or paper towel to remove excess polish. For a deeper clean, you can use a small amount of nail polish remover on a paper towel. Gently swirl the brush in the remover, being careful not to fan out the bristles. Then, wipe it clean and let it air dry completely before storing.
Q4: How do I prevent my nail art from chipping?
The key to preventing chips is proper preparation, thin coats, and a good seal. Always use a base coat and a quality top coat. Make sure to cap the free edge of your nail with your top coat to seal everything in. Avoid doing rough tasks with your hands immediately after painting, as this can also help.
Q5: I don’t have a dotting tool, what can I use instead?
A toothpick is a fantastic substitute for a dotting tool for beginners! You can also use the tip of a bobby pin that’s been cleaned, the end of a pen, or even a small safety pin. Just ensure the tip is clean and you dip it into the polish carefully.
Q6: How do I make my nail polish last longer on my nails?
Start with clean, oil-free nails. Apply a good quality base coat and a good quality top coat. Ensure you cap the free edge of your nail with your top coat. Applying thin coats of polish is better than thick coats as they dry harder and are less prone to lifting. Avoid prolonged exposure to hot water, as it can soften the polish.
Q7: Is nail art expensive to do at home?
Not at all! Compared to salon manicures, doing nail art at home is incredibly budget-friendly. The initial investment in a few basic tools and polishes is minimal, and you can reuse them for countless designs. You can even find great deals on nail art supplies online or at drugstores.
Achieving Salon-Worthy Nails at Home is Within Reach!
See? Creating beautiful nail designs doesn’t have to be intimidating. With these essential tools and straightforward steps, you’re well on your way to mastering beginner nail art. Remember, the goal is to have fun and express yourself. Don’t be afraid to experiment with colors and patterns! Every mistake is a learning opportunity, and with a little practice, your manicures will become increasingly impressive.
Start with the simple dot design, explore the stripe or half-moon, and soon you’ll be eager to try more. Keep your nails prepped, use your top coat wisely, and most importantly, enjoy the creative process. Your nails are a canvas for your personality – so go ahead, paint your masterpiece! Happy polishing!


