Get stunning nail designs with tape and glitter! This guide shares easy tips and tricks for creating professional-looking nail art at home, perfect for beginners. Explore simple techniques with common household items to elevate your manicure game.
Nail art can seem complicated, but mastering a few key techniques can unlock a world of stunning designs. Tired of smudged polish or glitter that just doesn’t stick? You’re not alone! Many of us dream of creating beautiful, intricate nail designs but feel overwhelmed by the process. The good news is, with a little know-how and some common supplies, you can achieve gorgeous results right at home. This guide will break down how to use tape and glitter for eye-catching nail art, making it fun and totally doable, even if you’ve never tried nail design before. Get ready to impress yourself and everyone else with your fabulous new nails!
Unlock Your Inner Nail Artist: The Magic of Tape and Glitter
Hey nail lovers! Lisa Drew here from Nailerguy, and I’m so excited to dive into a super fun and surprisingly easy way to create amazing nail designs: using tape and glitter! If you’ve ever admired those perfectly striped or glittering manicures and thought, “I could never do that,” think again! This is the perfect entry point into the vibrant world of nail art.
Tape acts as a stencil, creating clean lines and defined shapes that are hard to achieve freehand. Glitter, well, it’s pure magic! It adds sparkle, dimension, and a touch of glamour to any design. Combining these two elements opens up a universe of possibilities, from simple chic accents to bold, statement-making looks.
Why Tape and Glitter?
- Beginner-Friendly: This method is incredibly forgiving and requires minimal artistic skill.
- Achievable Results: You can get salon-quality looks without fancy tools or expensive products.
- Versatile: Endless patterns, color combinations, and glitter effects are at your fingertips.
- Budget-Conscious: Most supplies are readily available and inexpensive.
Let’s get started on transforming your nails into tiny works of art!
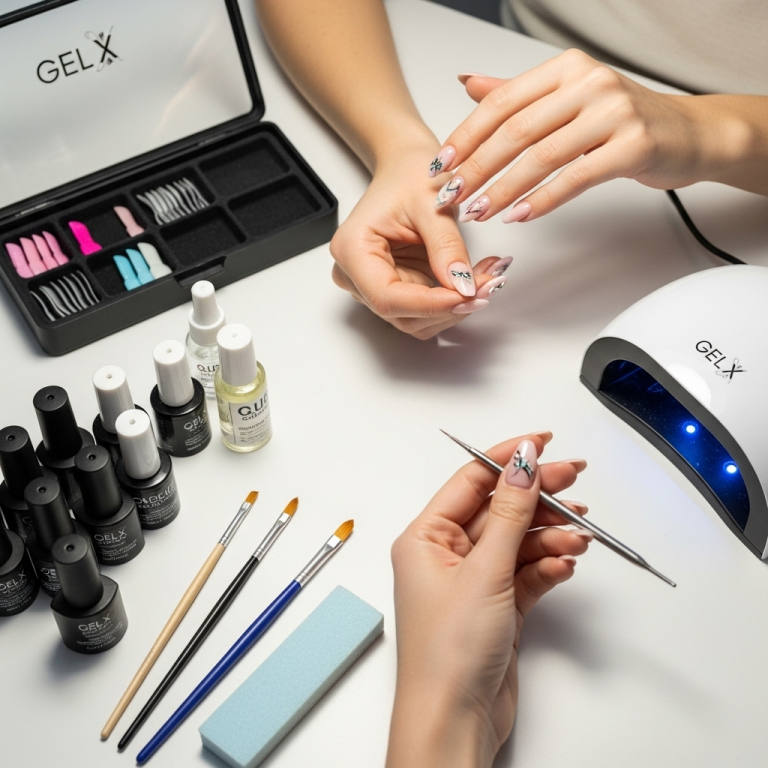
Gathering Your Glittery Arsenal: What You’ll Need
Before we start crafting, let’s make sure you have everything you need for a successful tape and glitter nail design session. Don’t worry, most of these items are probably already in your home or can be found at your local drugstore or beauty supply store.
The Essentials:
- Nail Polish: Your base color (or colors) and a top coat are crucial.
- Glitter: This can be fine glitter polish, loose cosmetic glitter, or chunky glitter.
- Tape: Painter’s tape or masking tape works best. Avoid regular sticky tape as it can be too harsh on your nails.
- Scissors: Small, sharp scissors for precise cutting of the tape.
- Tweezers (Optional but Recommended): For handling small pieces of tape and glitter.
- Nail File and Buffer: For preparing your nails.
- Cuticle Pusher: To tidy up around the nail edges.
- Cotton Balls/Pads and Nail Polish Remover: For any mistakes or cleaning up.
Optional Additions for Extra Sparkle:
- Nail Art Brush: A fine-tipped brush can help with picking up and placing glitter.
- Clear Top Coat or Nail Glue: To adhere loose glitter if not using glitter polish.
- Small Dish or Palette: To pour loose glitter onto for easier application.
Step-by-Step Guide: Dazzling Nail Designs with Tape and Glitter
Ready to create some magic? Here’s a breakdown of how to achieve a couple of popular tape and glitter nail designs. We’ll start with a classic striped look and then move on to a chic glitter gradient separated by tape.
Design 1: Bold Geometric Stripes
This is a fantastic way to start. The tape ensures super-sharp lines for a professional finish.
Preparation is Key:
- Nail Prep: Start by filing your nails to your desired shape and buffing them smooth. Gently push back your cuticles.
- Base Coat: Apply one or two coats of your chosen base nail polish color. Let this dry completely. This is super important to avoid lifting the polish when you remove the tape.
Applying the Tape Stencil:
- Cut the Tape: Using your sharp scissors, cut small strips of painter’s tape. The size will depend on your nail size and the stripe width you want.
- Apply the Tape: Carefully place the tape strips onto your dried base color. Press down firmly around the edges to ensure no polish can seep underneath. Make sure the tape is taut and wrinkle-free. You can create various patterns: parallel lines, chevrons by folding tape, or even geometric shapes.
Painting the Stripes:
- Apply Polish: Paint the exposed nail areas (the areas not covered by tape) with your contrasting or glitter polish. You might need two coats for full coverage, especially with glitter.
- The Crucial Removal: This is the make-or-break step for sharp lines! While the new polish is still wet, slowly and carefully peel off the tape. If you wait for the new polish to dry, it might lift and create jagged edges or pull off the base color.
- Drying Time: Let the newly painted stripes dry for a few minutes.
Finishing Touches:
- Clean Up: Use a small brush dipped in nail polish remover to carefully clean up any polish that may have smudged onto your skin.
- Top Coat: Once everything is completely dry, apply a generous layer of clear top coat. This seals your design, adds shine, and protects your beautiful work.
Design 2: Chic Glitter Gradient
This design uses tape to create a clean border for a glitter gradient, offering a sophisticated sparkle.
Preparation:
- Apply your chosen base nail polish color and let it dry completely, just like in the striped design.
Creating the Glitter Zone:
- Tape Placement: Decide where you want your glitter to start. For a French tip effect, place tape horizontally across your nail, about one-third of the way up from the tip. For a cuticle accent, place it closer to the base. Ensure the tape is firmly pressed down.
- Apply Glitter Polish: Apply your glitter nail polish generously over the area of the nail above the tape line. You can do one or two coats for desired opacity.
- Careful Removal: While the glitter polish is still wet, slowly and carefully peel off the tape.
Sealing the Sparkle:
- Let it Dry: Allow the glitter polish and any other polish to dry for a few minutes.
- Top Coat: Apply a clear top coat over the entire nail. For chunky glitters, you might need two layers of top coat to ensure a smooth, even finish and to fully encapsulate the glitter.
Exclusive Tips for Flawless Tape and Glitter Nails
Now that you know the basics, let’s dive into some pro tips that will elevate your tape and glitter nail game. These little tricks can make a big difference in the final look and the overall ease of the process.
Mastering the Tape Technique:
- Tape Quality Matters: Use a good quality painter’s tape or masking tape. These are designed to stick well but remove cleanly without damaging surfaces (or your nails!). You can find excellent brands online or at hardware stores. For example, 3M offers a range of tapes known for their reliability.
- Cut with Precision: Use small, sharp scissors or an X-Acto knife for clean tape edges. Jagged tape edges will result in jagged polish lines.
- Press Firmly: Always press the tape down firmly, especially around the edges. Use your fingernail or a cuticle pusher to ensure a good seal.
- The “Rip” Test: Before applying tape to your nail, try peeling a small piece off your hand. If it pulls your skin or feels overly sticky, it might be too strong for your nails and could cause damage.
Glitter Application Secrets:
- Wet Polish is Your Friend: For tape removal to create sharp lines, the polish layer underneath the tape MUST be dry, but the layer you are applying over the tape should be removed while wet. For applying glitter directly, it’s easiest to apply when the base polish is still wet, or directly onto the sticky layer of a wet base coat.
- Loose Glitter Control: If using loose cosmetic glitter, pour a small amount onto a palette or a piece of paper. Apply a thin layer of clear polish or nail glue where you want the glitter, then gently tap your nail onto the glitter. Avoid pouring glitter directly onto your nails to prevent waste and mess.
- Glitter Polish Layers: Don’t try to get full opacity with glitter polish in one go. Apply thin, even coats, allowing each to dry slightly before applying the next. This prevents clumping.
- Chunky Glitter Smoothing: For a smooth finish with chunky glitter, apply two layers of a good, thick top coat. Wait for the first layer to mostly dry before applying the second.
General Best Practices:
- Patience is a Virtue: Rushing is the enemy of good nail art. Always let your layers dry sufficiently before applying tape or top coat.
- Clean Workspace: Set up in a well-lit area with a clean surface. Lay down some paper towels or newspaper to catch any stray glitter or polish drips.
- Practice Makes Perfect: Don’t be discouraged if your first attempt isn’t flawless. Each time you try, you’ll get better!
- Nail Health First: Remember to give your nails a break between manicures. Use cuticle oil daily to keep your nails and skin healthy. For more on nail health, the U.S. Food & Drug Administration (FDA) provides helpful safety information on cosmetic products, including nail care.
Creative Design Variations to Inspire You
Once you’ve mastered the basic stripes and gradients, the possibilities are endless! Here are a few ideas to spark your creativity:
The Half Moon Sparkle
How-to: Apply your base color. Once dry, place a circular sticker (like those used for hole punches) or carefully shape a piece of tape into a curve at the base of your nail, near the cuticle. Paint the moon shape with glitter polish. Carefully peel off the sticker/tape while wet. Top coat.
Color Block Designs
How-to: Use tape to divide your nail into geometric sections (squares, triangles, chevrons). Paint each section with a different color polish or a mix of solid colors and glitter. Let each color dry completely (or at least mostly dry) before applying tape over it to paint the next section. This will require careful, layered taping.
Glitter Accents on Tips
How-to: After applying your base color, use tape to create a line across your nails where you want the glitter to start (similar to the gradient, but usually higher up like a French tip). Apply glitter polish over the tip. Remove tape while wet and top coat.
Negative Space Designs
How-to: This is the inverse of the striped design. Apply your glitter polish first over the entire nail. Once dry, apply tape to create shapes or lines, then paint over the tape with your base color. Remove the tape while the base color is wet to reveal the glitter underneath.
Maintaining Your Tape and Glitter Masterpiece
You’ve created a stunning nail design – hooray! Now let’s keep it looking fabulous for as long as possible.
Daily Care:
- Be Gentle: Avoid using your nails as tools. Try not to scrape or pry things open with them, as this can chip the polish and the design.
- Protective Top Coat: A good quality top coat is your best friend. Reapply a fresh layer every 2-3 days to refresh the shine and add an extra layer of protection.
- Moisturize: Keep your hands and cuticles hydrated with hand cream and cuticle oil. Healthy skin makes for a beautiful manicure!
When to Refresh or Remove:
- Chipping: If you notice any chipping, you can try to carefully “patch” it with a tiny bit of matching polish or glitter, but usually, it’s best to remove the polish and start fresh.
- Removal: To remove glitter polish, especially stubborn fine glitters, soak a cotton ball in nail polish remover, place it on your nail, and wrap it with a piece of foil for about 5-10 minutes. This helps to break down the glitter.
Frequently Asked Questions About Nail Design With Tape and Glitter
Q1: Can I use any kind of tape for nail art?
It’s best to use painter’s tape or masking tape. They are designed to stick firmly but remove cleanly without damaging surfaces or your nail polish. Avoid regular sticky tape (like Scotch tape) as it can be too strong and lift your base coat.
Q2: How do I get super sharp lines with tape?
The key is to ensure your base coat is completely dry before applying the tape. Then, press the tape down very firmly around the edges to create a seal. Remove the tape slowly and carefully while the new polish layer is still wet.
Q3: My glitter polish looks clumpy. What can I do?
Apply glitter polish in thin, even coats rather than trying to get full coverage in one go. If using loose glitter, a thin layer of clear polish or nail glue applied to the nail first, then dipping the nail into the glitter, often yields a smoother result.
Q4: How long does a tape and glitter nail design usually last?
With a good base and top coat, and gentle care, your design can last anywhere from 5-10 days. Reapplying a top coat every few days can help extend its life and keep the shine fresh.
Q5: Can I use regular craft glitter on my nails?
It’s recommended to use cosmetic-grade glitter. Craft glitter can sometimes have sharper edges that might be uncomfortable or potentially damage your nails and skin. Cosmetic glitter is formulated to be safe for use on the skin and nails.
Q6: What if I mess up and peel off my base color with the tape?
Don’t worry! This happens to the best of us. Let the area dry, then carefully apply your base color again. Let it dry completely before reapplying the tape and your accent color or glitter. A good top coat at the end will help blend any slight imperfections.
Conclusion: Your Glittery Journey Begins Now!
There you have it – your beginner’s guide to stunning nail designs using tape and glitter! You’ve learned how to prep your nails, master the art of tape stenciling, apply glitter like a pro, and even keep your creations looking fabulous. The beauty of this technique lies in its simplicity and the endless creative potential it unlocks.
Remember, nail art is all about self-expression and having fun. Don’t be afraid to experiment with different colors, glitter types, and tape patterns. Each design you create will build your confidence and refine your skills. So grab your polish, get your tape ready, and start sparkling! I can’t wait to see what amazing designs you come up with. Happy polishing!


