Nail design inspiration is all about embracing creativity! Discover essential styles like minimalist chic, glamorous glitz, playful patterns, and classic French tips to express your unique personality. This guide offers easy-to-follow ideas and tips for gorgeous, achievable manicures.
Ever stare at your nails, wishing they had a little more oomph? You’re definitely not alone! Choosing the perfect nail design can feel a bit overwhelming with so many trends and ideas out there. But don’t worry, achieving beautiful, stylish nails is easier than you think. We’re here to dive into some of the most popular and fun nail design styles that are perfect for beginners and seasoned nail art lovers alike. Get ready to find your next favorite look!
Unlock Your Nail Art Potential: Essential Styles to Get You Started
Think nail design is just for professionals? Think again! With a little inspiration and a few simple tricks, you can transform your nails into tiny canvases of art. We’ll walk through some of the most beloved nail styles, breaking them down so you can easily recreate them at home. Let’s get inspired!
1. The Effortless Elegance: Minimalist & Chic Nails
Minimalist nails are all about subtlety and sophistication. These designs prove that sometimes, less truly is more! They are perfect for everyday wear, complementing any outfit without demanding too much attention. Think clean lines, simple shapes, and a focus on beautiful nail health.
Key Elements of Minimalist Nails:
- Neutral Color Palettes: Soft beiges, creamy whites, gentle grays, and muted pastels are your best friends here.
- Negative Space: Letting parts of your natural nail show through is a hallmark of this style.
- Simple Accents: A single dot, a delicate line, or a tiny geometric shape can elevate a minimalist look.
- Impeccable Finish: A flawless top coat and perfectly shaped nails are crucial for this clean aesthetic.
Easy Minimalist Designs to Try:
The Single Dot: Paint your nails in a sheer nude or light color. Once dry, use a fine dotting tool or the tip of a bobby pin to place a single, contrasting dot (like black, gold, or white) at the base or on the side of each nail.
The Half-Moon: After applying a base color, use a nail guide sticker or a stencil to create a clean semi-circle at the base of your nail. Paint the rest of the nail in a different, complementary color, or leave it as negative space.
Thin Line Art: Apply a solid base color. With a very fine brush, draw a single thin line horizontally, vertically, or diagonally across one or all of your nails. Metallic polishes (gold, silver, rose gold) look especially chic here.
2. Dazzle and Shine: Glamorous & Glittery Nails
Who says you can’t have a little sparkle every day? Glamorous nail designs are all about making a statement with shine, shimmer, and often, bold colors. These are perfect for special occasions, holidays, or anytime you want to feel a little extra special.
Elements of Glamorous Nails:
- Glitter: From fine holographic glitters to chunky metallic flakes, glitter is key.
- Metallic Finishes: Chrome powders, metallic polishes, and foil accents scream glamour.
- Jewel Tones: Deep reds, emerald greens, sapphire blues, and rich purples add a luxurious feel.
- Embellishments: Rhinestones, pearls, and even small charms can take your design to the next level.
Glamorous Design Ideas:
Accent Nail with Glitter: Paint all nails in a solid color—a deep red or classic black works wonderfully. On one or two accent nails, apply a full coat of glitter polish. You can layer chunky glitter over a base color for more depth.
Ombre Glitter: Start with a solid base color. Using a makeup sponge, dab a glitter polish from the tip of the nail downwards, fading it towards the cuticle for a beautiful gradient effect.
Rhinestone Accents: After applying your base polish and top coat, strategically place a few small rhinestones near the cuticle or along the edge of a nail. Use a dot of top coat or nail glue to secure them.
3. Playful Expressions: Patterned & Themed Nails
Ready to have some fun? Patterned and themed nails are a fantastic way to show off your personality and creativity. Whether you love geometric shapes, florals, or even your favorite characters, there’s a pattern out there for you!
Fun Patterns to Explore:
- Geometric: Stripes, dots, chevrons, triangles, and grids offer endless possibilities.
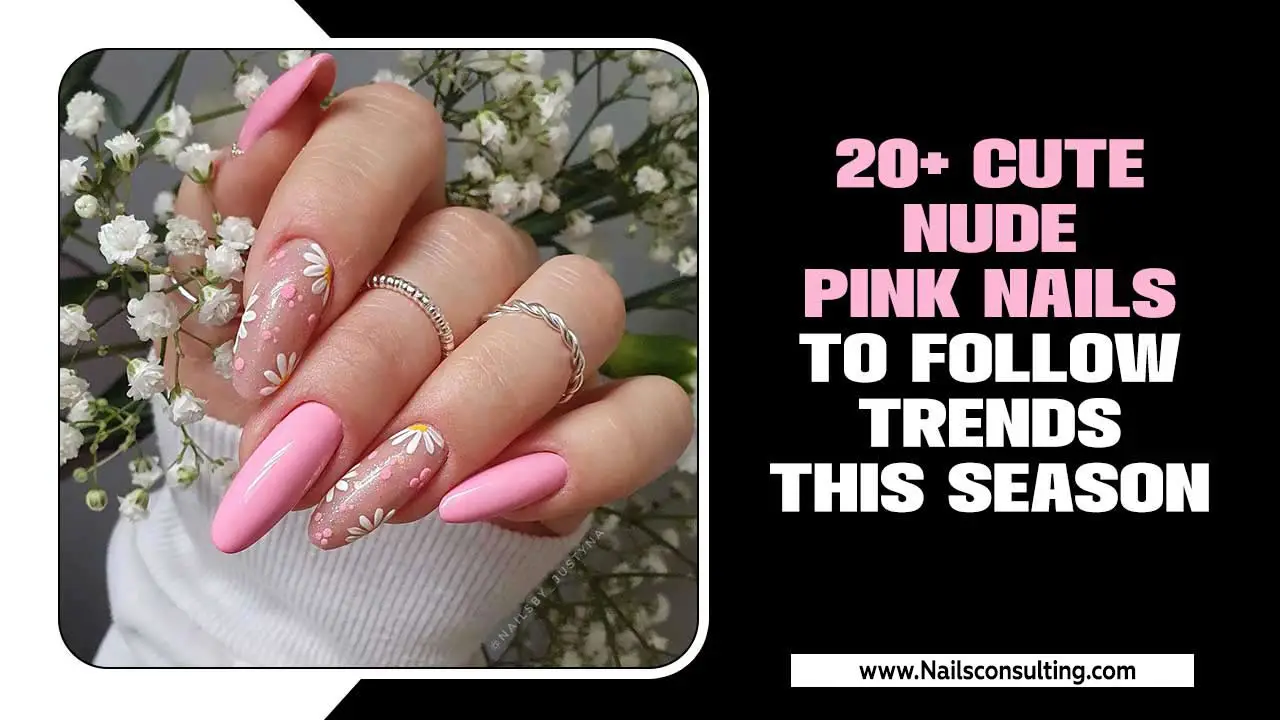
- Floral: From delicate wildflowers to bold tropical blooms, flowers are always a hit.
- Animal Prints: Leopard spots, zebra stripes, and snakeskin add a touch of wild style.
- Abstract: Swirls, splatters, and watercolor effects create unique, artistic looks.
Patterned Nail Techniques:
Stripes: Use striping tape or a very fine brush. Apply your base coat and let it dry completely. Carefully place striping tape to create your desired pattern, then paint over it. Peel the tape off while the polish is still wet for crisp lines.
Polka Dots: A dotting tool is your best friend for perfect circles. You can also use the ballpoint of a pen or even a toothpick for smaller dots. Vary the sizes and colors for a playful look.
Marbled Effect: For a simple marble, drop a few drops of two contrasting nail polishes into a cup of warm water. Swirl them gently with a toothpick, then dip your nail into the pattern. Clean up the excess polish around your finger with a brush dipped in nail polish remover.
4. Timeless Classics: French Tips & Variations
The French manicure is an icon for a reason! It’s clean, sophisticated, and universally flattering. While the classic white tip is timeless, there are many fun variations to explore that keep this look fresh and modern.
The Classic French Manicure:
- Base Color: A sheer pink, nude, or milky white polish.
- Tip Color: Crisp, opaque white.
- Technique: A steady hand and a French tip guide sticker or a small brush are key.
Modern Twists on the French Tip:
- Colored Tips: Swap the white for any color you love – pastels, neons, metallics!
- Reverse French: Apply the color to the base half-moon of your nail instead of the tip.
- Dotted French: Instead of a solid tip, create a line of dots along the tip of your nail.
- Glitter French: Use a glitter polish for the tip, or apply glitter over your white tip for extra sparkle.
5. Bold & Beautiful: Statement Nails
Statement nails are all about making a fearless declaration. These designs are often bolder, more intricate, or feature unique textures. They’re perfect for when you want your nails to be the star of the show!
Components of Statement Nails:
- 3D Embellishments: Gems, charms, studs, and acrylic art.
- Complex Art: Hand-painted intricate designs, intricate sticker work, or airbrushed effects.
- Unusual Textures: Velveteen powder, mirror chrome, or textured finishes.
- Vibrant Colors: Bright neons, deep jewel tones, or dramatic contrasts.
Getting Started with Statement Nails:
Focus on One or Two Nails: You don’t need to go all-out on every finger. Choose one or two nails for your statement design and keep the others simple.
Use High-Quality Decals and Stickers: For intricate designs without the difficult freehand work, explore the world of nail art stickers and water decals. They can offer stunning results with much less effort. Reputable brands like Essie offer a wide range of polishes that serve as excellent bases for these designs.
Master the Art of Application: For charms and larger gems, use a strong nail glue or a thick layer of top coat to ensure they stay put. Be mindful of snagging!
Essential Tools for Your Nail Design Journey
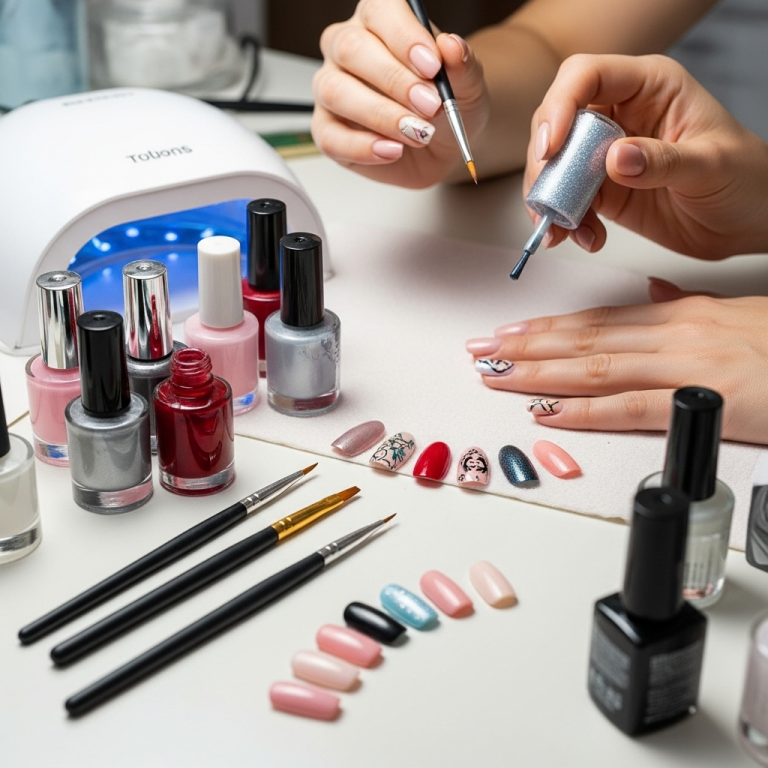
You don’t need a professional salon’s worth of equipment to create amazing nail designs at home. Here are some beginner-friendly tools that will make your DIY manicures a breeze:
| Tool | What It Does | Why It’s Great for Beginners |
|---|---|---|
| Dotting Tools | Create perfect dots, circles, and swirls. | Easy to hold and control, versatile for many designs. |
| Fine-Tipped Brushes | For drawing thin lines, intricate details, and small shapes. | Precision is key for detailed work, and these offer it. |
| Nail Art Stickers/Decals | Pre-designed patterns or shapes to apply to your nails. | Instant intricate designs with minimal skill required. |
| Striping Tape | Creates sharp, clean lines for geometric designs or French tips. | Guides you to create precise lines easily. |
| Makeup Sponges | For creating gradient (ombre) effects and textured looks. | Dabbing is simple and forgiving for blending colors. |
| Base Coat & Top Coat | Protects natural nails, helps polish adhere, adds shine and longevity. | Essential for any manicure, whether simple or elaborate. A good top coat is vital for making designs last. |
Nails Care is Key to Great Design
Before diving into any exciting nail design, remember that healthy nails are the best foundation! Taking good care of your nails will not only make them look better naturally but will also make any design application smoother and more durable.
Simple Nail Care Steps:
- Keep them clean and dry: Moisture can weaken nails.
- Moisturize: Use cuticle oil and hand cream regularly. This keeps the skin around your nails healthy and prevents hangnails. Organizations like the American Academy of Dermatology offer general skin and nail care advice.
- File correctly: File in one direction to prevent splitting.
- Don’t overuse harsh removers: Opt for acetone-free removers when possible.
- Give your nails a break: If you wear a lot of polish, give your nails a week or two of polish-free time occasionally.
Beautiful nail designs start with a healthy base. By following these simple nail care tips, you’ll ensure your nails are strong, healthy, and ready for any creative expression you choose.
FAQ: Your Beginner Nail Design Questions Answered
Got more questions about diving into nail design? We’ve got you covered!
Q1: What are the easiest nail designs for beginners?
A: The easiest designs usually involve single colors, simple dots (with a dotting tool), basic stripes (using tape), or applying glitter polish. Negative space designs and using nail art stickers are also great starting points!
Q2: How can I make my nail designs last longer?
A: Start with a good quality base coat. Apply your polish in thin, even layers, allowing each to dry slightly before the next. Crucially, finish with a high-shine, quick-drying top coat, and reapply it every 2-3 days to maintain shine and chip resistance.
Q3: What’s the difference between nail art stickers and decals?
A: Nail art stickers are typically thicker, press-on designs. Decals (or water decals) are thinner, often requiring soaking in water to release the design from a backing paper before application. Decals tend to look more integrated with the nail polish.
Q4: Can I do ombre nails without a special brush?
A: Absolutely! The easiest way to achieve an ombre effect at home is by using a makeup sponge. Dab your desired colors onto the sponge and then gently press it onto your nail, layering and blending as you go. It’s a forgiving technique!
Q5: How do I clean up mistakes or polish on my skin?
A: A small, flat brush (like a concealer brush) dipped in nail polish remover is your best friend for clean-up. You can also use an orange stick with a tiny bit of cotton wrapped around the tip, also dipped in remover. Be precise!
Q6: My nail polish always chips quickly. What am I doing wrong?
A: Chipping can be caused by several things: not using a base coat, applying polish too thickly, not sealing the free edge (the tip of your nail), or not using a good top coat. Ensure you cap the free edge with your color polish and your top coat—this seals the tip and prevents lifting.
Conclusion: Embrace Your Inner Nail Artist!
There you have it – a rundown of essential nail design styles to get your creative juices flowing! From the understated charm of minimalist nails to the dazzling allure of glitter and the playful fun of patterns, there’s a whole universe of nail art waiting for you. Remember, the most important part of nail design is expressing yourself and having fun. Don’t be afraid to experiment with colors, textures, and techniques. With a few basic tools and these inspiring styles, you can easily create gorgeous, personalized manicures that turn heads. So grab your polishes, embrace your creativity, and let your nails become your ultimate accessory!

