Nail design ideas for teenagers are all about expressing personal style, from vibrant colors and playful patterns to chic minimalist looks. Discover stunning, easy-to-achieve trends that are perfect for school, parties, or just everyday fun. Get ready to transform your nails into mini works of art!
Hey there, fellow nail art lovers! Are your nails feeling a little…blah? Looking for some fresh, fun ways to make them pop without spending hours at a salon? You’re totally in the right place! Teen years are all about exploring who you are, and your nails are a fantastic canvas for that self-expression. Sometimes finding the perfect nail design that’s trendy, easy to do yourself, and perfect for your vibe can feel a bit overwhelming. But guess what? It doesn’t have to be! We’re about to dive into some seriously cool and super achievable nail design ideas that are perfect for teenagers. Get ready to unlock your inner nail artist and give your fingertips a stylish upgrade!
—
Frequently Asked Questions About Teen Nail Designs
What are the most popular nail colors for teenagers right now?
Pastels, neons, bold primaries, and classic neutrals are all trending! Think soft lavenders and blues, electric pinks and greens, vibrant reds and blues, and sophisticated nudes or whites. It’s all about what makes you feel amazing!
How can I make my DIY nail designs last longer?
Start with clean, dry nails. Apply a good quality base coat to protect your natural nail and help polish adhere. Use thin layers of color polish, letting each dry slightly before applying the next. Always finish with a durable top coat. Reapply the top coat every couple of days to maintain shine and prevent chipping.
What are some easy nail art techniques for beginners?
Simple dotting tools for polka dots, tape for crisp lines and geometric patterns, sponges for ombre effects, and using your nail brush with a contrasting polish for simple stripes or swirls are all fantastic beginner techniques.
Can I wear nail designs to school?
Absolutely! Many schools are fine with subtle or artistic nail designs as long as they don’t involve anything distracting or unsafe. Solid colors, simple patterns, or minimalist art are usually perfect choices. Always check your school’s dress code if you’re unsure.
What are the essential tools I need for basic nail art?
For pretty basic designs, you’ll mainly need nail polish remover, cotton pads, a base coat, your favorite colored polishes, a good top coat, and maybe a dotting tool or a fine-tipped brush. Tweezers can also be helpful for placing small embellishments.
How do I remove glitter nail polish easily?
Glitter can be stubborn! The best trick is the foil method. Soak a cotton ball in nail polish remover, place it on your nail, and wrap your fingertip with aluminum foil. Let it sit for 5-10 minutes, and the glitter should slide right off. You can find more detailed tips on the Nail Care Guide.
—
Nail Design Ideas For Teenagers: Proven Stunning Trends
Nails are more than just nails; they’re little canvases for your personality! For teenagers, this is the perfect time to experiment and let your unique style shine through. Whether you’re into subtle elegance, bold statements, or playful pops of color, there’s a nail trend out there waiting for you. Forget boring manicures – we’re talking about designs that turn heads, spark conversations, and make you feel fantastic every time you look at your hands.
From Instagram-worthy gradients to minimalist chic, we’ve rounded up the hottest and most achievable nail design ideas specifically for teens. These trends are all about expressing yourself, having fun, and learning a few simple DIY techniques along the way. So grab your favorite polishes, and let’s get creative!
Why Nail Art is Your Teen Style Secret Weapon
Nails are a fantastic way to express yourself, especially during your teenage years when you’re figuring out your identity. It’s a low-commitment way to try out new styles, from edgy grunge to sweet pastels, without a huge change. Plus, a cool manicure can seriously boost your confidence! Think about it: every time you reach for your phone or wave hello, your nails get noticed.
Nail art is also incredibly versatile. You can match your nails to your outfit, your mood, or even the season. And the best part? You don’t need to be a professional artist to create stunning looks. With a few basic tools and some inspiration, you can achieve salon-worthy results right at home. It’s a creative outlet that’s both fun and rewarding!
The Hottest Nail Design Trends for Teenagers
Ready to level up your nail game? We’ve scoured the most popular styles and distilled them into easy-to-understand ideas with tips for getting the look. Let’s dive into the trends that are absolutely taking over!
1. Abstract Art & Swirls: Effortless Cool
Abstract nail art is super forgiving and looks incredibly chic. It’s all about freehand lines, dots, and shapes. This trend is perfect for expressing creativity because there’s no “wrong” way to do it!
- The Look: Think wavy lines in contrasting colors, random dots, or minimalist shapes like triangles and squares. You can keep it simple with two colors or go wild with a whole rainbow.
- Why Teens Love It: It’s easy to customize, looks sophisticated without being complicated, and can be as subtle or as bold as you like.
- How to Get the Look:
- Start with a clean nail and a base coat.
- Paint your nails a solid base color (e.g., white, black, nude).
- Once dry, use a fine-tipped nail art brush or a toothpick dipped in a contrasting polish to freehand lines, dots, or squiggles.
- For perfect wavy lines, use thin strips of nail tape as a guide before painting.
- Always finish with a good top coat to seal in your design.
2. Minimalist Geometry: Clean Lines, Big Impact
Less is definitely more with this elegant trend. Geometric designs are sharp, modern, and surprisingly easy to achieve with a little patience and the right tools. They’re perfect for a polished look that’s still super stylish.
- The Look: Think clean lines, simple shapes like half-moons, stripes, or color-blocking, often using a neutral base with a pop of metallic or a contrasting color.
- Why Teens Love It: It’s sophisticated, complements any outfit, and looks very put-together. It’s the perfect “grown-up” nail look that’s still fun.
- How to Get the Look:
- Apply a base color.
- For clean lines, use nail tape. Cut strips to the desired length and width, press them firmly onto the dry polish to prevent bleeding, then paint over them.
- Once the painted section is dry, carefully peel off the tape.
- For diagonal lines or color-blocking, simply paint freehand or use tape to create sections.
- Finish with a hydrating cuticle oil and a glossy top coat.
3. Pastel Perfection & Gradients: Soft & Dreamy
Pastel colors are always a winner for a soft, dreamy vibe. Gradients (or ombré) take it a step further, blending multiple colors together for a beautiful, seamless effect. It’s like a sunset or a rainbow on your nails!
- The Look: Soft shades of pink, lavender, mint green, baby blue, and peach. Gradients can blend these pastels together, or even transition from a light shade to white or nude.
- Why Teens Love It: It’s sweet, pretty, and perfect for spring and summer. Gradients look intricate but are surprisingly achievable.
- How to Get the Look (Gradient/Ombre):
- Paint your nails with a white or light base color.
- Grab a makeup sponge (a clean kitchen sponge cut into small pieces works too!).
- Apply a few stripes of your desired pastel polishes onto the sponge, side-by-side or slightly overlapping.
- Gently dab the sponge onto your nail, building up the color. You might need to dab a few times.
- Clean up any excess color around your nails with a brush dipped in nail polish remover.
- Once dry, apply a shimmery top coat or a clear top coat.
4. Bold & Bright Pops: Playful & Energetic
Don’t shy away from vibrant colors! Bold shades like electric blue, hot pink, lime green, and sunny yellow are fantastic for making a statement. They’re energetic, fun, and perfect for showing off your personality.
- The Look: Solid, bright colors on all nails, or an accent nail in a neon shade. You can also combine bright colors in abstract designs or stripes.
- Why Teens Love It: It’s energetic, eye-catching, and shows confidence.
- How to Get the Look:
- Ensure your nails are smooth with a good base coat.
- Apply 2-3 thin coats of your chosen bright polish.
- For extra vibrancy, especially neons, consider a white base coat underneath.
- Clean up edges precisely with a detail brush for a sharp finish.
- A high-shine top coat will make those vibrant colors pop even more.
5. Fun with Floam & Glitter Accents
Who doesn’t love a little sparkle? Glitter and holographic finishes are perfect for adding a touch of magic to any design. From full glitter nails to subtle accent stripes, glitter is always a good idea.
- The Look: Glitter polish applied all over, glitter gradient (where glitter is concentrated at the tip or cuticle), or small glitter accents like dots or stripes. Holographic polishes catch the light beautifully.
- Why Teens Love It: It’s fun, festive, and adds instant glam. It’s perfect for parties or just when you want to feel extra special.
- How to Get the Look:
- Full Glitter: Apply 2-3 coats of your glitter polish. A sticky or glitter-specific base coat can help it adhere better.
- Glitter Gradient: Apply a base color. Then, use a sponge or a brush to dab glitter polish onto the desired area of the nail, blending the edges softly.
- Glitter Accents: Use a fine-tipped brush or a dotting tool to apply fine glitter polish strategically as dots, lines, or outlines.
- Be sure to use a good top coat; some thicker glitters may require two layers to smooth out.
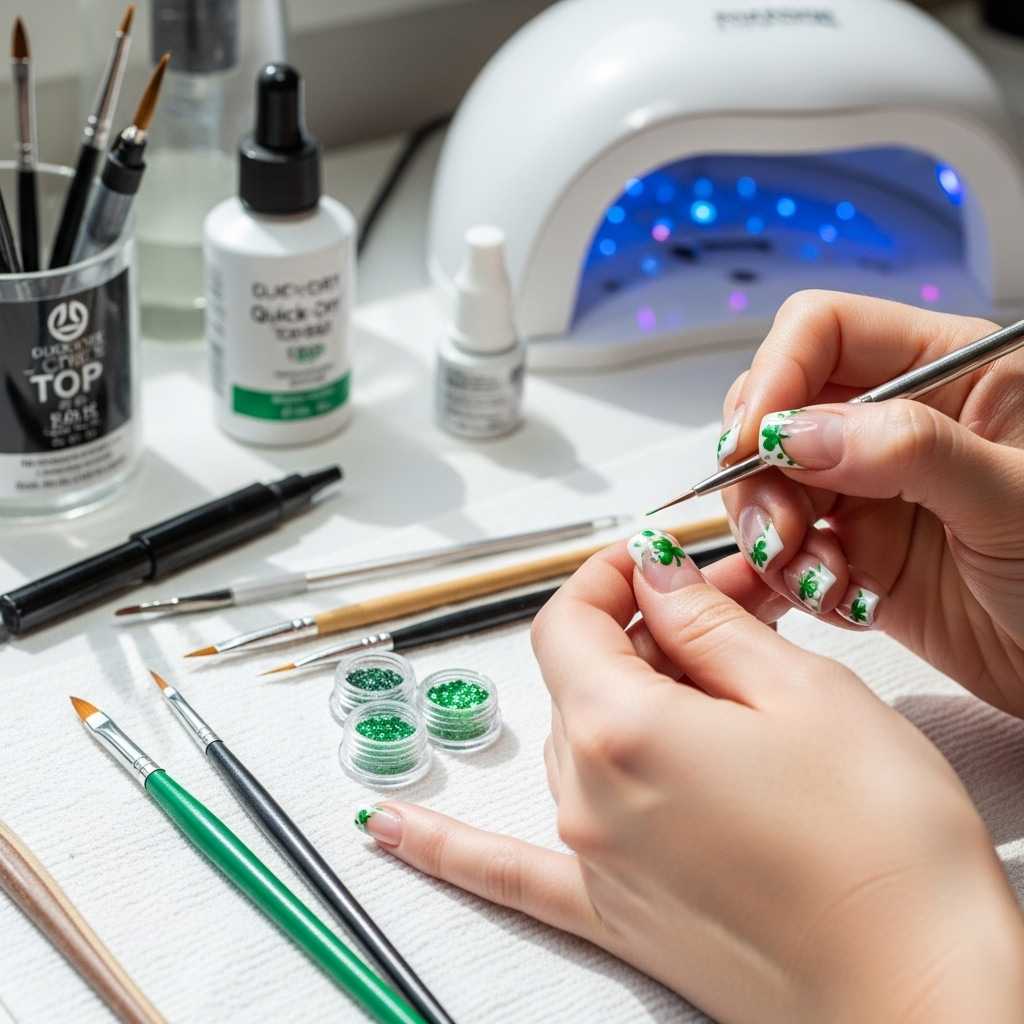
6. Theme-Based Nails: Show Your Fandom!
Love a particular movie, band, game, or holiday? Show it off on your nails! This is where you can get really creative and personal.
- The Look: This can be anything! Think tiny fruits for a summer vibe, stars and moons for a dreamy look, character-inspired colors, or holiday themes like pumpkins for Halloween or snowflakes for winter.
- Why Teens Love It: It’s a super fun way to express your interests and passions.
- How to Get the Look:
- Simple Themes: Use colors associated with your theme. For example, yellow and black for bees, blue and white for clouds.
- Detailed Designs: Use nail art brushes and fine liners for drawing specific shapes or characters.
- Stickers & Decals: For intricate designs you can’t freehand, nail stickers or water decals are your best friend! Apply them carefully over a dry polish and seal with a top coat. You can find great options on sites like Etsy.
7. Nature-Inspired Nails: Organic Beauty
Bring the beauty of the outdoors to your fingertips with nature-inspired designs. Think delicate flowers, falling leaves, starry skies, or even marble effects.
- The Look: Delicate floral patterns, minimalist leaf outlines, starry night skies with glitter, or realistic marble patterns.
- Why Teens Love It: It’s elegant, calming, and adds a touch of natural beauty.
- How to Get the Look (Marble Effect):
- Apply a base coat and a base color (e.g., white or a light nude).
- While the base is still slightly wet, drip a few different colors (e.g., grey, black, and white for marble) onto the nail.
- Use a toothpick or a fine brush to gently swirl the colors together, creating a marble-like pattern. Don’t over-swirl!
- Clean up any messy edges.
- Seal with a top coat.
Essential Tools for Your Nail Art Arsenal
You don’t need a whole professional kit to create amazing nail art. Here are some beginner-friendly tools that will make a big difference:
| Tool | What It’s For | Beginner Tip |
|---|---|---|
| Base Coat | Protects natural nails and helps polish adhere. Essential for a smooth finish. | Always apply a base coat before color! |
| Top Coat | Seals your design, adds shine, and protects against chipping. | A good top coat can make your manicure last much longer. |
| Nail Art Brushes | Fine-tipped brushes for drawing lines, dots, and intricate details. | Start with a couple of different tip sizes. |
| Dotting Tools | Tools with small metal balls on the end for creating perfect dots and swirls. | Comes in various sizes for different dot dimensions. |
| Nail Tape | Thin, adhesive tape for creating crisp lines and geometric shapes. | Ensure it sticks well and is removed while polish is still slightly tacky for the sharpest line. |
| Makeup Sponge |
Related Posts |