Nail design hacks with scotch tape can help you create stunning, professional-looking manicures right at home with minimal effort. This simple office supply is a beginner-friendly tool for achieving clean lines, geometric patterns, and flawless French tips, making salon-quality nail art accessible and fun for everyone.
Hey nail lovers! Ever look at those intricate nail designs and think, “There’s no way I can do that”? I used to feel the same way! Getting those perfect lines and sharp angles can seem impossible. But what if I told you that a common office supply could be your secret weapon for salon-worthy nails? Yep, I’m talking about good old Scotch tape! Nail design hacks with Scotch tape are an absolute game-changer for anyone who wants to up their nail art game without spending a fortune or needing a degree in fine arts. We’re going to dive into how this everyday item can help you achieve effortless genius on your fingertips. Get ready to transform your manicures!
Why Scotch Tape is Your New Nail Art Bestie
You might be surprised to learn just how versatile Scotch tape is for nail art. It’s surprisingly forgiving, readily available, and incredibly effective at creating crisp, clean lines that are the foundation of many popular nail designs. Think geometric patterns, chic French tips, and color-blocking effects. When you’re starting out, perfecting these looks with a freehand brush can be frustrating. Tape acts as a stencil, guiding your polish and preventing smudges. It’s the perfect solution for busy individuals who want stylish nails without the fuss.
Getting Started: What You’ll Need
Before we jump into the fun designs, let’s gather our supplies. You don’t need a lot, and most of these are likely already in your home or easily accessible!
Scotch Tape: Standard clear office tape works perfectly. The matte finish kind might offer a bit more grip, but any kind will do in a pinch.
Nail Polish: Your favorite base colors and top coat.
Scissors or a Nail Art Cutter: For precise tape cutting.
Tweezers (Optional but Recommended): To easily place and remove the tape.
Nail Polish Remover and Cotton Swabs: For any tiny oopsies.
A flat, clean surface: To prepare your tape if needed.
It’s amazing how these simple tools can unlock so many creative possibilities.
The Tape-as-Stencil Method: Your Blueprint for Perfect Lines
The fundamental principle behind using Scotch tape for nail design is treating it like a stencil. We’re going to use the tape to block off sections of the nail, allowing you to paint clean lines and shapes.
Step 1: Prepare Your Nails
Start with clean, dry nails.
Apply your base coat and let it dry completely. This protects your natural nail and provides a smooth surface.
Apply your first color. This will be the “underlayer” of your design. Make sure it’s also completely dry before moving on. For a crispier line, it’s often best to wait until the polish is fully cured, not just touch-dry.
Step 2: Apply the Tape
Cut a piece of Scotch tape to fit your nail. You can cut it straight across, diagonally, or into smaller shapes depending on the design you want.
Pro Tip: For extra crisp lines, you can “de-stick” the tape by pressing and lifting it a few times on the back of your hand or a clean surface. This prevents it from pulling up wet polish from your base color and ensures it adheres just enough to act as a stencil.
Carefully place the tape onto your nail. Press down firmly around the edges to ensure there are no gaps where polish can seep underneath. Use tweezers for better control if you find it difficult to place with your fingers.
Step 3: Apply Your Second Color
Now, apply your second polish color over the exposed part of the nail.
Apply a thin, even coat. Multiple thin coats are better than one thick one, as they dry faster and are less likely to smudge when you remove the tape.
Step 4: The Crucial Removal
This is the most exciting and critical step! While the second color is still slightly wet but not pooling, carefully and slowly peel off the tape.
Pull the tape away at an angle, smoothly and steadily. If you wait too long, the polish will dry and could chip or peel off with the tape. If you remove it too soon, it might smudge. It’s a delicate balance, but you’ll get the hang of it!
If any polish seeped under the tape, use a cotton swab dipped lightly in nail polish remover to clean up the edges. Be very careful not to touch the design itself.
Step 5: Seal the Deal
Let the design dry completely.
Apply a good quality top coat to seal in your design and add shine. This will also help smooth out any slight unevenness.
This basic method is the foundation for countless stunning nail designs. It’s all about practice and patience, but the results are so worth it!
Effortless Nail Design Ideas Using Scotch Tape
Now that you understand the core technique, let’s explore some fun and easy designs you can create with Scotch tape.
1. Classic French Tips Reinvented
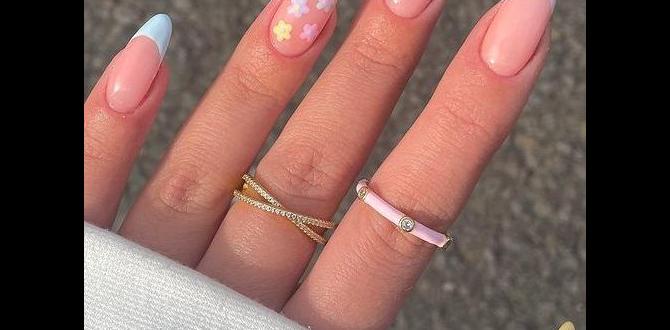
Forget the struggle of freehanding that perfect white smile line!
How-to:
1. Paint your nails with your base color (a nude, pink, or sheer polish is classic). Let it dry completely.
2. Cut small strips of tape. For a classic French tip, you’ll want to create a curve. A rounded scissor tip or even carefully tearing a thin edge can help.
3. Place the tape across your nail, lining up the edge where you want the white tip to begin.
4. Apply white polish to the tip of your nail, above the tape.
5. Carefully remove the tape while the white polish is still wet.
6. Let dry and apply a top coat.
Variations: Try colored tips, glitter tips, or even double French tips by adding a second piece of tape above the first for a thin line of color.
2. Chic Geometric Patterns
This is where the tape really shines! Clean lines and geometric shapes are super trendy and surprisingly easy.
How-to:
1. Paint your nails with your base color and let it dry thoroughly.
2. Cut strips of tape and apply them in geometric patterns. Think triangles, squares, chevrons, or even just intersecting lines.
3. Paint over the exposed sections with your second color.
4. Remove tape while polish is still wet.
5. Let dry and top coat.
Pro-Tip for Multi-Color Geometric: Paint your first color. Let it dry. Apply tape. Paint the second color. Remove tape. Let dry completely. Apply a new piece of tape over a bit of the second color, creating a new shape. Apply a third color. Remove tape. Top coat!
You can even find pre-cut nail art tape, but standard Scotch tape offers more creative freedom for different widths and angles.
3. Bold Color-Blocking
Divide your nails into distinct color sections for a modern, artistic look. Scotch tape is perfect for ensuring sharp divisions between colors.
How-to:
1. Paint your base color and let it dry.
2. Place a strip of tape across your nail at the desired dividing line.
3. Paint the section above the tape with a contrasting color.
4. Remove the tape while the second color is still wet.
5. Let dry completely and finish with a top coat.
Advanced Color-Blocking: For more than two colors, ensure each section dries fully before applying the next piece of tape.
4. Gradient/Ombre Effect with a Twist
While not a traditional ombre, tape can help create a sharp edge for a two-tone gradient effect.
How-to:
1. Apply your lighter color and let it dry.
2. Apply your darker color to about half or two-thirds of the nail, blending the edge slightly with a sponge or brush for a soft transition.
3. While the darker color is still slightly wet, carefully place a strip of tape to create a sharp line where you want your gradient to end.
4. Gently remove the tape.
5. Let it dry completely and then apply a top coat.
5. Accent Nail Art
Focus your tape magic on just one or two nails for a subtle yet stylish statement.
How-to:
1. Paint all your nails with a base color.
2. Choose one nail for your accent. Apply tape in a pattern (e.g., diagonal stripes, a V-shape).
3. Apply a contrasting color over the tape.
4. Remove the tape while wet.
5. Let dry and top coat.
Table: Comparing Tape Types for Nail Art
While standard Scotch tape is great, let’s look at other options and their pros and cons specifically for nail art.
| Tape Type | Pros for Nail Art | Cons for Nail Art | Best For |
|---|---|---|---|
| Standard Clear Scotch Tape | Widely available, inexpensive, good adhesion, versatile for various shapes. | Can sometimes be too sticky and pull polish if not de-sticked, can wrinkle. | Beginners, general use, French tips, geometric lines. |
| Masking Tape (Painter’s Tape) | Gentle adhesion, less likely to lift polish, provides a matte finish. | Thicker and harder to cut precisely, can bleed if not sealed well. | Very sensitive polish, achieving a matte over glossy look (by leaving tape on). |
| Washi Tape | Decorative patterns, holds reasonably well, comes in thin widths. | Can be porous and bleed, adhesion varies greatly by brand, often too thick for clean lines. | Creating colored bands or decorative borders, but requires careful sealing. |
| Nail Art Stencils / Specific Nail Tape | Designed for nails, precise shapes and widths, good adhesion. | More expensive, limited design options compared to free-cutting tape. | Achieving very intricate or specific nail art shapes consistently. |
For most beginner-friendly nail design hacks with Scotch tape, the standard clear tape is your go-to. Its versatility and accessibility make it a fantastic starting point.
Tips and Tricks for Flawless Results
Even with tape, a few extra tips can elevate your manicures from good to great.
Drying Time is Key: Patience! Seriously, wait until your polish is bone dry before applying tape. A quick touch test in an inconspicuous spot can help.
The De-Sticking Trick: As mentioned, pressing and lifting tape a few times on your hand or a desk reduces its stickiness. This prevents it from pulling up your base color when you remove it.
Thin Coats are Your Friends: Don’t glob on the polish. Thin, even coats dry faster and reduce the chance of smudging or bleeding under the tape.
Press Firmly: Ensure the tape is sealed against your nail, especially at the edges, to prevent polish from seeping underneath.
Peel Slowly and Steadily: Rip-off is rarely the best approach here. A smooth, slow peel at an angle usually yields the cleanest results.
Clean Up as You Go: Keep nail polish remover and a fine-tipped brush or cotton swab handy. A little clean-up right after removing the tape can fix minor mistakes before they set. You can learn more about proper nail care at the American Academy of Dermatology.
Practice Makes Perfect: Your first attempt might not be flawless, and that’s okay! The more you practice, the better you’ll become at applying and removing the tape, and predicting how the polish will behave.
Troubleshooting Common Tape Nail Art Issues
Let’s tackle some common problems you might encounter.
| Problem | What Might Be Happening? | Solution |
|---|---|---|
| Polish Bleeds Under the Tape | Tape edges weren’t sealed firmly, or polish was too thin/wet. | Press tape edges down firmly. Ensure all layers of polish are dry before applying tape. Apply polish in thin coats. |
| Tape Pulls Up Dry Polish | Base color was not fully dry, or tape is too sticky. | Wait longer for your base color to dry completely. De-stick the tape before applying. |
| Jagged or Uneven Lines | Tape was removed too quickly, or polish was too wet. | Remove tape slowly and steadily when polish is slightly tacky but not pooling. |
| Design Smudges After Tape Removal | Polish was removed too soon, or top coat was applied too aggressively. | Wait for polish to be mostly dry before removing tape. Apply top coat with a light touch, letting it glide over the design. |
Don’t get discouraged if a design doesn’t turn out exactly as planned. Every attempt is a learning experience!
Beyond Basic Lines: Creative Applications
The beauty of Scotch tape nail design hacks is their adaptability. You can move beyond simple stripes and experiment with creating textured effects or even using the tape as a stamp of sorts.
Creating Sharp Borders for Glitter: Apply a base color, let it dry. Apply your glitter polish, letting it dry. Carefully place tape over the glittered section. Apply a contrasting color over the remaining exposed nail. Remove tape to reveal a crisp line between your glitter and color.
Faded Edges (Intentional): Sometimes, a less-than-perfect peel can create a cool, slightly softened edge. If you’re going for a more abstract look, embrace these “imperfections.”
Building Layers: For more complex designs, allow each colored layer to dry completely before adding the next piece of tape and color. This builds up precise shapes and adds depth.
The key is to experiment. What happens if you fold the tape? What if you use a curved strip? What if you layer colors on top of tape? The possibilities are quite extensive. For more advanced nail art techniques and inspiration, sites like Nailpro Magazine offer a wealth of ideas and professional insights.
Frequently Asked Questions About Scotch Tape Nail Art
Q1: Can I use any type of tape for nail art?
A1: While standard clear Scotch tape is the most common and easiest to use, other tapes like masking tape or specialized nail art tape can also work. The key is how it adheres and how easily it removes without damaging your polish.
Q2: How do I get really clean lines with Scotch tape?
A2: Ensure your base polish is completely dry, de-stick your tape before applying it, press the edges down firmly, and remove the tape slowly when the new polish is slightly tacky but not wet. Don’t forget a clean-up brush with remover for any tiny bleeds.
Q3: What’s the best polish consistency for tape manicures?
A3: Thin, even coats are best. Overly thick or runny polish is more prone to bleeding under the tape or smudging when the tape is removed.
Q4: How long do I have to wait before removing the tape after applying polish?
A4: This is the trickiest part! You want to remove the tape when the new polish is slightly tacky – firm enough not to run, but not so dry that it chips or peels with the tape. It’s usually just a minute or two after application, but test by gently touching an inconspicuous spot.
Q5: Can I use this technique with gel polish?
A5: Yes, you can! With gel polish, you’ll need to cure each layer as usual. For the tape application, apply the tape over a cured color layer. Apply your next gel color, then remove the tape before* curing. This might require a bit more precision as gel can be stickier. Always ensure the polish is fully cured according to the manufacturer’s instructions.
Q6: My tape is lifting my original polish. What should I do?
A6: This is a common issue! Your original polish layer might not be dry enough, or the tape is too sticky. Make sure your base color is 100% dry (allow at least 15-30 minutes, or even longer if it’s a dark or thick formula). Try de-sticking the tape by pressing and lifting it a few times on your hand before placing it on your nail. This reduces its tackiness.
Q7: What’s the difference between using Scotch tape versus nail art sticker stencils?
A7: Scotch tape is incredibly versatile because you can cut it into any shape or size you want, allowing for unlimited design possibilities


